

Leigham Manor Estate ~ Plymouth, Devon.
Client : Private.

We’ve been very fortunate to have been involved in some wonderful projects over the years, and none so more than this.
So…let’s start at the very beginning.

There is very good reason to believe that the original name for the river Plym was Laira. In 1802 it was called ‘the Lairy’, before that in 1643 it was known as ‘the Leerie’, go back a few years again to 1638 and it’s recorded as being ‘Lary Poynte’. When you go back even further to 1591 the name of this part of the river is known as ‘the Lare’. Back in the day this stretch of river and its estuary went up to Marsh Mills and beyond and in the Domesday record there is a manor named as being situated on the main stream of this river, and that manor was known as Leurichestona. Today we all know this area as Leigham. The name Leurichestona may imply a reference to a prominent stone outcrop or feature beside the river. Leurich is not too far removed from the name Laira, and we do know that most of the main Devon river names have pre-English names and ‘Lew’ is a Celtic river name. Just prior to the Norman Conquest in 1066 A.D. the land in these parts were owned by Saulf the Saxon, having land for two ploughs, one serf, two villeins, three acres of meadow and eight acres of woodland with a value of ten shillings. Then, just one year later in 1067 A.D. with the aftermath of the Norman conquest, it was goodbye Saulf, and the land was owned by the Breton, Judhel of Totnes. He was a loyal soldier and supporter of William the Conqueror who granted Judhel vast areas of land and manors within the South-West of England. The name ‘Leigham’ incidentally is Anglo-Saxon in its origin. ‘Leaham’ in the old English language is composed of two words, ‘Leah’ translating to a clearing, meadow or woodland, and ‘Ham’ meaning a home, village or homestead. Combine the two together and you get something on the lines of a ‘home by the meadow’.

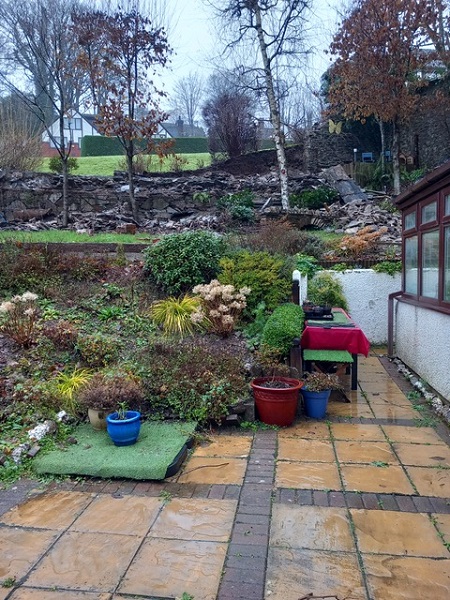
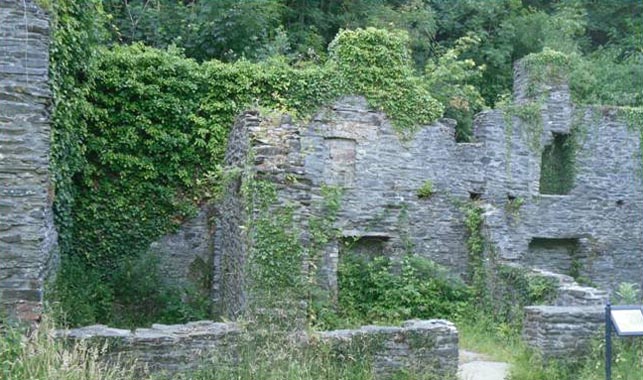
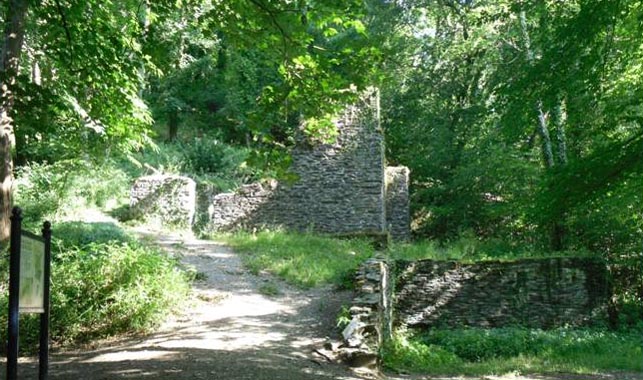
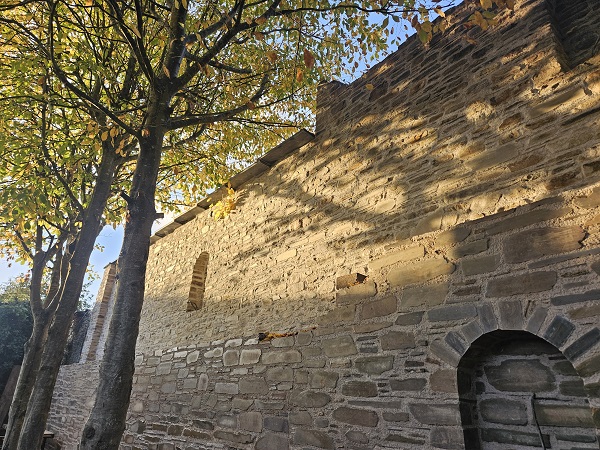
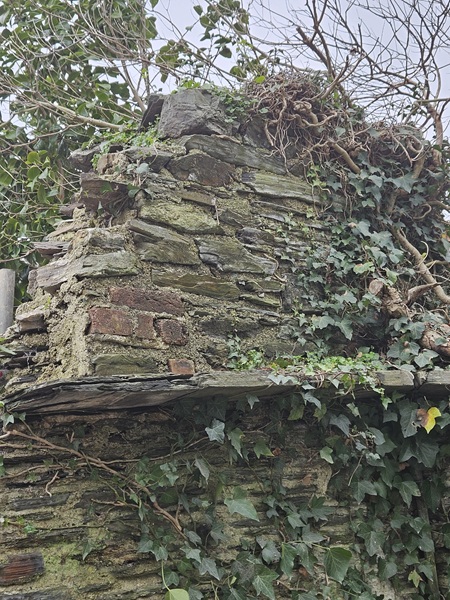
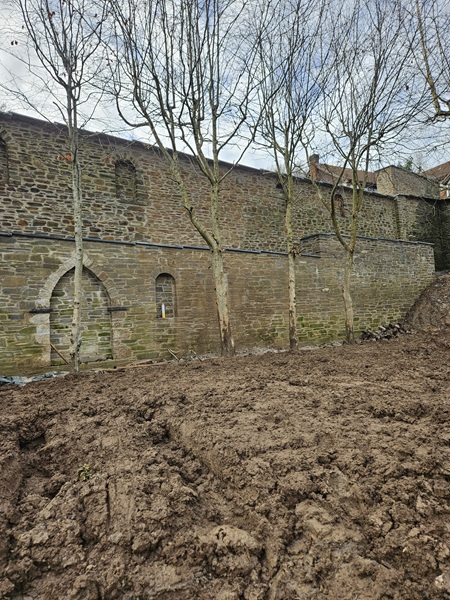
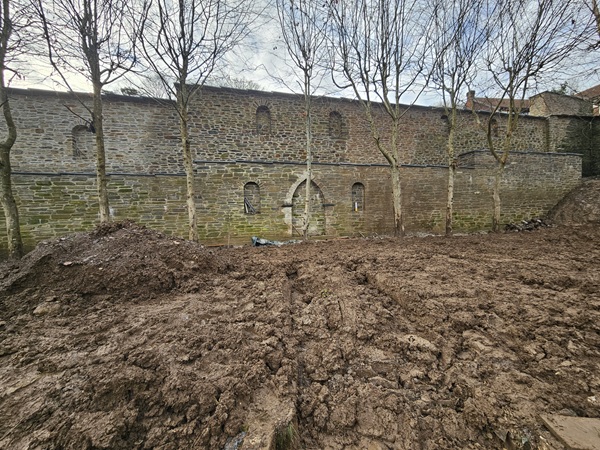
Jump forward several centuries later and Leigham Manor was a much larger estate. After the Second World War, the Leigham Manor Estate had fallen into disrepair. It was eventually bought in the late summer of 1946 by Plymouth City Council as part of its redevelopment plan for the city. Over the next few decades parts of the estate were sold off around Mainstone and Estover for residential housing, industrial units and recreational use. By the late 1980’s the last part of the estate was sold for development. The old manor house, as shown in the image above, was demolished and forty-one luxury detached homes were built forming a new privately owned estate called Manor Park and completed in 1995. Although the manor house was now lost forever, the original walls of its enclosed kitchen garden were still standing and the garden would of produced and supplied fruit and vegetables for the estate.
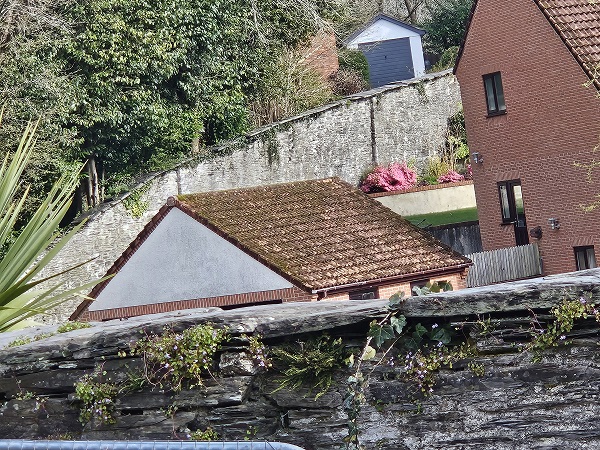
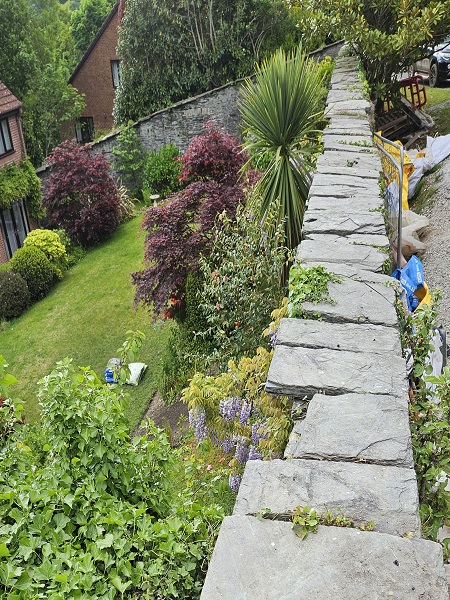
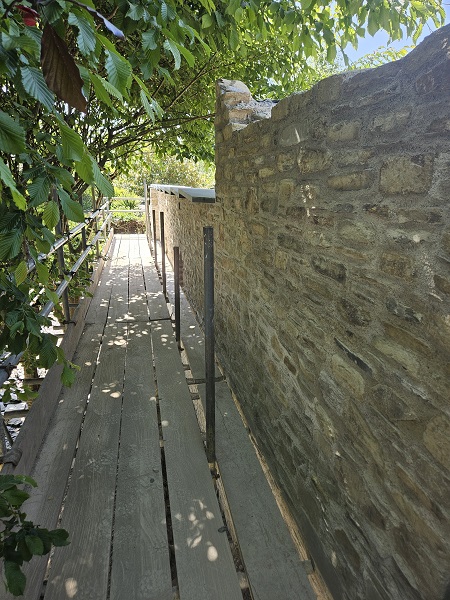
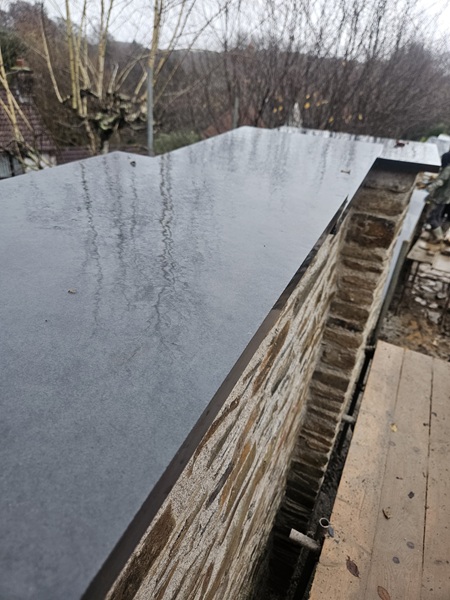
There is nothing we don’t know about stone walls and the huge stone walls that formed this enclosed garden are roughly a hundred and seventy years old and were probably put up sometime during the early 1860’s. Enclosing an area of about one and a quarter acres, which if you think about it, that area equates to roughly the same size as a modern day football pitch, making it a rather large walled garden. It now has four new properties sat within its walls. One of the properties inside this old kitchen garden has lovely mature well maintained grounds at the rear.
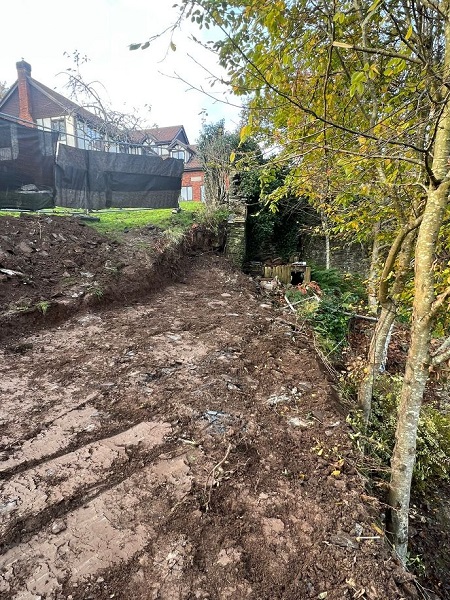
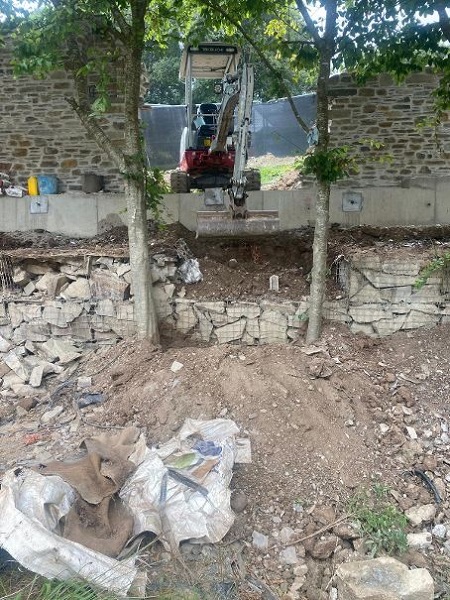
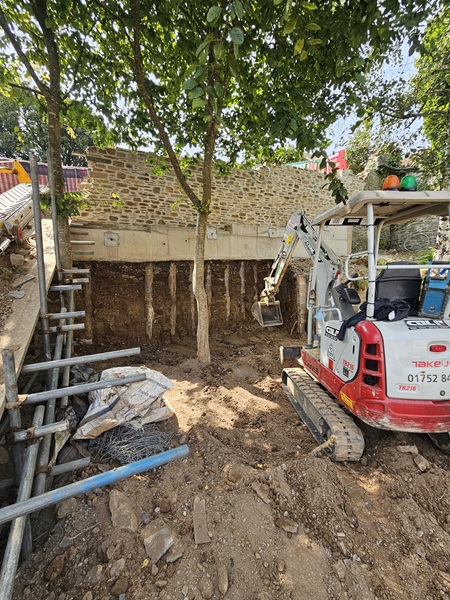
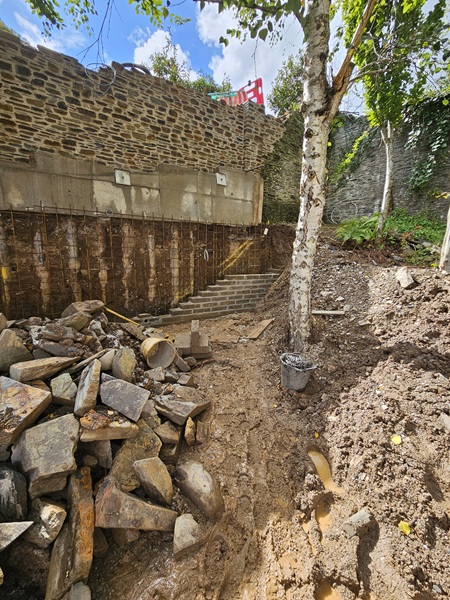
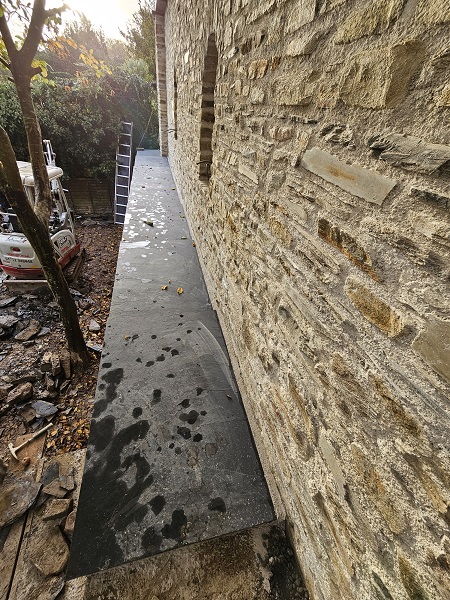
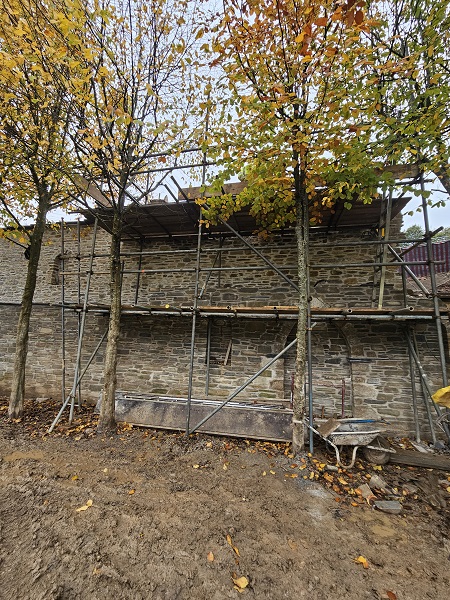
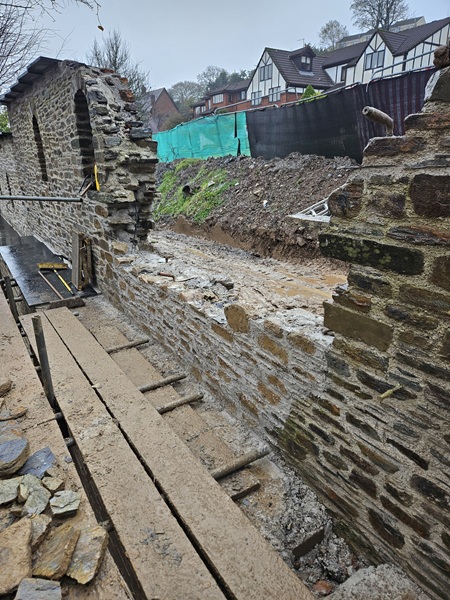
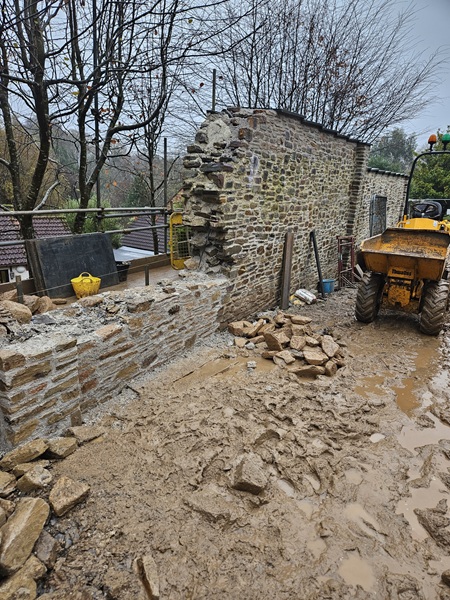
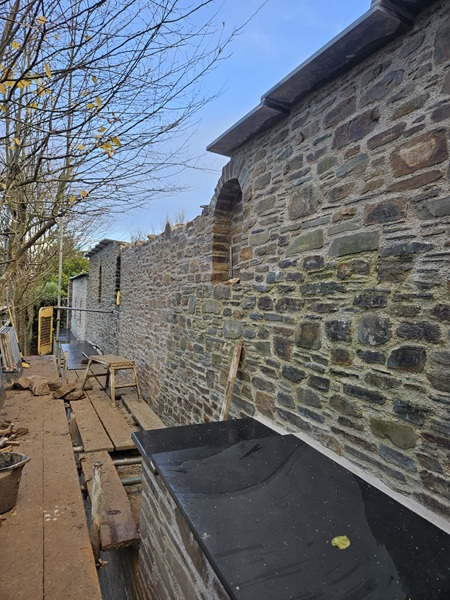
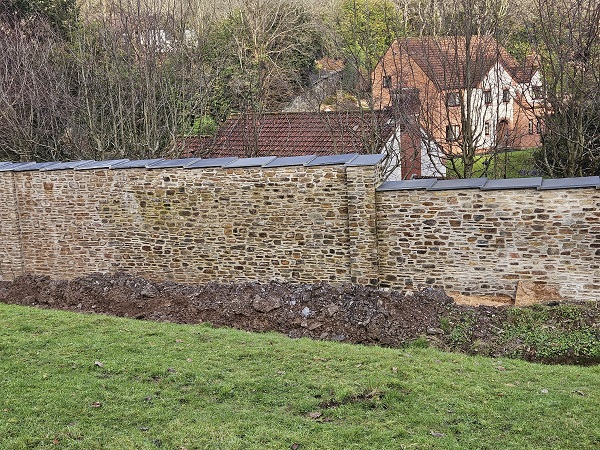
Well…it did…until one morning the owners had woken up to find out that a thirty metre long section of the old garden wall, which formed part of their boundary, had completely collapsed.
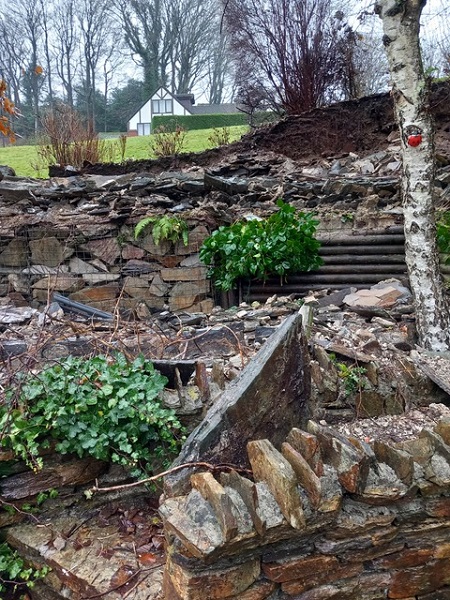
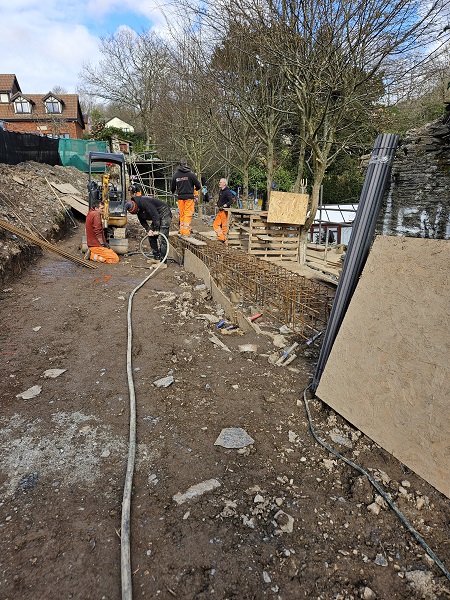
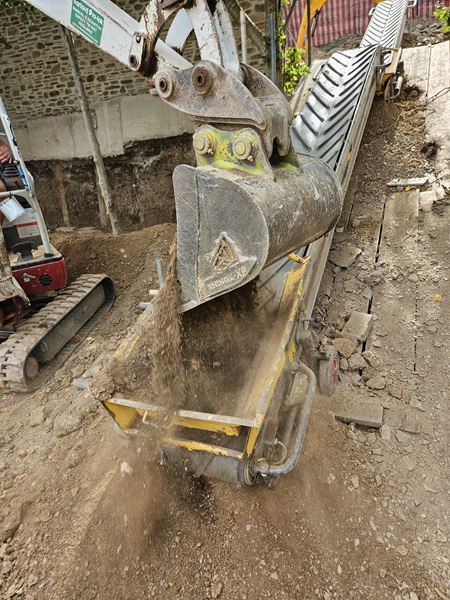
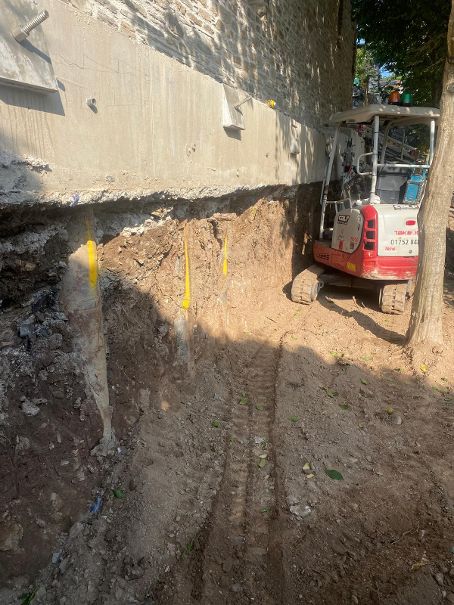
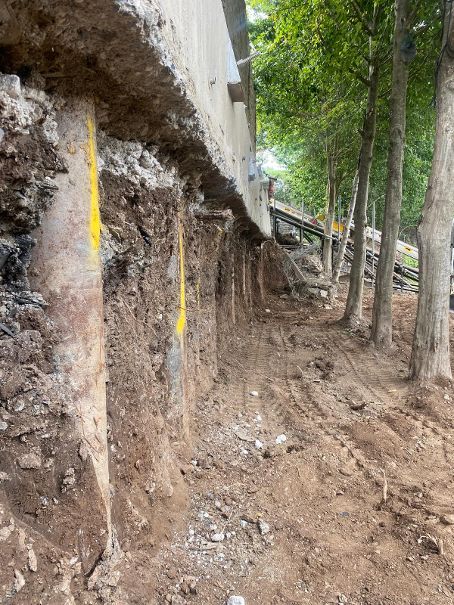
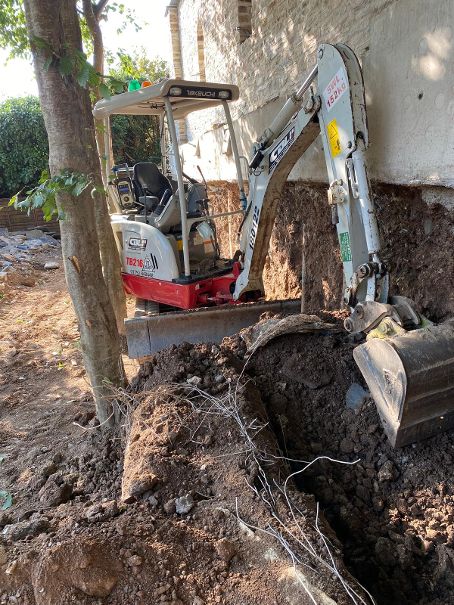
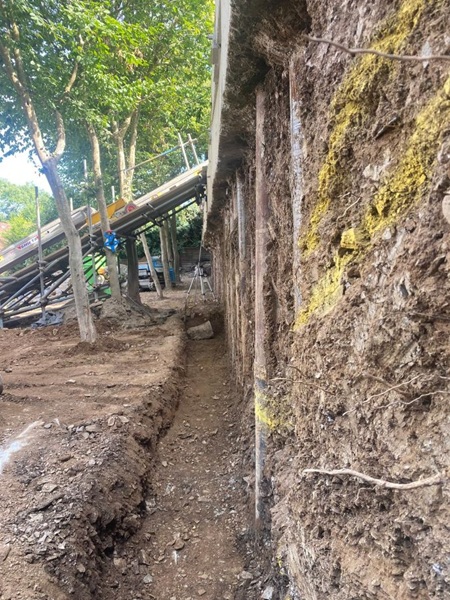
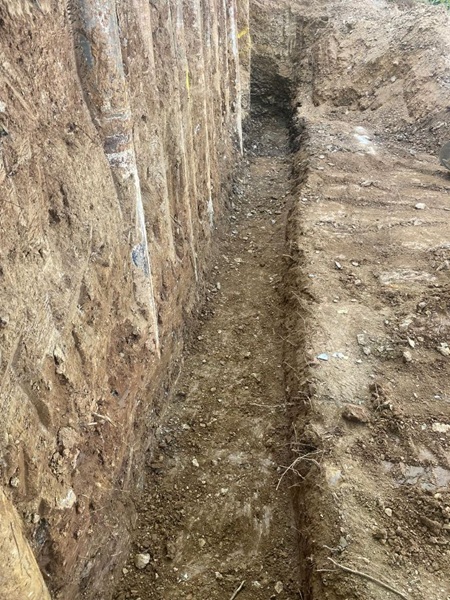
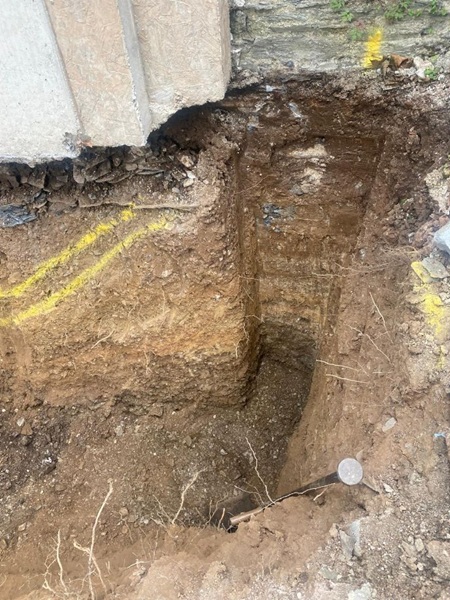
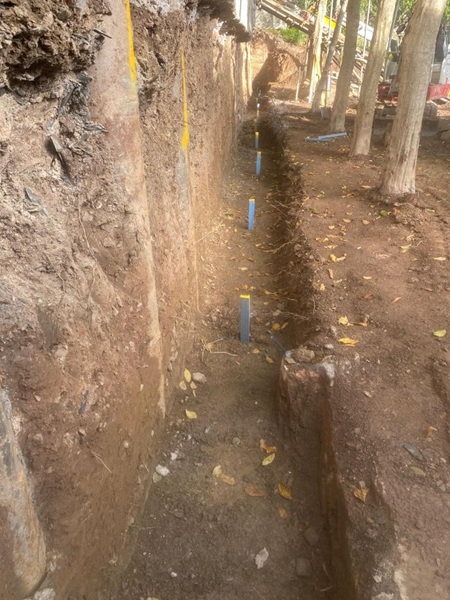
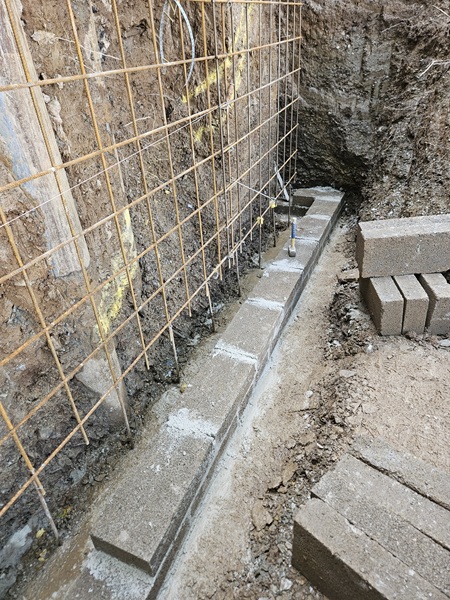
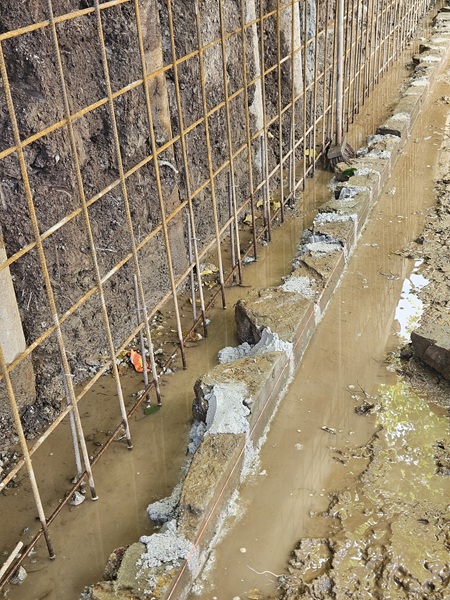
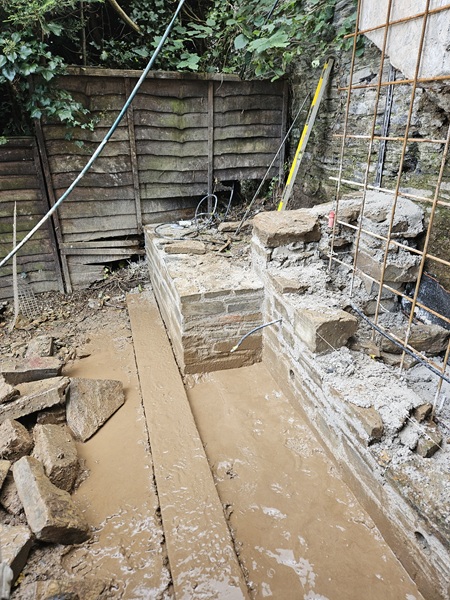
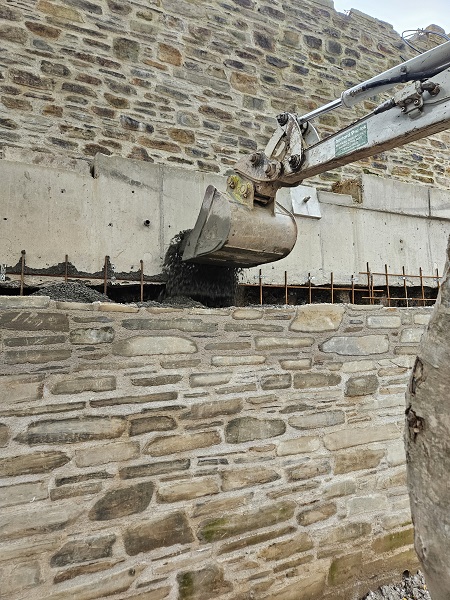
The wall had collapsed due to a spell of heavy rain and high winds and its cause for it falling down was attributed to storm damage, so the cost for the rebuild ultimately fell into the hands of the insurance company who undertook the risk to insure the property. A structural engineer was appointed to survey the damage and issue a full report along with structural drawings detailing the specifications for how the wall had to be rebuilt. The main contractor chosen to carry out the work were Garness Contracting Ltd, a company based in North Devon. They soon got the work underway by getting a temporary road access in place and the foundations for the new wall ready. Next they had to excavate the ground down to the base of the existing stone wall along the full extent of the collapse.
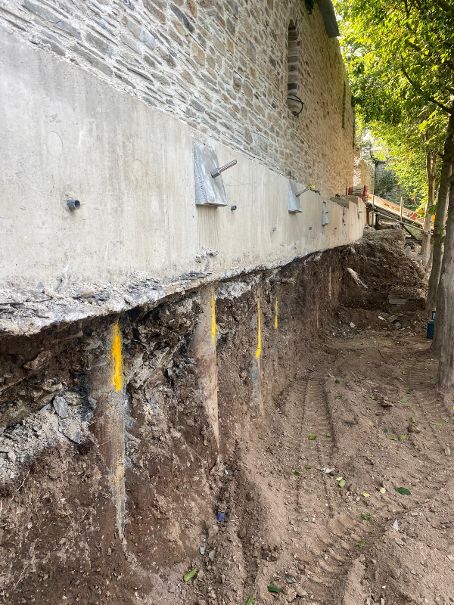
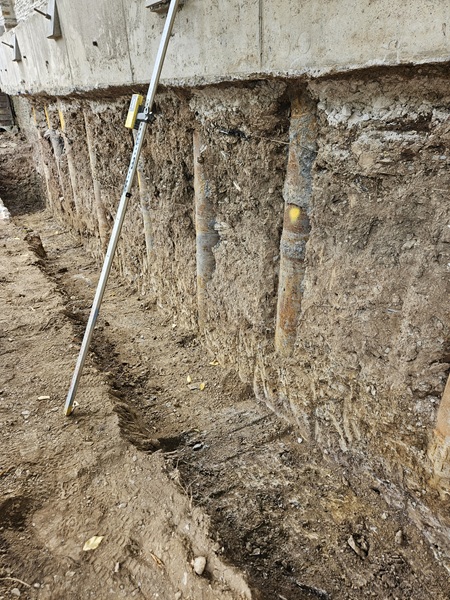
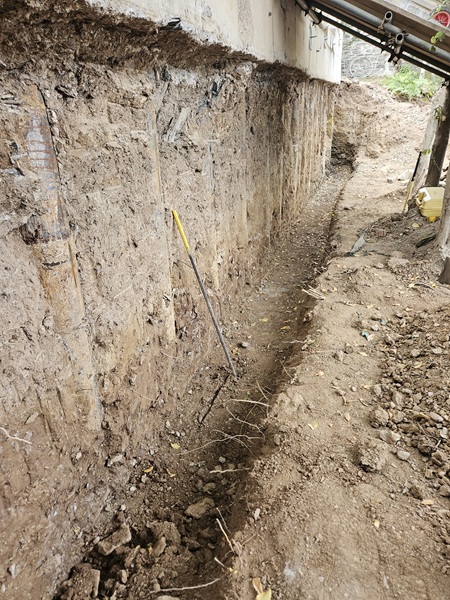
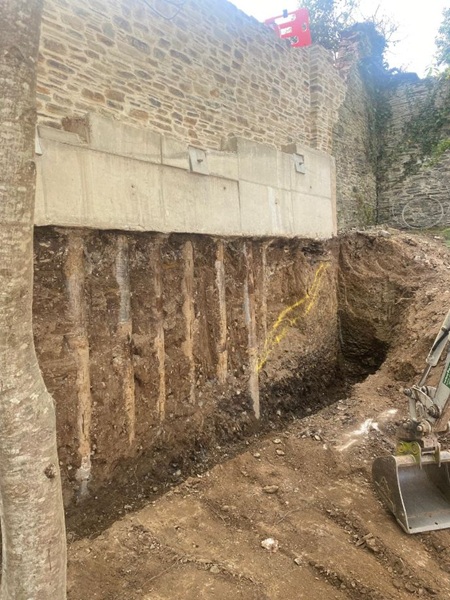
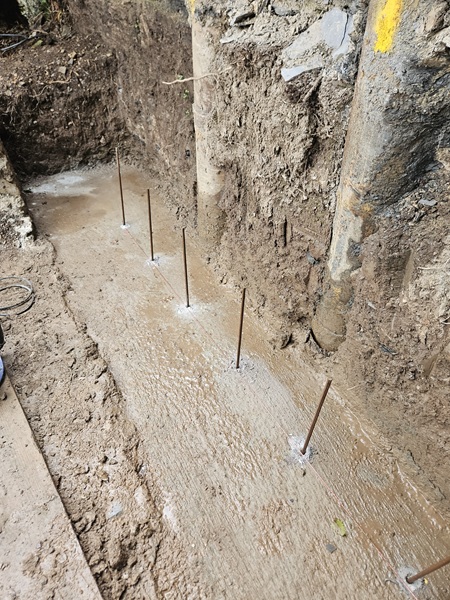
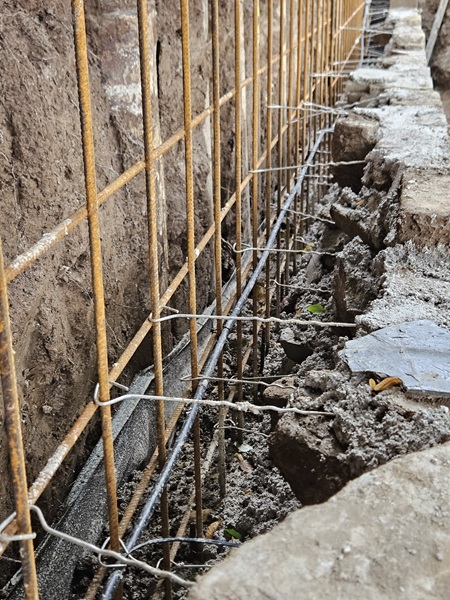
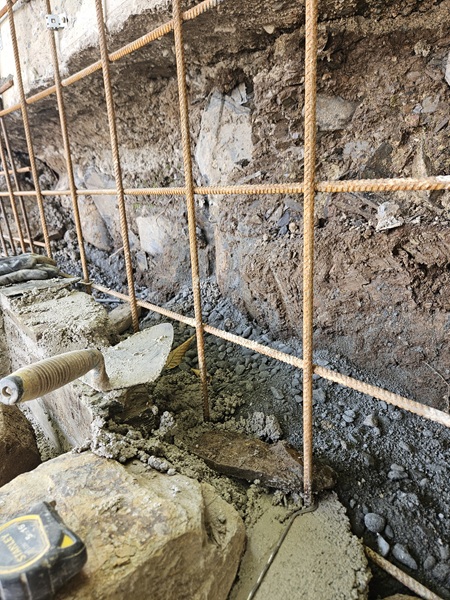
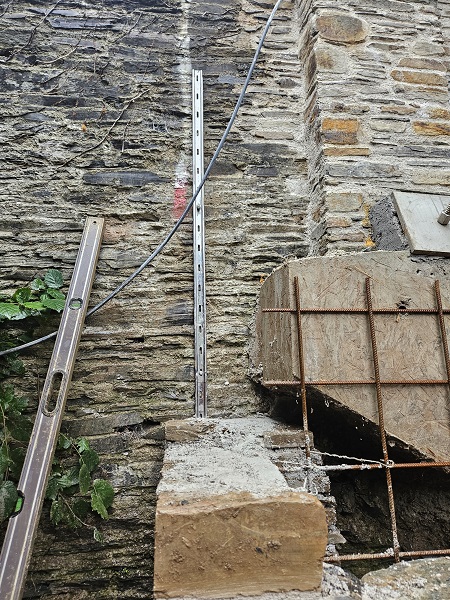
Then a double row of piles encased in concrete were sunk into the ground in line with the wall and these went down to a depth of between eight to nine metres until solid ground was hit. The double row of piles were staggered and put in about 900mm centres apart and roughly forty piles where put down in total. The steel from the tops of the piles projected out of the ground by 600mm.
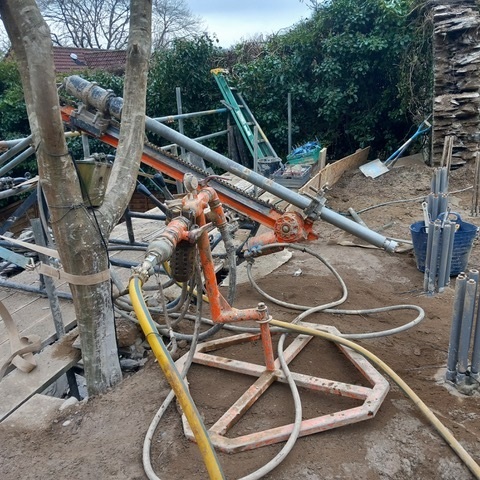
This was to enable a new reinforced steelwork cage to be fixed to them.
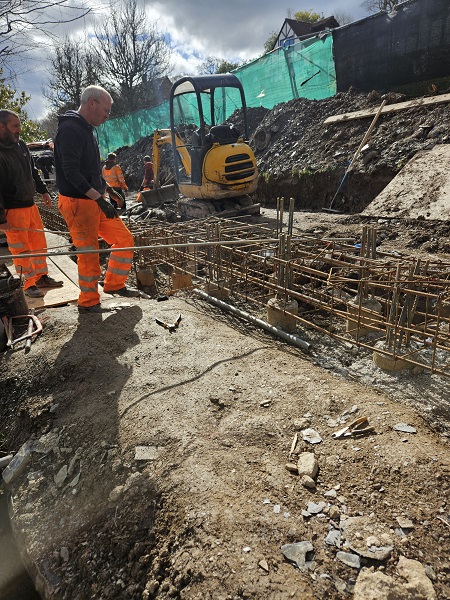
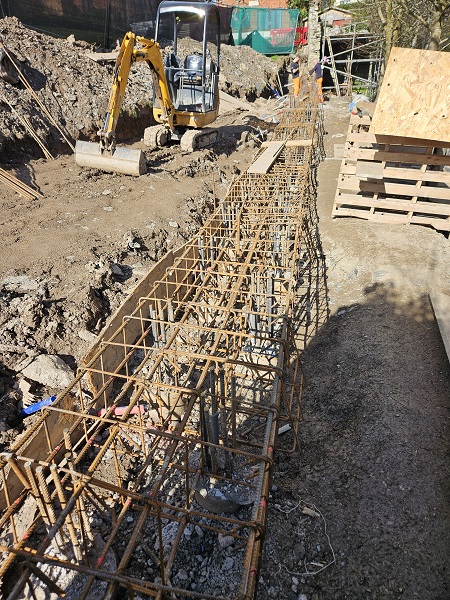
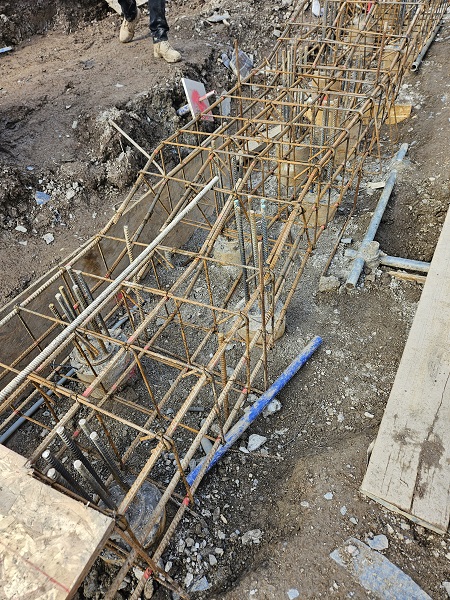
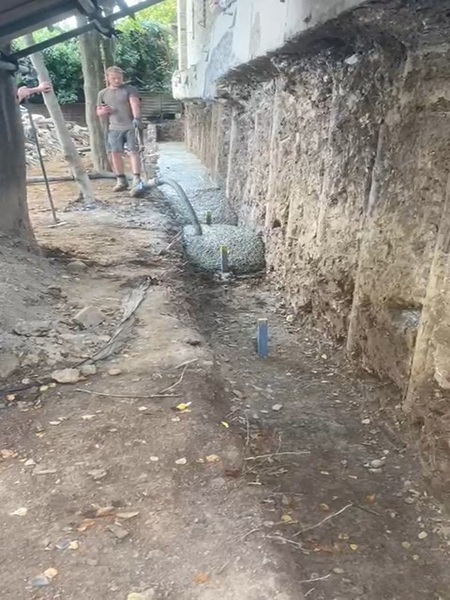
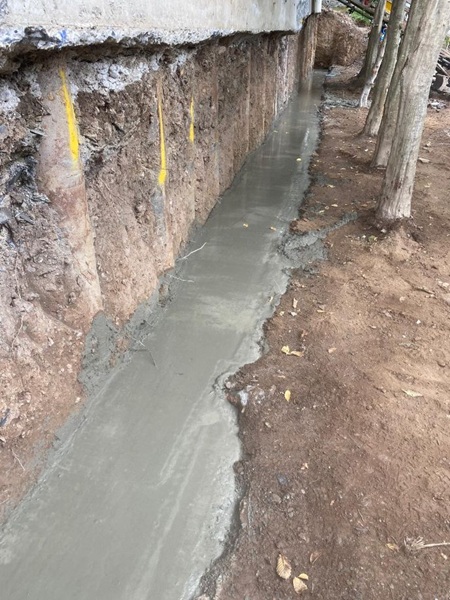
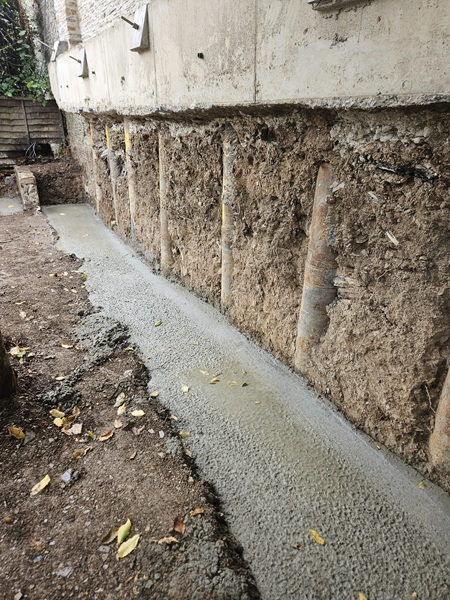
Once all the steelwork was in situ, shuttering was placed either side of the steel cage and a mass concrete beam was cast to form a new stepped foundation.
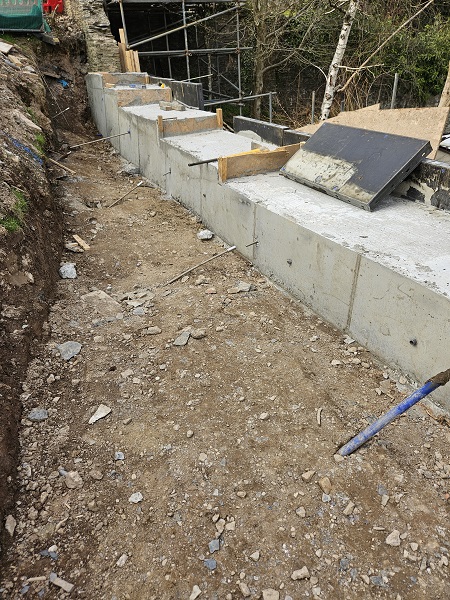
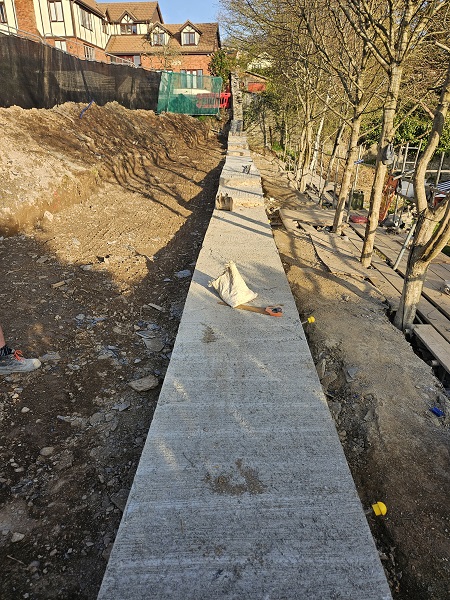
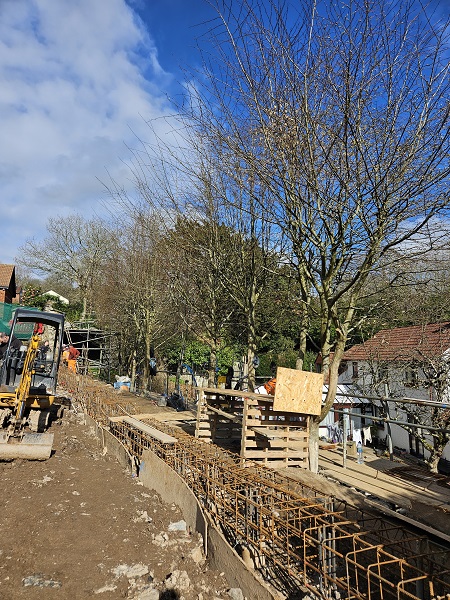
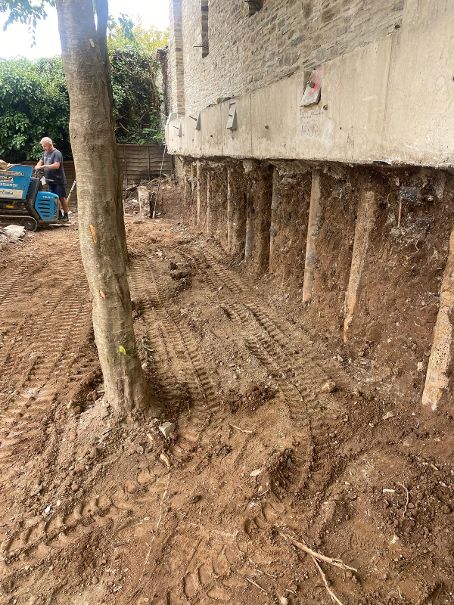
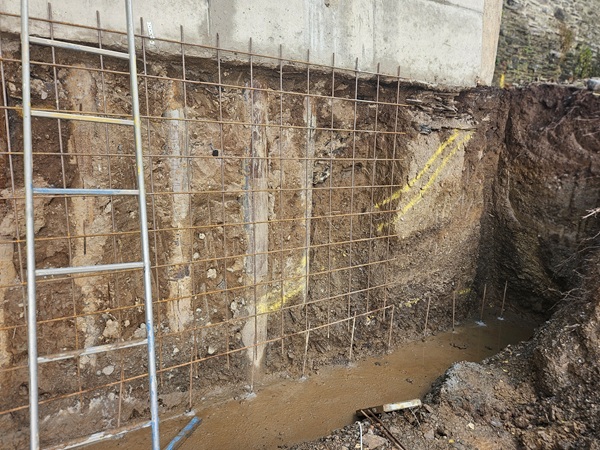
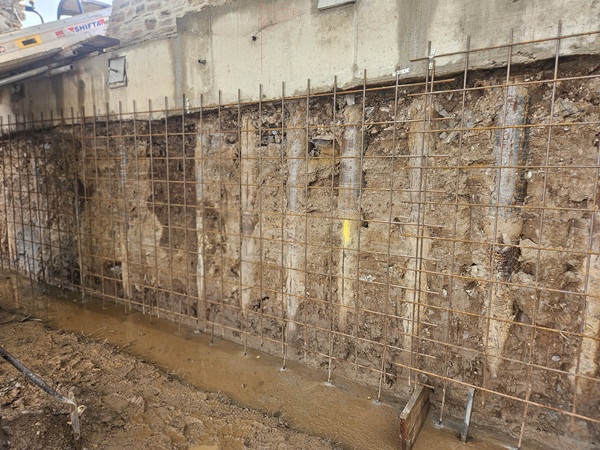
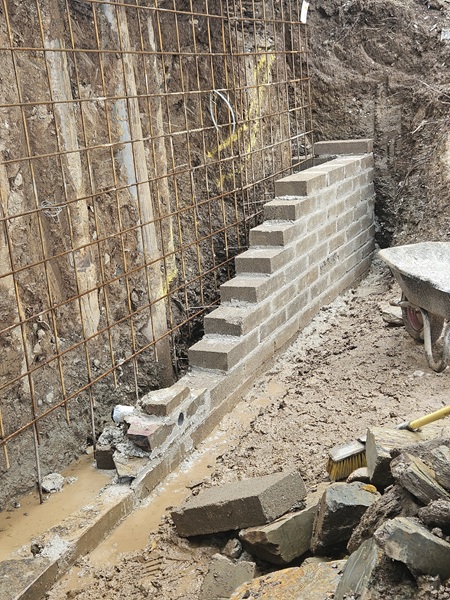
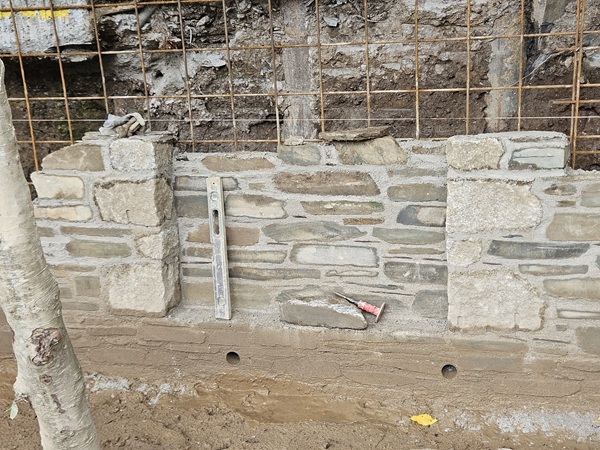
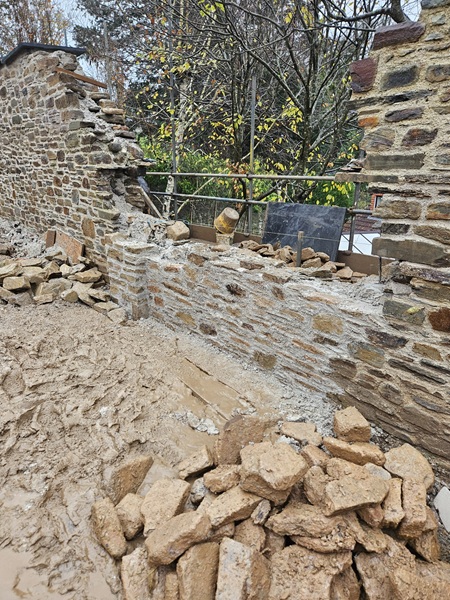
The new 900mm wide reinforced concrete beam foundation was now essentially sat on top of the pilings. It was at this point that Garness Contracting Ltd contacted us giving instructions to carry out the stonework. Having worked out what materials we needed to get started, a start date was agreed upon and the first batch of materials were delivered.
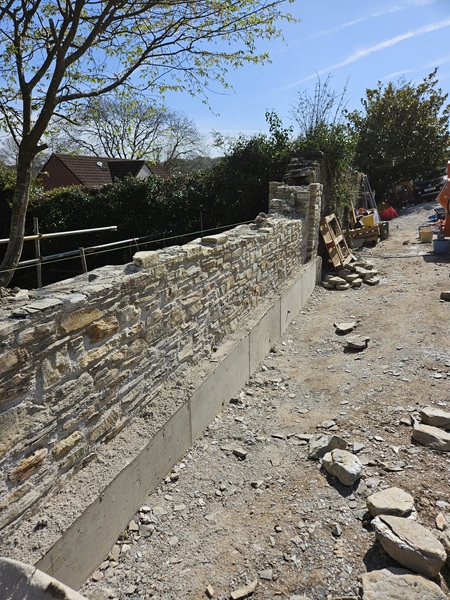
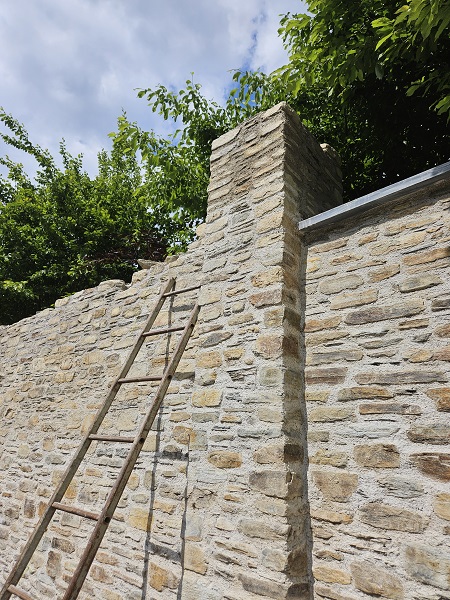
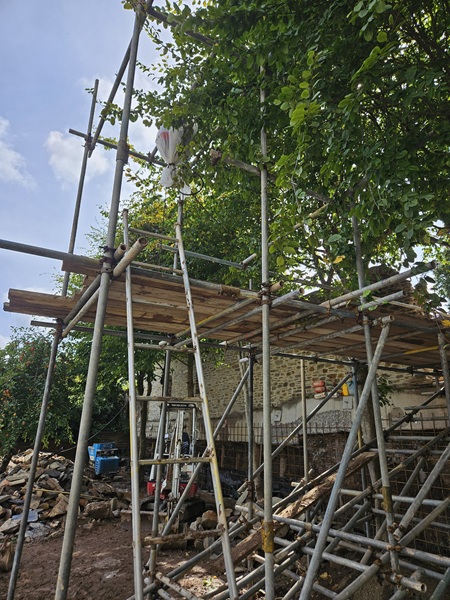
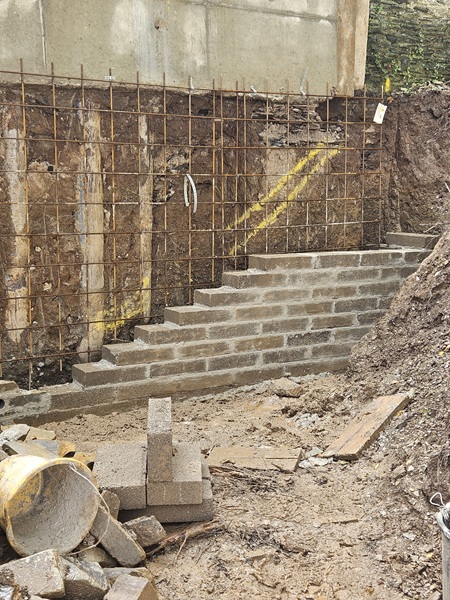
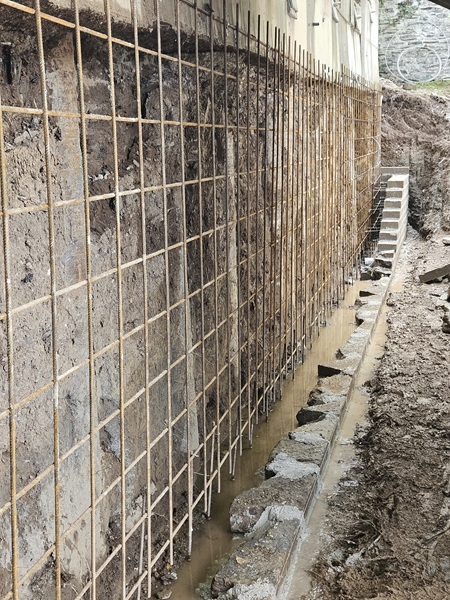
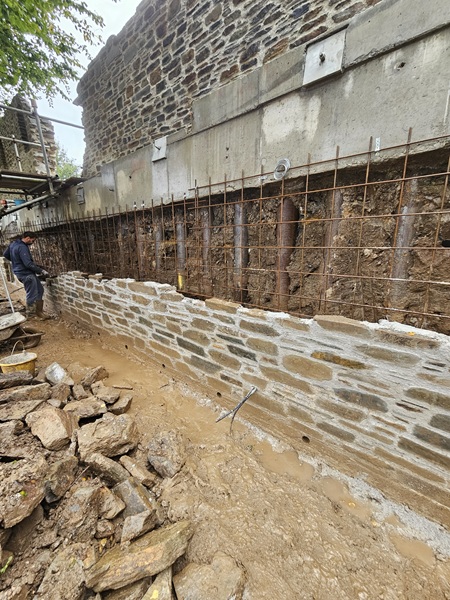
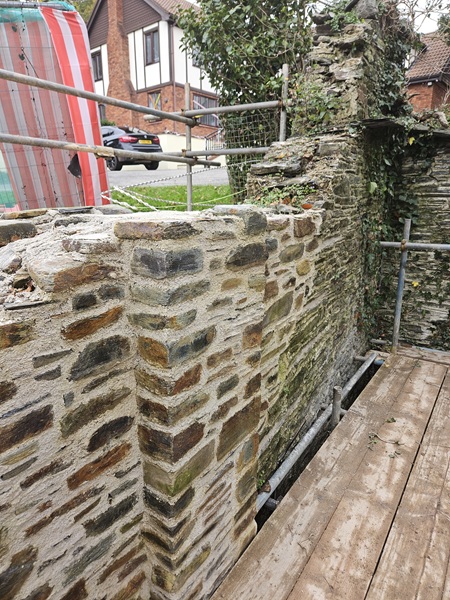
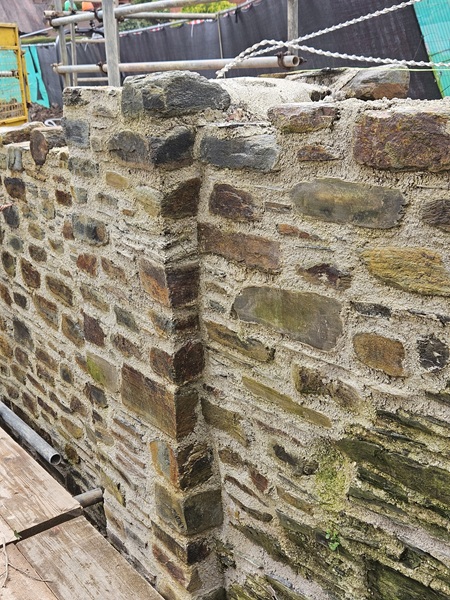
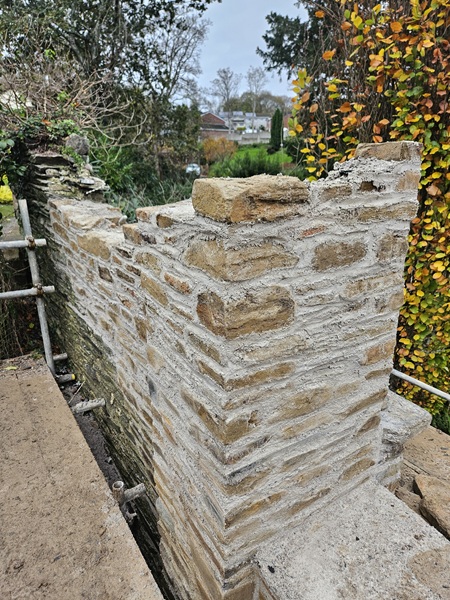
On the first day, our team of six stonemasons turned up on site and work soon got underway with setting out and laying down the new stonework.
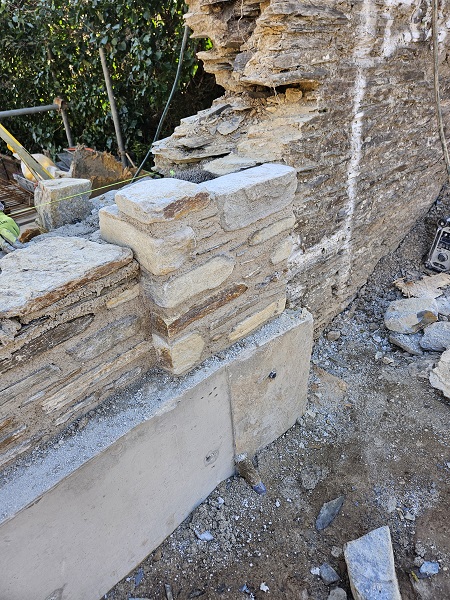
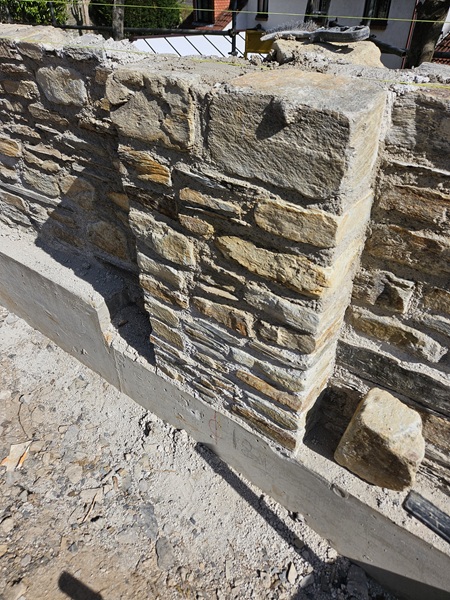
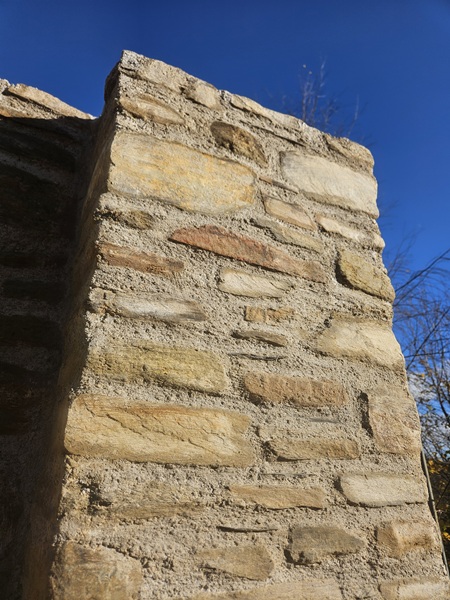
These piers would match in with the other piers that were built into the original garden walls. Once we were so far up we set out a line all the way to the other end and proceeded our way along the length of the new wall with the stonework.
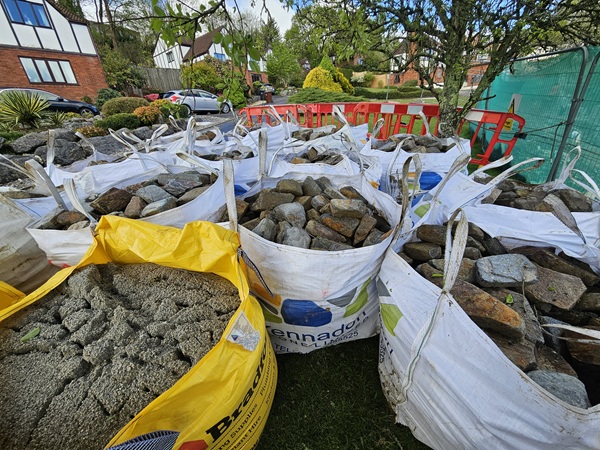
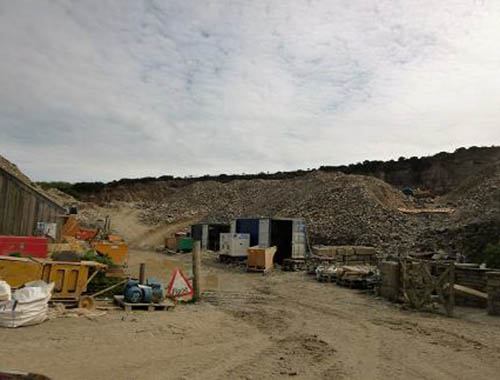
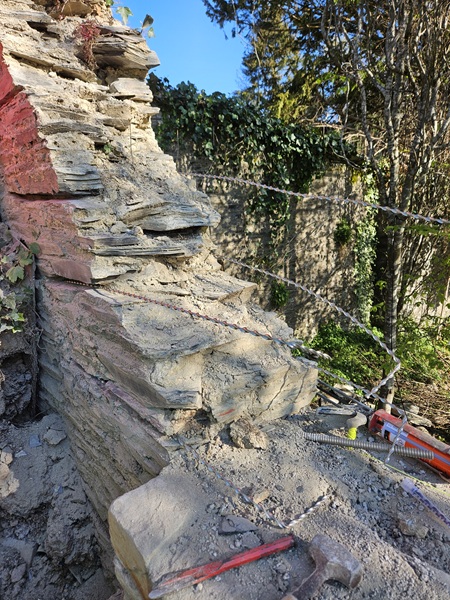
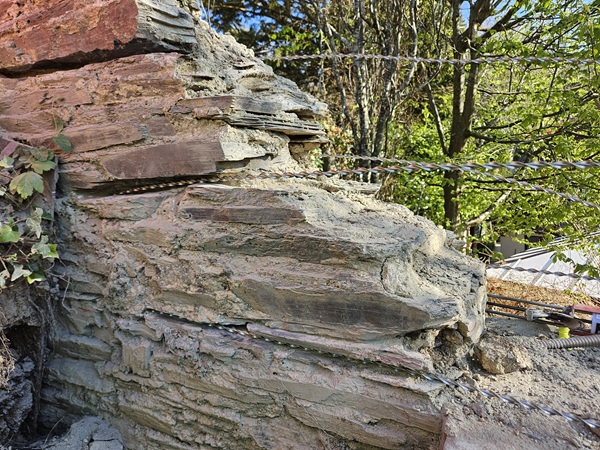
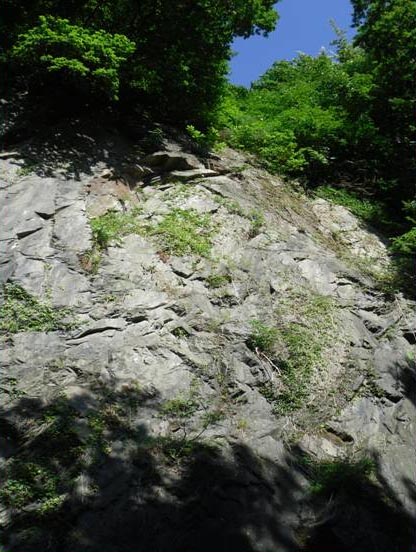
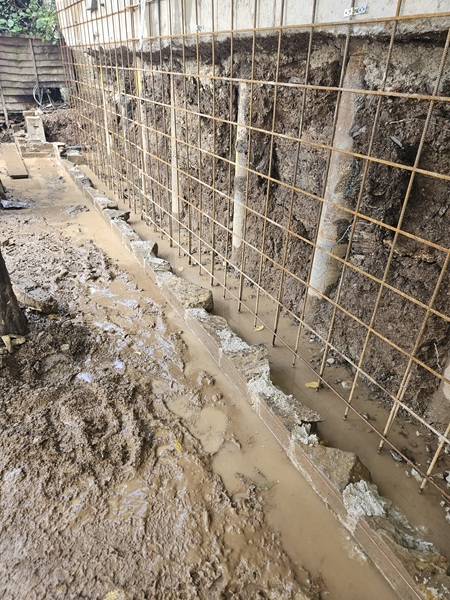
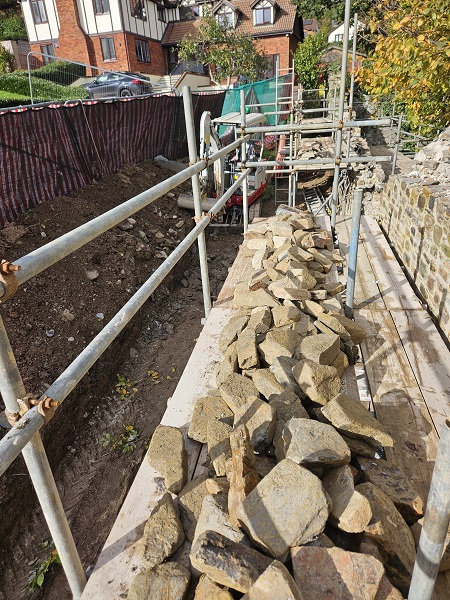
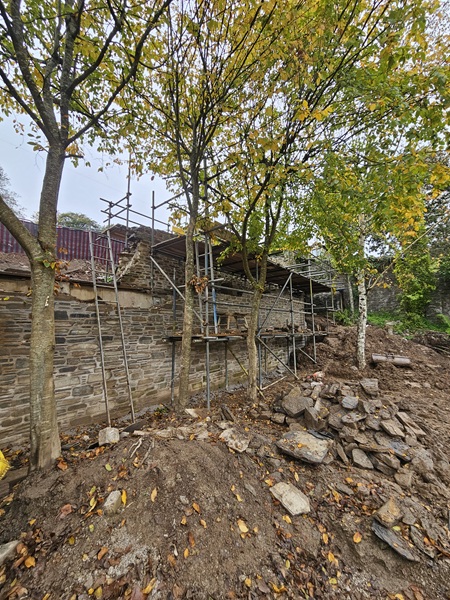
Although we had some stone from the original wall when it had collapsed, there was certainly nowhere near enough the quantity needed to build what was required. Nor was it good quality. The original stone would have come from small nearby quarries that were basically cut into the sides of hills on the estate. We do know from old ordnance survey maps that an old quarry on the estate is less than three hundred yards away from the kitchen garden, long abandoned and now completely overgrown. It is very likely that the stone used to build these walls came from this old quarry. Back in the day it would of provided a free source of stone for the estate. We needed new stone and we were going to need tons of it. It was agreed that the new stone would come from Yennadon quarry situated within the confines of the Dartmoor National Park in Dousland. We would use both the new and the old stone, mixing it together as we went along. That way at least we would use as much of the original stone as we possibly could.
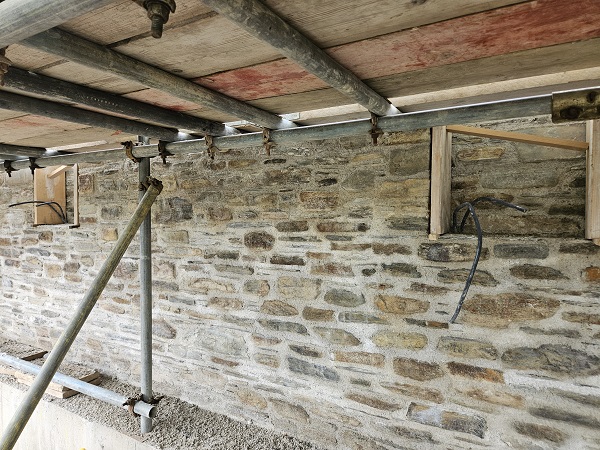
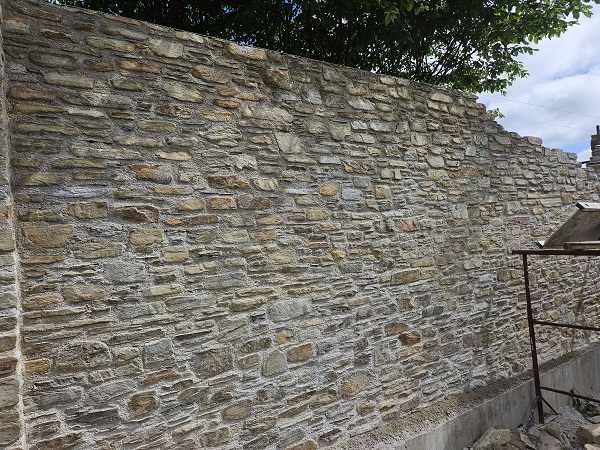
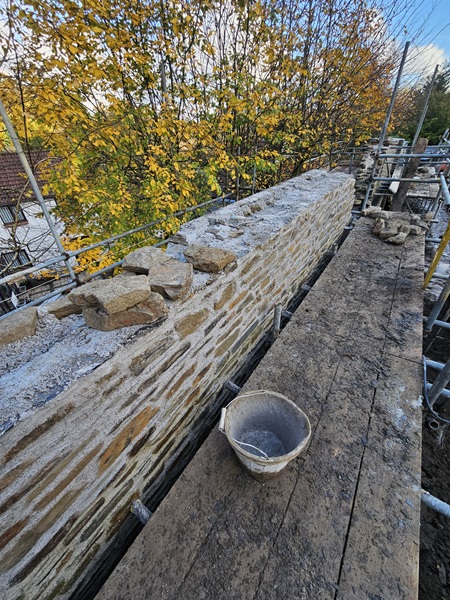
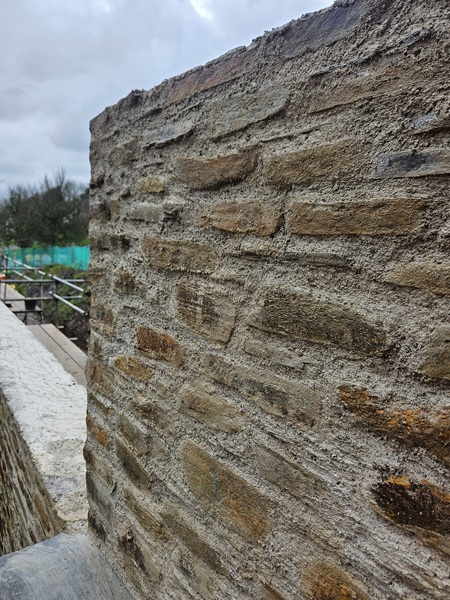
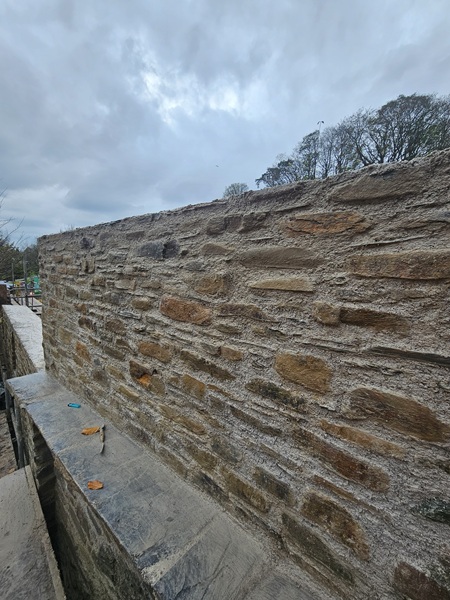
Stone has been quarried here at Yennadon for more than a hundred years. But, in geological terms this slate stone is about four hundred million years old and formed during what is known as the Devonian period. That’s about a hundred and fifty million years before the dinosaurs even set foot on Earth. Yennadon stone has metamorphic properties and metamorphic rocks are pre-existing igneous, sedimentary or other metamorphic rocks transformed by intense heat, pressure, and chemically active fluids deep within the Earth’s crust, causing mineral and structural changes without melting them completely, resulting in new textures like banding (known as foliation) or interlocking crystals, seen in rocks like slate, marble, and gneiss. The stone supplied by Yennadon that we used is classed as small walling stone. It has varying rustic colouring that can be laid on a bed between 100mm and 250mm wide. Perfect for what we needed as the wall we were building was 500mm thick. The mortar specified consisted of three parts sharp sand and one part NHL3.5 lime. Soon we were getting the wall up to its height.
Setting in additional piers as we went along.
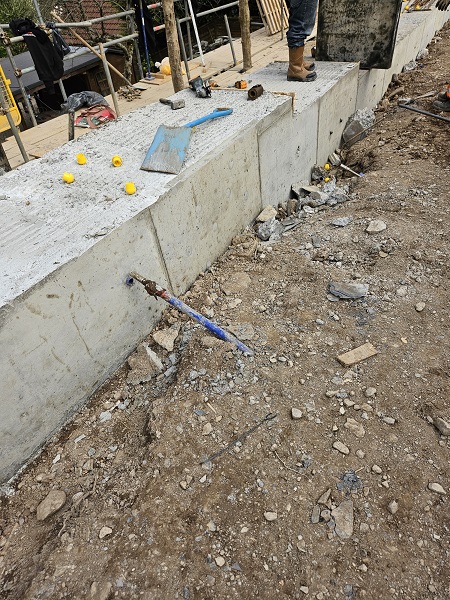
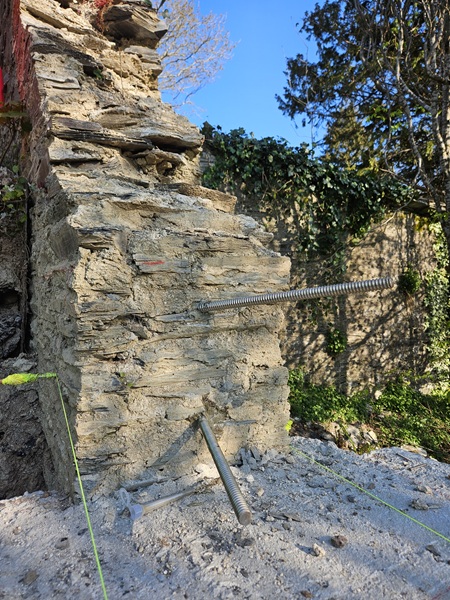
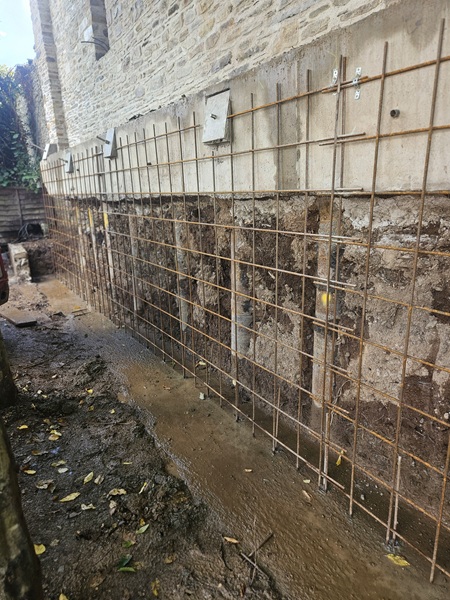
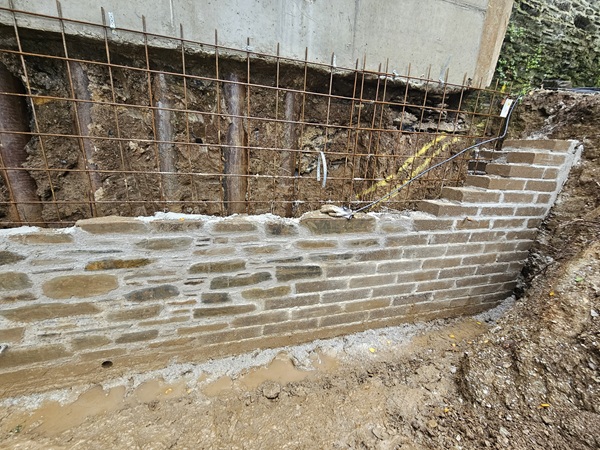
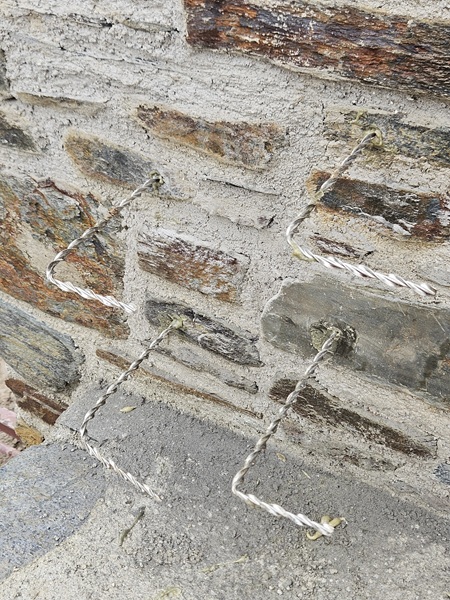
At the other end of the wall a couple of 25mm diameter stainless steel threaded bars were drilled and resin fixed into the existing section of the old wall. These went in to a depth of about 300mm and would help tie in the new stonework to the old.
Another pier was built at this point and the tie bars were built into that.
Additionally we were instructed to incorporate extra ties into the wall as it went up. The existing section of wall here was leaning slightly out of upright. These ties were stainless steel consisting of 10mm diameter helical bar cut to length. They were placed into bed joints that were cut out and prepared to a depth of 50mm within the existing stonework. They went back a minimum of 500mm into the stonework beyond the line of where the old stonework meets the new, extending into where the new pier was going up.
Once in situ, the tie bars are fixed into place with epoxy resin. The epoxy resin is kept back 25mm from the face of the stonework, which is then pointed in with lime mortar. The ties are set in every 300mm apart over the full height of the wall and are fixed to both sides. This gives lateral strength preventing the leaning section of wall moving any further. It is classed as a structural repair and is cost effective as it causes minimal disturbance and a much cheaper option that would require the leaning section to be taken down and rebuilt.
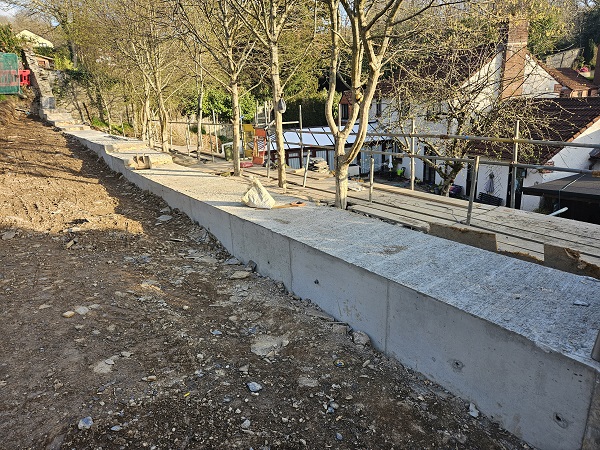
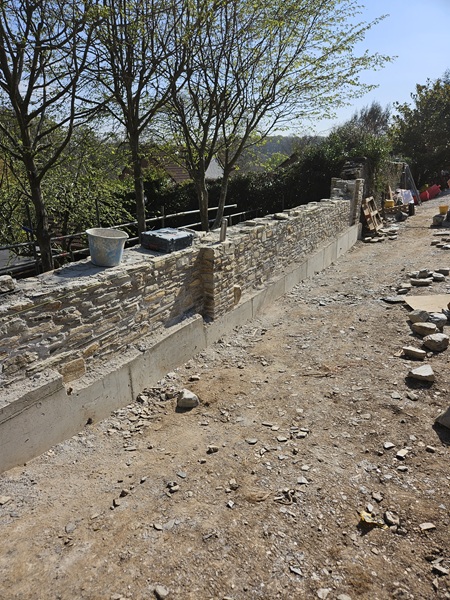
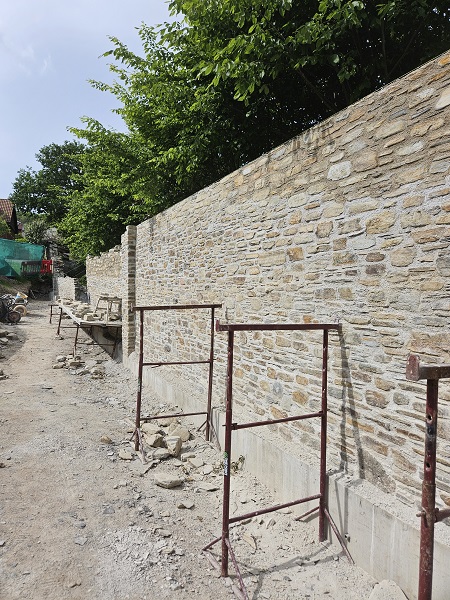
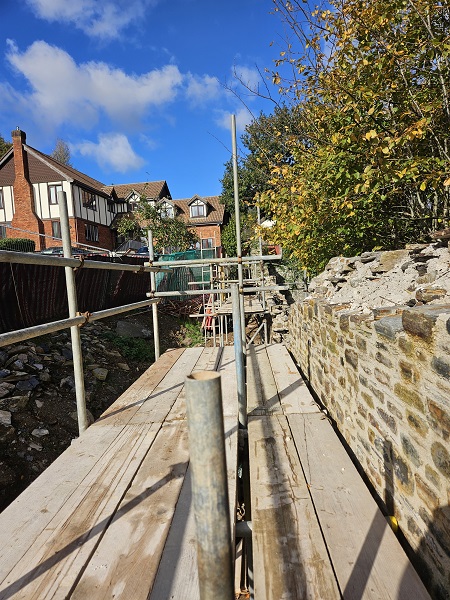
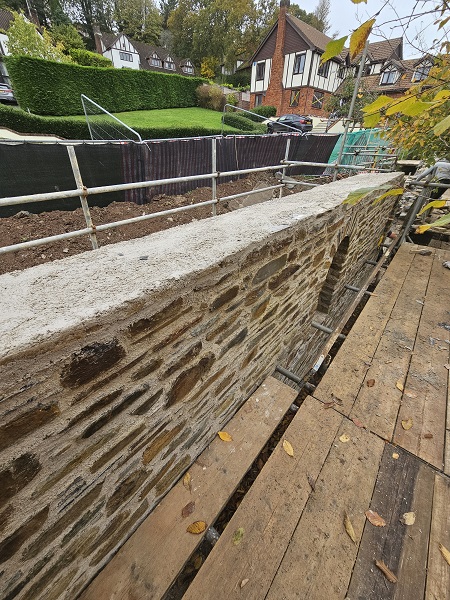
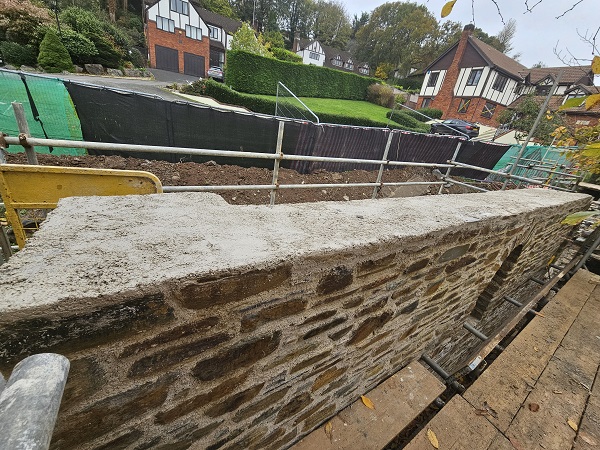
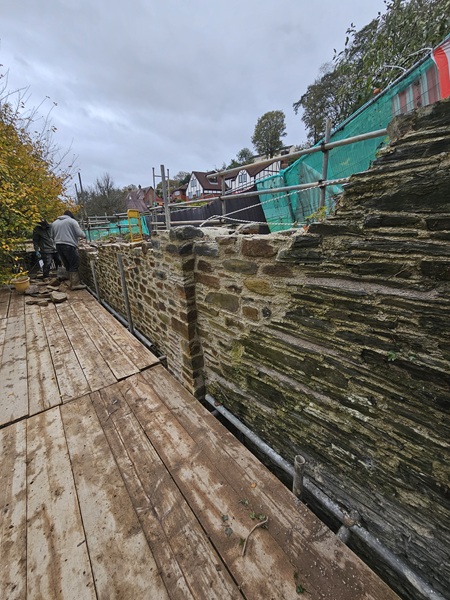
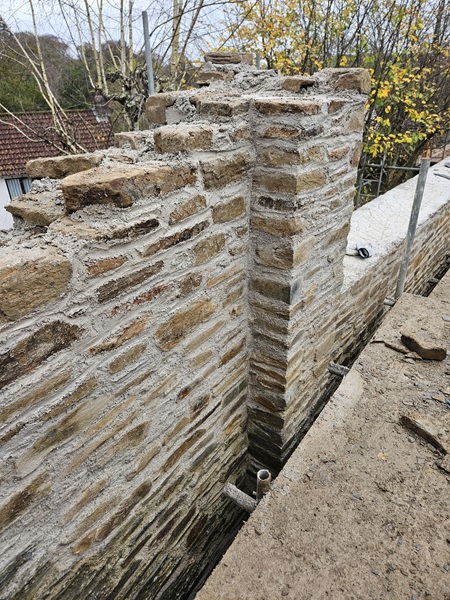
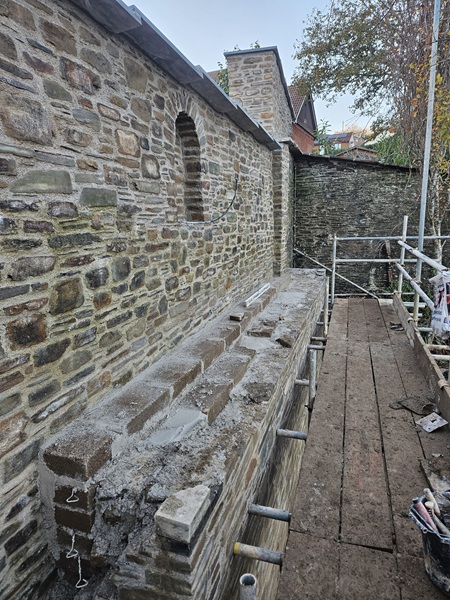
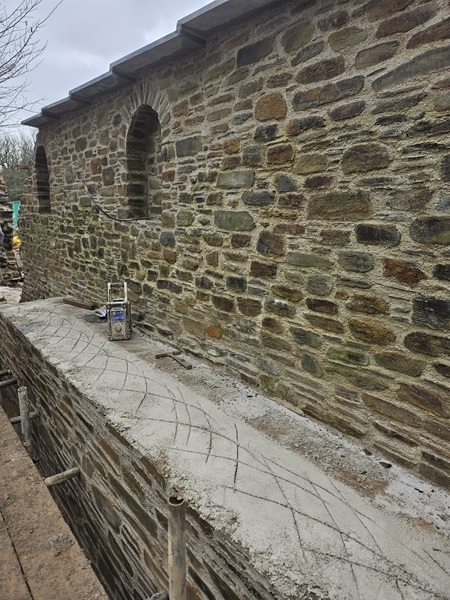
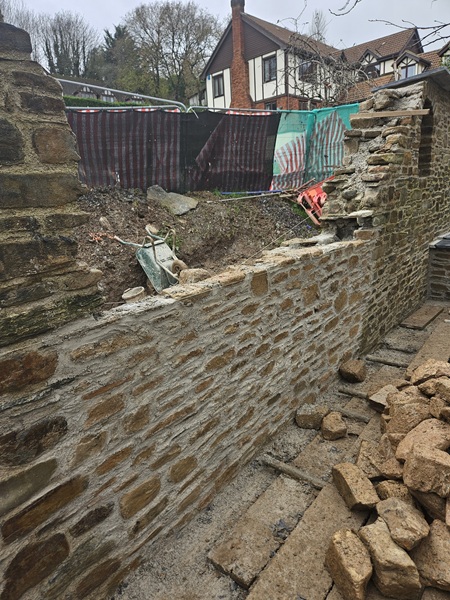
With both ends of the wall now going up, we continued building the new stonework up along its full length.
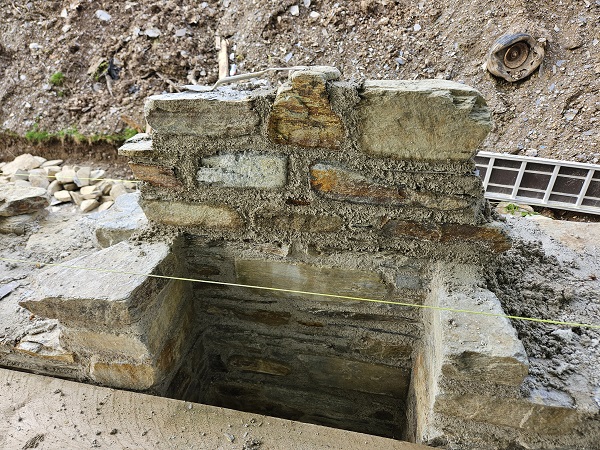
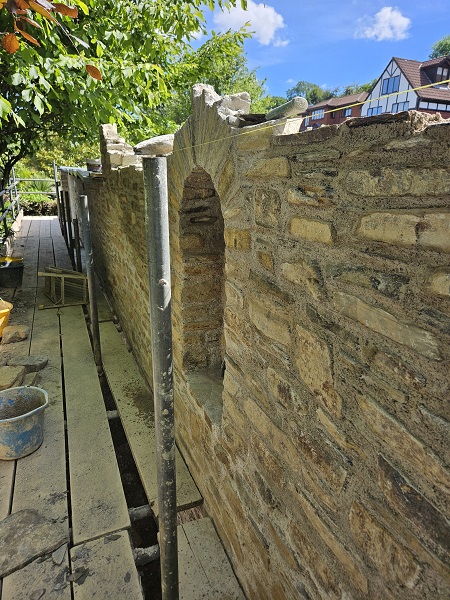
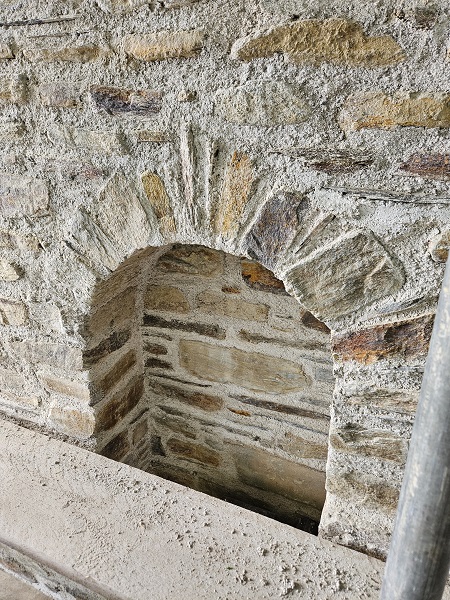
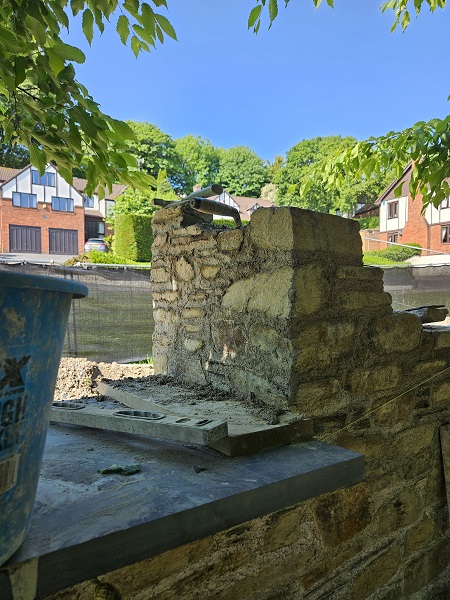
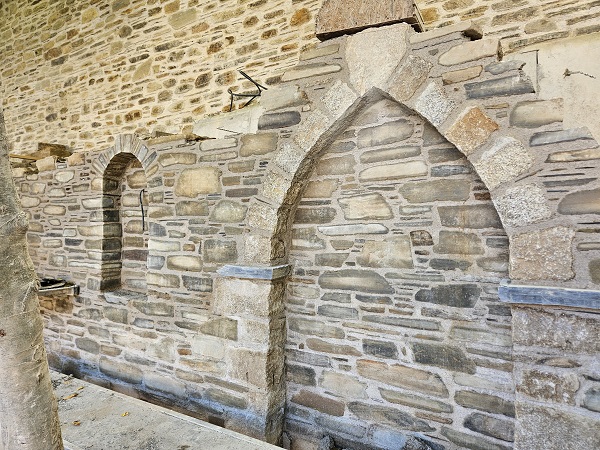
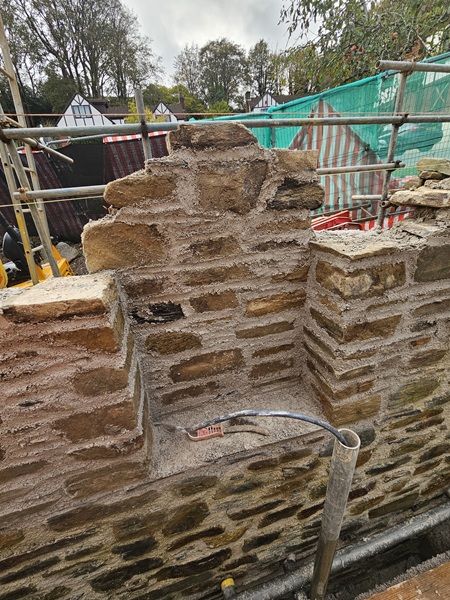
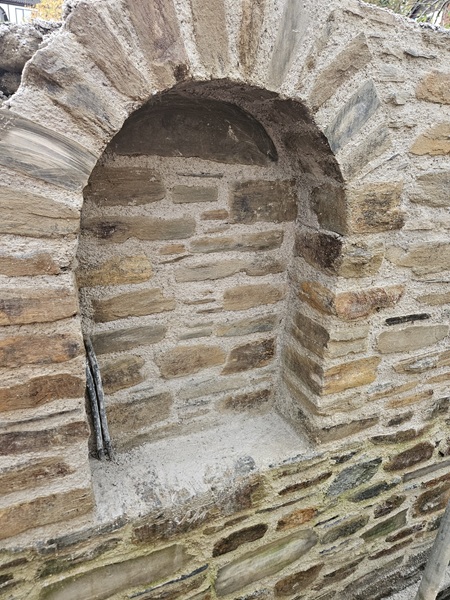
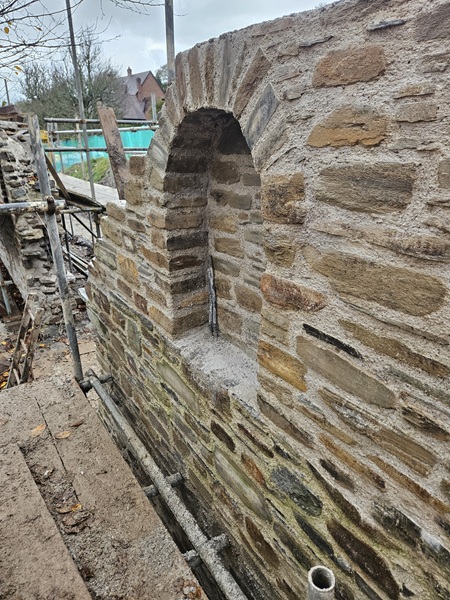
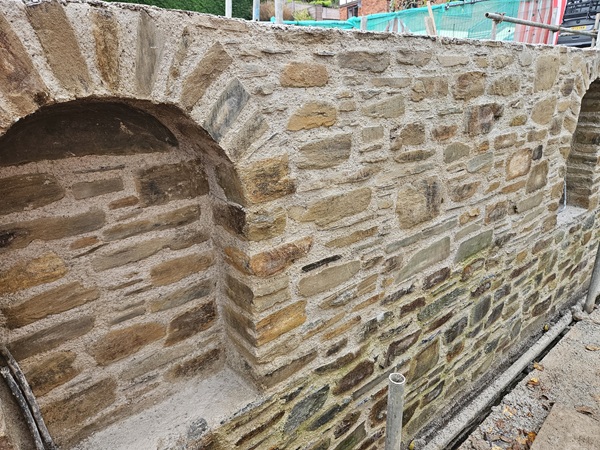
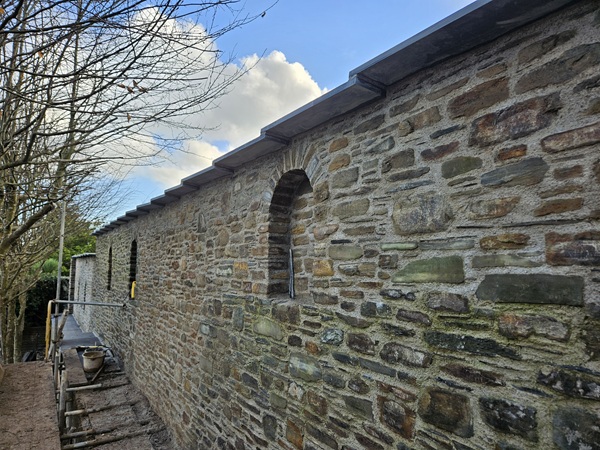
On the clients side of the wall, the client wanted some features built into the stonework in the form of arched niches.
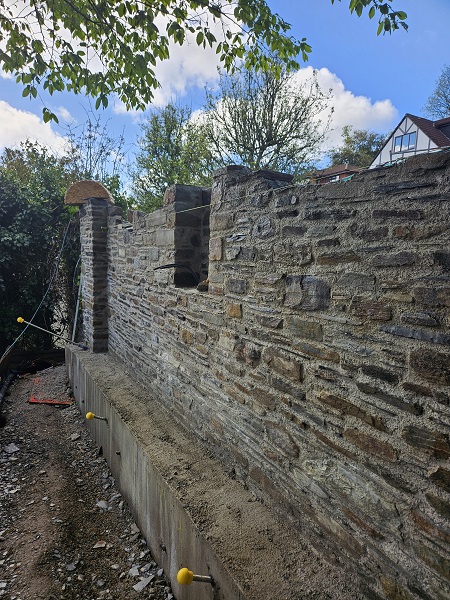
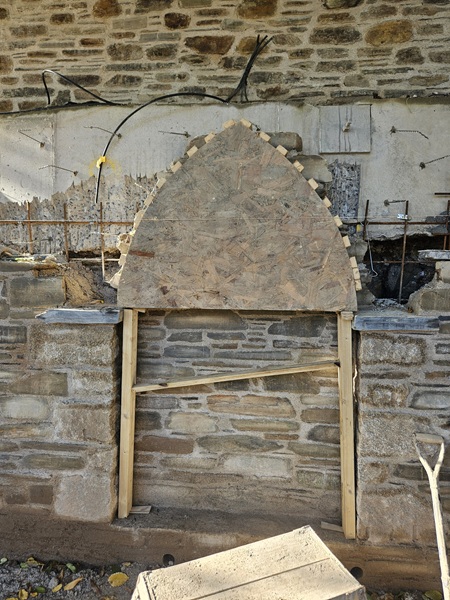
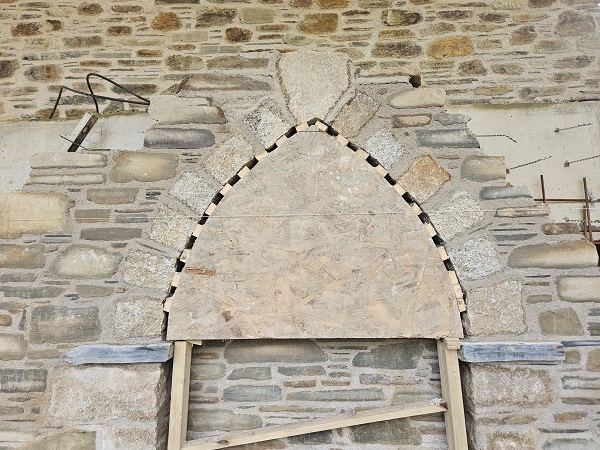
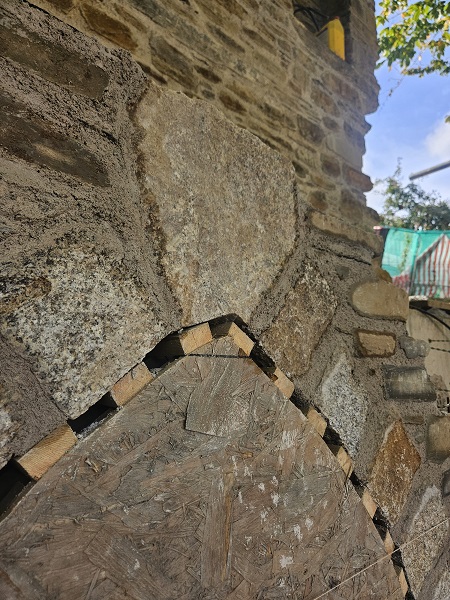
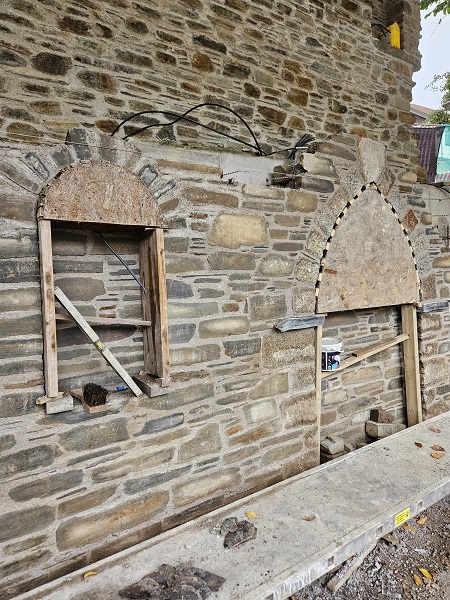
These features were built approximately 500mm wide, 900mm high and 150mm deep. In total there were going to be six of these arched features built into this section of wall. We also built in electrical armoured cables to feed the new lighting which was going into each niche. By now the wall was getting higher so a scaffold was put in place for us to proceed even higher.
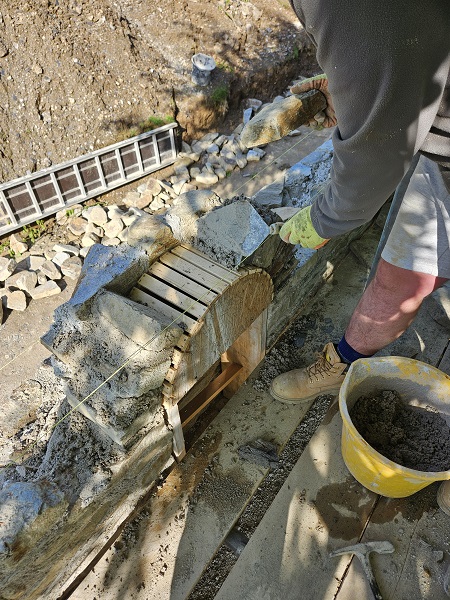
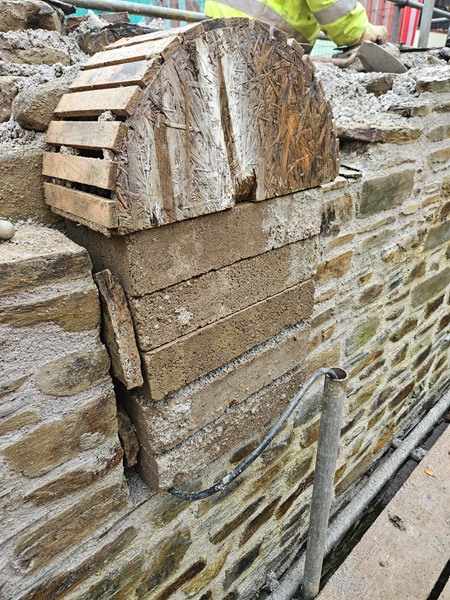
A couple of timber centrings were made up to form the profiles for the half-round arches over the niches and these were going to be used for all of these features.
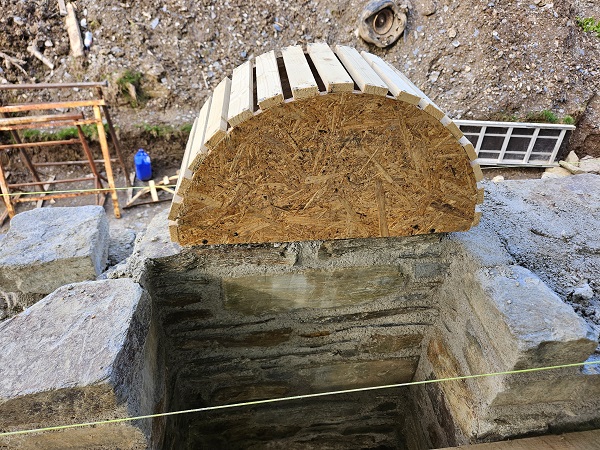
Once they were made the stonework to the back of the niches were built up.
Temporary timber leg supports were put in place to sit the arched centrings on.
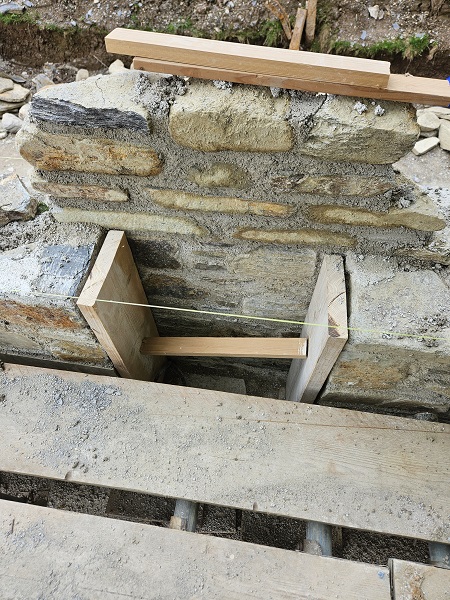
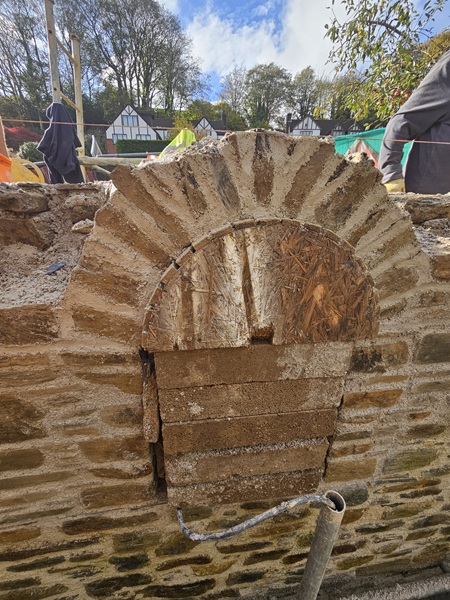
These are all put in place using wooden folding wedges. This makes the removal of the timber centring once the arches have set much easier. Suitable stone was selected and the arches were then set in place.
After a couple of days the timber centrings were removed.
And the stonework was built up around and over the new arches.
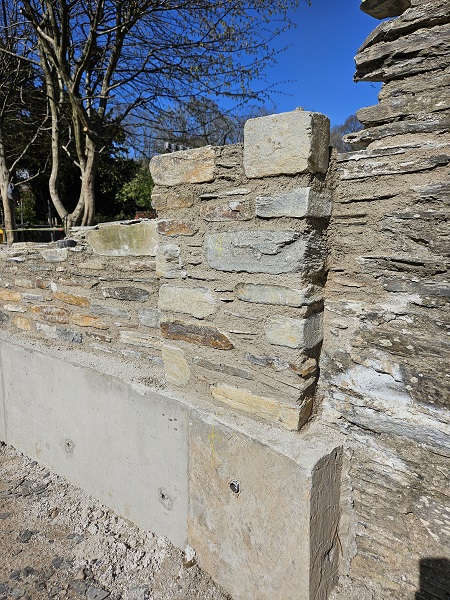
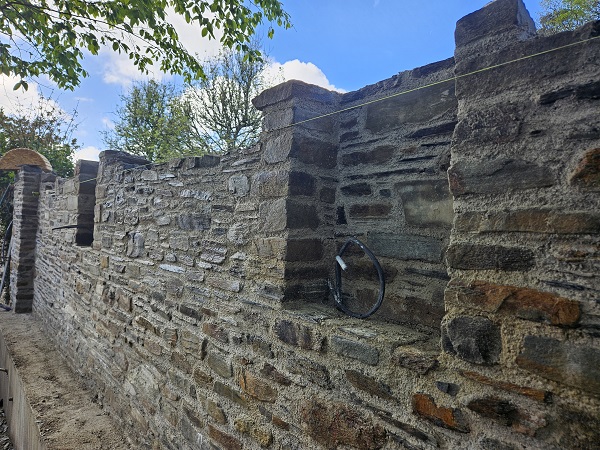
The wall on this section was now getting up to its final height.
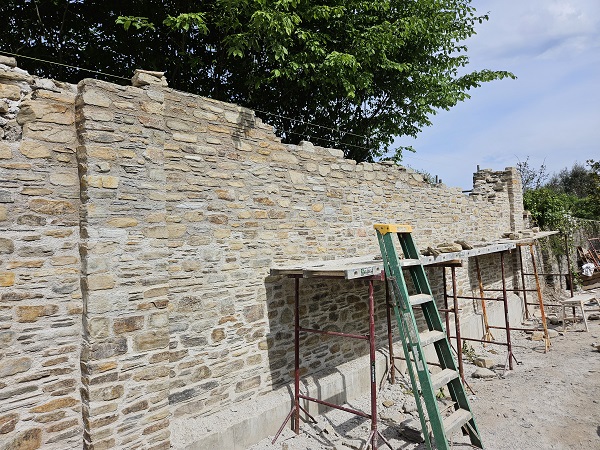
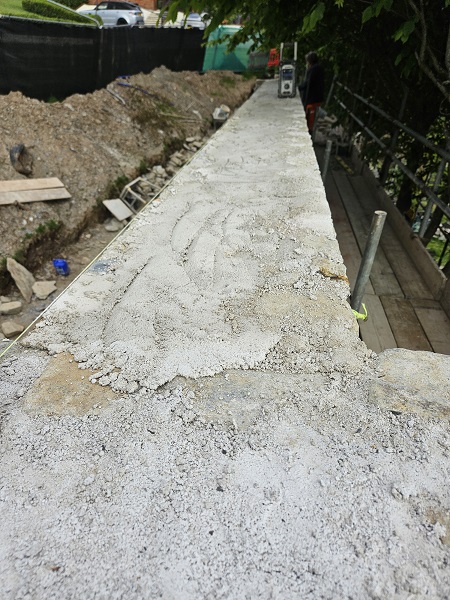
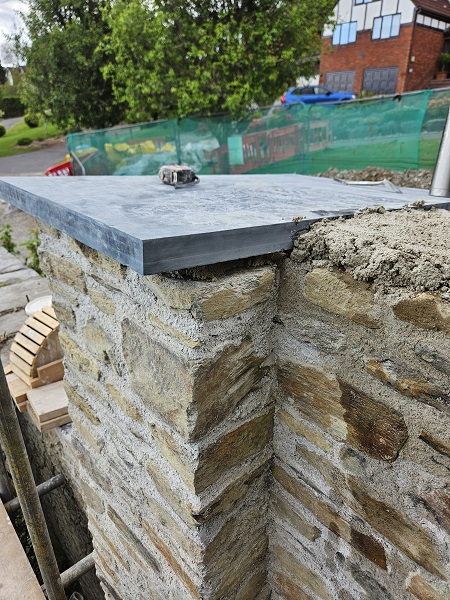
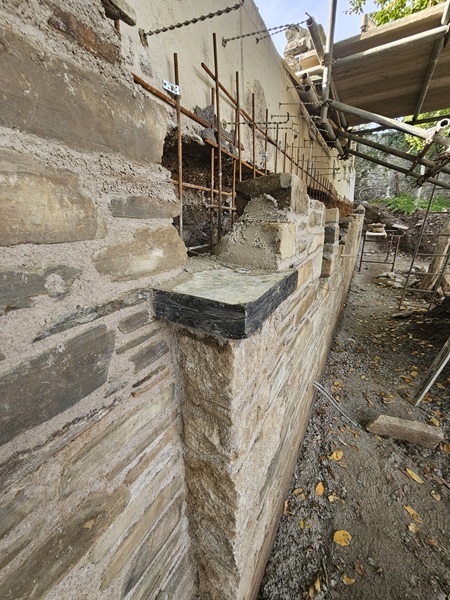
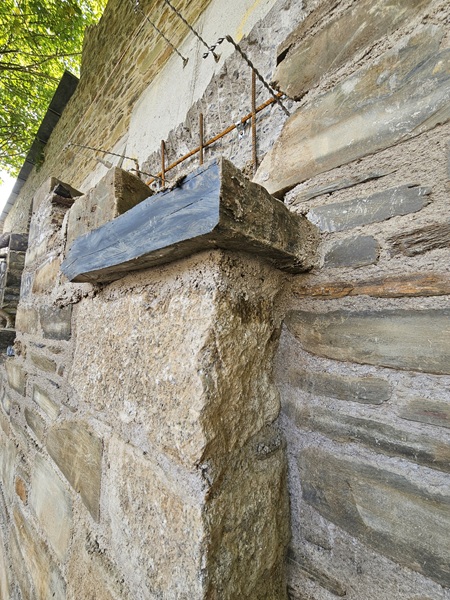
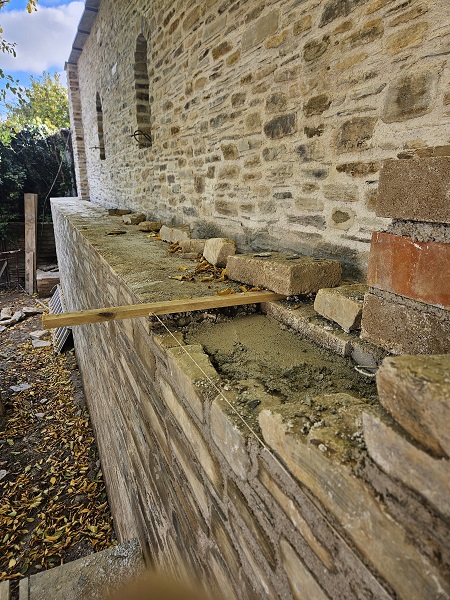
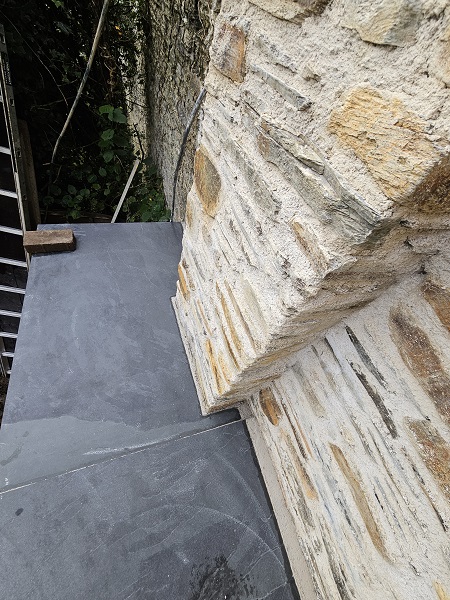
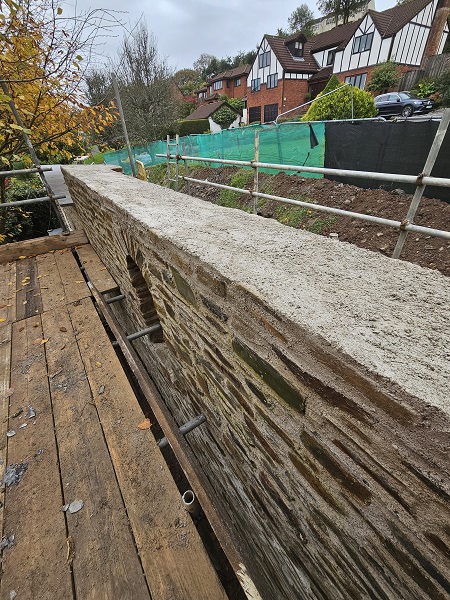
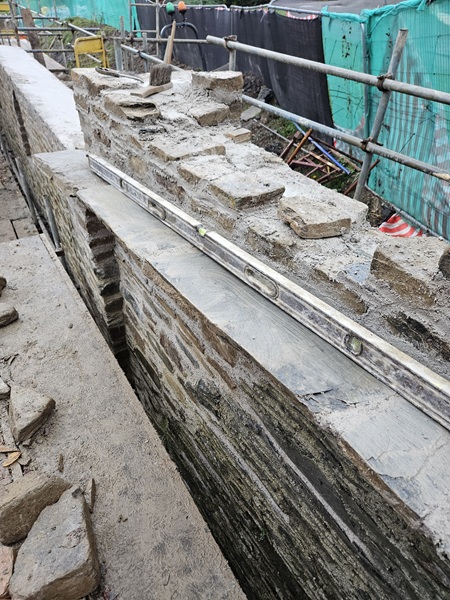
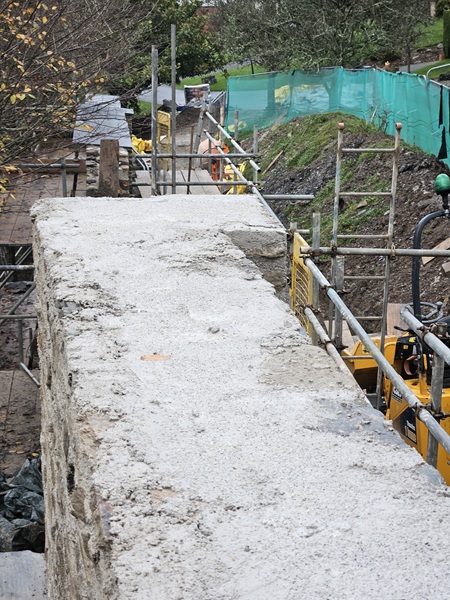
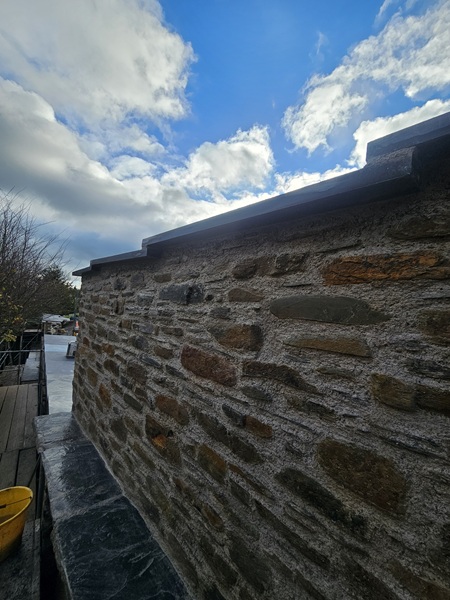
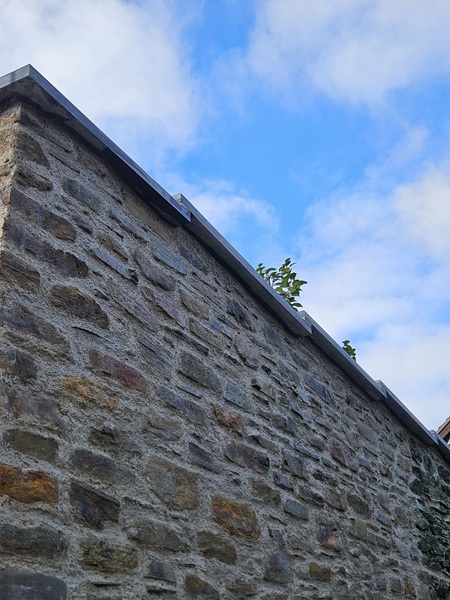
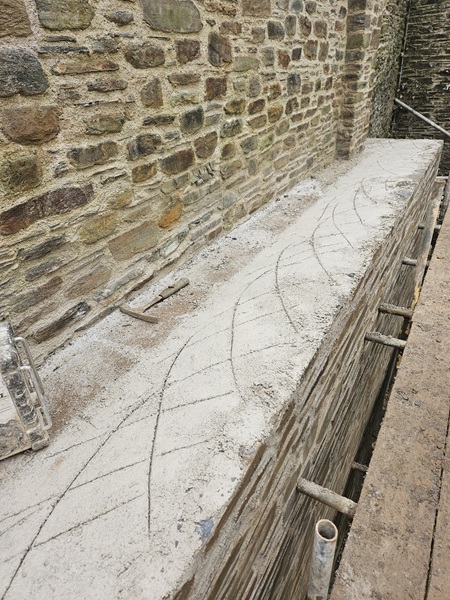
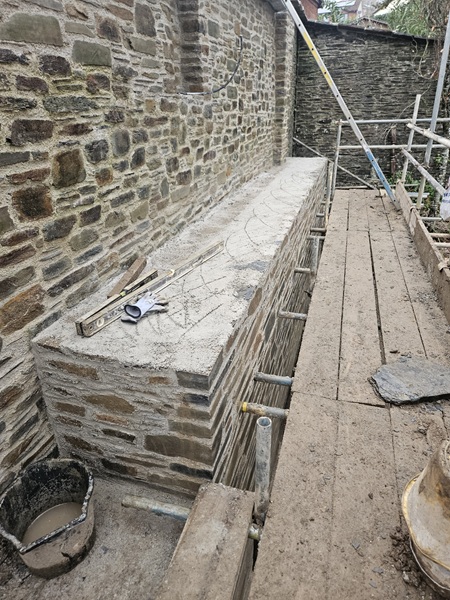
So we got this up to level and prepared the wall to receive the new coping that was going to go on top.
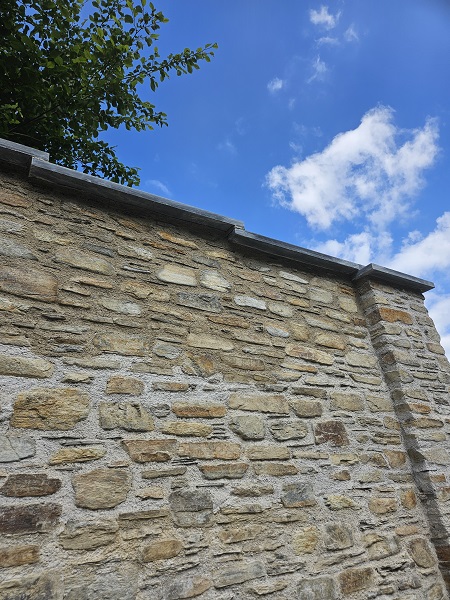
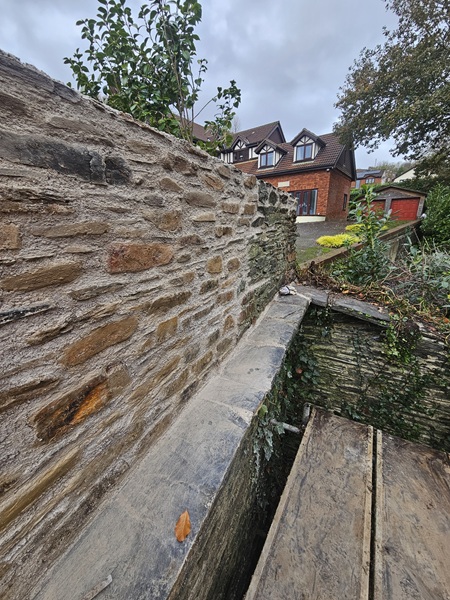
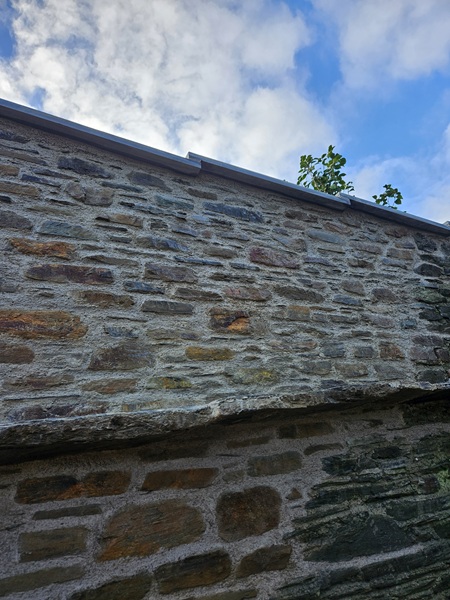
The top of the wall was level but we built it 50mm higher on the clients side forming a cross fall for the new coping.
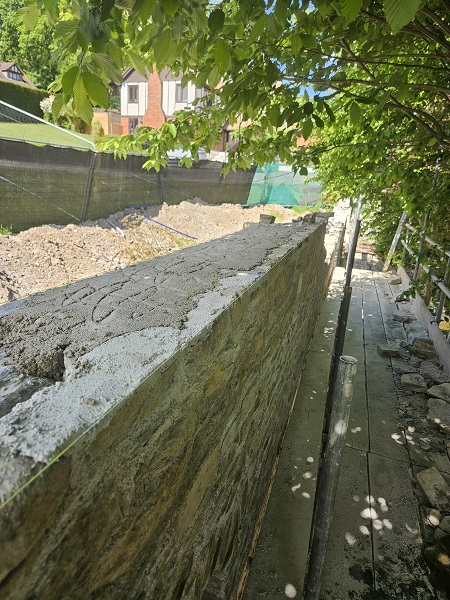
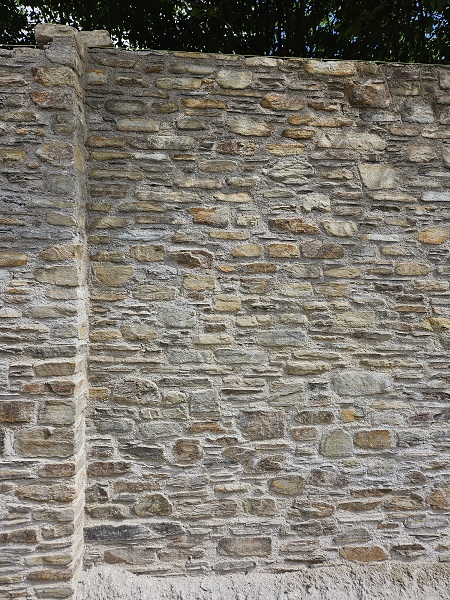
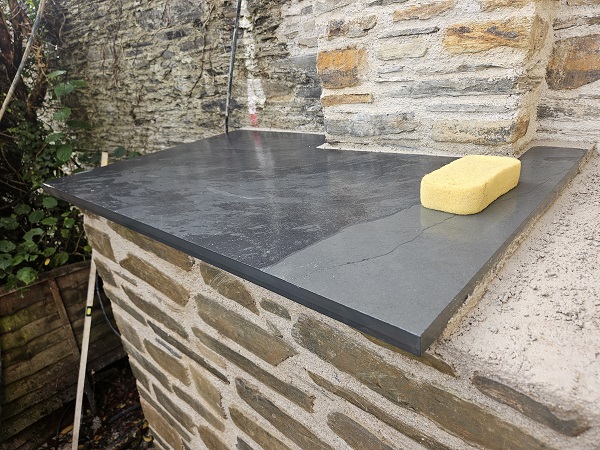
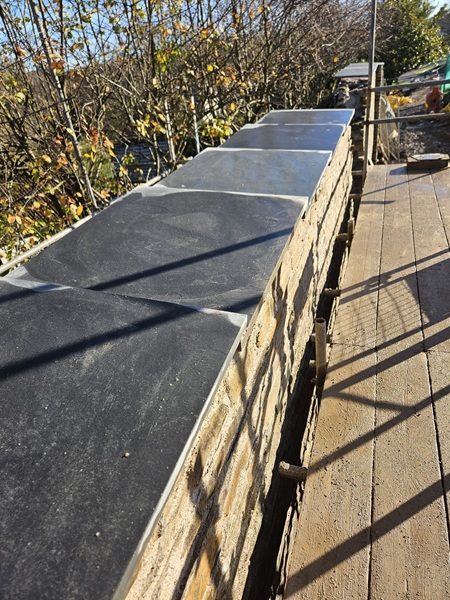
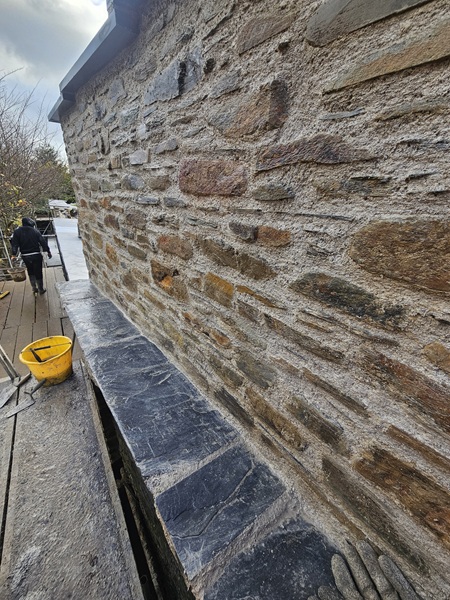
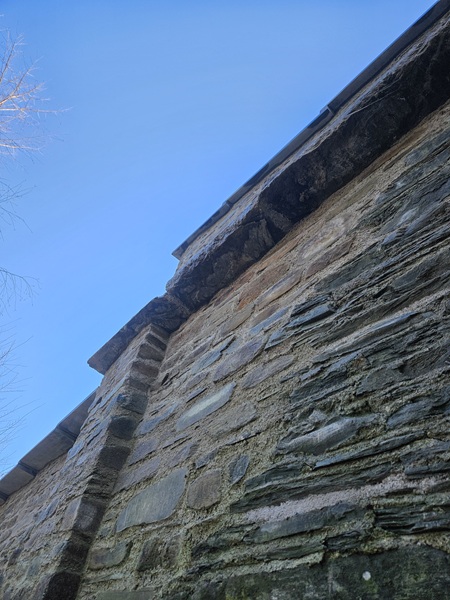
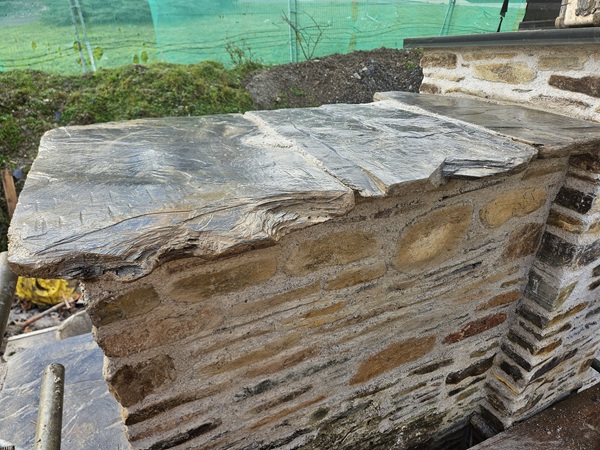
The copings on the original remaining garden wall consisted of natural slate 750mm wide of varying lengths and between 30mm and 50mm thick.
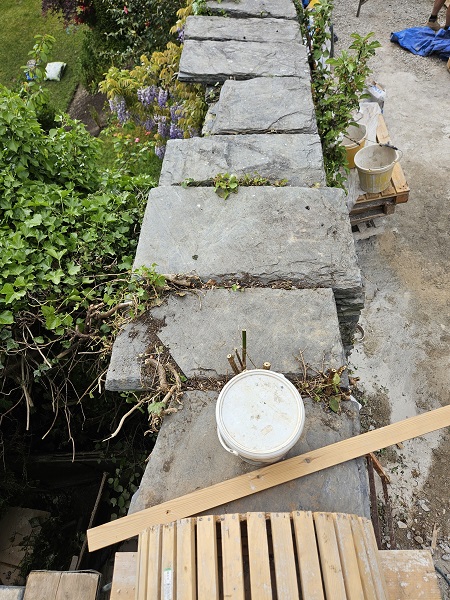
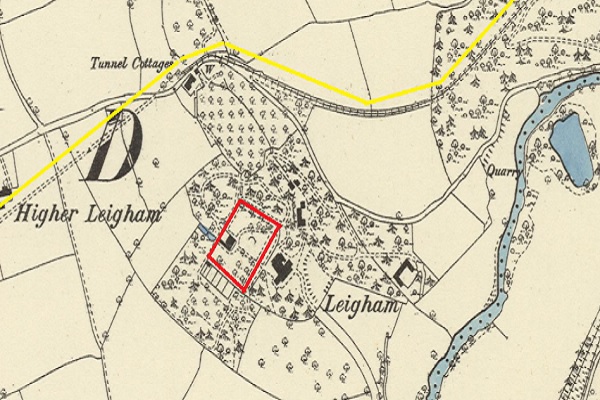
This slate had been dimensioned and would of cost a lot of money back in the day, especially when you consider that the whole of this garden wall had been topped off with this. The slate itself more than likely came from either Cann Quarry or Rumple Quarry, two quarries situated next to each other up in Plymbridge Woods which is less than a mile away and back then there was a horse driven tramway track from these two quarries that came past the estate less than a hundred yards away from this garden wall. The tramway system can be seen on early ordnance survey maps. Here the tramway is highlighted in yellow and the walled kitchen garden is outlined in red.
The Cann Slate Quarry, where slate and elvan stone were extracted, has its origins dating back to at least 1671. By 1777 the quarry was owned by John Parker the Earl of Morley at Saltram Estate. To enable him to ship his slate out of the quarry he asked the engineer John Smeaton, who designed the famous lighthouse which we see on Plymouth Hoe today, to carry out a survey for a possible canal course from his slate quarry to Marsh Mills, Plympton. Smeaton suggested a twelve foot wide canal with locks but thought that slate production at the Earl’s quarry would not make the project cost effective so instead he suggested a tramway at half the cost. Both ideas came to nothing and the quarry carried on producing slate. However, by 1821 John Parker Junior the new Earl, decided to build a narrow navigable canal which was only six feet wide, this ran alongside the River Plym and was achieved by converting an existing 17th century mill leat.
This was eventually joined up with the wider estuary of the river Plym at Marsh Mills and the Plymouth and Dartmoor Railway Company constructed a junction to join his canal up with their railway line and the Lee Moor Tramway Bridge was put into place over the river Plym in 1823 to transport English China Clay to Plymouth from the quarries at Lee Moor. At this time the Earl of Morley was also extracting minerals on Lee Moor. The last horse drawn wagon crossed the bridge in 1961 to become a footbridge. The canal officially opened up sometime between 1829 and 1830. It had no locks and was about two miles long, but in 1834 the railway company extended their track which followed the towpath of the canal all the way up to the quarry and the canal then reverted back to a leat purely to operate the Mills at Marsh Mills. The quarry today is owned and maintained by the National Trust, as a site of historical importance, it is now home to peregrine falcons.

The old cottages where workers at Cann Quarry once lived now lay in ruins.
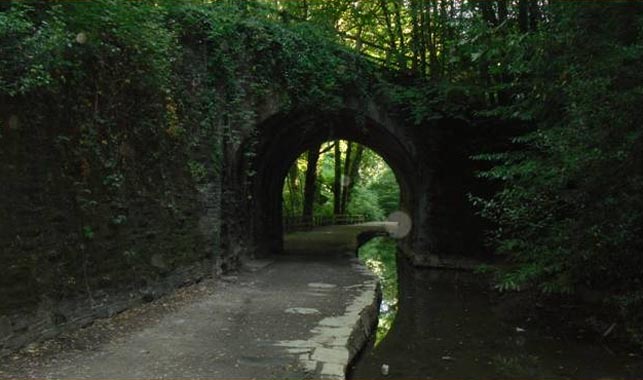
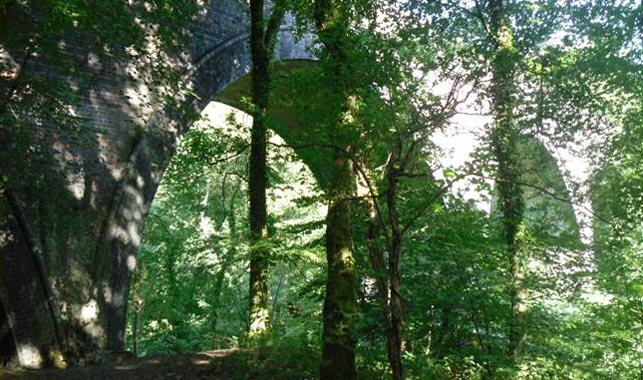
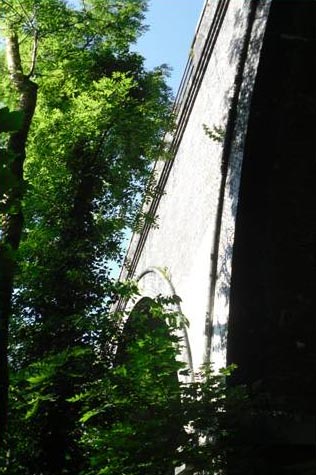
The Cann Viaduct spans the river Plym and cuts through Cann Quarry. Constructed from ‘Staffordshire Blue’ engineering brick, it was built between 1905 and 1907 and it replaced the previous viaduct which once stood here that was built from timber and stone. The original viaduct was designed by Isambard Kingdom Brunel.
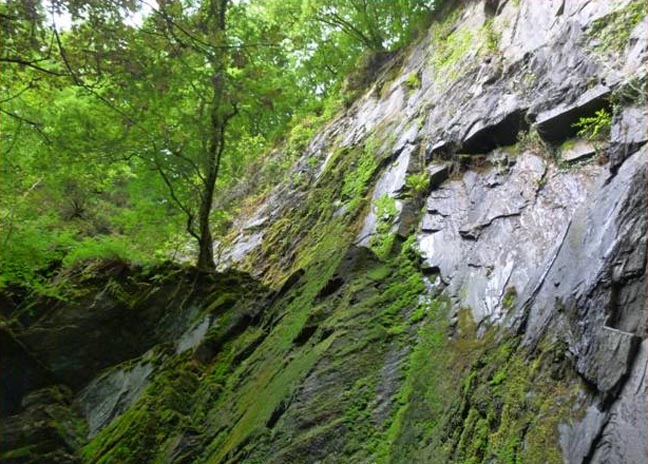
Literally, a stone’s throw away from Cann Quarry, you will find Rumple Quarry.
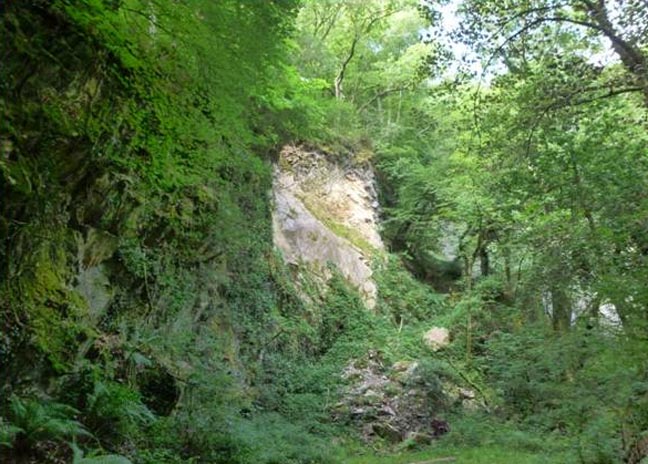
Working faces of the Rumple Quarry can still be seen.
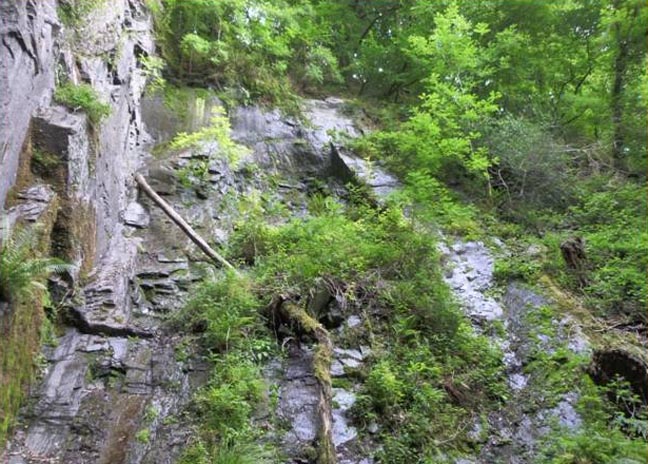
And piles of extracted stone lie abandoned on the old quarry floor.
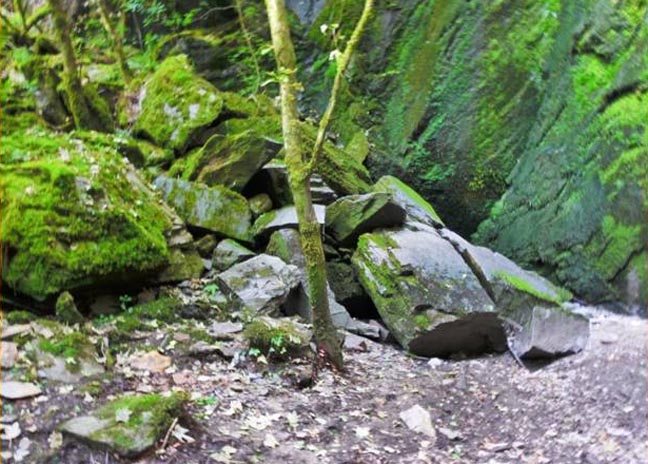
With the remains of Rumple Quarry engine house nearby.
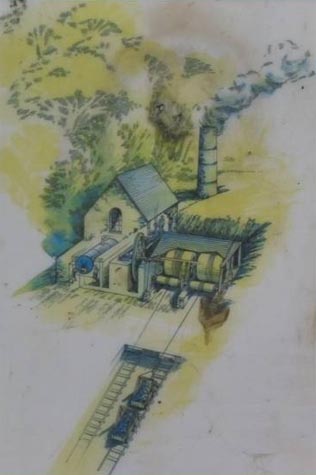
There is an artist’s impression from one of the National Trust’s information boards depicting the Rumple Quarry engine house which was built in the late 1860’s. It housed a powerful steam engine which hauled the stone up from Rumple Quarry to the waiting trains on the Tavistock line. Rumple Quarry was considered a dangerous place to work due to overhanging rock formations and two men died at the quarry in 1861 after part of the working cliff face collapsed and slate production here ceased for two years.
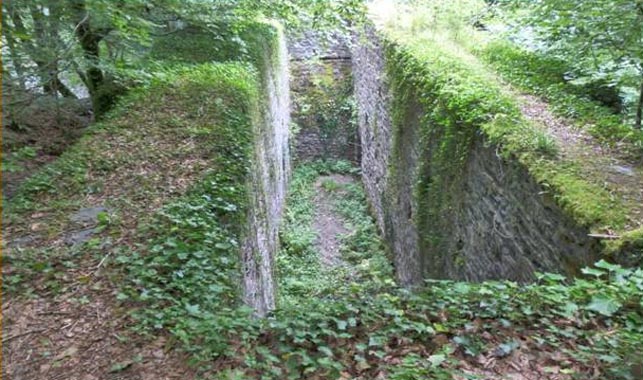
Not too far away lies the remains of the Rumple wheel pit. Opened in 1865, it once supported a fifty foot diameter water wheel. It was constructed to replace a nearby steam powered winch but it was deemed a failure and only operated for a year, after which steam power was re-introduced. At the end of 1863, Rumple Quarry joined forces with Cann Quarry to become ‘The Plym River Slab & Slate Company Ltd’. By 1915 there was not much slate left to extract from these quarries but ‘Porphyritic Elvan’was still being exploited for use as window sills, paving stone and linings for furnaces, and shortly after this the quarries ceased to operate. Stone from these quarries had even been used to pave the streets of Piccadilly in London.
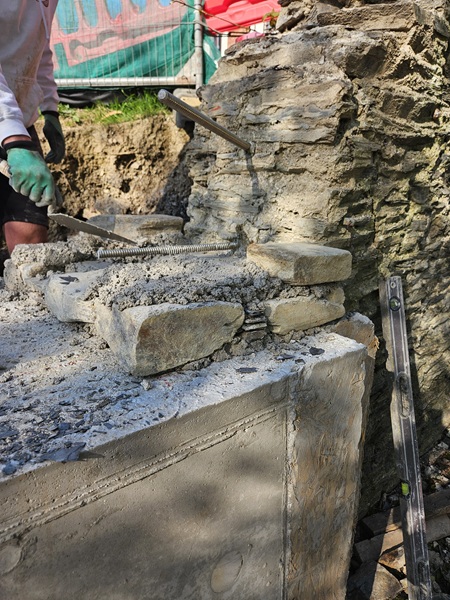
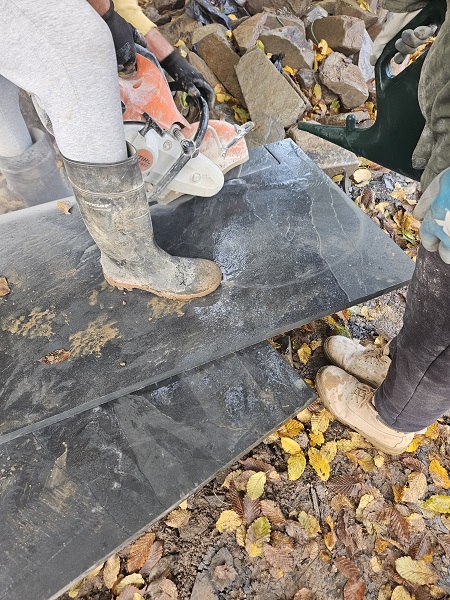
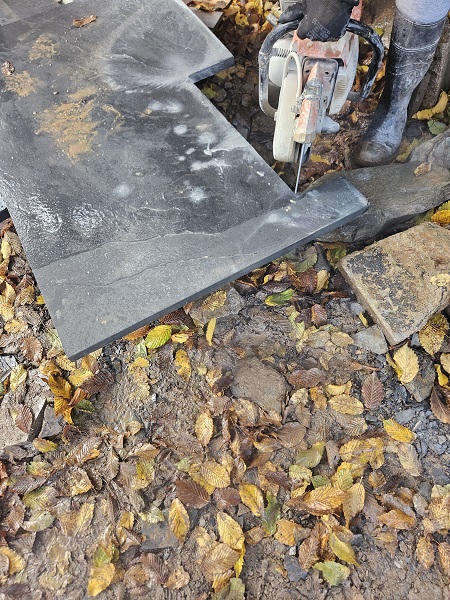
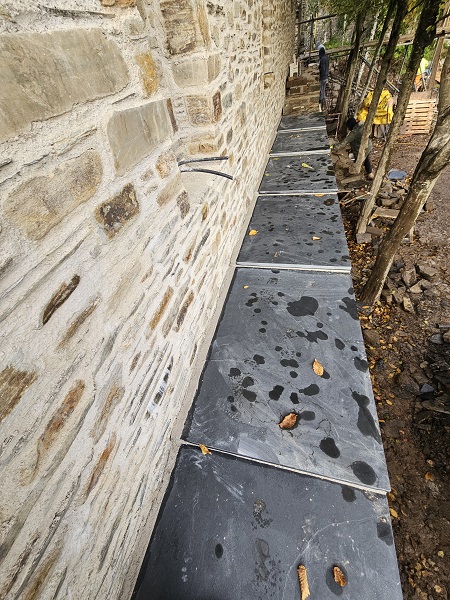
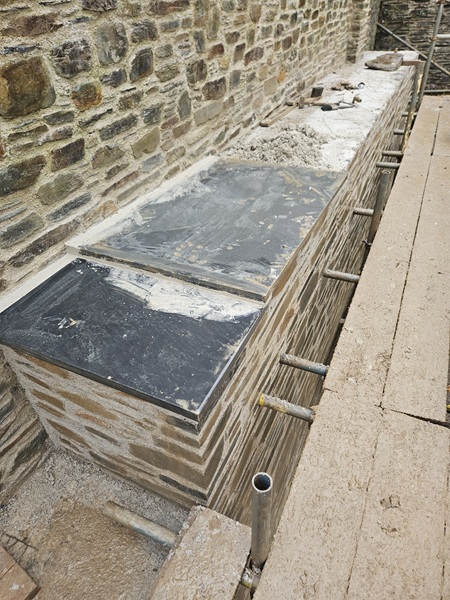
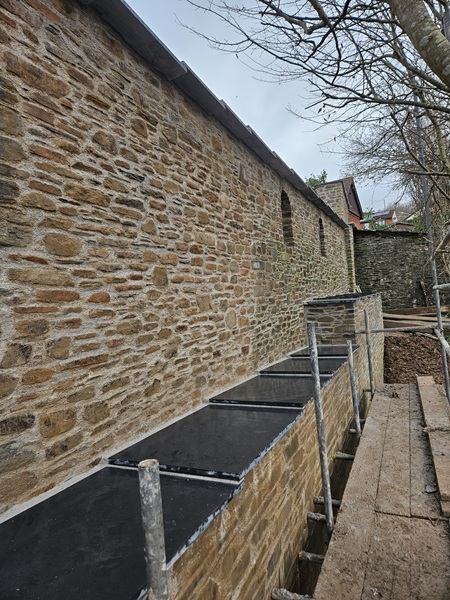
The copings that had once topped the wall on the section which collapsed had been completely trashed when it fell down. There was hardly any of it left and the pieces that were now lying around were certainly not fit for purpose. So it was decided that new slate was to be ordered and used to replace the old.
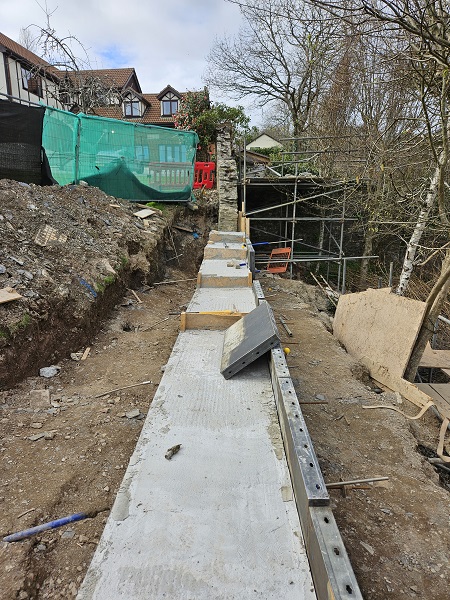
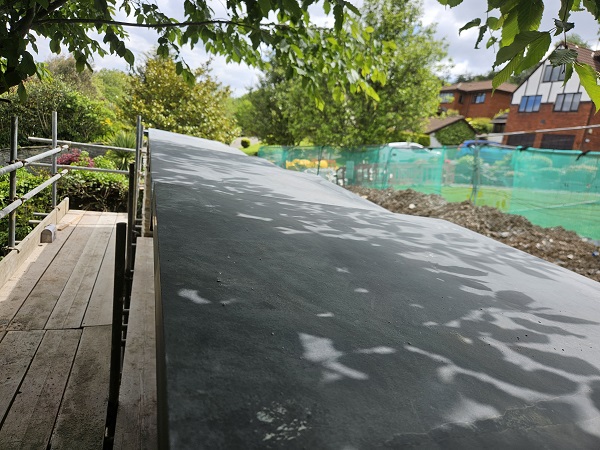
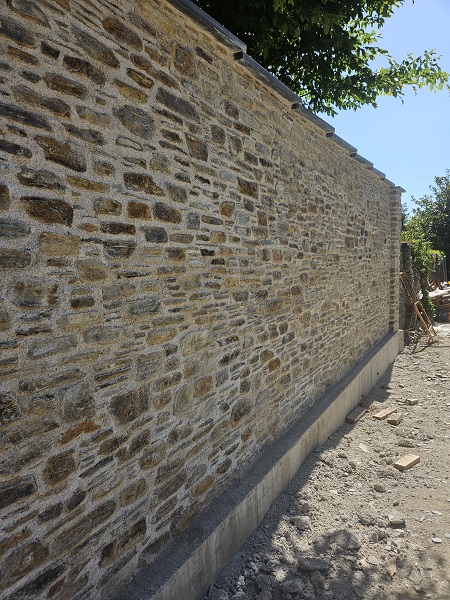
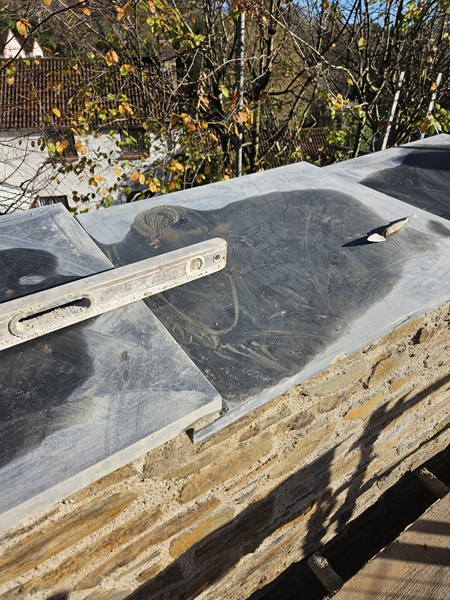
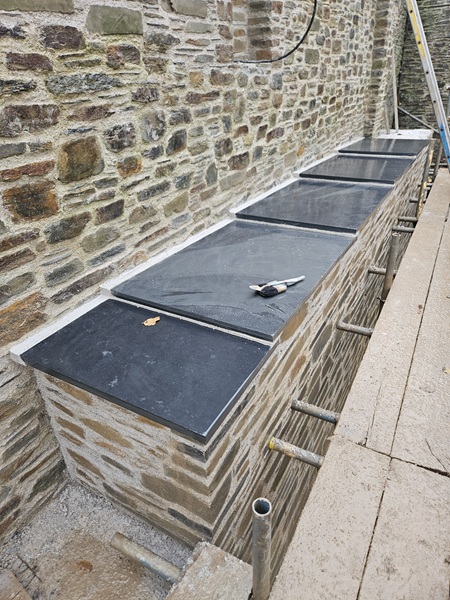
The new slate was cut into sections 750mm wide, 900mm long and 30mm thick. It was supplied by Kenyon Canopy (Slate & Stone) Ltd, based in Saltash, Cornwall. Now that we were up to height on one section of the wall we set the copings in place from the first pier to the second.
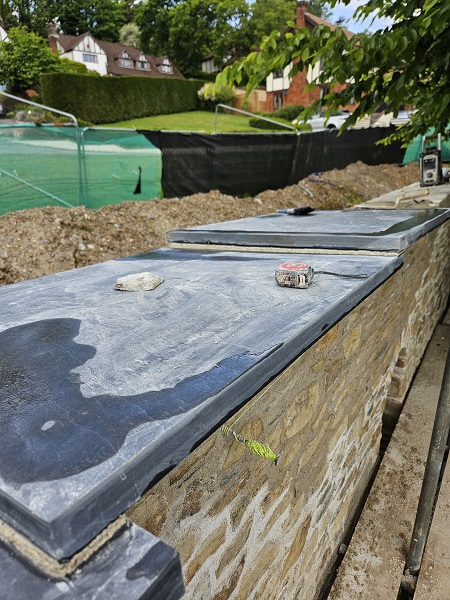
On the clients side of the wall the slate coping had an overhang of about 180mm, which is seven inches in old school measurement. This, on average, matched the overhangs of the old slate copings on the original wall.
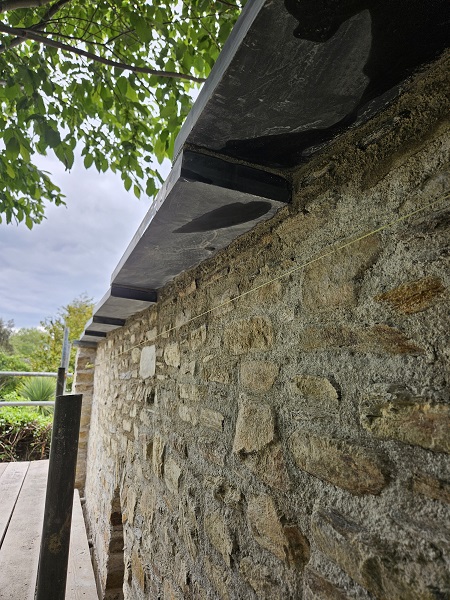
We also overlapped the slates by 50mm. This is a far better way than just butting the slate up to each other as the jointing over time would be vulnerable to falling out, vegetation taking root and the copings lifting. By overlapping each coping it locked each section into place. It also help to blend in with the original copings, which where up and down, due to their different thicknesses.
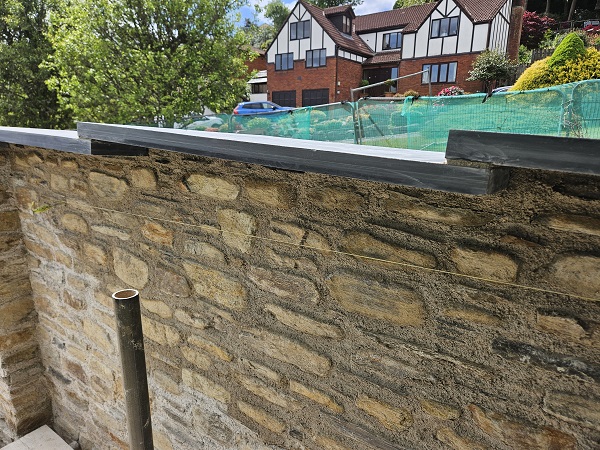
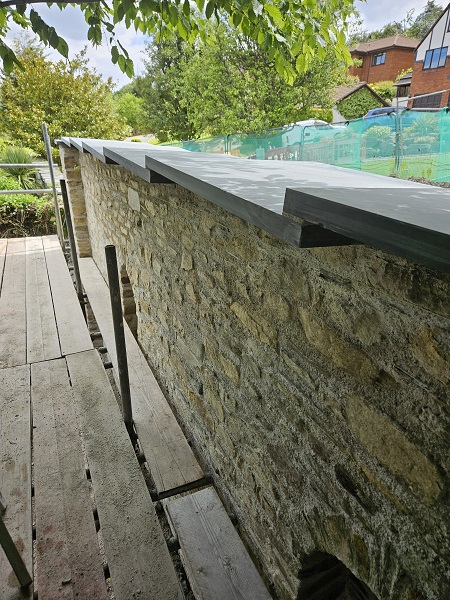
On the outside of the wall the overhang for the coping was about 50mm which also matched the profile of the original wall.
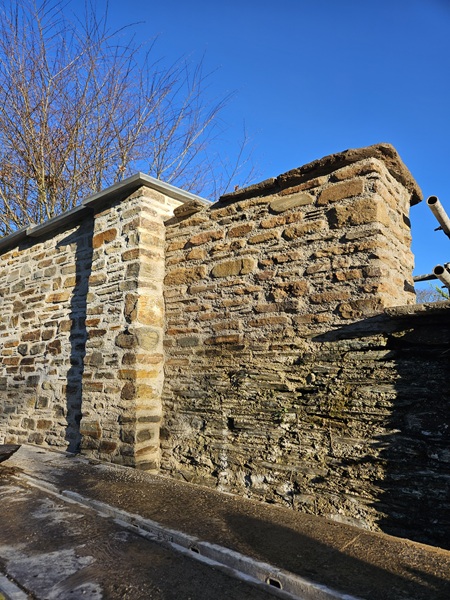
With this part of the wall now completed we turned our attention to the next section. This section was to be raised higher again, so up went the pier.
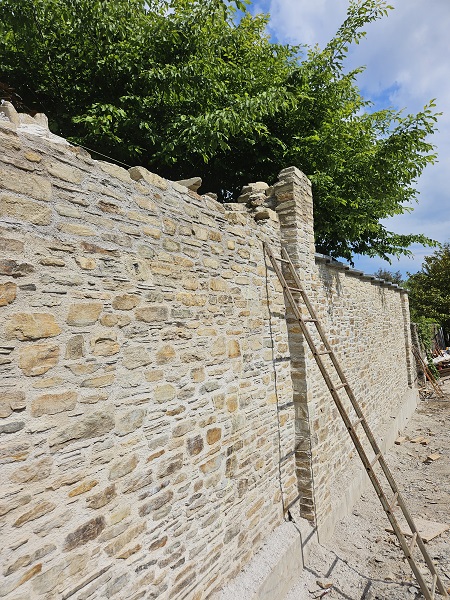
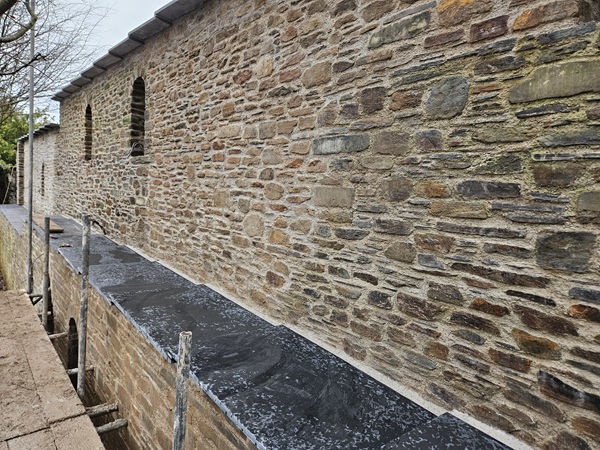
We also built in a couple more arched niches along this section of wall.

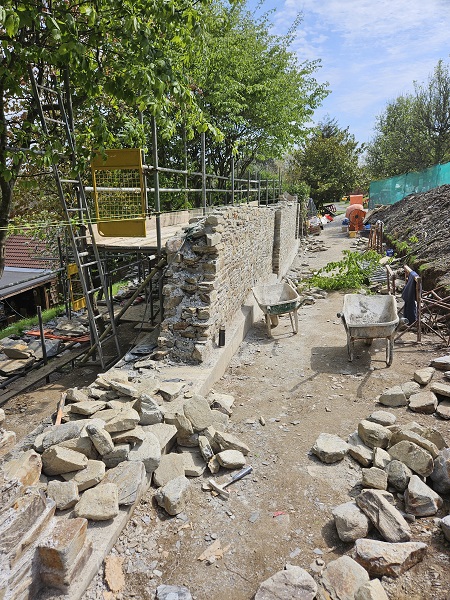
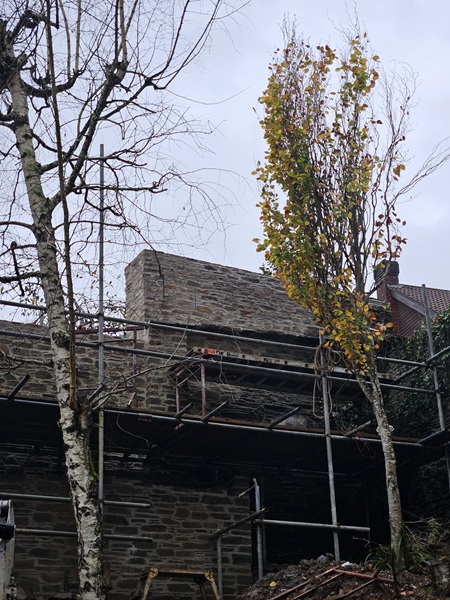
We got this section up as far as we could, but at this stage we couldn’t quite get up to the finished height as the scaffolding needed to be raised.
Our attention then turned onto the other end of the wall and we concentrated on getting that up.

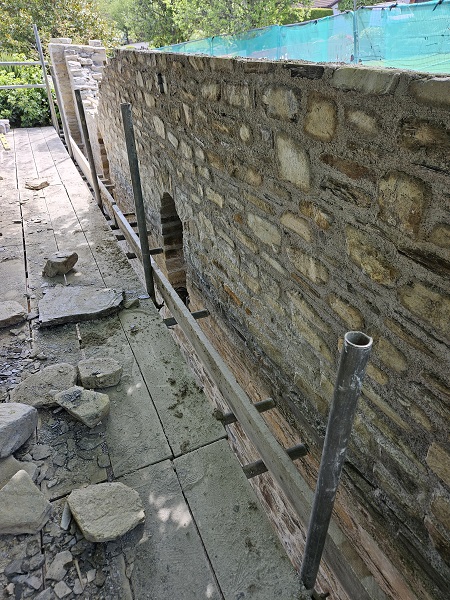
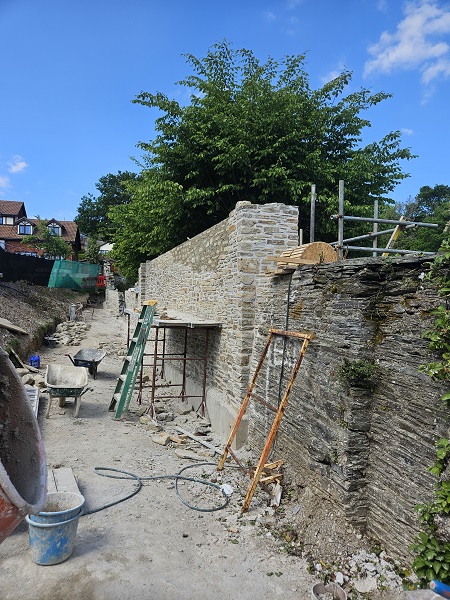
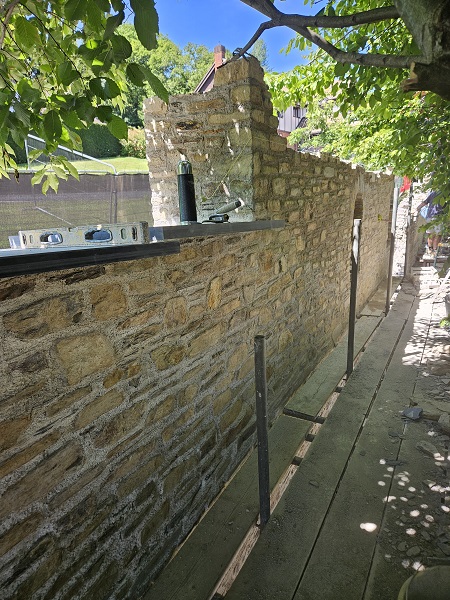
We got this end up as far as we could, but again scaffolding was required before we could go any higher. Throughout the course of the work we had to leave a gap in the wall. This was to enable access for us to get stone and mortar on the clients side in order to build it. The gap was also there to serve another purpose.
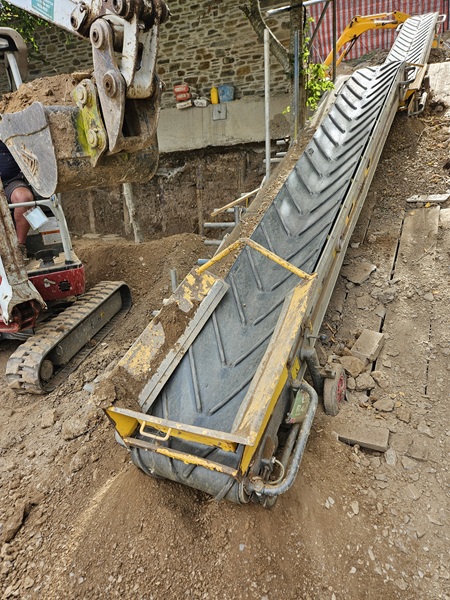
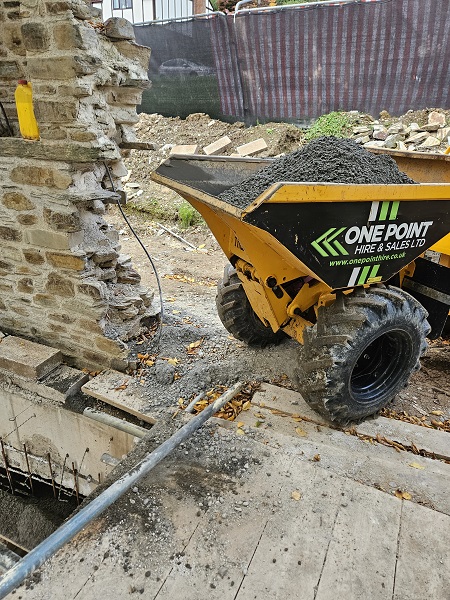
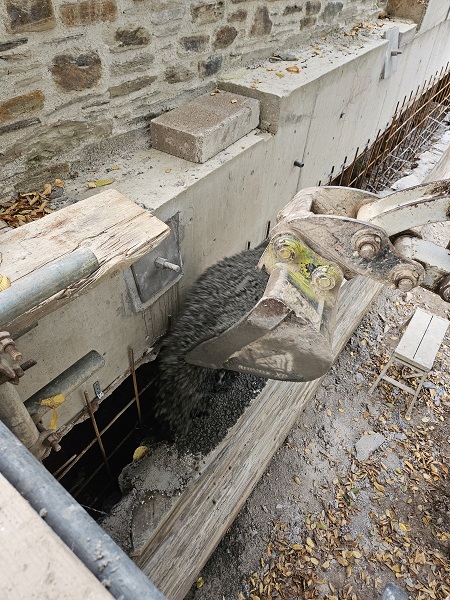
Before the wall had collapsed during the storms, at some point in time, the garden side of the wall had gabion baskets put in place that were filled with stone along the length of its base. This was to help retain the sloping ground up against the bottom of the old wall. When the old wall collapsed, it had disturbed the gabions to such an extent raising concerns that the soil between the new piles in behind could wash out overtime and cause problems to the new wall in the future. At this stage the structural engineer was called back in to determine a way forward and instruct on what was needed to proceed. Eventually it was deemed that the existing gabion wall was to be removed and the ground behind taken back to expose the piling. Then a new concrete foundation laid in preparation for a reinforced stone wall that was going to be built against the new piles. Once all this was established we had to get the machinery, consisting of a small mini digger and a power barrow, through the gap in the wall down into the garden below.
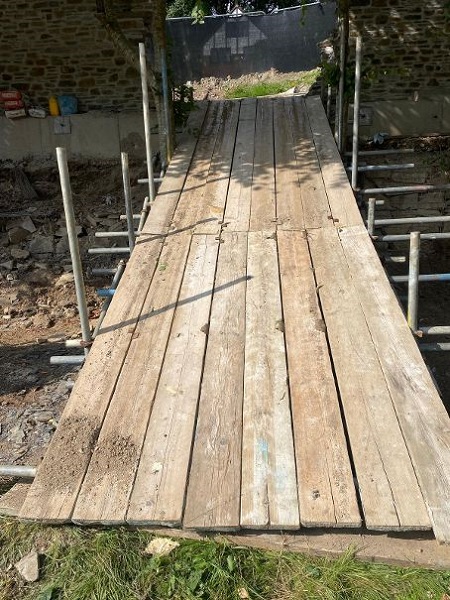
A scaffolded ramp was put in place to facilitate this.
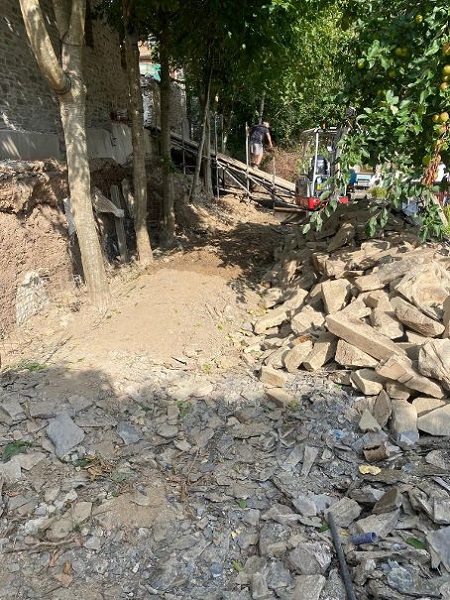
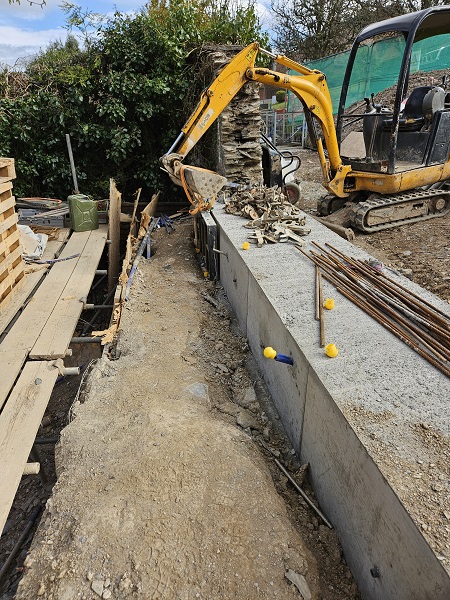
The main contractors came back in and started the preparation works for the lower pile facing wall. The first job was to remove all the gabion baskets and setting the stone contained within them to one side for re-use and this amounted to roughly forty tons of stone in total. This was added to the pile of existing stone from the original wall.

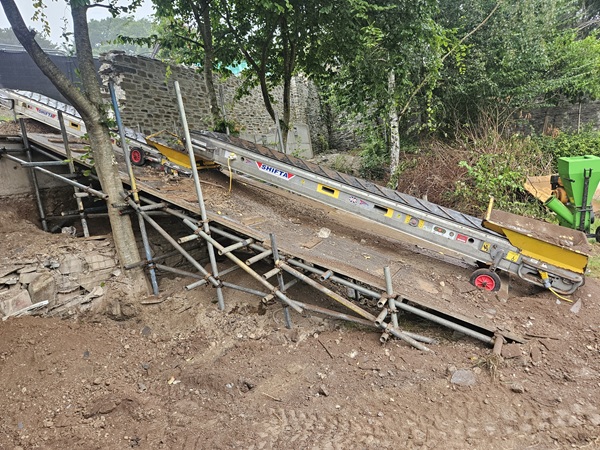
Gabion Baskets are not a new concept. They’ve been around for millennia in one form or another. The Egyptians used a version made from woven ‘sedge’, a grass like plant, and filled them with sludge, similar to modern sandbags these were then used to strengthen the banks of the River Nile. Originating from the Italian word ‘Gabbione‘ meaning ‘big cage’, Leonardo da Vinci designed a type of ‘Gabion’ called a ‘Corbeille Leonard’ (Leonard Basket), and this was used for the foundations of the San Marco Castle in Milan, Italy. Modern gabion baskets are box cages made from steel and they come in various grades and sizes. These cages are set down and stone is placed inside. It’s important to lay the stone inside similar to techniques used in dry stone walling, and not just throw the stone in any which way. This will give each cage much more stability. As each cage is filled, the lid is closed down and tied with wire. Then another cage is set into place next to it and they are tied together and so on. This type of construction also creates a good habitat for insects and wildlife. As you go higher, it’s important to half bond the cages just as you would when building a brick wall. Also the height will determine how thick the gabion wall needs to be. The life expectancy of gabions depends on the lifespan of the wire, not on the contents of the basket. The structure can and will fail when the wire fails. Galvanized steel wire is most common, but PVC-coated and stainless steel wire are also used. Some gabion manufacturers guarantee a structural consistency of fifty years. Once the gabions had been removed a conveyor belt was put in place up the ramp and the ground that was behind them was cleared away to expose the pilings.
All the excess spoil was taken away from site.
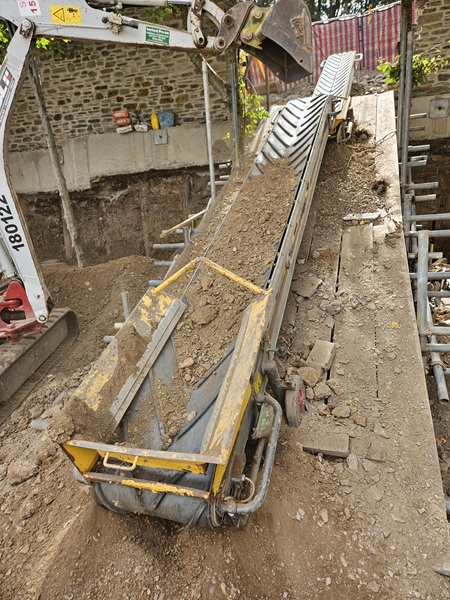
Work got underway removing the gabions, the stone and the soil.
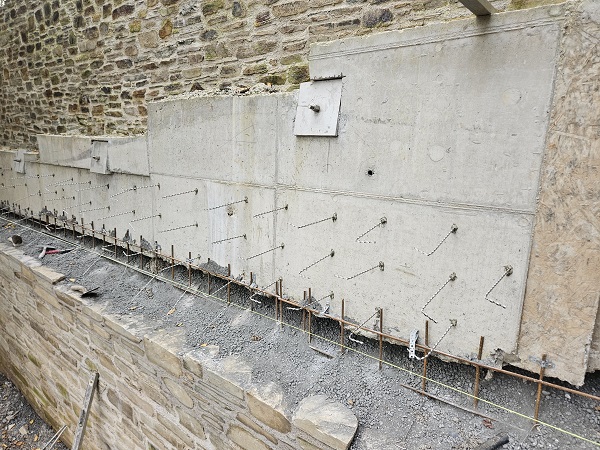
And soon the piles were exposed along the whole length of the wall.
And we were left with a wall that was basically sat on stilts.
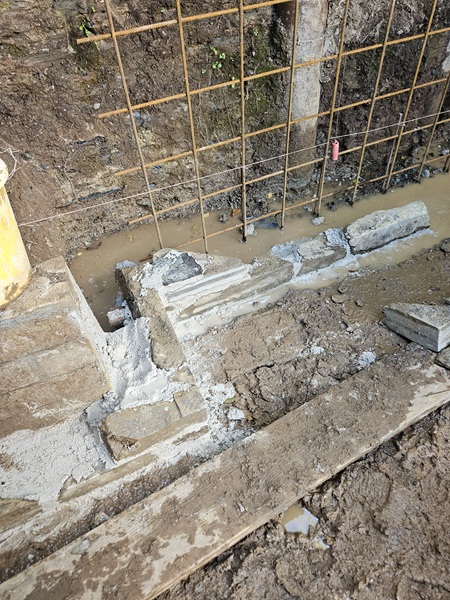
Once all the pilings had been exposed, a trench was excavated for a new concrete strip foundation.
Wooden stakes were hammered down along the base of the trench to determine the level of the concrete strip foundation.
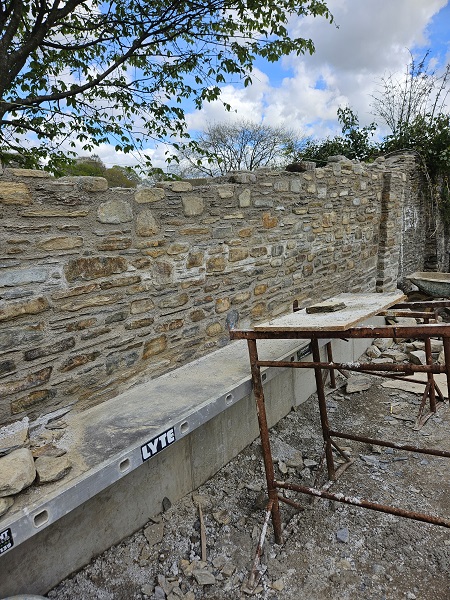
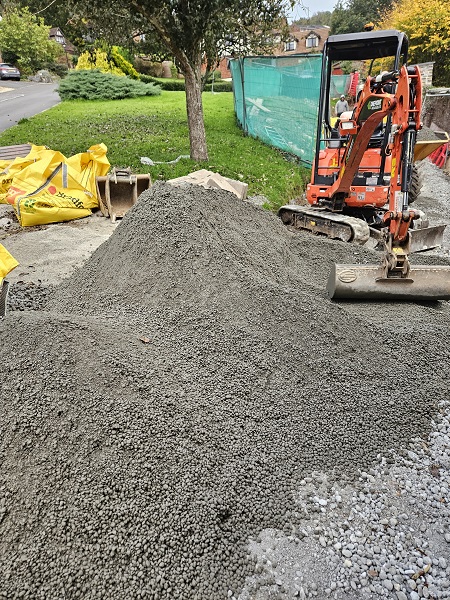
The specification for the new foundation called for the concrete to be grade C30 and needed to be 800mm wide and 300mm thick and this had to be placed in by pump.
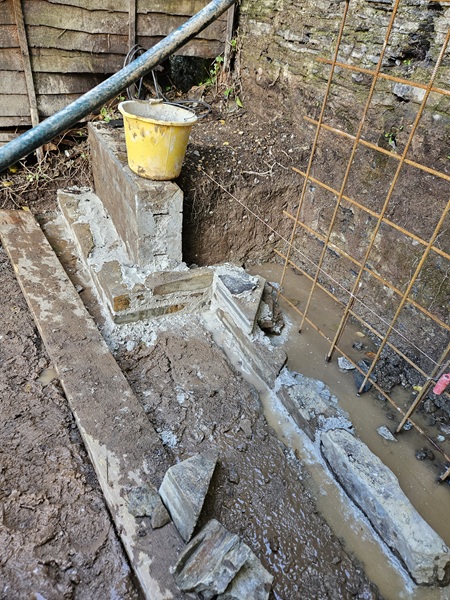
10mm diameter starter bars were drilled and fixed into the new concrete at 450mm centres.
Then reinforcement mesh was fixed to the starter bars which was also fixed into the concrete foundation above.
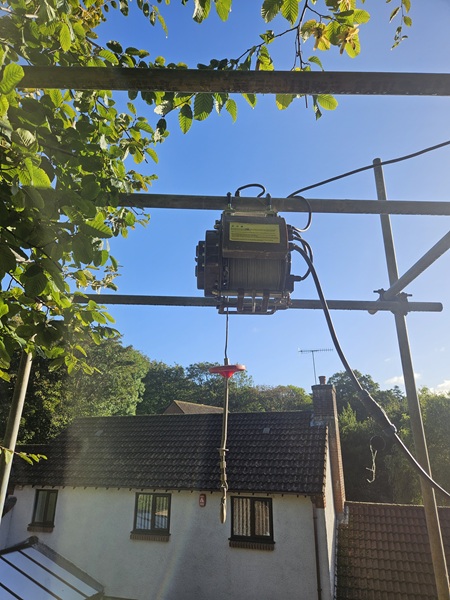
At this stage we were ready to start the stonework which was going to be built up to form the wall for the new pile facing to a height which would also cover the foundation above. But first we had to get rid of the conveyor ramp and adapt the scaffold requiring a hoist the get all the materials down going forward.
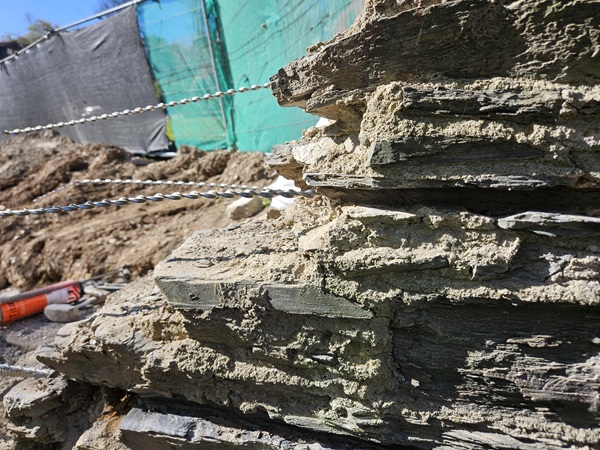
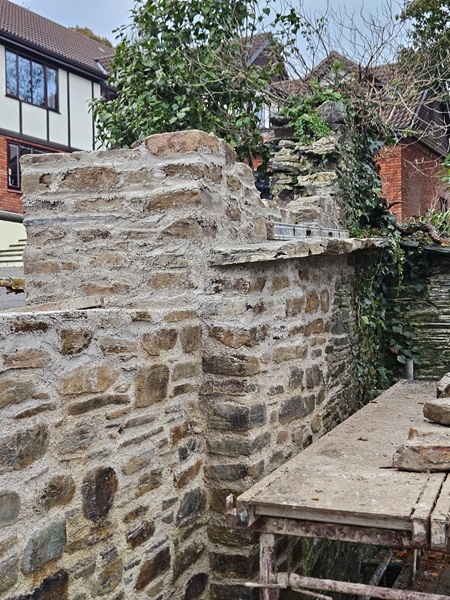
The stone used was the stone that was set aside from the gabion baskets. This stone had also came from Yennadon Quarry, but unlike the stone we were using for the top section which was naturally rustic, this stone consisted of all sawn cut faces and varied between a 100mm and 400mm on bed. The colours varying from pale blues, greens and greys. Starting at one end, we set out and got the quoin up.
At the other end, the new wall was going into a raised earth bank in the corner so for this section of the wall we placed in concrete blocks on their flats making it 225mm thick. Once the wall was complete all these blocks would not be seen as they would be below ground. The word ‘quoin’ is derived from the French word ‘coin’ meaning ‘corner’ or ‘wedge’ and in masonry terms it refers to an external corner of a wall or building.

Once the quoins were up we strung out a string line and ran in the stonework along the base.
Now that the base had been set out we had to incorporate drainage into the wall. Plastic pipes with a diameter of 75mm were cut and built in level at 900mm centres. These were placed 150mm above the concrete foundation eventually allowing for the finished ground levels to be the bottom of the pipes.
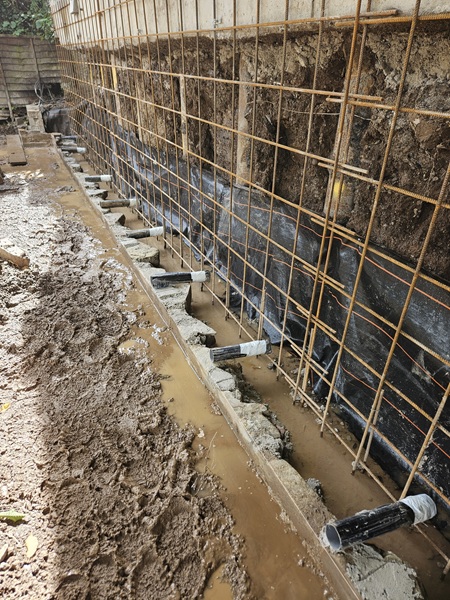
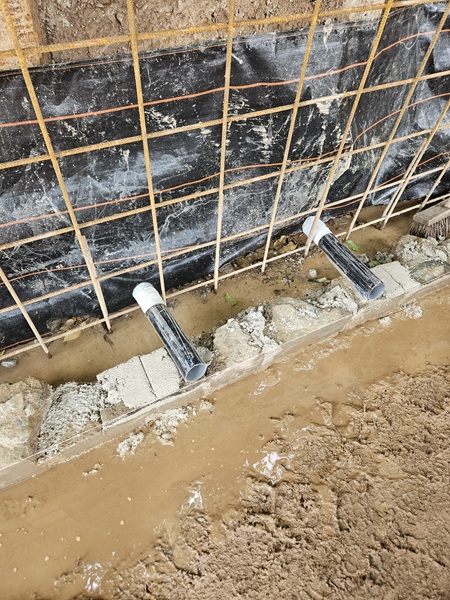
A geotextile membrane was placed in along the back of the wall and then 10mm pea gravel was laid in along the full length of the wall to sit the pipes on.
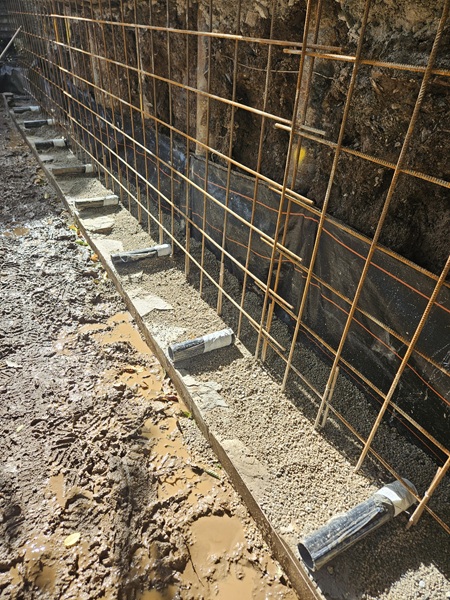

The pipes were then built in an surrounded with more pea gravel.
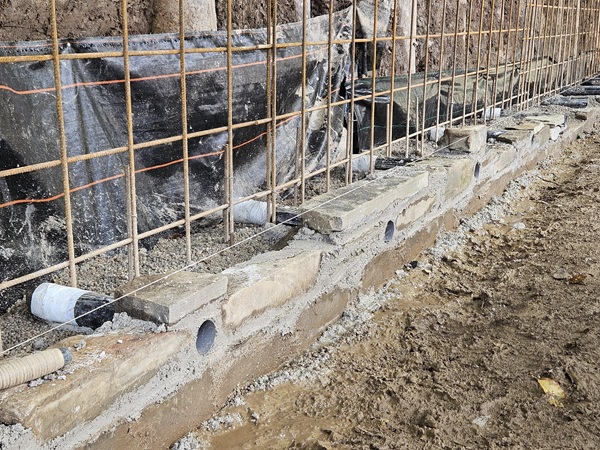
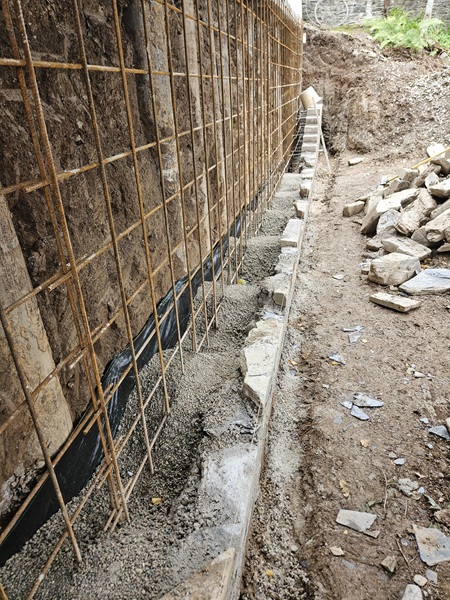
This system of drainage would allow any build up of water pressure behind the new wall to escape. Once all the drainage holes were set in we carried on bringing the new stonework up.
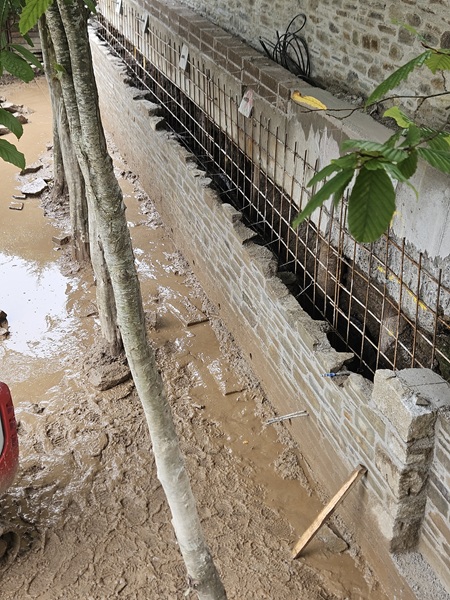
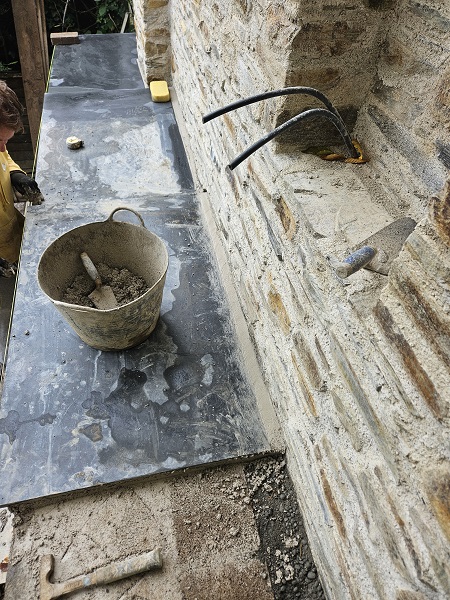
Electric cables were built in along the bottom to feed external sockets. As the new stonework went up we built in stainless steel ties that locked in around the steel mesh in behind.
One day we turned up and noticed a group of mushrooms growing against the soil on the back of the walls between the piles.
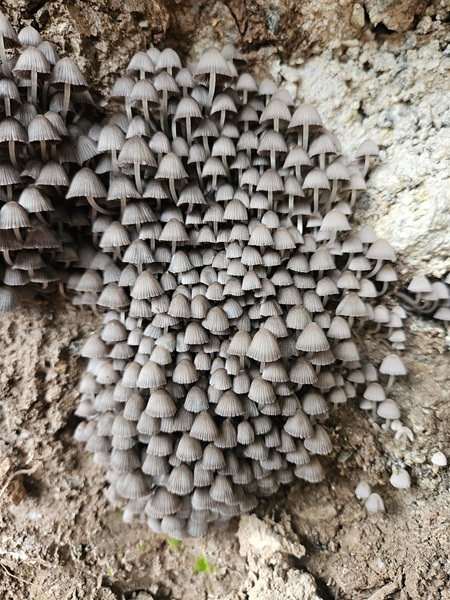
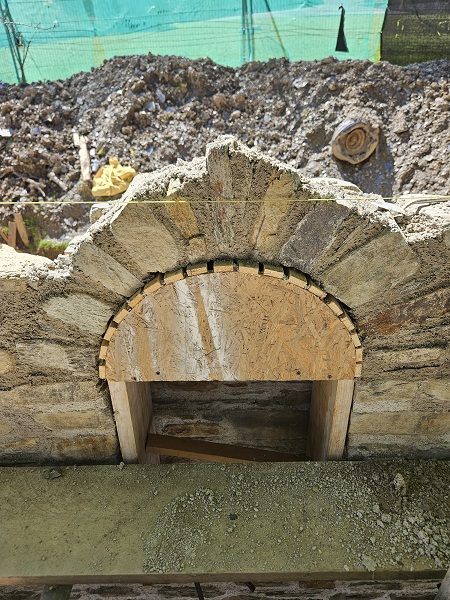
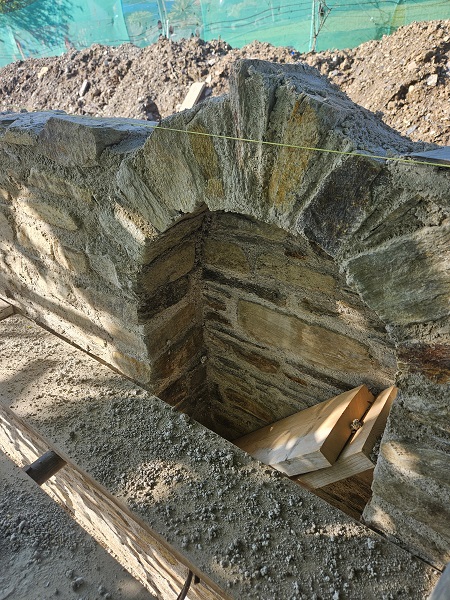
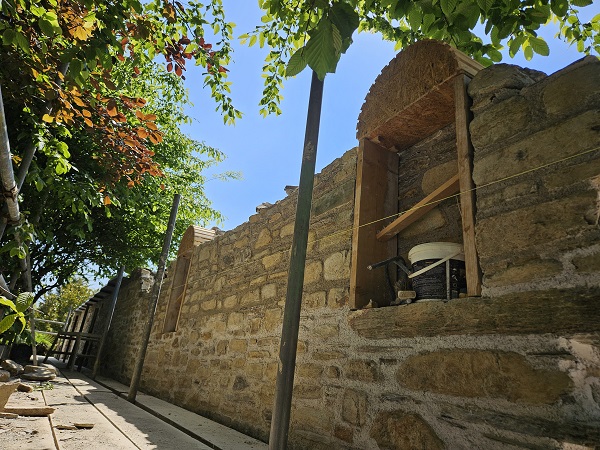
We were not quite sure what they were but they looked like ‘Fairy Inkcaps’ (Coprinellus disseminatus), a non poisonous species, but after a few days they had completely disappeared. As we were already building six arched niches into the wall above, the client requested some additional features to be built into the lower pile facing wall. This was going to be a gothic style recessed door opening with two further arched niches on either side. Some rough hewn granite was sourced for the quoins and the arch to create the gothic door feature.
During the course of setting out the pile facing wall the granite quoins for the door feature were put in place.
Once the new stonework was up roughly a metre or so high, it was time to backfill the void behind the wall with a semi-dry lean mix concrete to form a solid reinforced mass. This was achieved by tipping the semi-dry concrete through a gap between the scaffold into a pile down to the garden below, and from there scooped up into a mini digger bucket and placed in behind the wall. This first batch of concrete consisted of roughly ten cubic metres to fill the void.
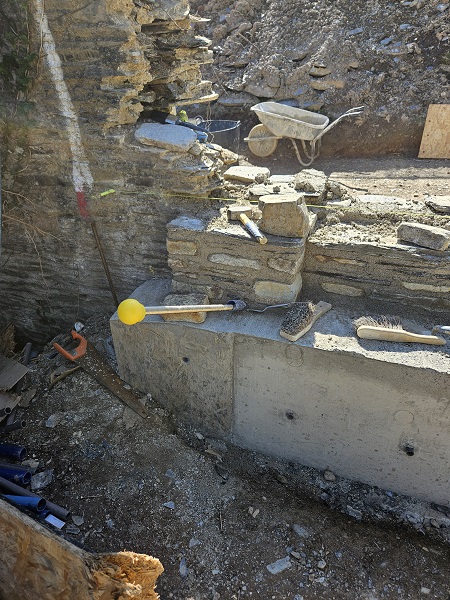
Now the concrete was in place we could bring the stonework up higher. We concentrate on the gothic door feature and when the quoins were up about 1000mm we set in a couple of corbels that were cut from the slate that was used to cap the original wall.

Two arched niches on either side of the doorway were also out.
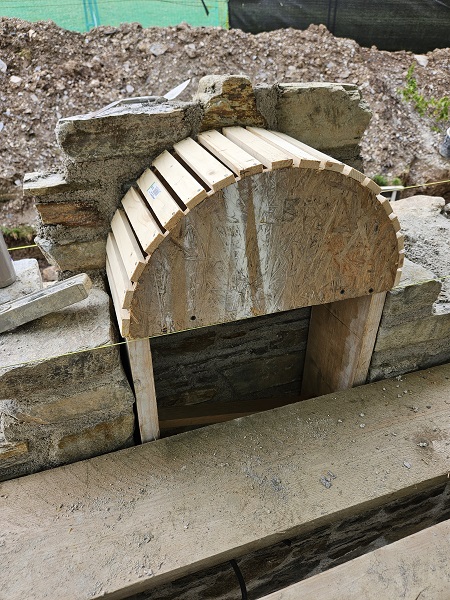
A wooden centring was made up to form the shape of the gothic arch and put in place.
This was put in using wooden wedges so it would make it easier to remove once the arch was formed. Then we formed the gothic arch.
A keystone was shaped and dressed to suit the top of the arch.
The two arched niches on either side were also brought up at the same time. More armoured cable was built in to facilitate the lights for each arch.
And once the arches had been completed the wooden centrings were removed.
We continued getting the stonework up to height and where the new wall returned back in to meet the existing wall at each end we fixed in stainless steel starter ties to tie the new stonework back in to it.
Once the wall was up to just underneath the foundation above, that was sat on the piling, another batch of semi-dry lean mix concrete was delivered to site for us to place in behind the wall.
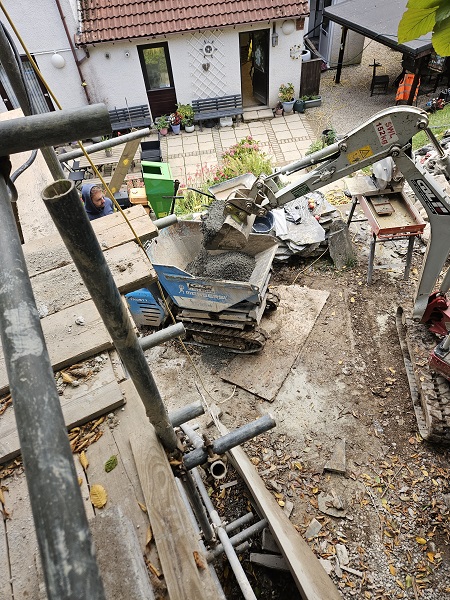
From here the concrete was loaded into a small dumper.
The dumper was then taken down to the gap in the wall.
And just like the previous concrete we had delivered it was tipped down into a pile in the garden below.

Down in the garden the concrete as loaded into a power barrow.
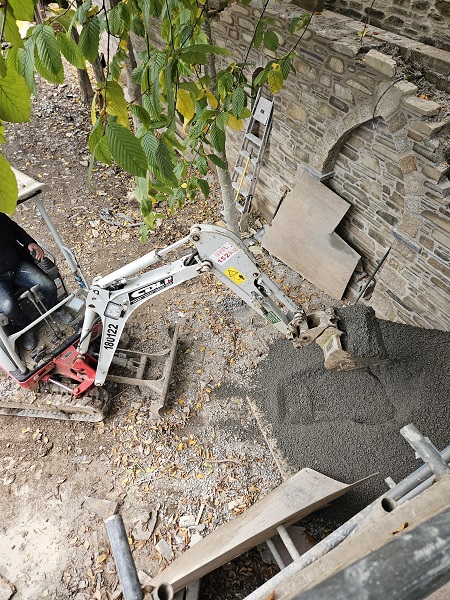
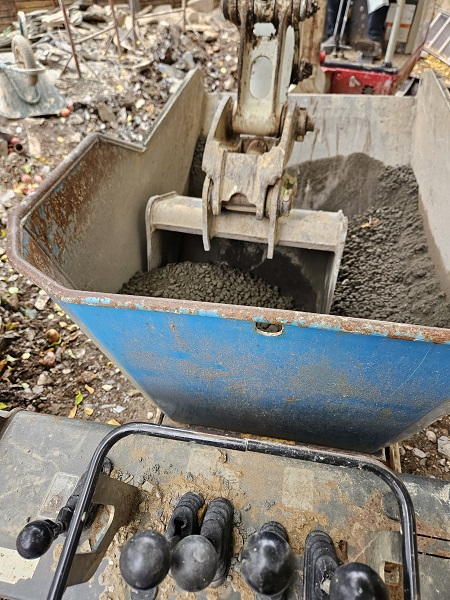
The power barrow was loaded up and then used to feed the mini digger as it placed the concrete in behind the wall.
The concrete was filled up to just underneath the foundation that was sat on the piles, leaving a small gap which was pack in solid with stone and mortar.

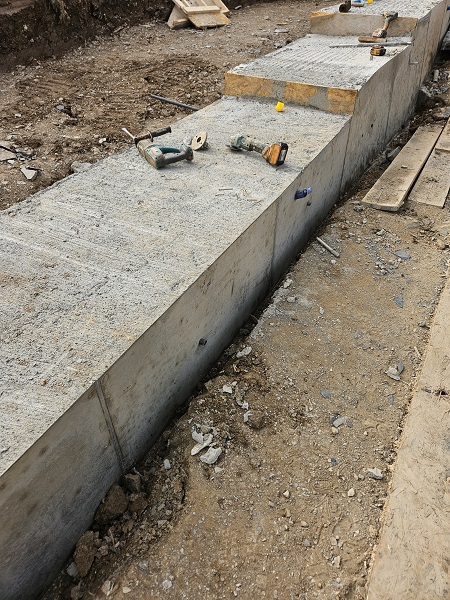
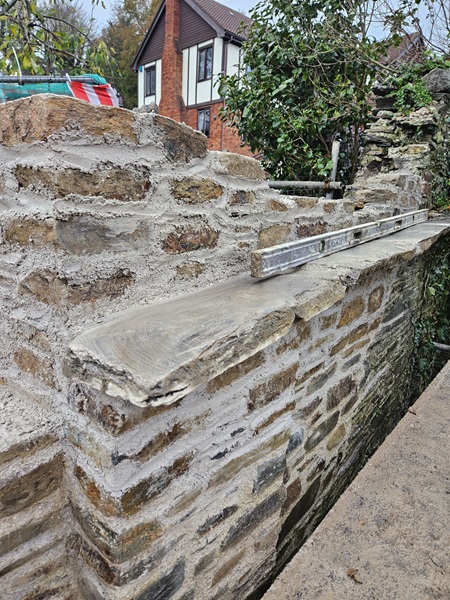
Additional 8mm diameter stainless steel ties were drilled and resin fixed into the concrete foundation to tie the stonework back into the concrete. The square stainless steel plates you see here set into the concrete are bolted onto 25mm thick stainless steel threaded bar. These bars are set in at an angle of twenty-five degrees. They are cast within the concrete and go back behind the wall about twelve metres or so until they hit bedrock which are then grouted in situ. This is to prevent the new foundation from bending along its length as it is retaining a substantial amount of ground behind it. These bars are spaced about 2.5 metres apart along the length of the foundation. The section of pile facing wall directly under the section of wall above where we had already laid the new slate copings was built up to its finished height.
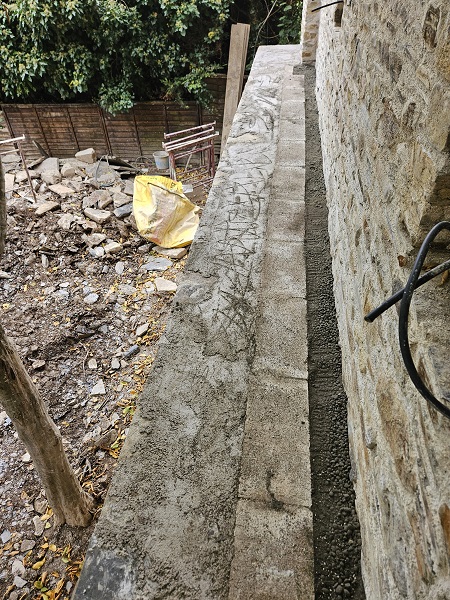
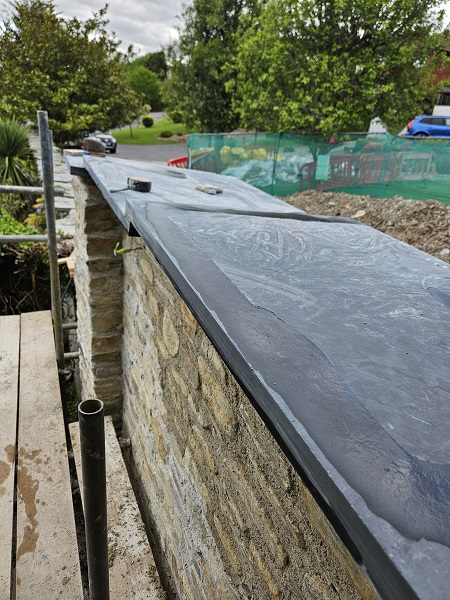
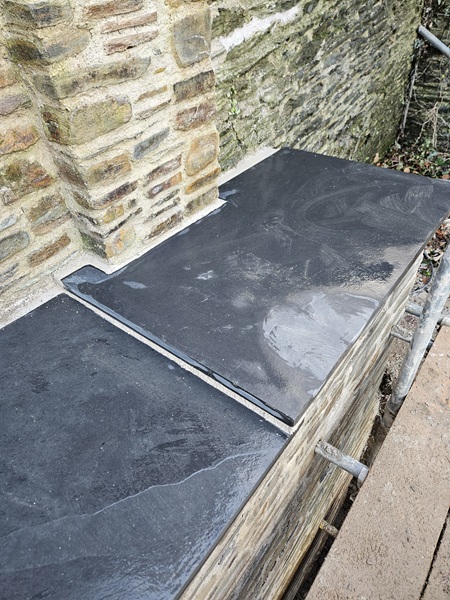
The finished pile facing wall was 700mm thick and this was to have a new slate coping to mirror the coping above. The slates were 750mm wide, 1200mm long and 30mm thick. These were set in with a slight fall from the front to back with a 50mm overhang. They were also set in over lapping each other by 50mm, again matching the detail above. The first coping we had to set in needed to be cut for it to go around the pier.
When that was cut to shape it was laid into position.
Then the others followed suit.
Just like the wall above, the pile facing wall was also going to be stepped up to hide the foundation sat on the actual piles, but we couldn’t quite finish this section off yet with copings because the section above had to be finished off and we didn’t want anything falling down onto any new copings below whilst we were working on the wall above. The scaffolders came back in and erected some more scaffolding for us to finish the wall above.
Once the scaffolding was in place we jumped back on that to finish the next section of copings.
This section was soon built up to finished height with a 50mm cross fall to received the slate coping.
At this stage we could only get the copings on up to where the gap in the wall was.

So, the scaffolders were called back in again to erect some more scaffold up on the other side of the opening so we could start getting that section of wall up to its height.
Another pier was built at this end of the wall where the new stonework was tying into the old and more of the Helical ties were built in as the wall went up.
A couple more niched arches were set out and built into this section which also had cables built in for the lights.
Once the niches were set out timber centrings were put in place.
And the arches were formed.
Once the arches were in we got the wall up to coping height.
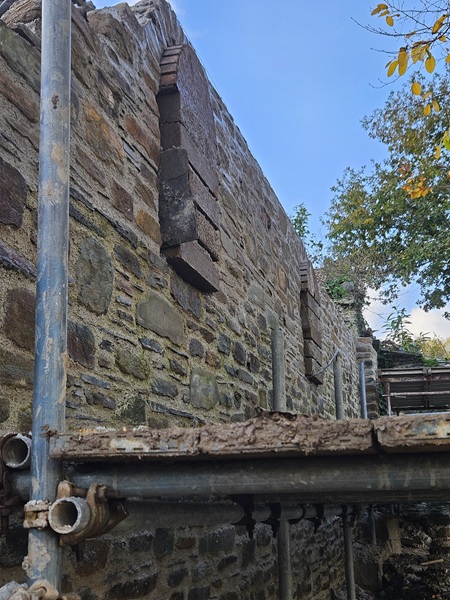
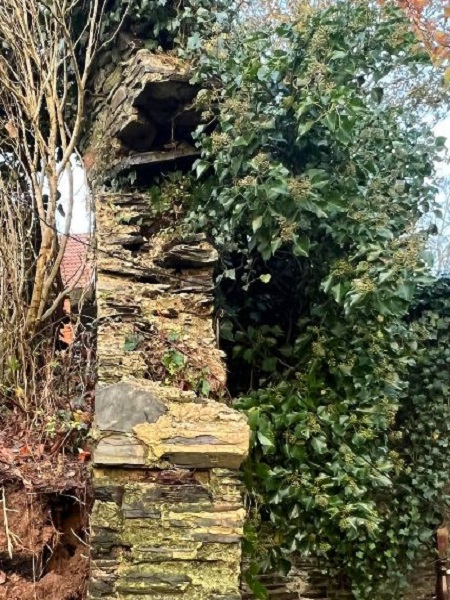
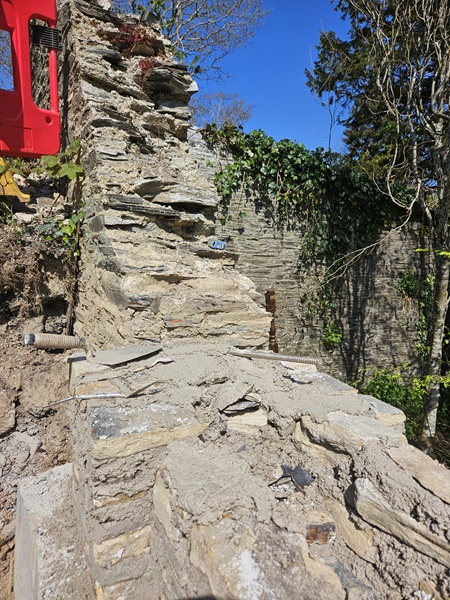
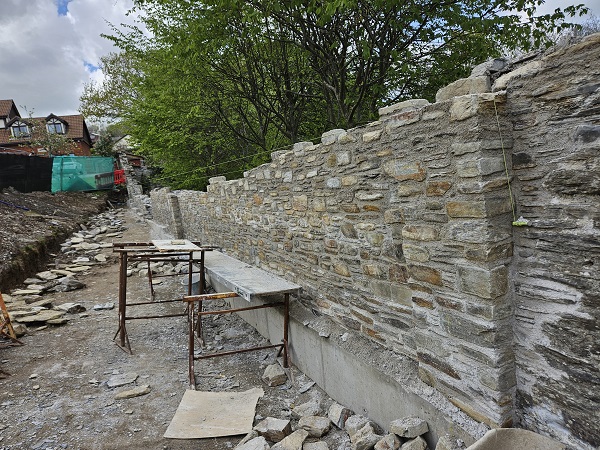
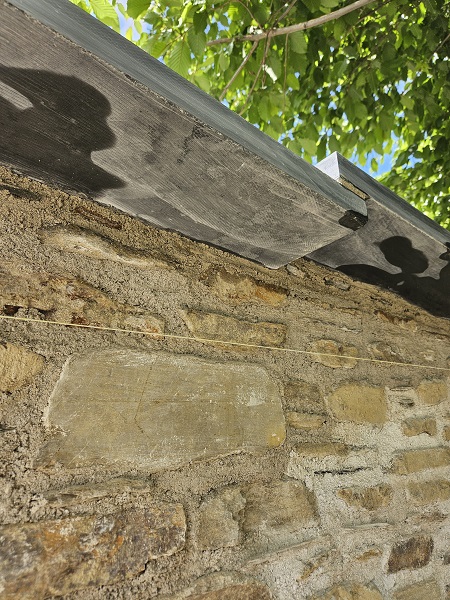
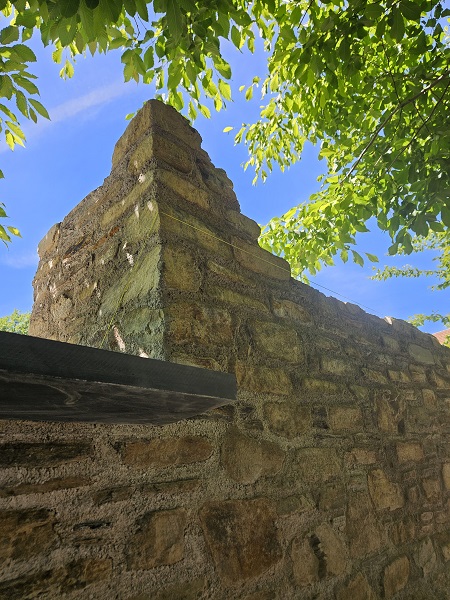
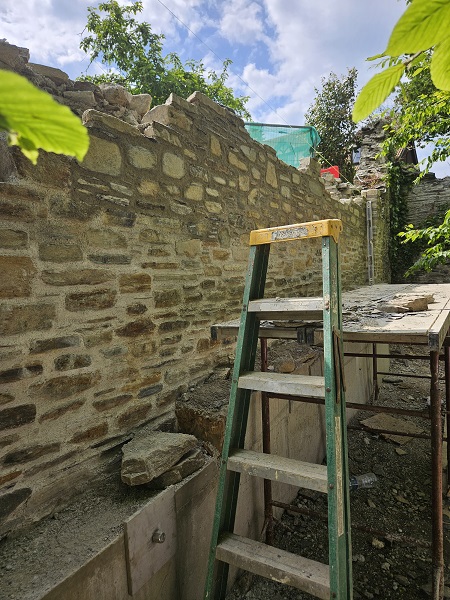
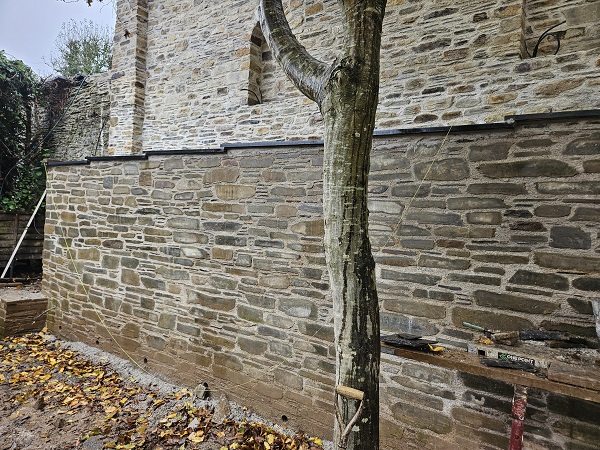
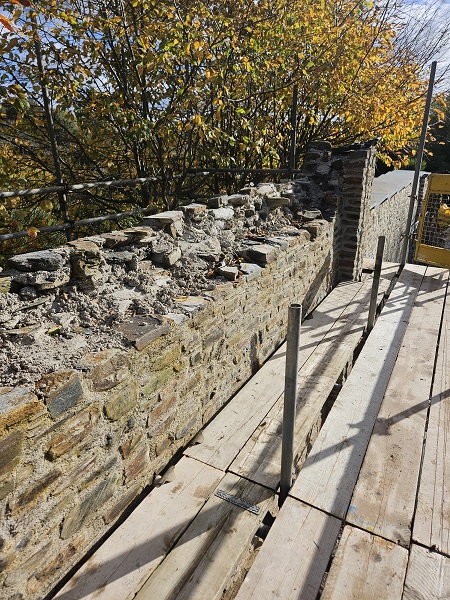
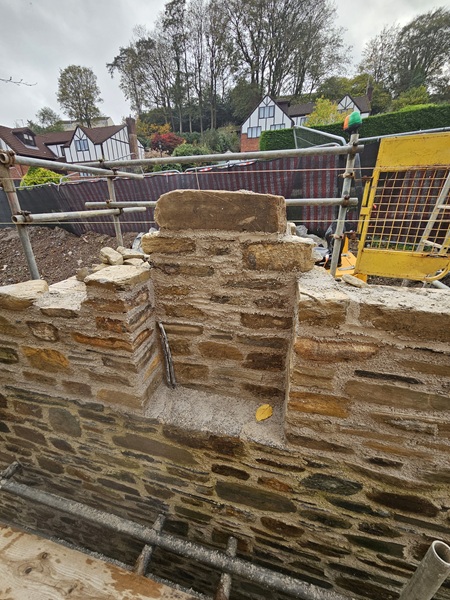
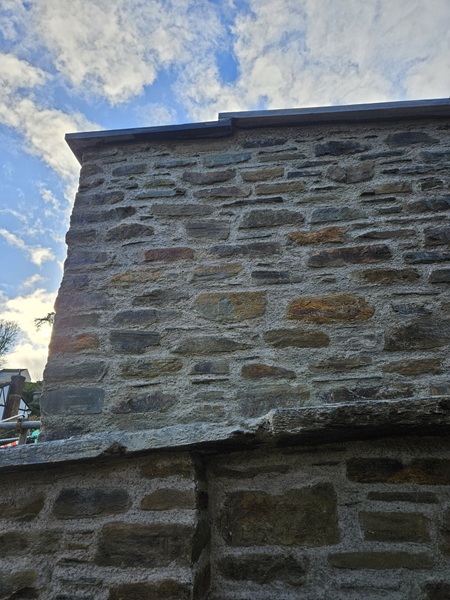
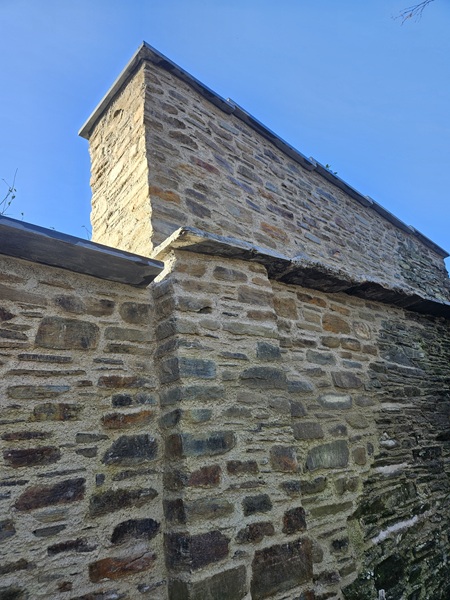
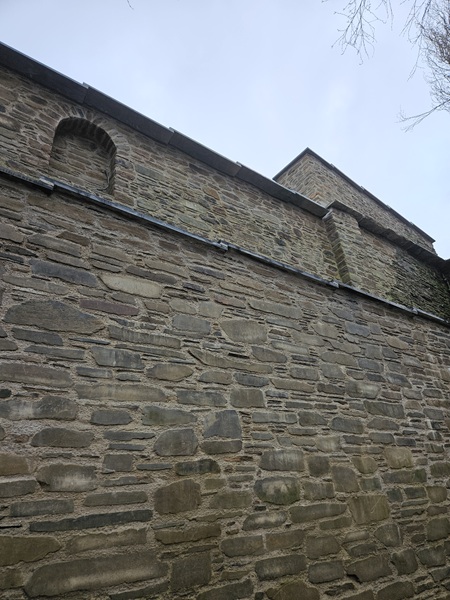
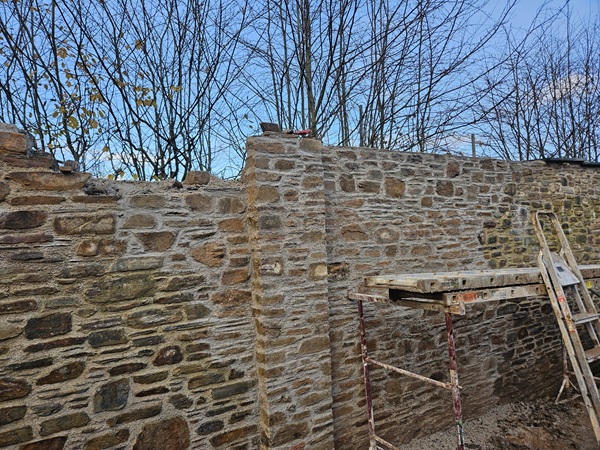
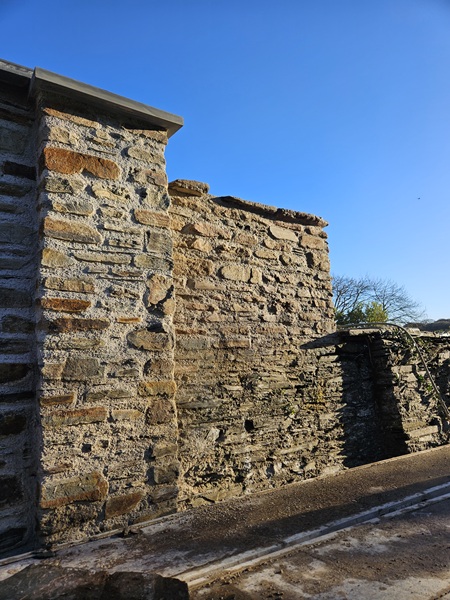
This section of wall jumped up higher again which tied into the last remaining section of the original wall. The remaining wall was covered in ivy and vegetation growth. Remains of the original slate coping was still visible and the stonework above it for some reason must of been built on top of the coping at a later date. It was also less wider than the original wall being 450mm wide.
We used and built in some of the old slate that had come from the original copings to line up with the copings that were already there.
And then we got the pier up to the same height as the old section of wall.

Which was finished off with a cross fall in preparation for the new slate copings.
This was the highest section of the wall and was roughly eight metres above the level of the garden below it. We next laid the slate coping to the lower level section of wall from the opening in the wall up to the pier.
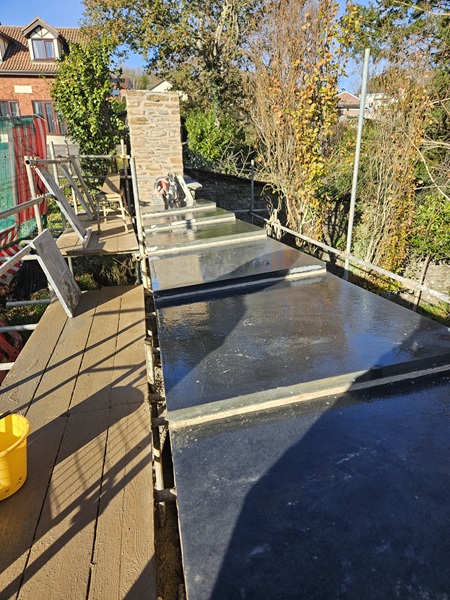
We then laid the copings for the highest section of wall, which only had a 50mm overhang on each side.
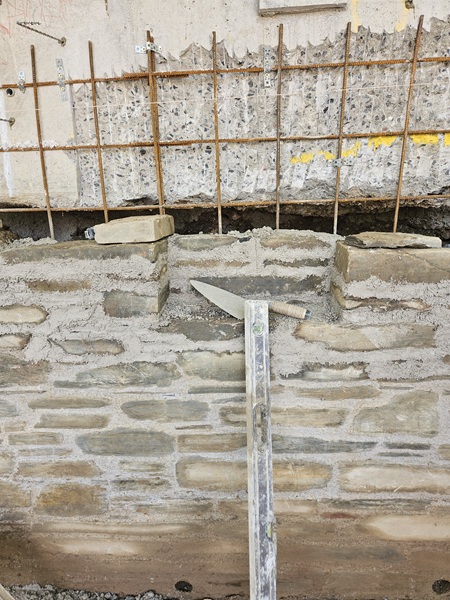
Now that the copings were finished on this section of wall the scaffold was dropped and we concentrated on the area below where we had to bring the stonework on the pile facing wall up to cover the concrete foundation.
Built with a 50mm crossfall, the slate copings were set into place.
The end section of coping had to be cut to go around the pier.
Now that was out the way, finally, it was time to fill that access hole up in the middle of the wall.

Once this was up to height, the slate coping was finished off.
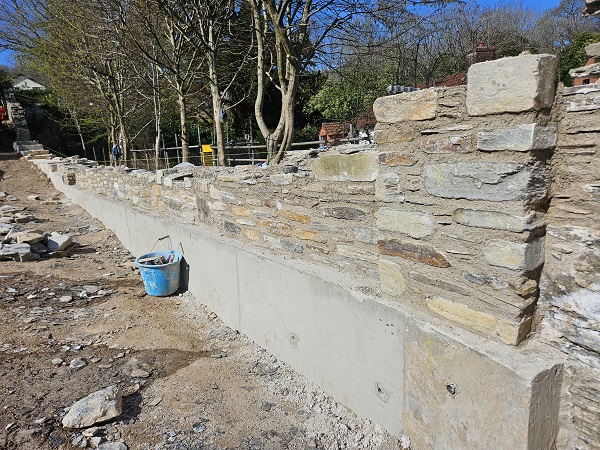
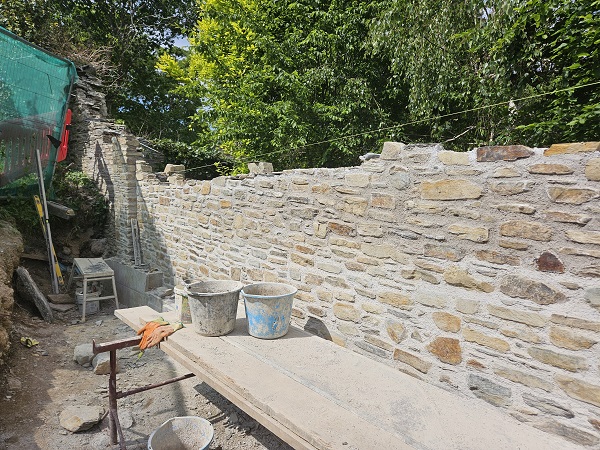
The copings were now completed along the top sections of wall which meant we could finish the copings on the pile facing wall.
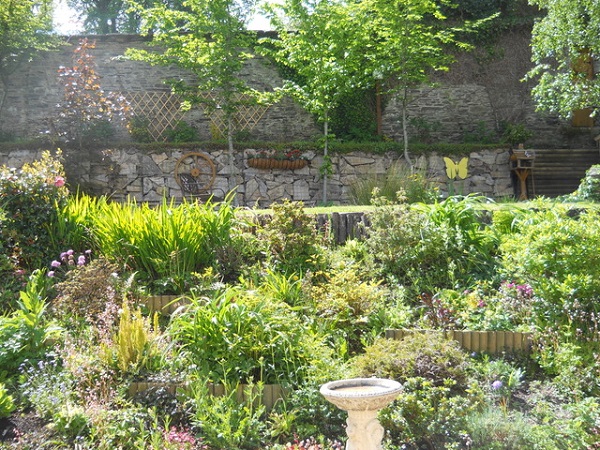
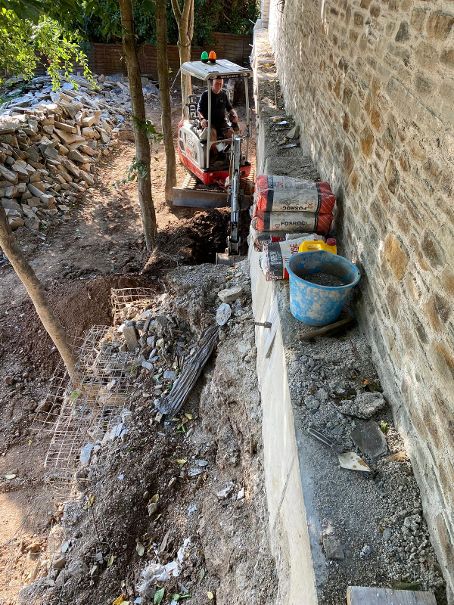
Walled gardens have been around since Medieval times and the high walls being a key feature. These high walls were constructed not so much for security reasons, although originally all gardens may have been enclosed for protection from animal or human intruders, but for horticultural purposes to offer shelter and an encouraging micro-climate for growing fruit, vegetables and flowers. In temperate climates the walls shelter the gardens from winds and frost and in doing so can raise the ambient temperature within the garden by several degrees, allowing this micro-climate to grow plants that would not otherwise survive in an unchanged local climate. One acre of a kitchen garden was expected to provide enough produce to feed twelve people. Now that the wall was completed we had a few small jobs to do before we were finished. One of those jobs was to extend a small section of wall at one end to give the client more privacy. Some stainless steel ties were fixed into the stonework.
And the wall was extended.
We used some of the original slate for the coping.
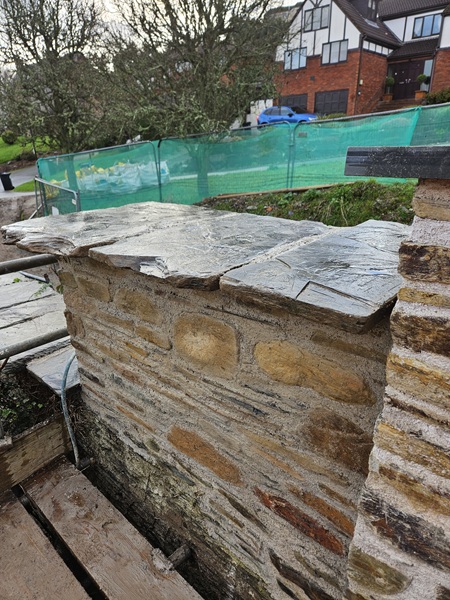
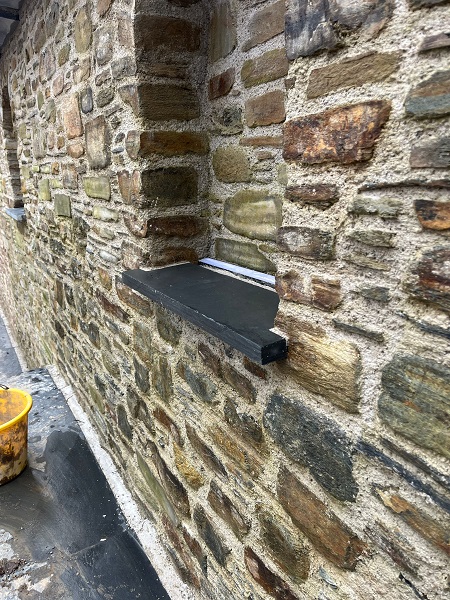
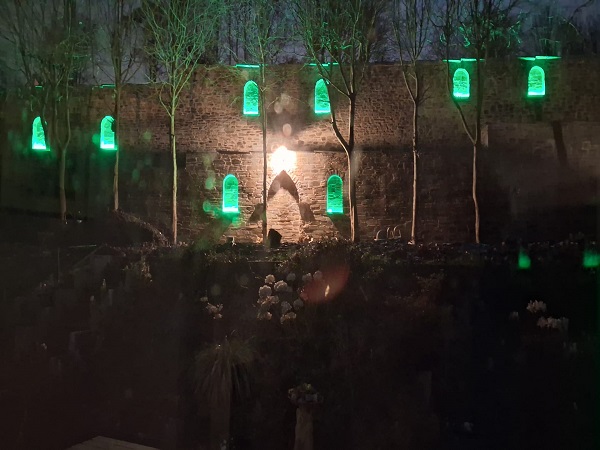
Another job was to finish the recessed niches we had built into the wall. There were six on the upper section of wall and two on the lower section. The electricians had been in to connect all the lights and outside plug sockets and we finished off the niches by putting in some slate sills. The lights fitted were green LED strip lights that went along the back of the niche. Once switched on they would light up the arched openings along the wall.
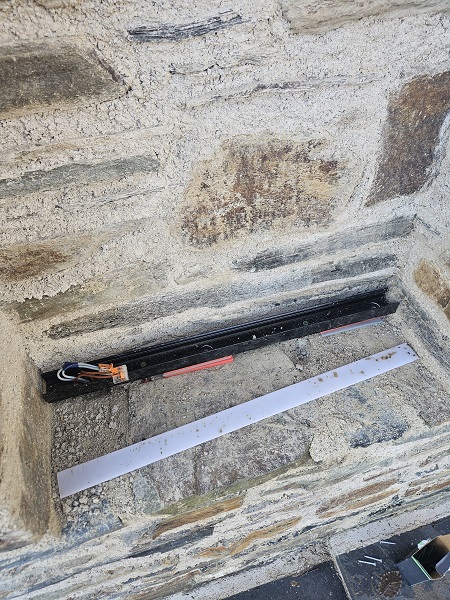

Slate sills were cut to fit all the openings.
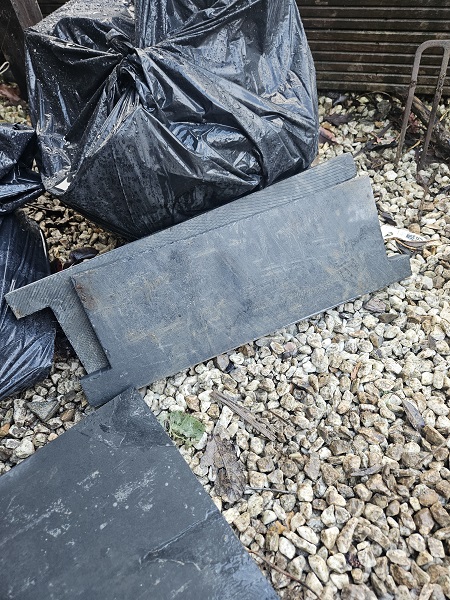
And then fixed into place.

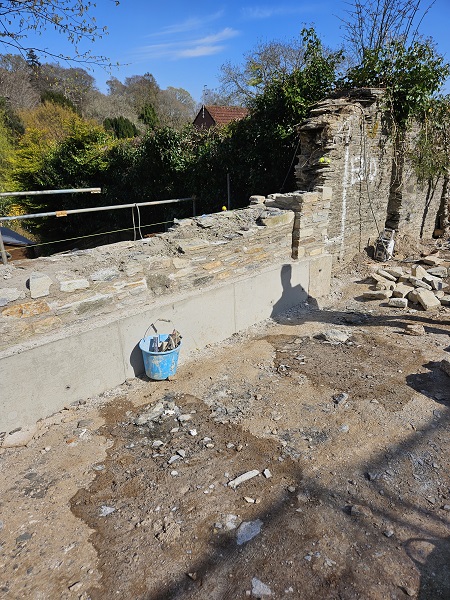
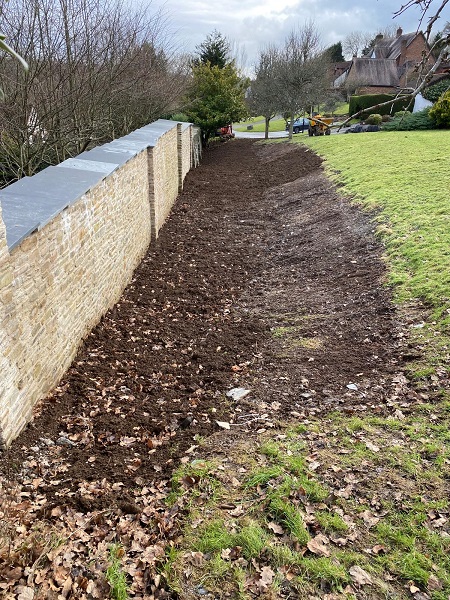
For now, that was us more or less done. The only thing left to do was to tidy up the site and make good the ground levels.
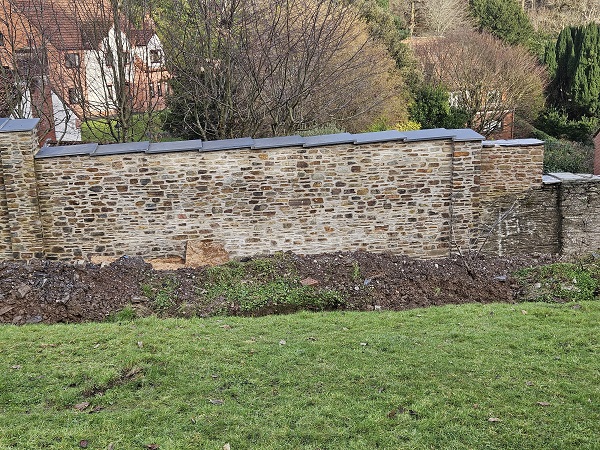
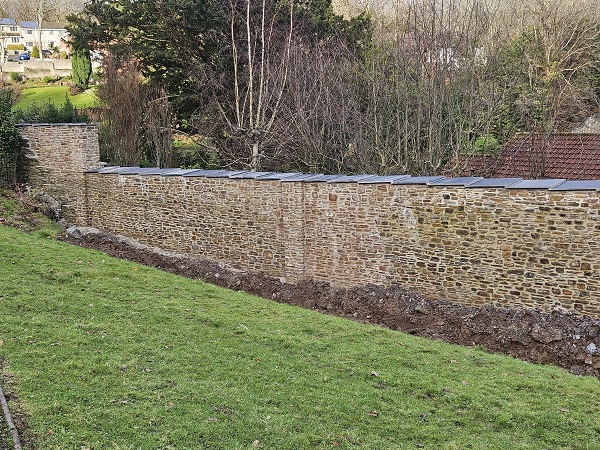
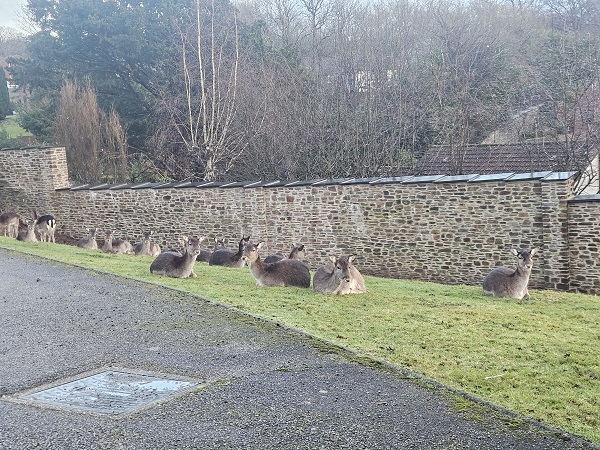
Walls this high are meant to keep the deer out. Almost everyday whilst on site the deer would often walk past where we were working and once the wall was complete it didn’t take long for them to feel at home again.

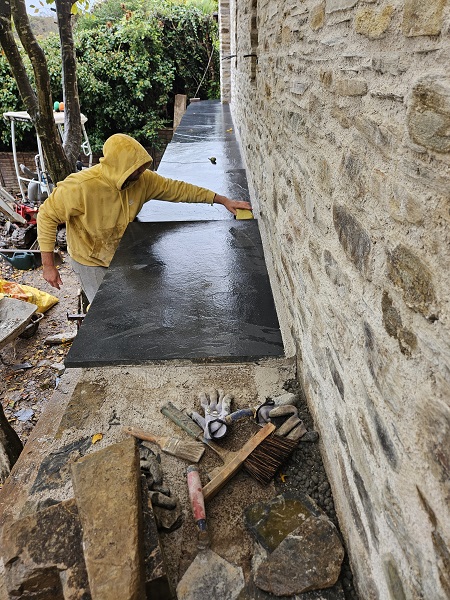
Once the ground on the clients side of the wall had been cleaned up and levelled off it was time to switch those lights on.
Leigham Manor House can clearly be seen on the ordnance map that was surveyed between 1859 to 1865 but the gardens walls are not shown. However, on the ordnance map surveyed from 1865 it shows a much larger manor house along with the garden walls. It must of been around that period that the manor house had extensive work carried out along with the construction of its enclosed garden walls. During this time the estate was owned by the wealthy Elliott family and was for several generations.