

Furzedown ~ Malborough, South Devon.
Client : Private.

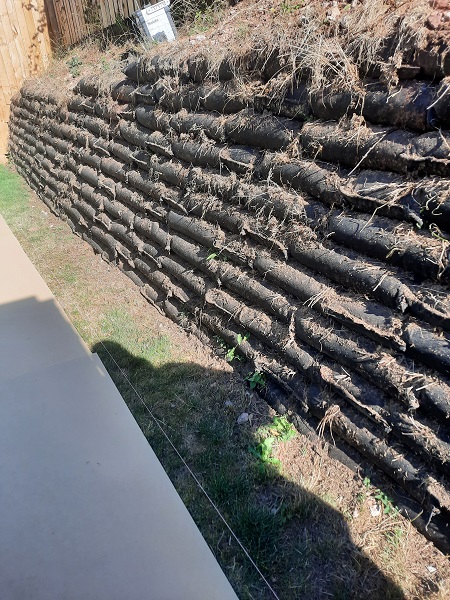
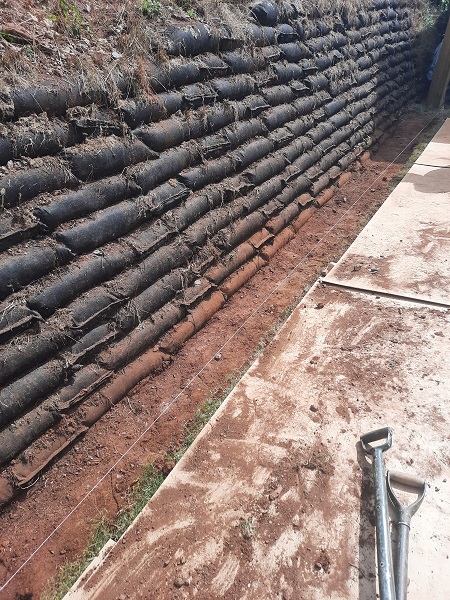
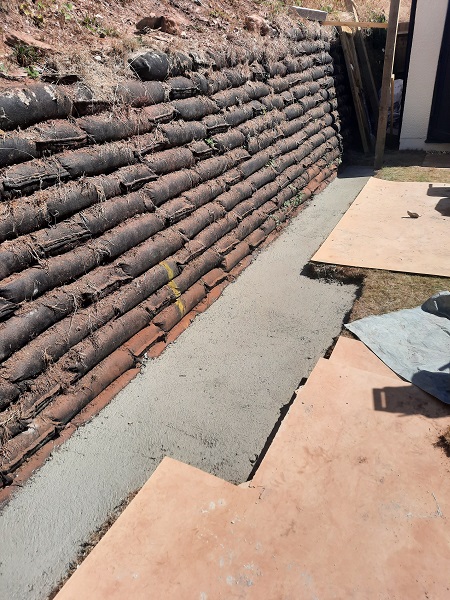
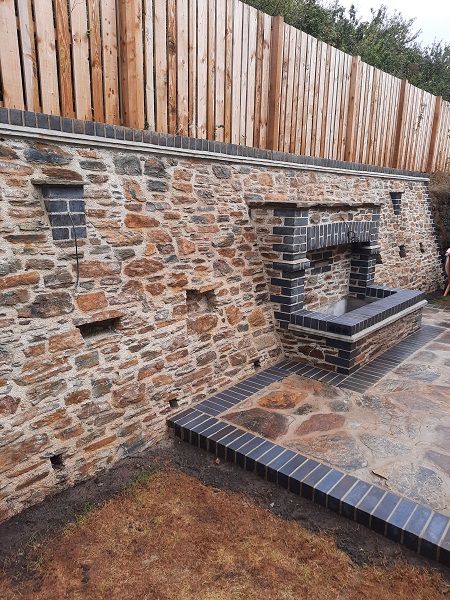
Furzedown is a new build situated on the outskirts of Marlborough, a village in South Devon. At the rear of this new property a retaining wall had been built using geo-textile earthbags. A system where bags filled with earth are placed on top of each other and pinned together. They are designed to allow the natural growth of plants, flowers and grass whilst retaining the soil behind.
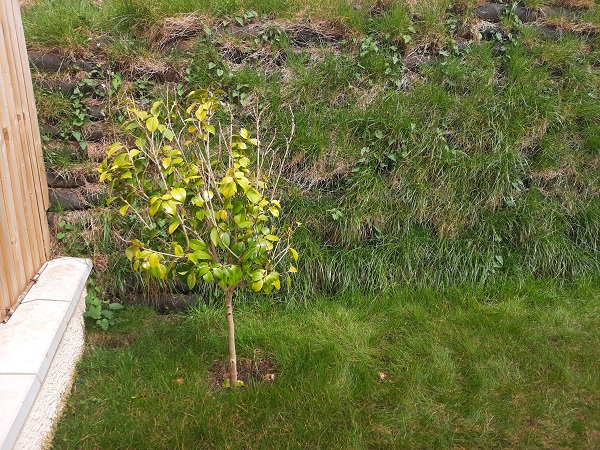
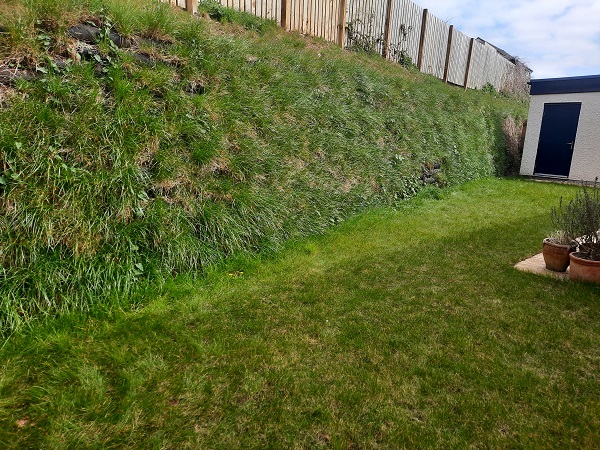
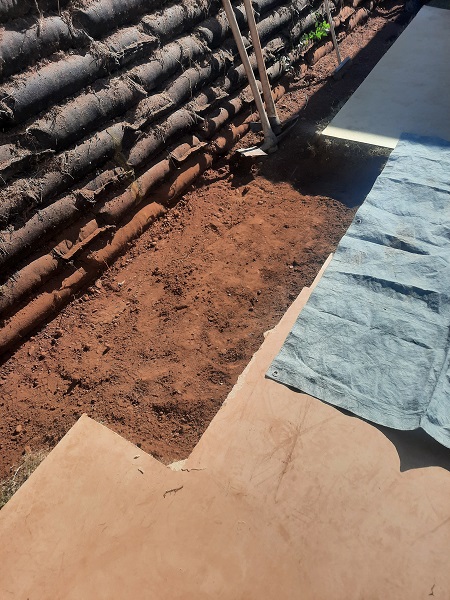
We were asked to face this geo-textile retaining wall with natural stone incorporating a water feature. We were also going to build a new patio area. By the time we had arrived on site the client had removed all the vegetation from the wall to expose the earth bags. The first thing we had to do was lay down some boarding to protect the lawn.
We then marked out the ground and dug a trench for a concrete strip foundation where the wall was going to go.
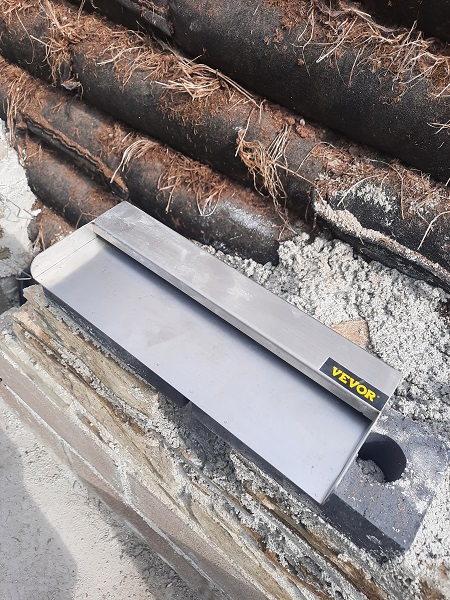
When that was ready we laid in the concrete for the strip foundation.
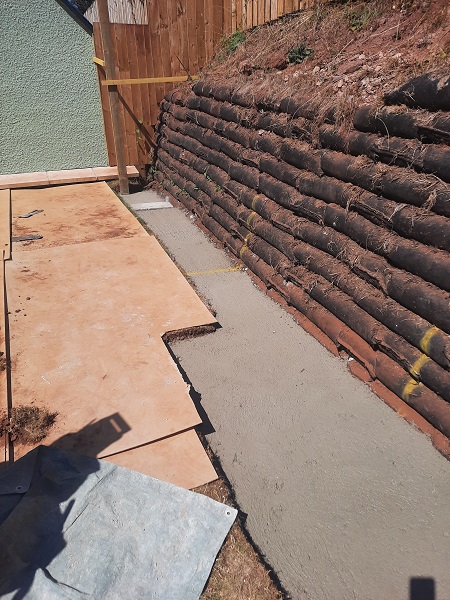
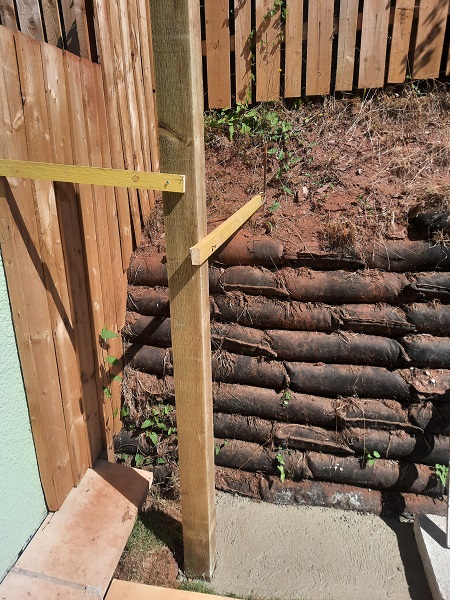
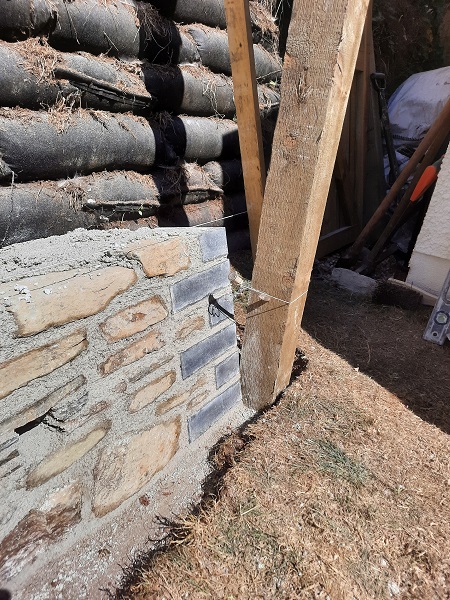
At each end of the foundation we set in two treated timber upright posts. One was to fix some timber fence panelling to, the other was to hang a gate off of it.
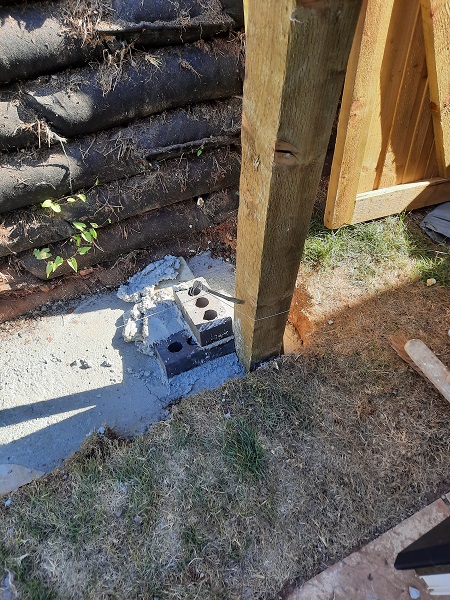
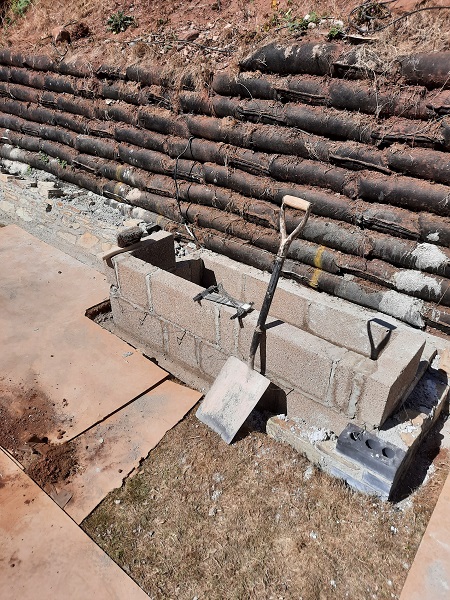
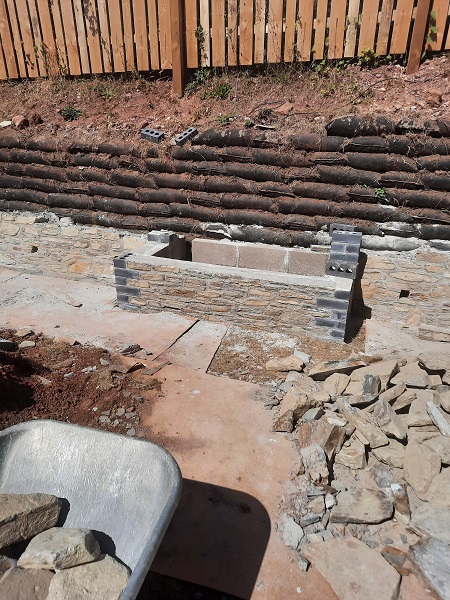
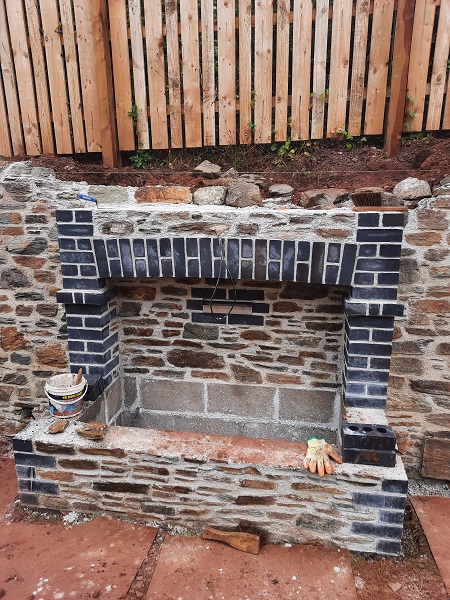
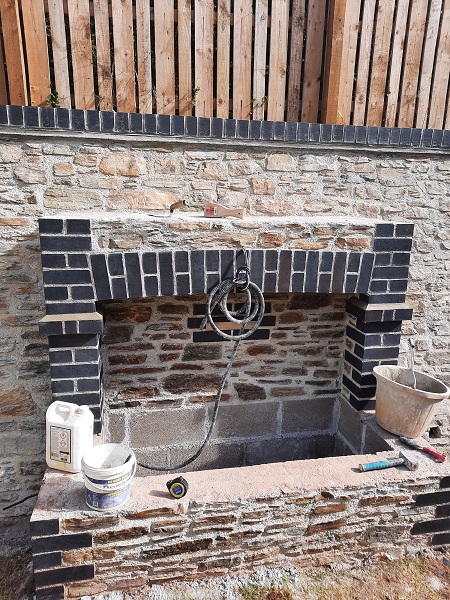
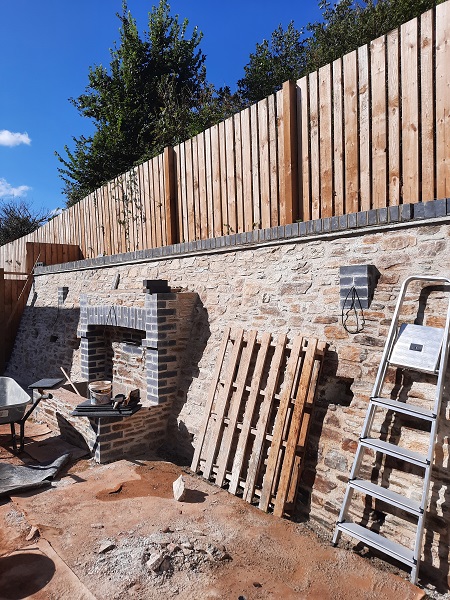
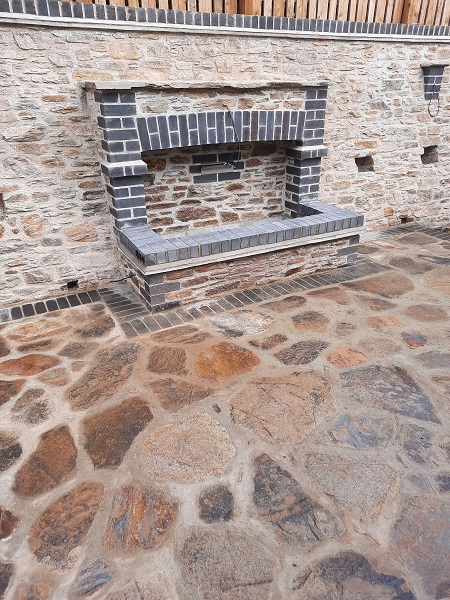
We were now ready to start building the wall up and the first thing was to set out the base for the water feature, which was in the centre of the wall, and this was built using concrete blocks. Any blockwork would not be seen as it would all eventually be faced in natural stone.
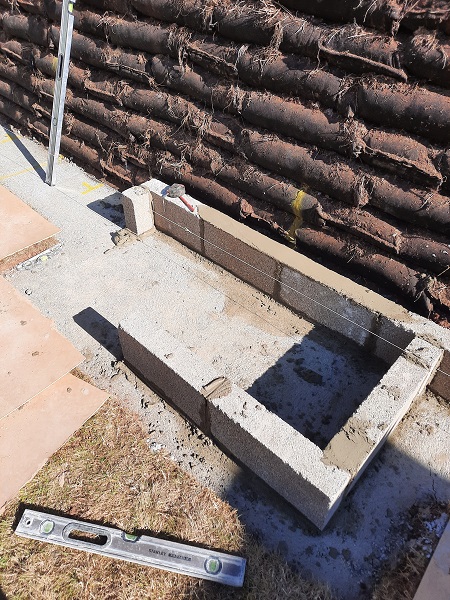
Stainless steel ties were built in to take the stonework.
We then got started on the stonework.
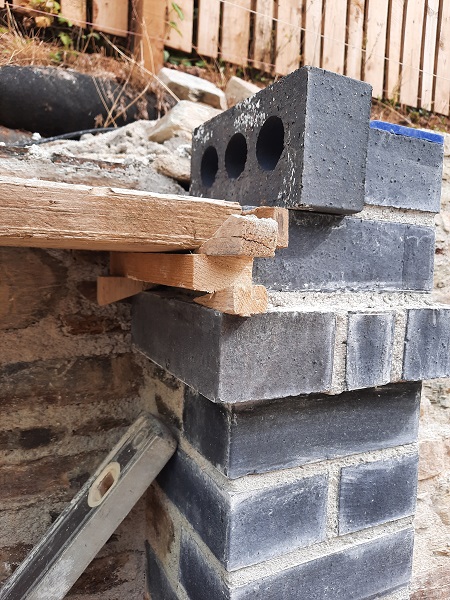
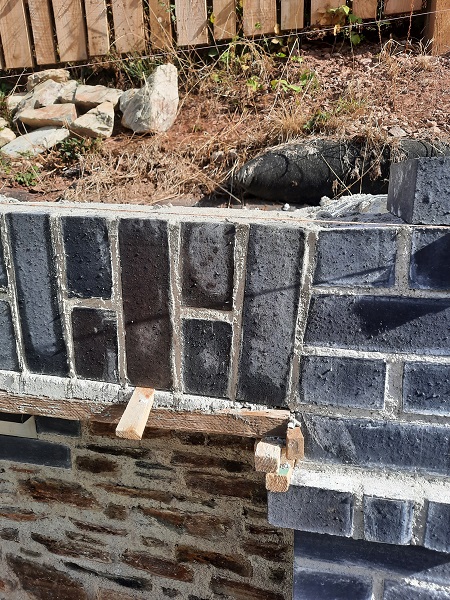
Staffordshire blue engineering bricks were used for all the corner details.
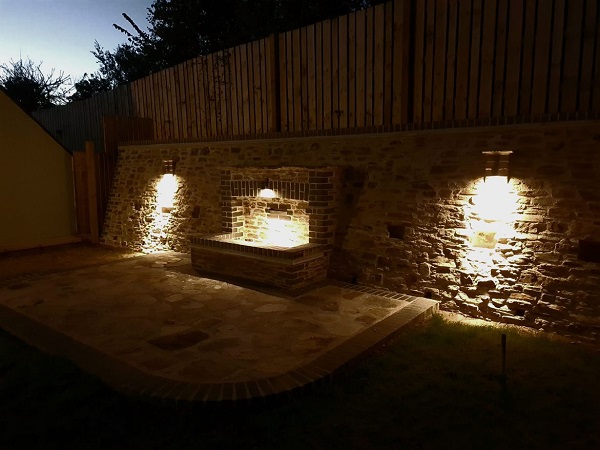
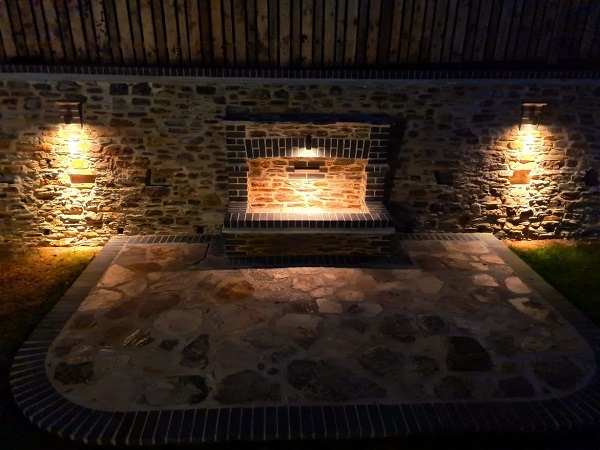
When the stonework was up a little we concentrated on the water feature. The back of the water feature was built up in stone. An eighteen inch wide stainless steel water blade was built into the back of the water feature. This is connected to a re-circulating water pump and when it’s all up and running the water cascades down into the pond below as a continual sheet of water. The water blade has to be set in perfectly level for it to work.
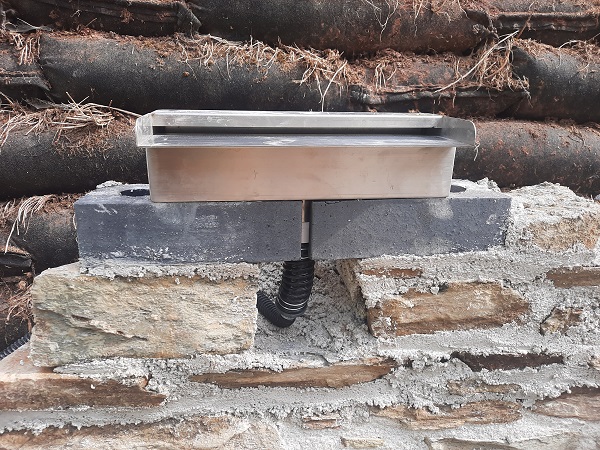
Staffordshire blues were used to frame the water blade.

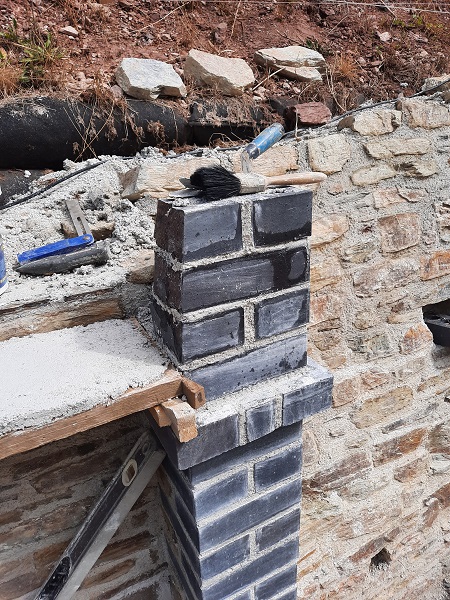
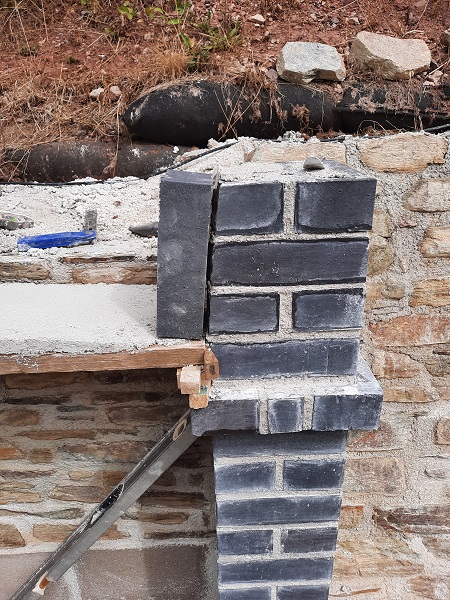
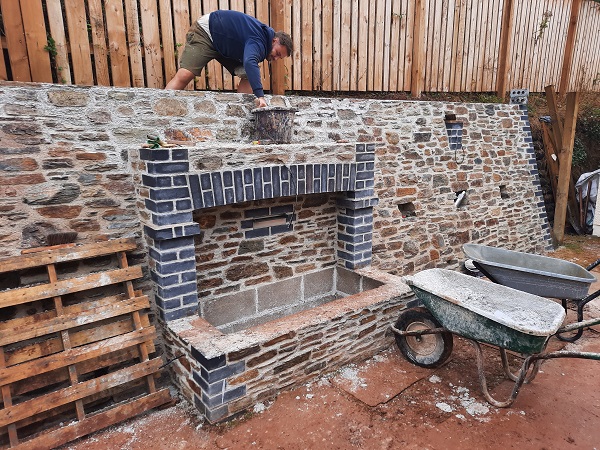
We built a couple of piers either side of the water feature in brick.
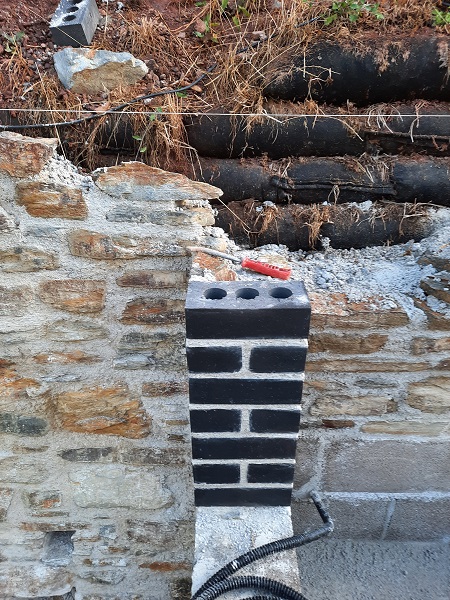
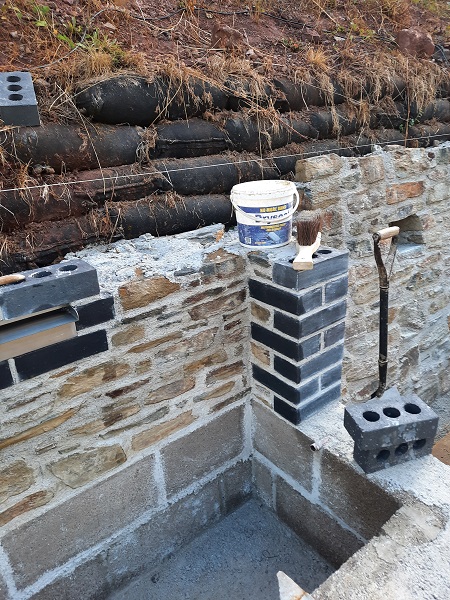
These had a corbelled top.
These two piers were going to support an arch to go over the water blade. The next task was to set up a ‘centring’ to form the arch. First we cut a scaffold plank to length and positioned it on top of the corbels. These were placed on wooden blocks and wedges. This would make it easier to remove once the arch had been built.
We then placed a screed of sand and lime on top of the plank to form the radius of the arch and this was left to set over night.
We then had to build up the ‘skews’ on top of each pier. The skews are the bricks cut to form a right angle to the centring and where the arch springs from.
When the skews are built, bricks are placed in dry over the centring to get the spacing correct for the joints.
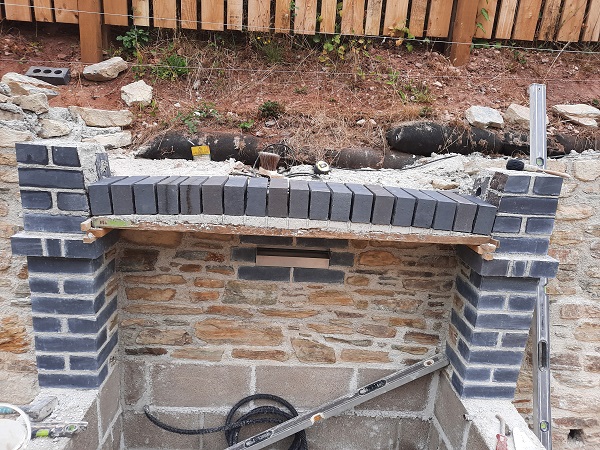
Now we were ready to build the arch.

Stonework was then built over the arch and the centring removed.
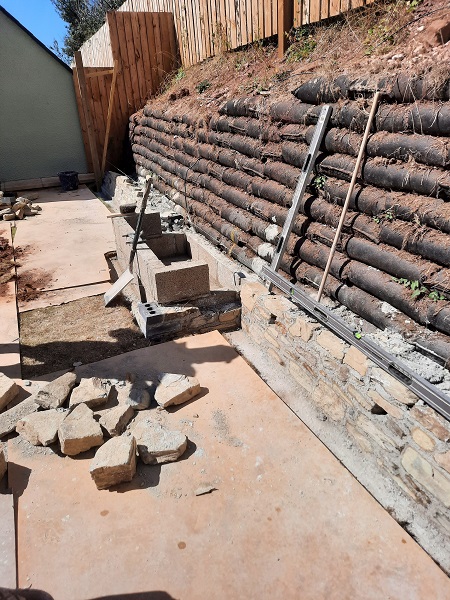
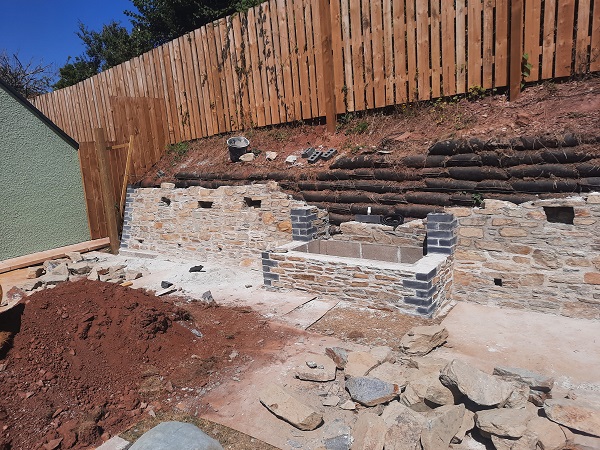
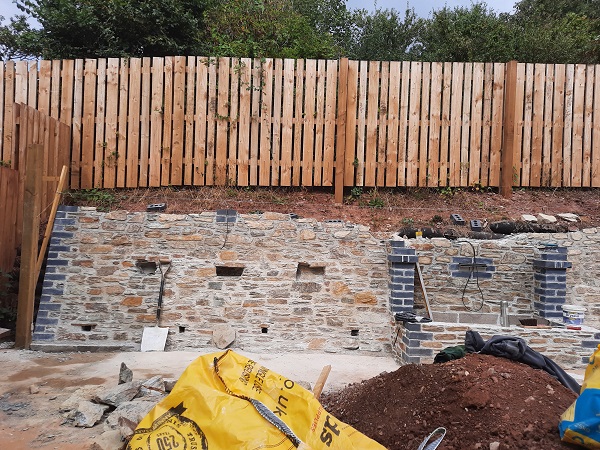
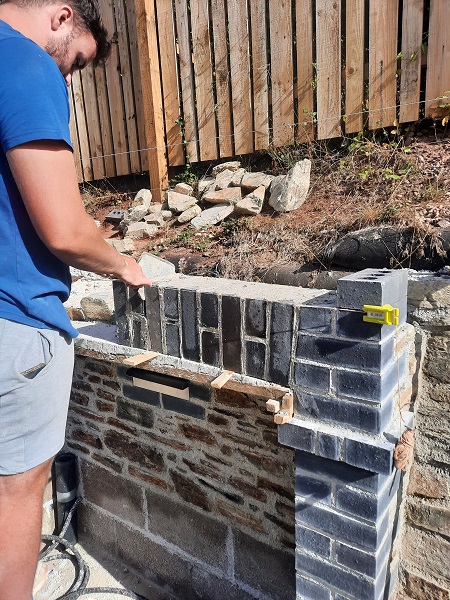
Now the water feature was more or less finished we concentrated on bringing the wall up to height.
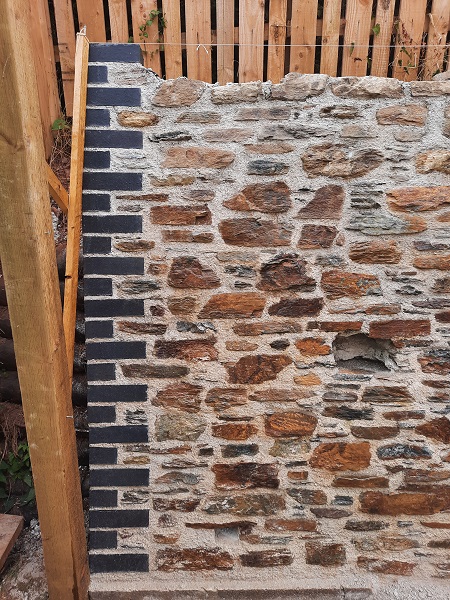
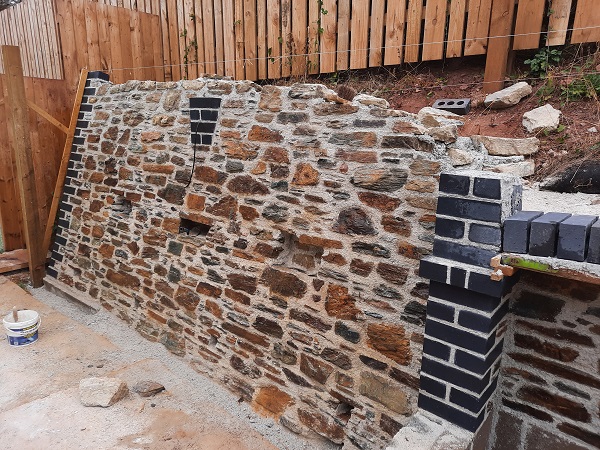
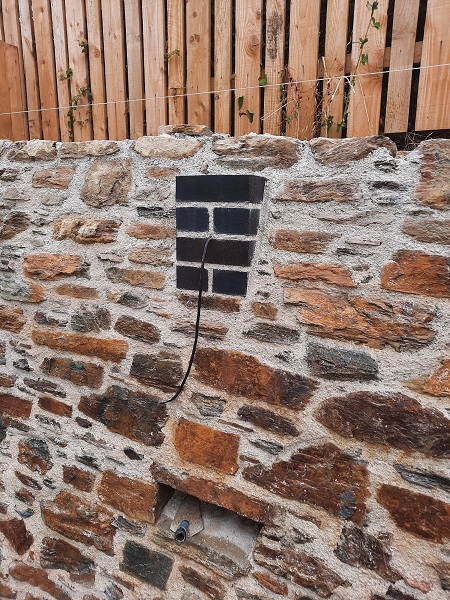
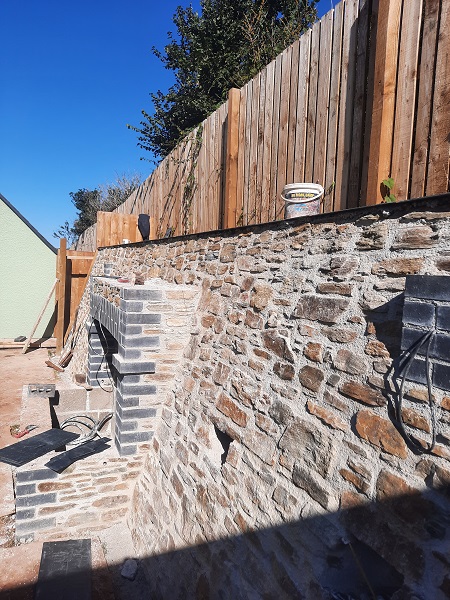
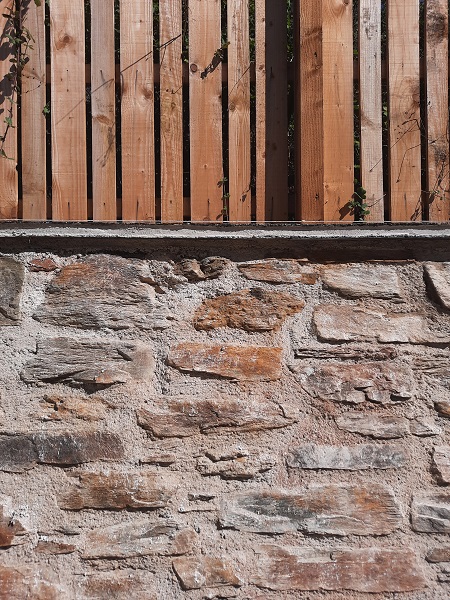
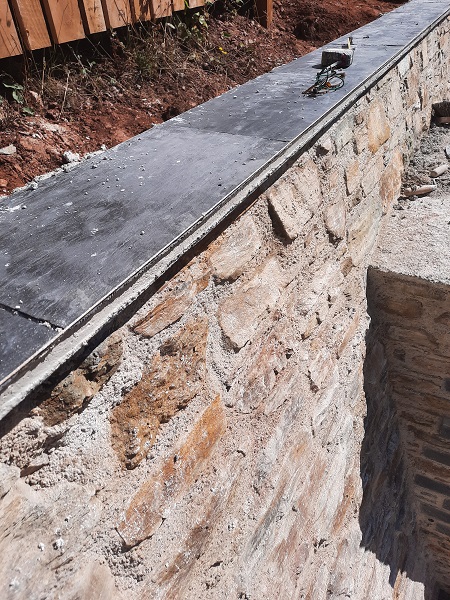
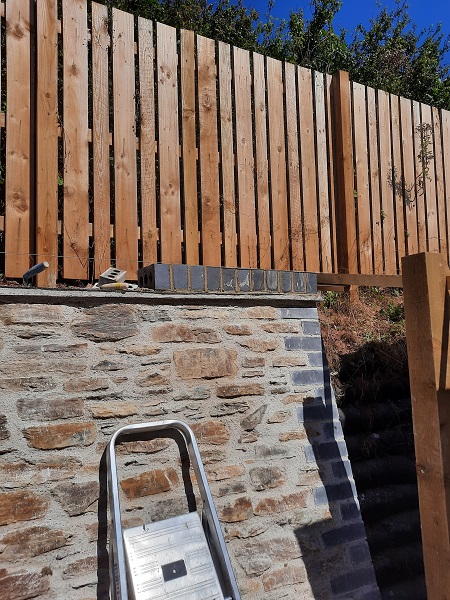
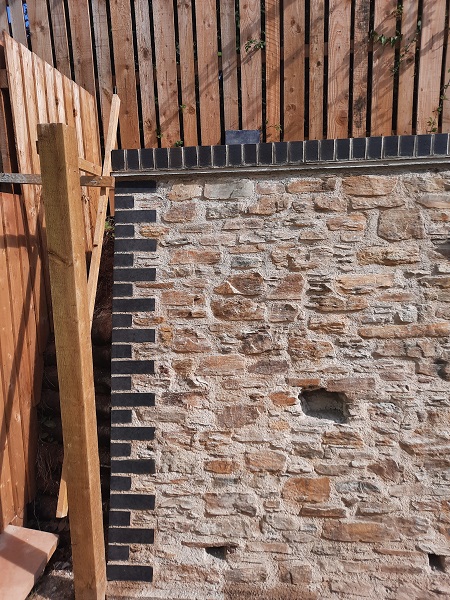
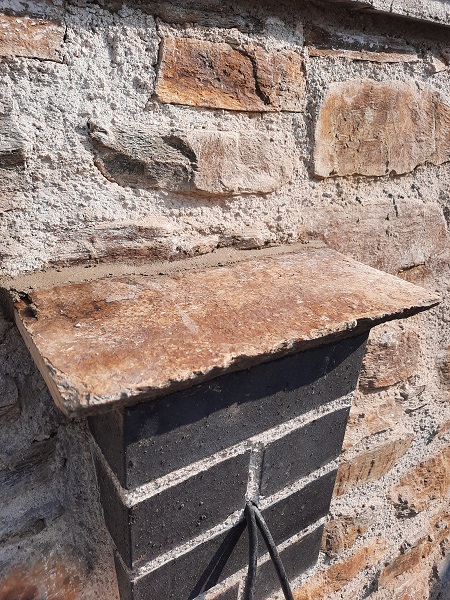
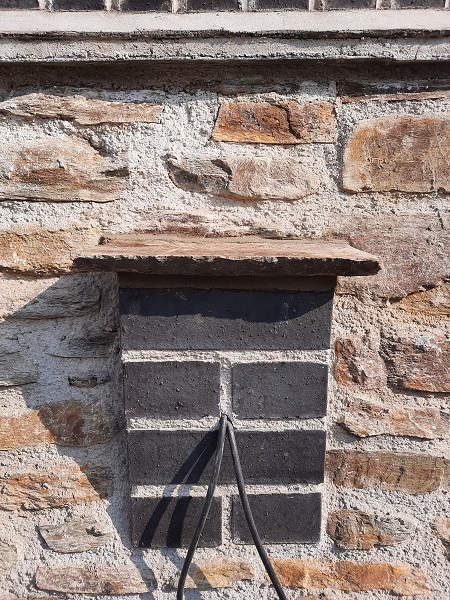
The wall was built on a batter, leaning back into the bank, and the thickness of stonework was about eighteen inches. A few pockets were left in the stonework so that some soil and plants could be put in. Armoured electric cables were also built into the wall to accommodate lighting and also a socket to operate the pump for the water feature. We built a couple of small upright brick pillars into the wall to fix the downlighters to. All the stonework and brickwork was built using a traditional lime mortar. The stone we used was a natural rustic slate that came from Yennadon quarry.
The wall was brought up slightly higher than the ground level behind it.
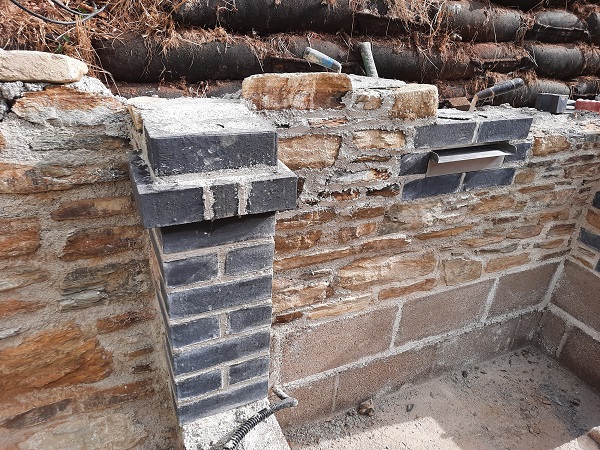
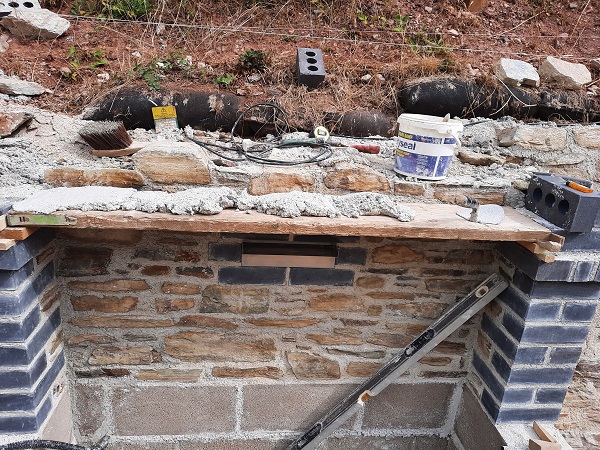
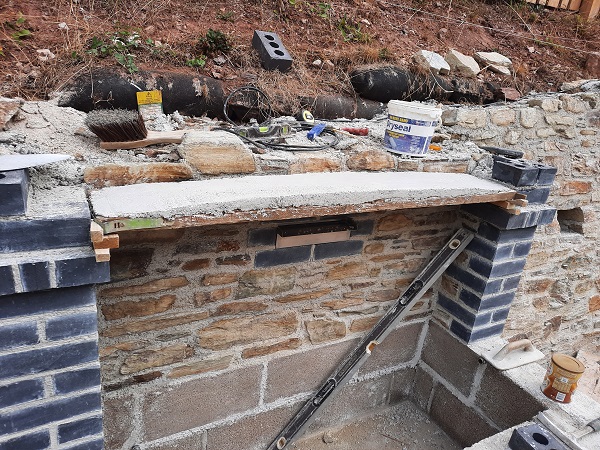
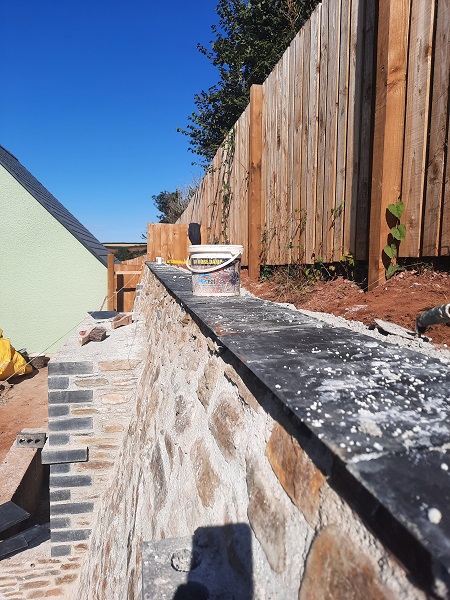
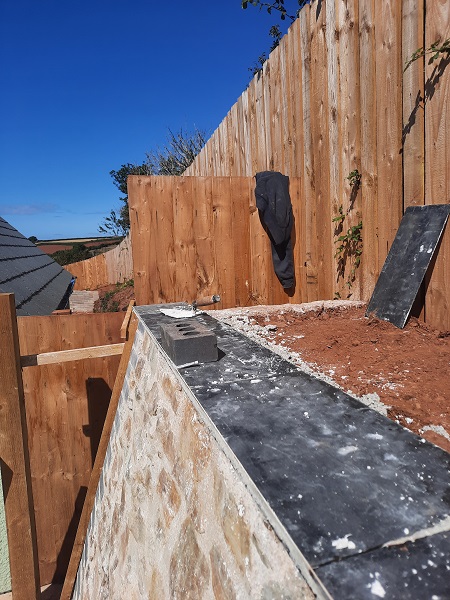
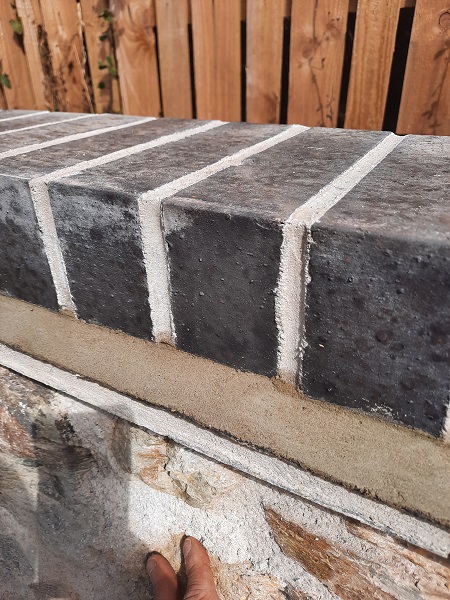
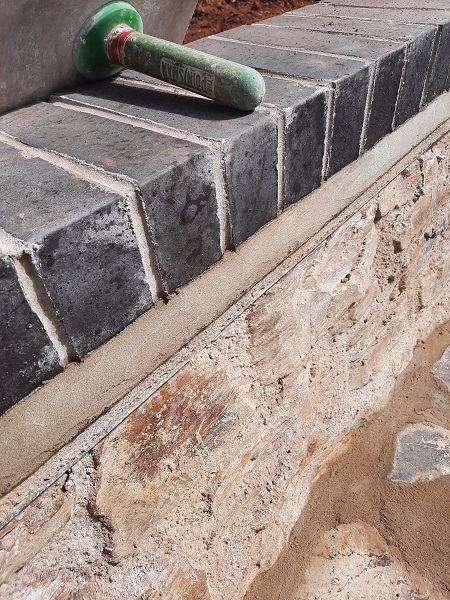
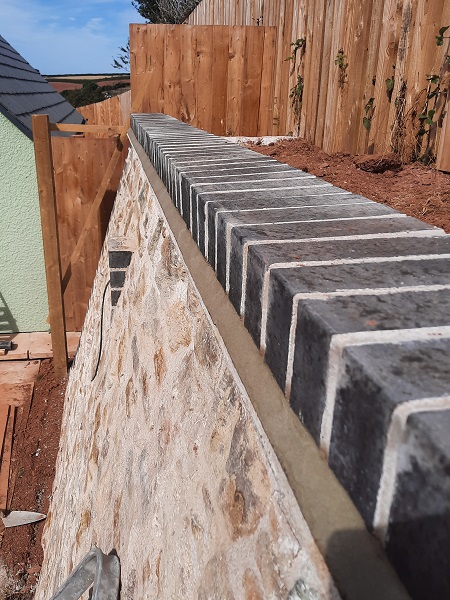
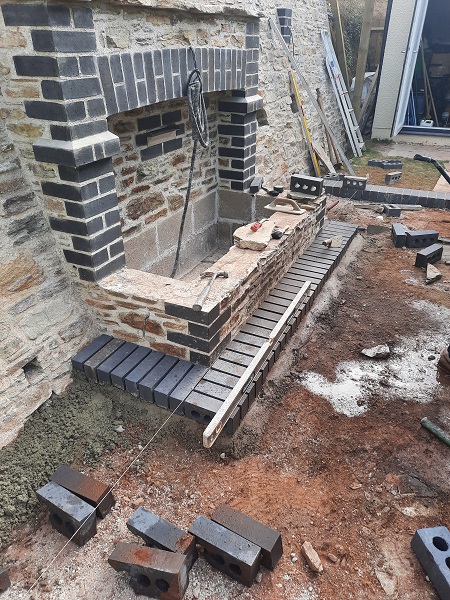
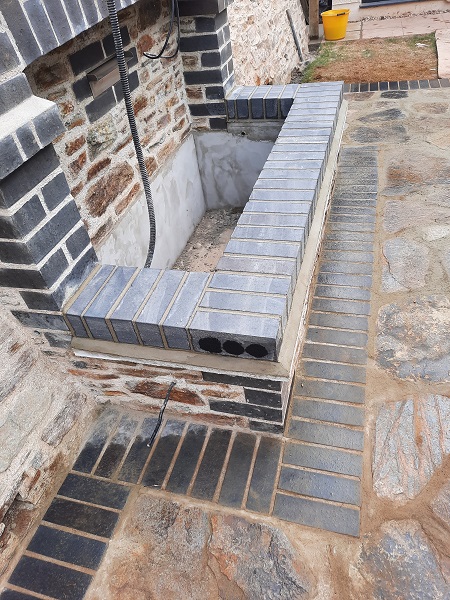
No wall is complete without a coping, so that was the next thing to sort out. This was going to be brick on edge built out of the Staffordshire blue engineering brick. First we set in two courses of natural slate projecting from the face of the stone by about two inches.
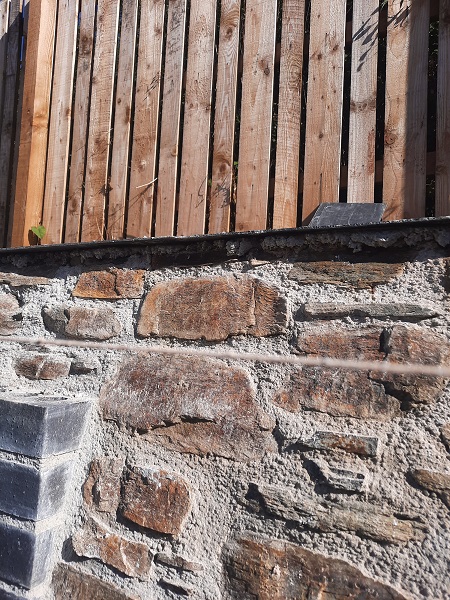
The two courses are half bonded which is more weather resistant, and the joint between the slate is weather struck.
After this the bricks were set out.
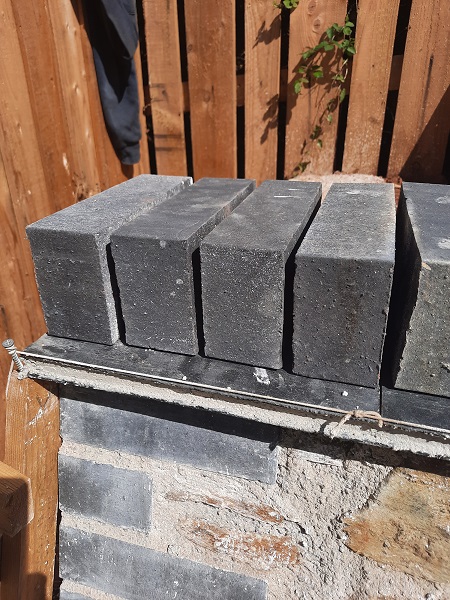
And it was time to start laying the brick on edge.


A forty-five degree angled fillet was formed along the edge of the slate. This was done in a waterproof sand and cement and makes the coping more weather proof.
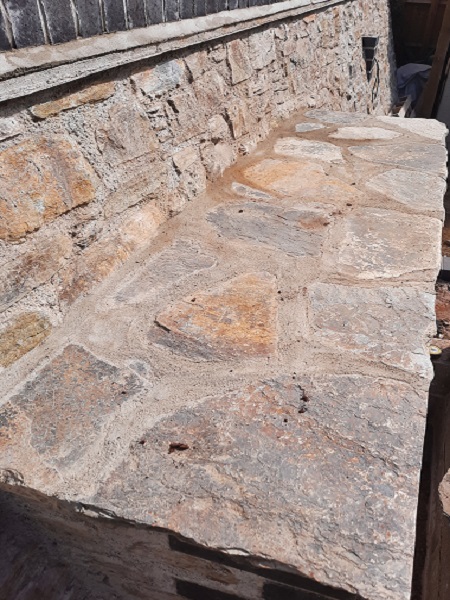
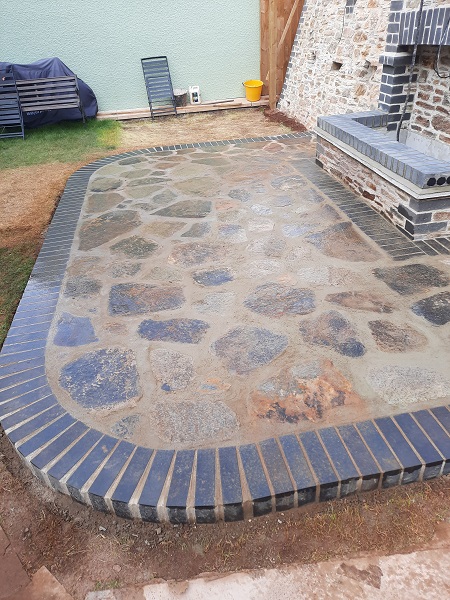
The top of the water feature was crazy-paved in natural rustic slate.
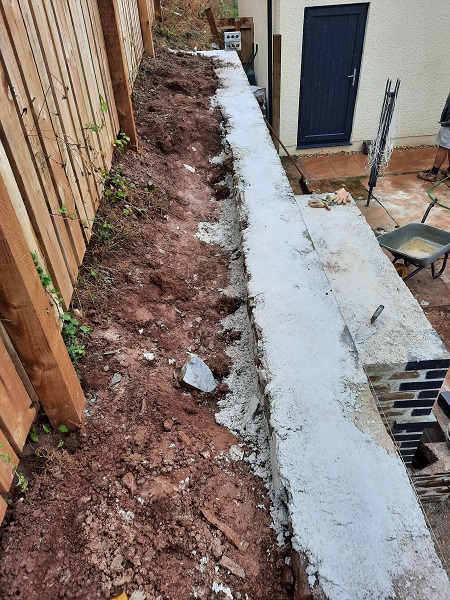
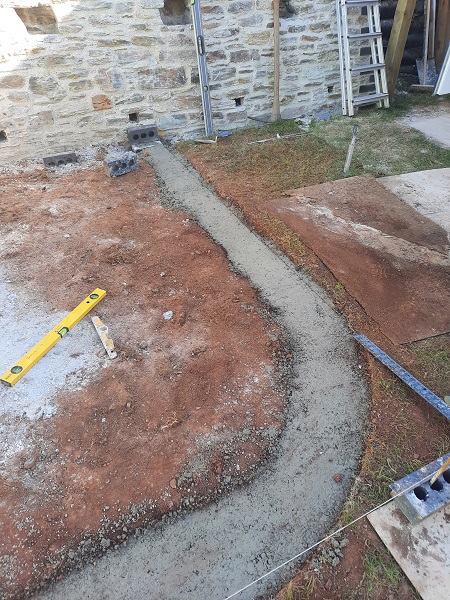
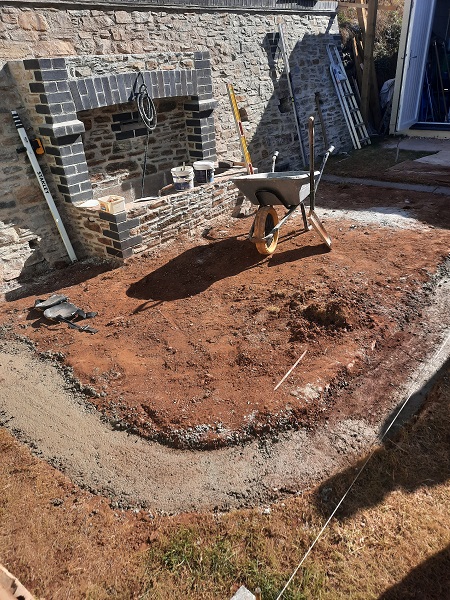
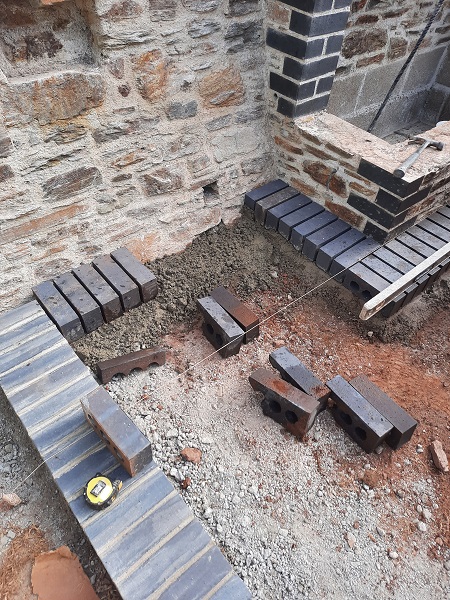
Well, that was the wall more or less finished so next we concentrated on the new patio, and a trench was dug out for that.
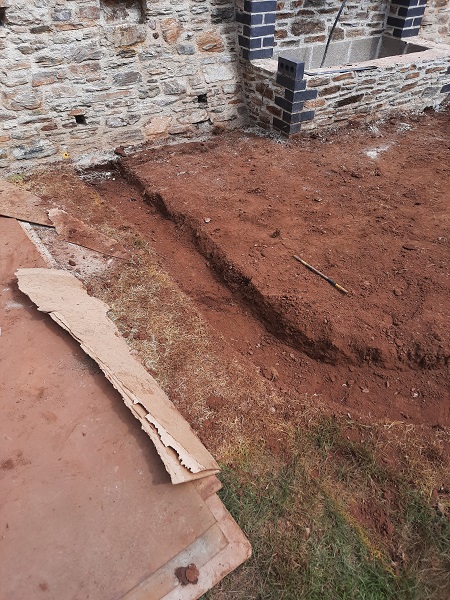
Then a concrete strip foundation was laid in.
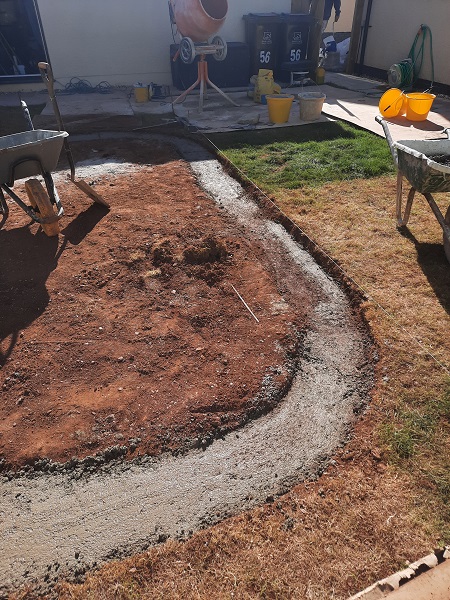
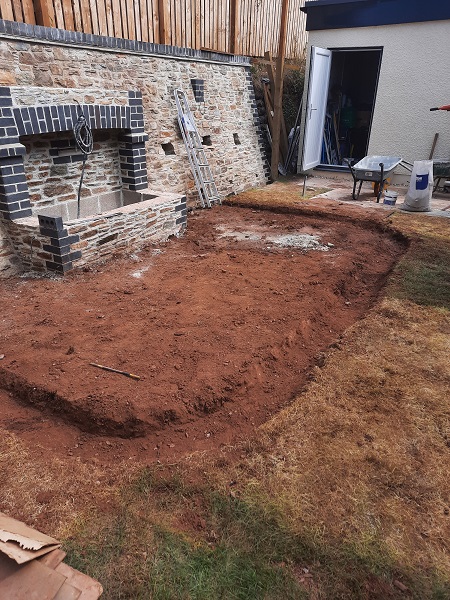
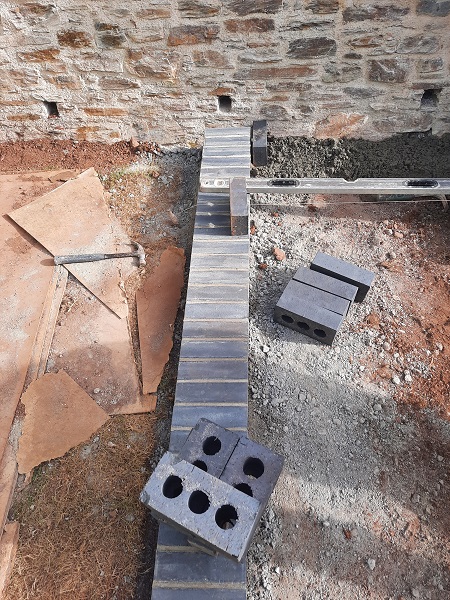
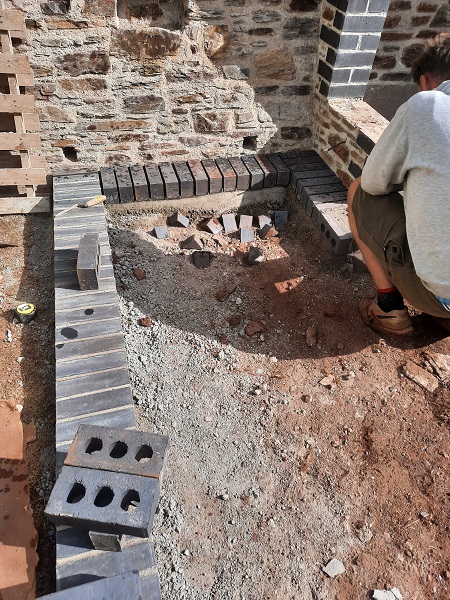
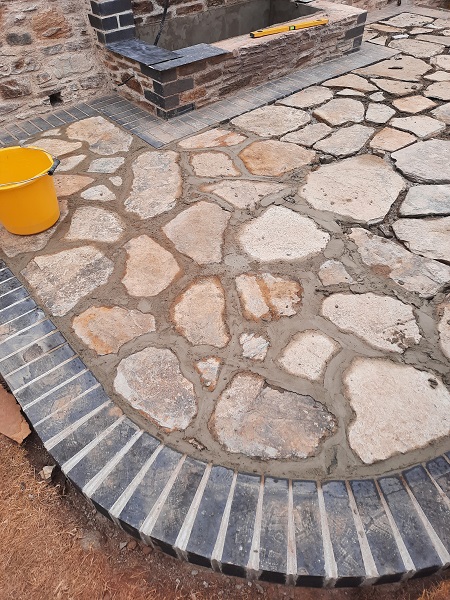
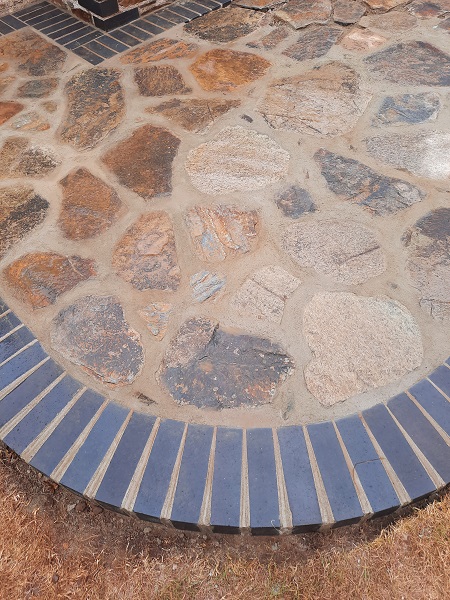
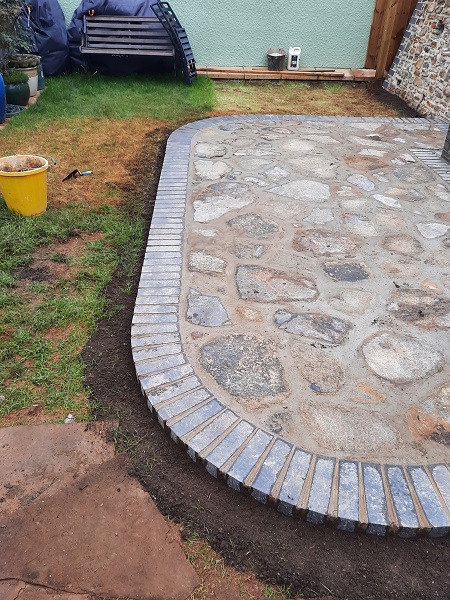
This foundation was to build a brick on edge in the Staffordshire blue engineering brick which would frame the new patio area. Once the concrete had set we started to lay the bricks in for the edging.
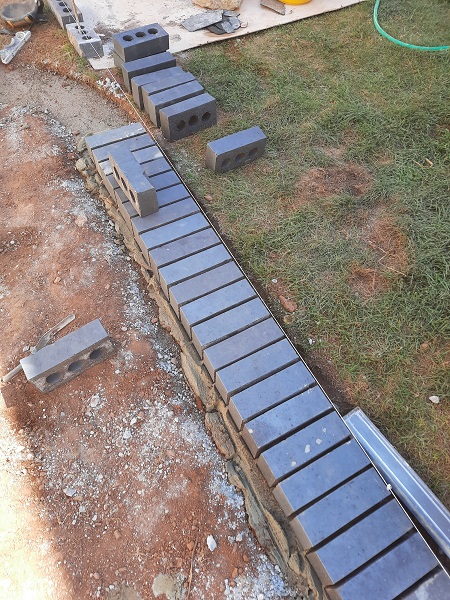
The corners of the patio were set out on a radius.
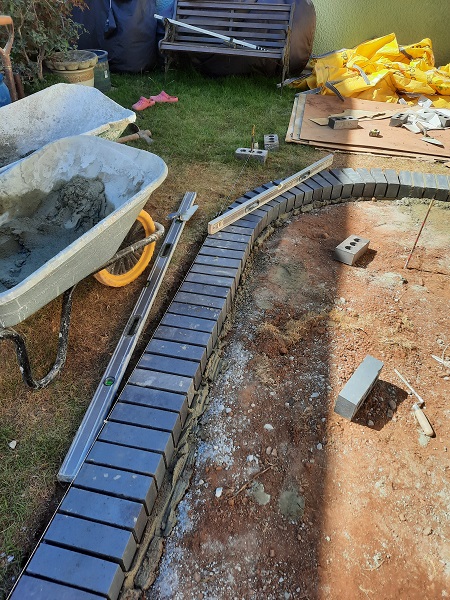
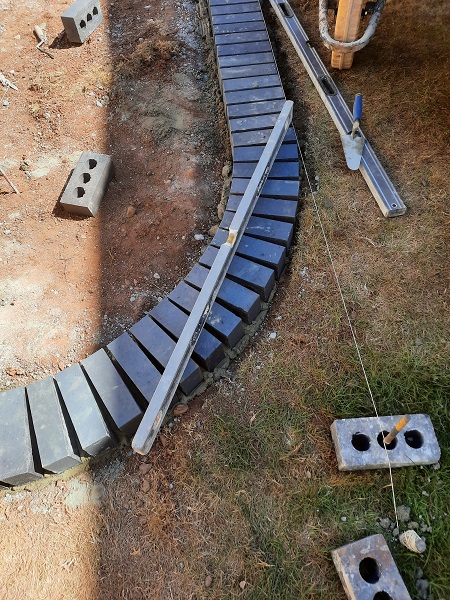
When the edging was placed in and all the bricks spaced out correctly, the joints were pointed in.
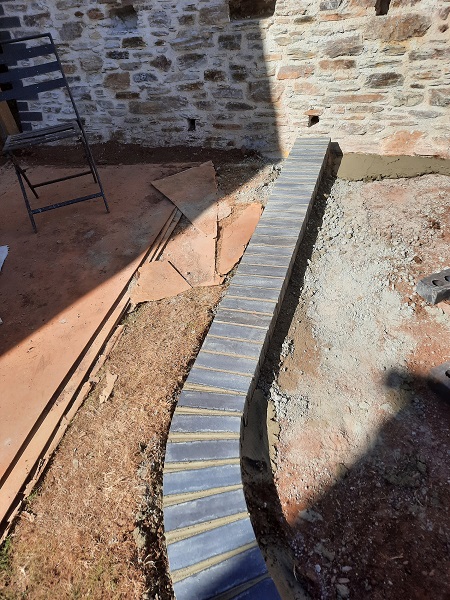
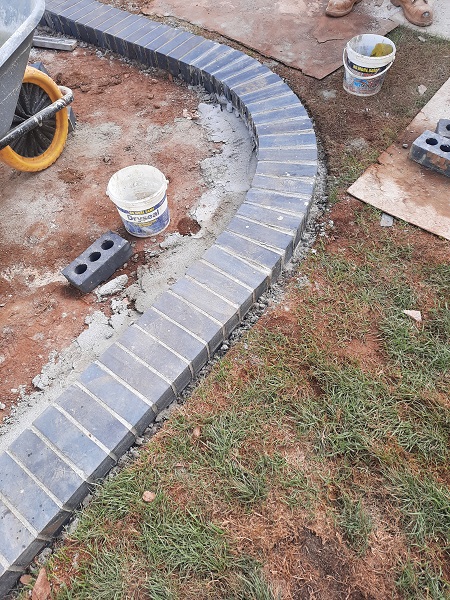
The brick on edge was set in just above the existing finished lawn as this would give a decent edge when ever the grass needed strimming.
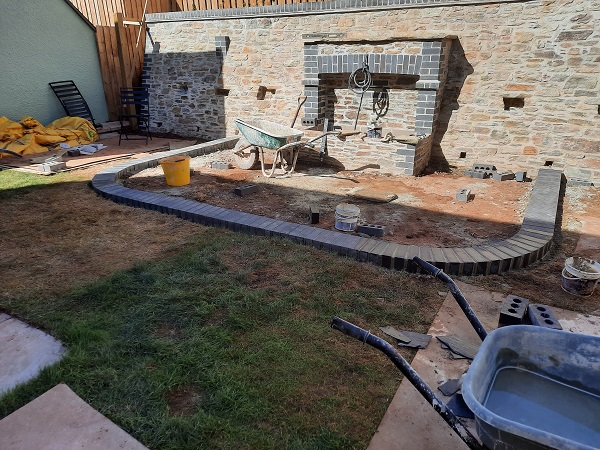
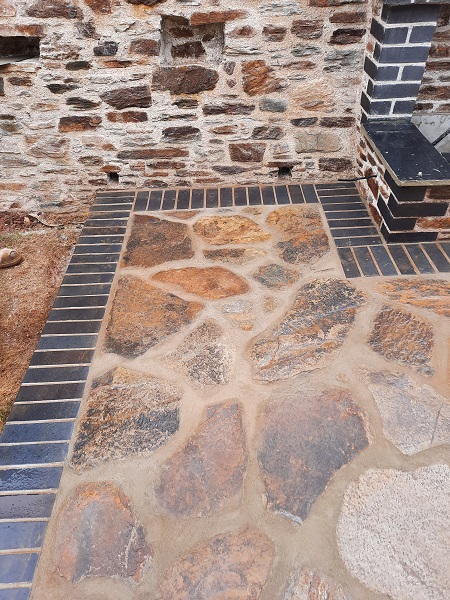
We also continued the brick on edge around the water feature and along the edge of the new wall.
By now all the stone had arrived for the patio. This also came from Yennadon quarry and consisted of natural rustic slate crazy paving. This was laid on a four inch thick continual screed of sand and cement.
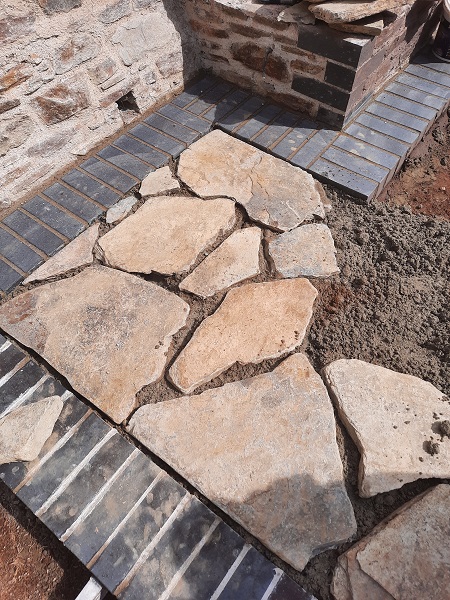
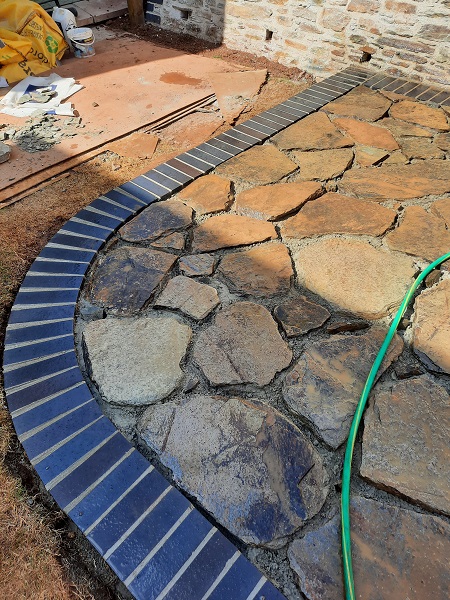
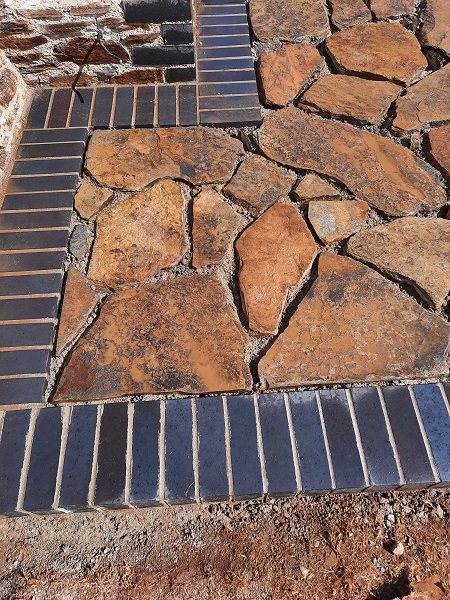
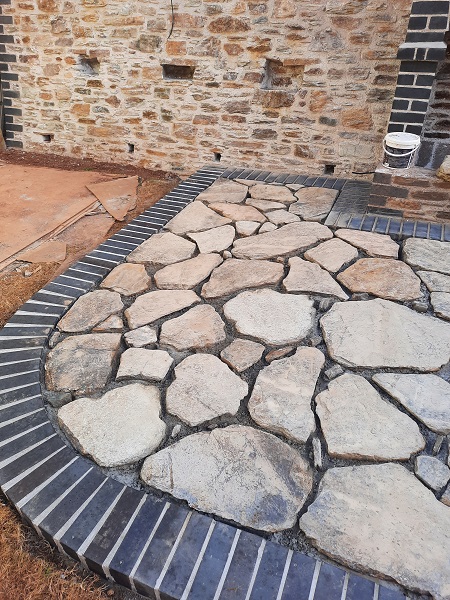
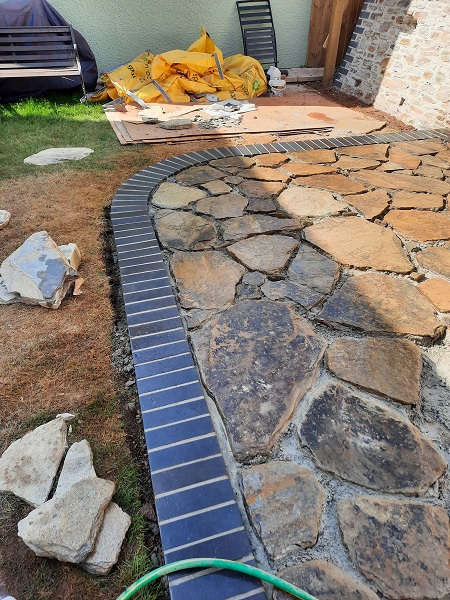
And when all the crazy paving had been laid it was pointed in using sand and cement.
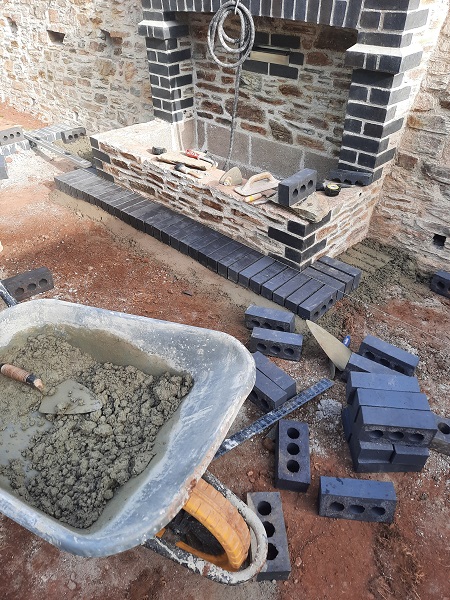
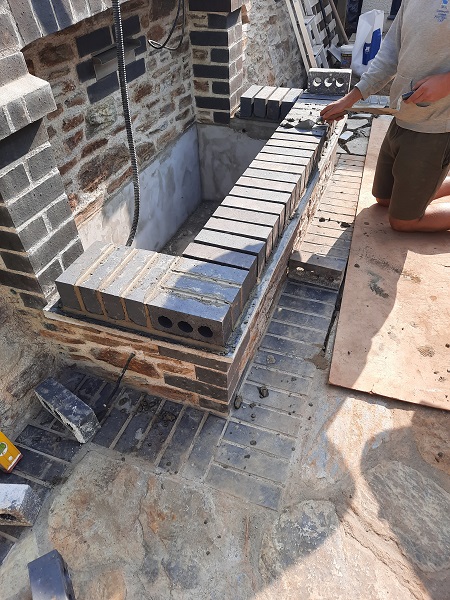
In the meantime the brick on edge coping had to be finished off around the water feature, this was going to mirror what had been done on top of the new retaining wall, so the two courses of slate was first put on for that.

Then the brick on edge was placed in on top of the slate.
The inside of water feature was also rendered in a waterproof sand and cement and then given two coats of tanking slurry to ensure there would be no leaks.
A couple of pieces of stone were cut to cap off the top of the brick piers where the downlighters were going to go.

A new gate was fixed to the end post we had set into the foundation earlier.

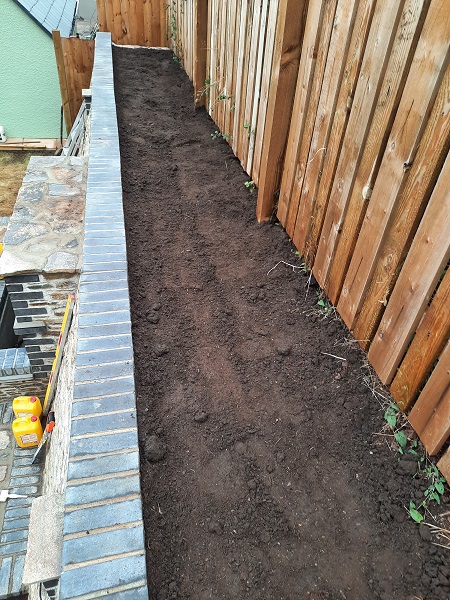
And the back of the retaining wall was filled up with some good quality topsoil ready for planting.
And that was us basically done.
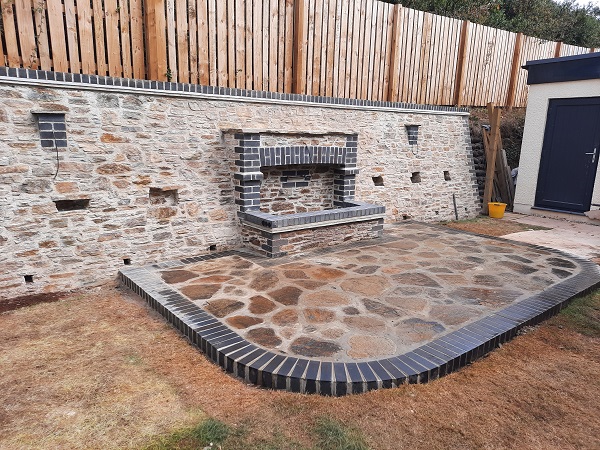
Apart from switching those lights on and creating the perfect space to spend those summer evenings.
The Staffordshire blue bricks we used for this project compliment the stonework very well. It is a strong type of construction brick, originally made in Staffordshire, England. The brick is made from the local red clay, Etruria marl, which when fired at a high temperature in a low-oxygen reducing atmosphere it takes on a deep blue colour and attains a very hard surface with high crushing strength and low water absorption. The industry dates back to at least the 17th century, however brickworks really took off in the 19th century. A key date is 1851 when the Joseph Hamblet brickworks were founded in West Bromwich, which became one of the largest producers of Staffordshire blue bricks. This type of brick was used for foundations as well as being extensively used for bridges and tunnels in canal construction, and later, for railways. Its lack of porosity makes it suitable for capping brick walls, and its hard-wearing properties make it ideal for steps and pathways. It is also used as a general facing brick for decorative reasons.