

Albermarle Villas ~ Stoke, Devonport, Plymouth.
Client : Private.

The former Municipal Science, Art and Technical School in Devonport was built in 1897 at a cost, back then, of approximately £14,000. The architect was Mr. Henry Snell and the builder was Mr. Thomas May, of Cobourg Street, Plymouth. The building is Grade II listed and has now been converted into residential use.
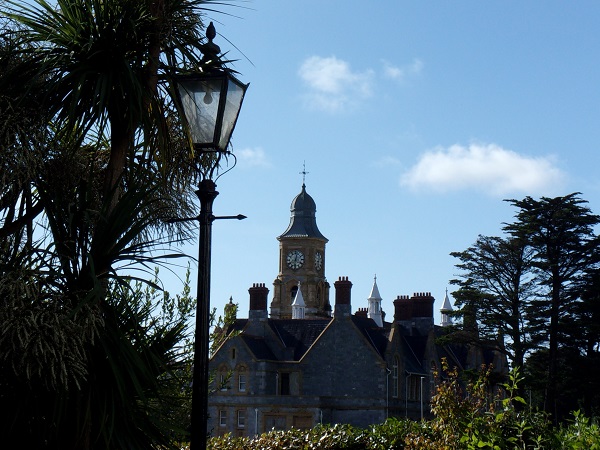
Opposite this building, some seventy years before its construction, the renowned English architect John Foulston designed and built a planned group of eight individual detached Georgian style residences named Albermarle Villas and is mentioned in Pevsner’s ‘Buildings of England’.
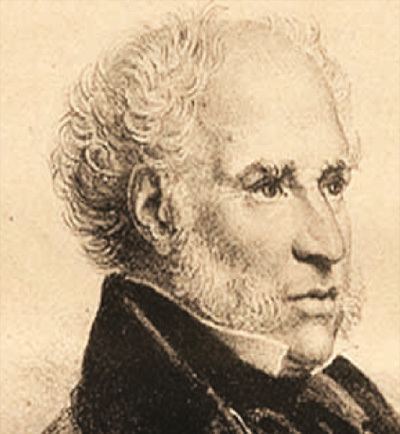
JOHN FOULSTON 1772 – 1841
At the turn of the 19th century, Plymouth was a prosperous port town, separated along the coast of Plymouth Sound from the neighbouring towns of East Stonehouse and Devonport which was collectively known as the ‘Three Towns’. Foulston was responsible for many buildings in the Plymouth area including the creation of Union Street from Frankfort Gate which was built across marshland to unite the three towns. Most of Foulston’s work was in the Greek Revival style, but his best known project was the creation of a group of buildings in Ker Street, Devonport in 1821–24. This eclectic group consisted of a Greek Doric style town hall and commemorative column, a terrace of houses in Roman Corinthian style and two houses in Greek Ionic style, a ‘Hindoo’ style nonconformist chapel and an ‘Egyptian’ style library. Of these, all but the chapel and the houses survive, and are Grade I listed. Foulston’s Royal Hotel, Theatre and Assembly Rooms were built between 1811 and 1818. The theatre was notable for being one of the first buildings in Britain to use cast and wrought iron for parts of its main structure, sadly it was demolished just before World War II to make way for a cinema. Among his other works in Plymouth were The Plymouth Athenaeum, home of the Plymouth Institution of which Foulston was a member. The Athenaeum (1818–19) was bombed during World War II in 1941 and later demolished. Belmont House (c.1825), The Proprietary Library (1812), destroyed by bombing, 1941, The Royal Union Baths (1828), demolished 1849 to make way for Millbay railway station, and St. Catherine’s Church (1823), demolished 1958. He also designed many stucco-faced terraces and suburban villas, including Albermarle Villas (1827) in Stoke, Devonport. In his later years he created an elaborate water garden at his home ‘Athenian Cottage’ in the suburb of Mutley, and would drive round the streets of the town in a gig disguised as a Roman war chariot. He died in 1841 at his home and is buried in St. Andrew’s new cemetery in Plymouth.

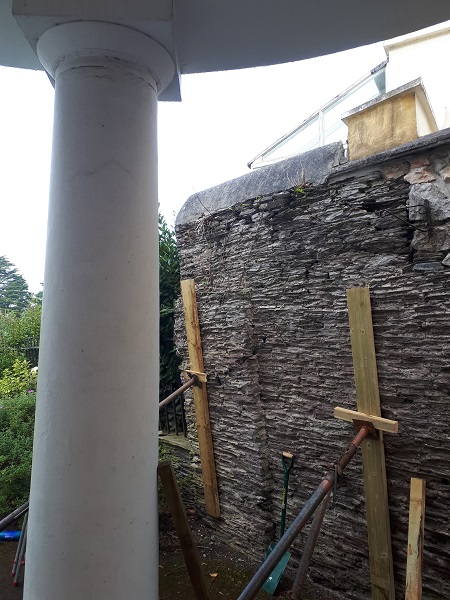
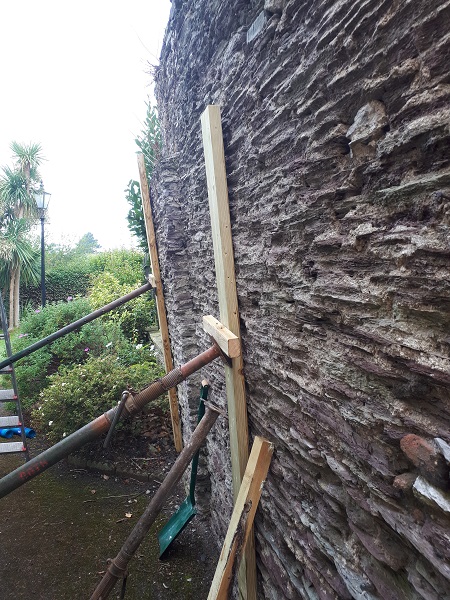
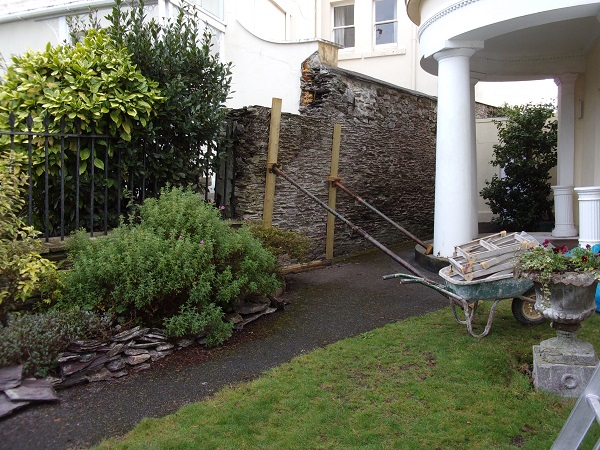
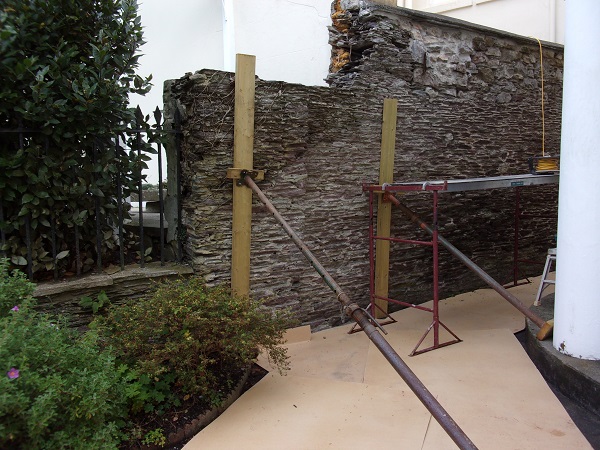
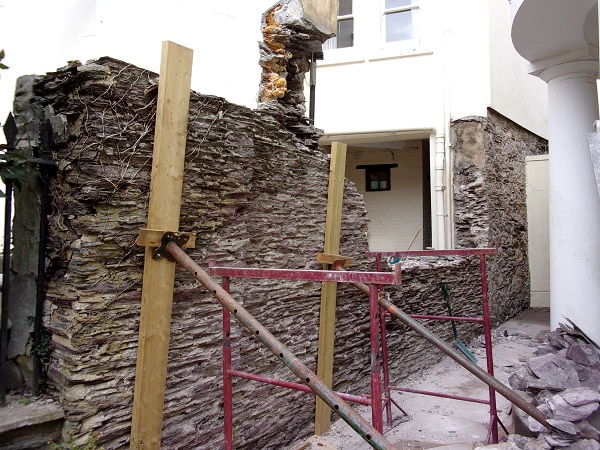
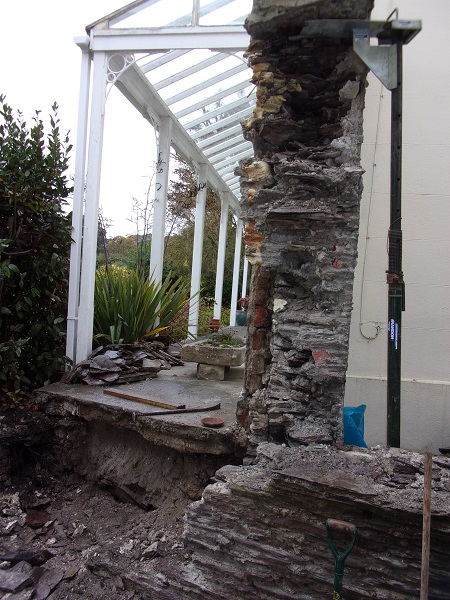
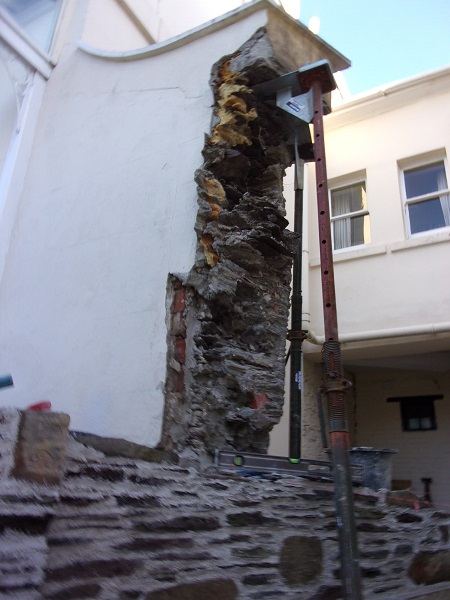
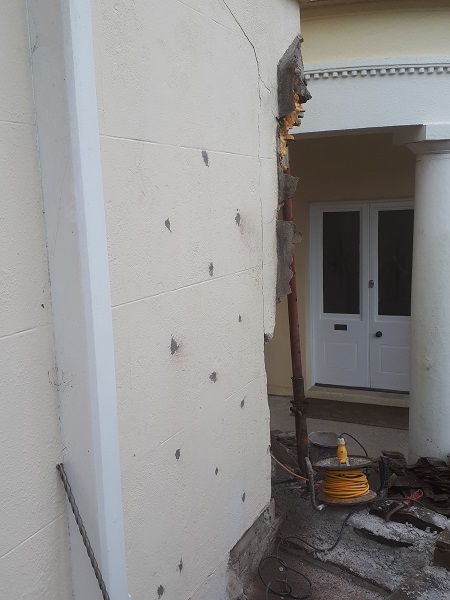
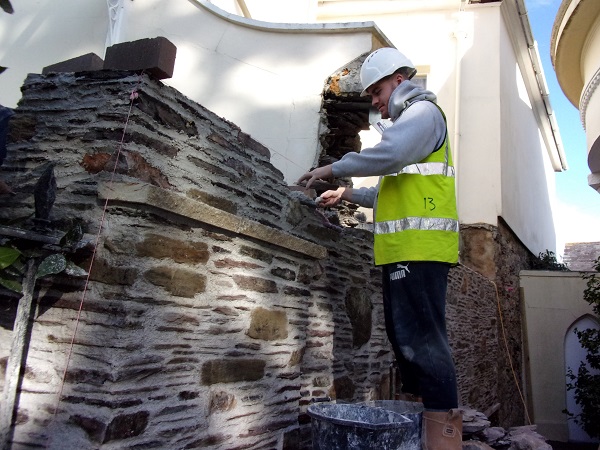
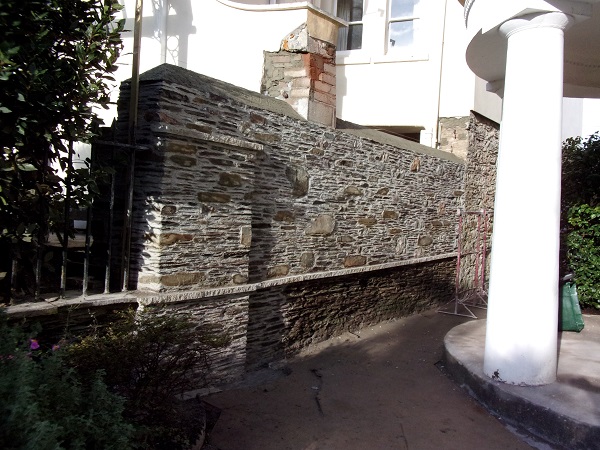
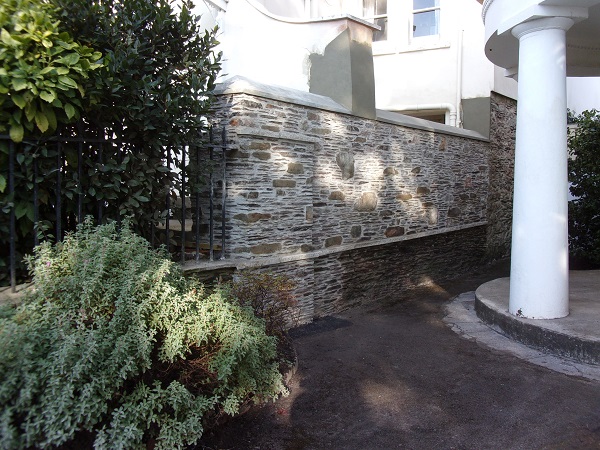
We were contacted by the client to take at look at a section of boundary wall dividing the two properties along Albermarle Villas concerning its stability. As they were built by Foulston the properties here, along with the garden walls, are all Grade II listed. Once we carried out the initial assessment, there were clear signs of considerable movement. As a precaution, it was decided in the interests of safety that the section of wall in question needed to be shored up straight away to prevent further movement until a more detailed investigation could be carried out.
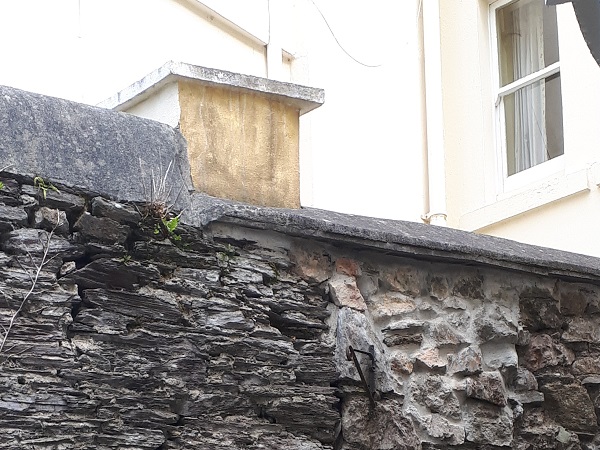
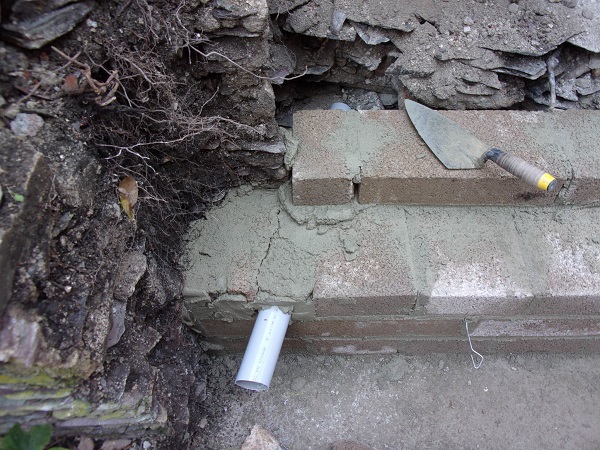
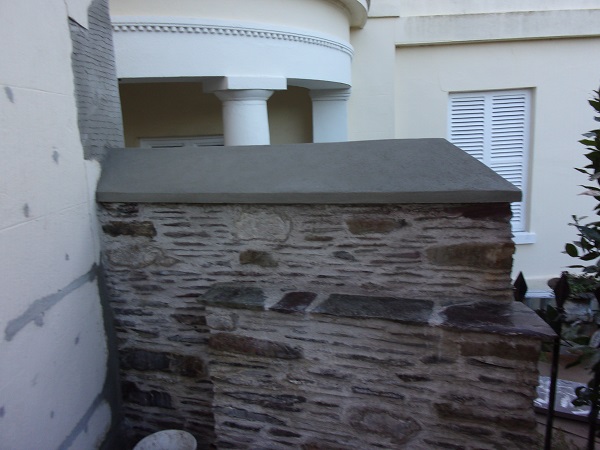
Leaning walls can be worrying to say the least, if not dangerous, and they need to be understood. The centre of mass of a solid wall is its physical centre and considered stable if the upright centre line of the wall lies within the thickness of its base to the top of the wall. If it lies outside this, it’s considered to be dangerous. For example, if a solid wall is eighteen inches thick, then that wall would need to lean eighteen inches out of upright over its full height before it would topple, assuming all the stonework is built solidly throughout the thickness of the wall. All free standing walls built of stone are constructed of two skins built back to back. That doesn’t always mean the wall is built solid all the way up through its entire thickness. The two skins could, and often do as with older walls, de-laminate from each other, which will be even more detrimental to the stability of the wall and must be taken into consideration. Also, the fact that this wall’s coping was either missing or insufficient didn’t help the situation. The physical centre lines on the wall we were repairing were only just inside its base thickness. Another very important factor is to ensure the top of the wall has a suitable capping or coping to make sure water cannot penetrate down through the centre of the wall, which over time can, and will, cause all sorts of problems relating to the structural integrity of the wall itself.
At some point in its history some sections of this wall had been raised up by about two feet (600mm), probably to give more privacy. It wasn’t even in keeping with the original wall as different stone had been used and the workmanship a bit rough to say the least.
This additional weight on top had most likely contributed to the wall leaning. Because the wall was inevitably going to be taken down anyway, as an extra precaution, at this stage we reduced the top of the wall by two feet directly above the props to relieve any undue stress.
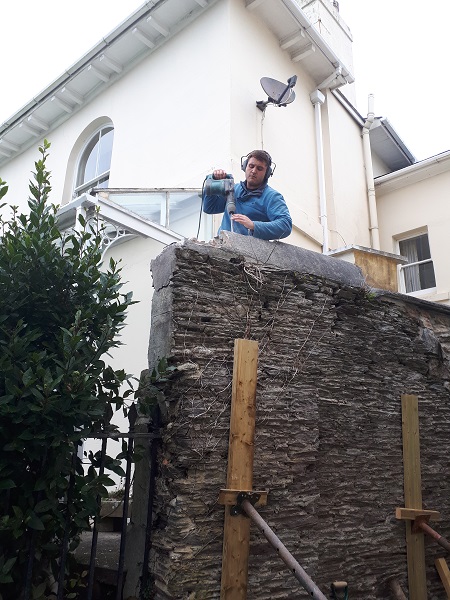
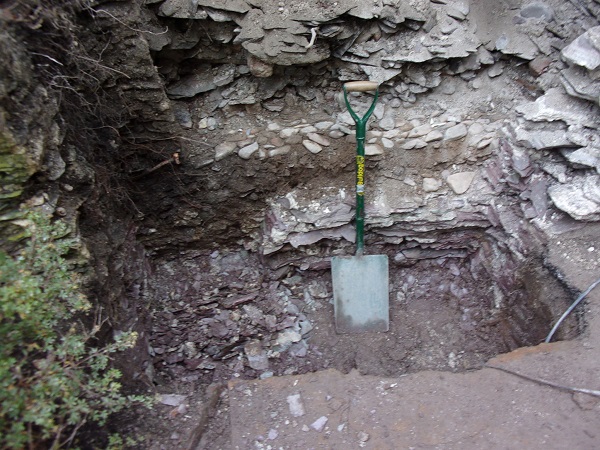
The main concern here was the fact that if the wall were to collapse, it would fall against the columns of the portico belonging to the adjoining property, which were at most less than four feet (1200mm) away, and this potentially could of caused untold damage. Once the wall was made safe, a structural engineer was appointed to carry out a detailed inspection along with specified recommendations for its reinstatement. This included a survey of the drains which ran alongside the foundations of the wall to determine if any sections of the drainage system had collapsed which may of contributed to the wall leaning over as much as it did. The drains proved to be in good working order and wasn’t the root cause of any problems. We were then instructed to dig a trial pit to expose the bottom of the wall.

The trial pit was dug to a depth of approximately ‘two feet six inches’ (750mm) before we hit the bottom of the wall. Two hundred years ago concrete would not of been used as a foundation as most walls were built out of a trench cut into the ground. The ground conditions in the trial pit revealed that the ground beneath the wall consisted not bedrock but firm clay which was certainly firm enough to support the wall, and more importantly it wasn’t wet. After the inspection, we got the report back, and then had the go ahead to carefully start taking down the wall.
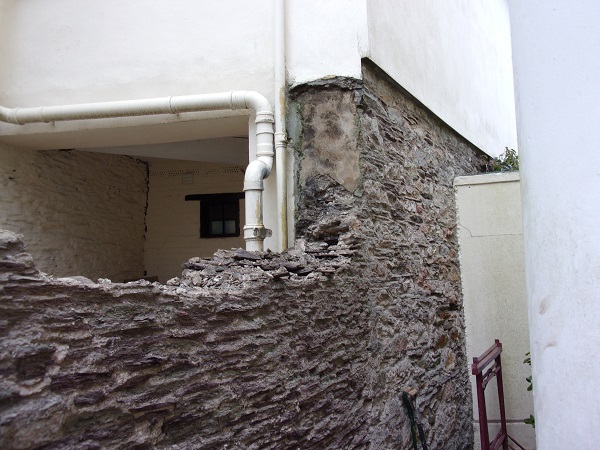
The other end of the wall was tied into the house. The stonework to the house was newer than that of the garden wall. Probably built sometime during the mid 1800’s, part of the original garden wall had been demolished and a new wall built in its place as part of an extension to the property and a marked difference in the stonework could be seen. Although there was a straight joint between the two, the wall at this point was still flush and still upright so hardly any movement had occurred. However, the wall was gradually leaning away from the house, and the further down the wall you went the worse it got. This was because the other end of the wall that was now propped up had been pulling the wall over along its length. Prior to taking down the wall we laid sheets of hardboard on the ground in the areas we were working. This was for protection as it would make life a great deal easier when it came to tidying up the site after we finished.
It was the section of wall nearest the house where we first began to carefully take down the wall by hand, as the other end was going nowhere now that it was firmly propped up.
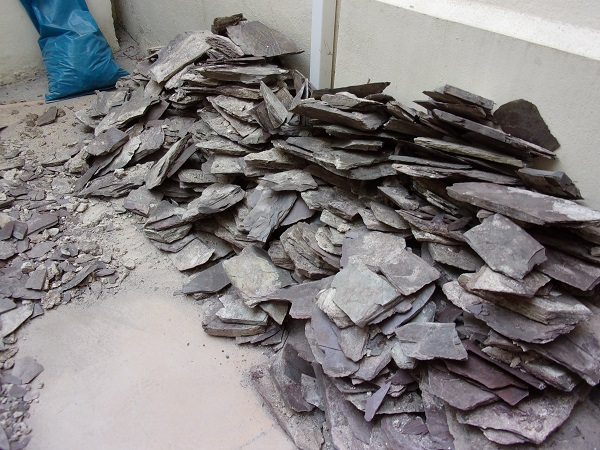
For now all the original stone was set aside for re-use.
Our next task was to then take down the section of wall previously propped up and excavate down for a new concrete foundation.
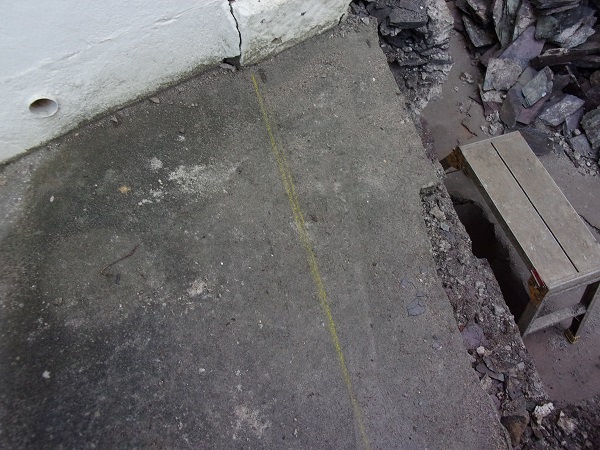
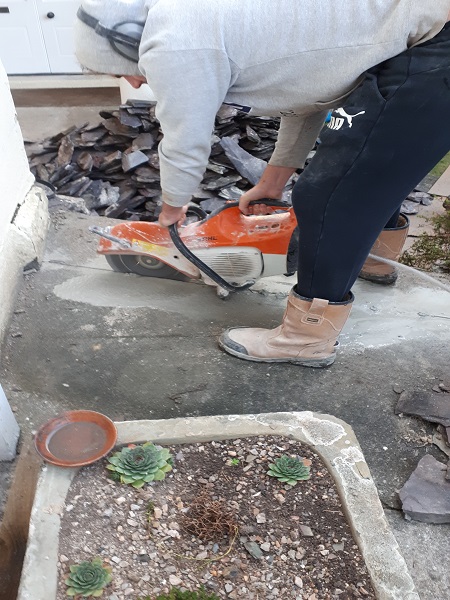
The ground level behind the wall was much higher and the concrete path above had to be cut back in line with the edge of the new foundation. This was marked out.
And then cut with a water fed diamond saw.
Whilst excavating down we uncovered the original cobbled path constructed from small granite pebbles. This 200 year old bit of paving was laid down in Foulston’s time and formed a landing at the bottom of a set of steps which were now buried under the concrete path.
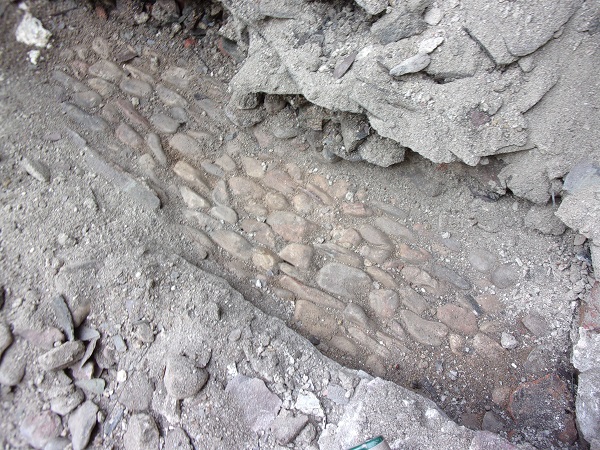
Our foundation had to go down to a much lower level than that of the old cobbles.
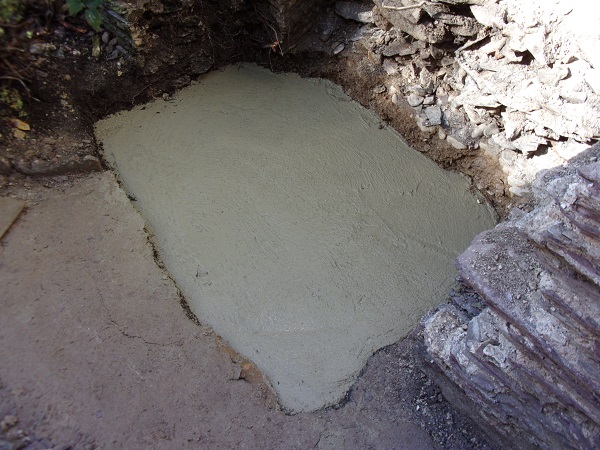
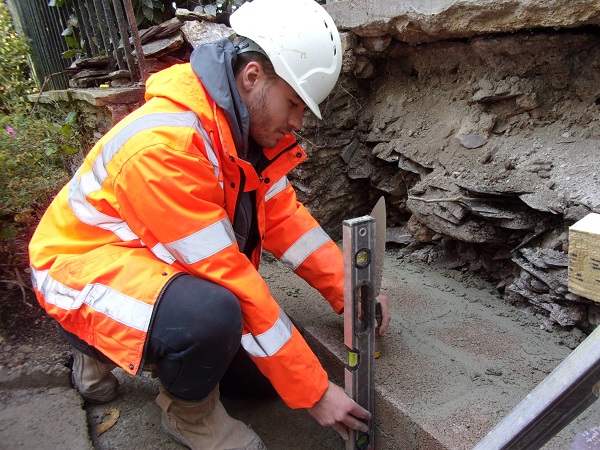
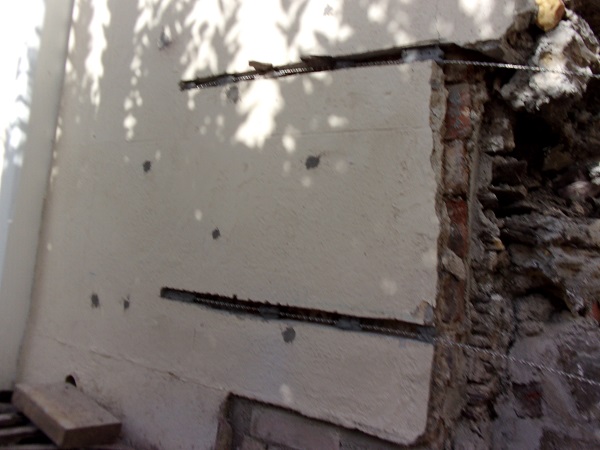
Once the hand dug trench had been excavated and prepared, it was inspected by the structural engineer before a new pad foundation was poured down using C30 grade concrete.

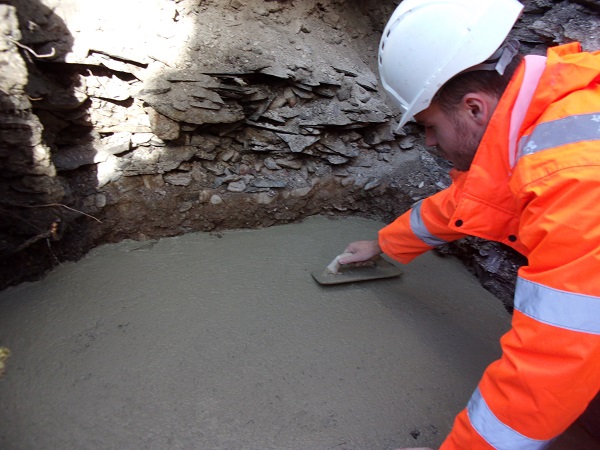
The concrete pad was ‘two feet six inches’ thick (750mm) and this would form a good sound base to build the end pillar section of the new wall.
When the concrete had set we built up some concrete blockwork to retain the path behind, building in some stainless steel ties as we went. None of the blockwork would be seen as it was going to be faced with natural stone.
A land drain was incorporated in the back of the blockwork should any build up of ground water needed to escape in case it caused a problem at any time in the future.
The new blockwork was tied into the original remaining stonework.
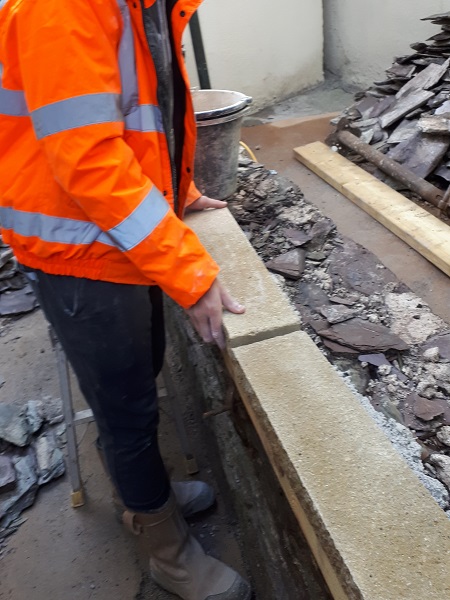
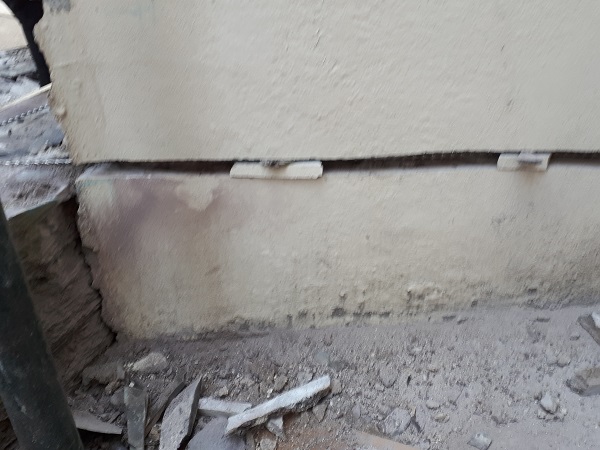
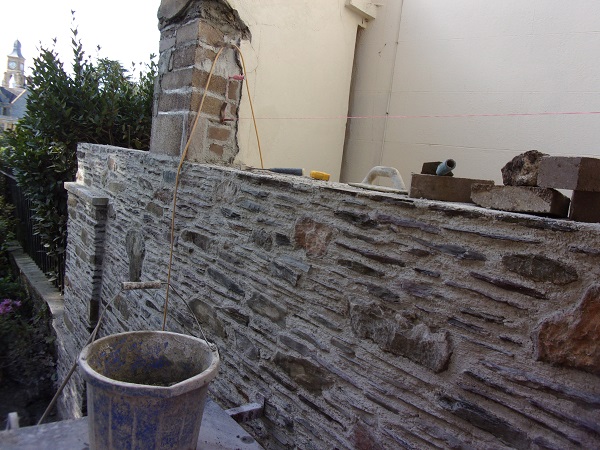
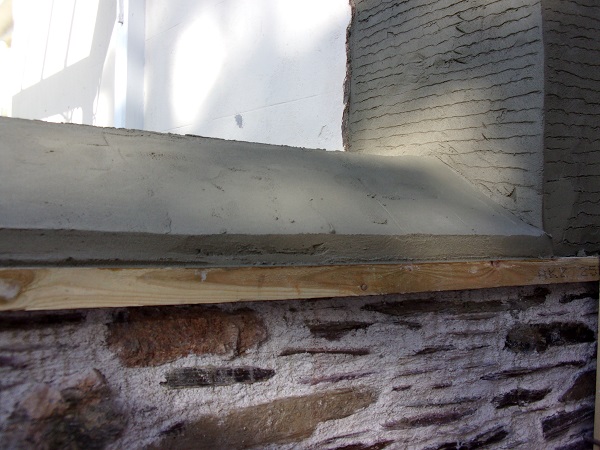
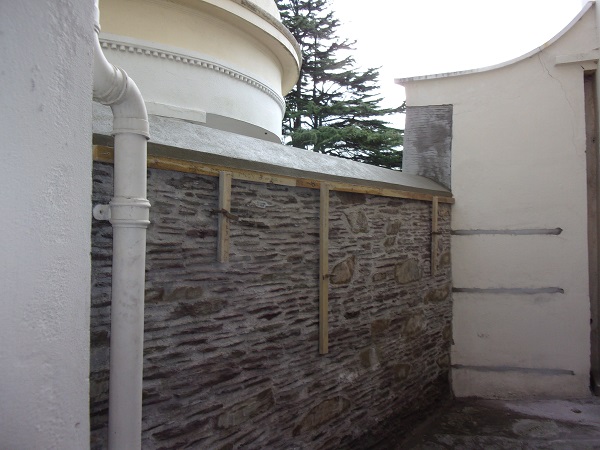
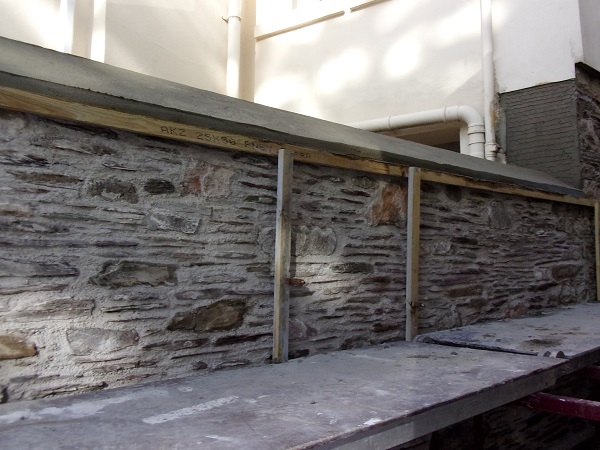
A height of approximately ‘two feet six inches’ (750mm) of the original wall from the new concrete pad back to the house was kept as this was deemed structurally safe. It didn’t need a new foundation and was it was also retaining the ground levels behind it. A timber was temporarily fixed to the top edge of the remaining section of wall.
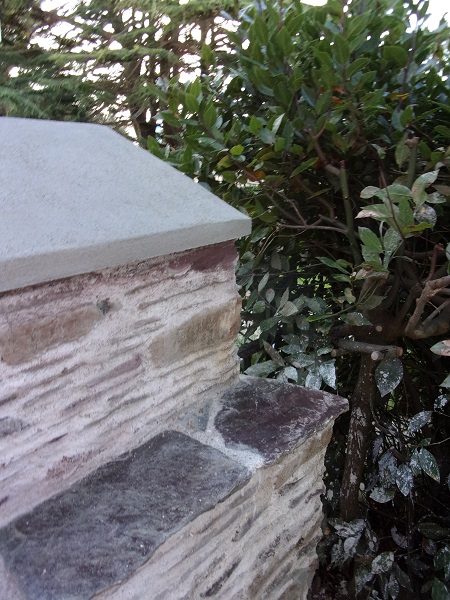
This was fixed to give a straight edge in order to lay a reconstituted sandstone plinth which projected out from the face of the existing wall by one inch (25mm). This was done to demarcate between the original stonework and the new which was going to be built above it. It also lined up and matched in with the original garden wall coping further down the wall which had cast iron railings set into it.
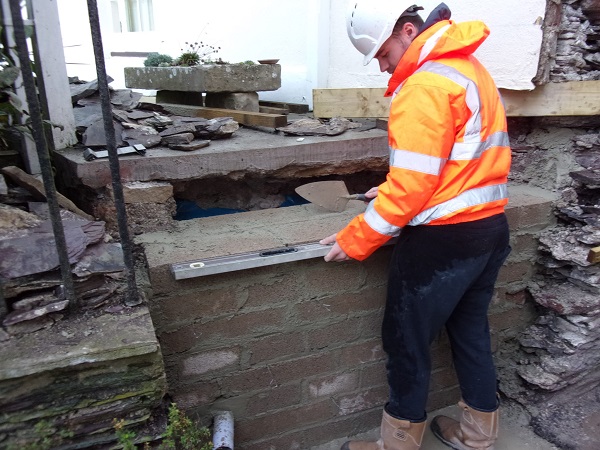
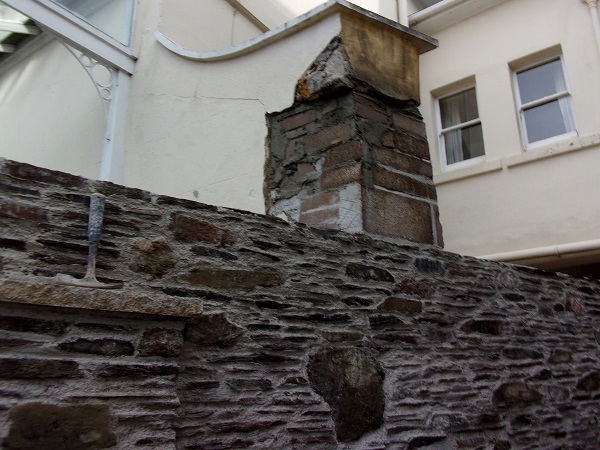
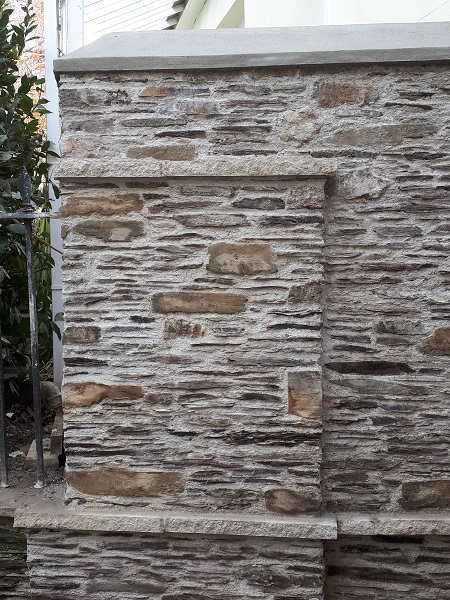
After the plinth was set in it was time to start building up the wall using the original stone. We first concentrated on the end pillar, the area where we had built up the concrete blocks to retain the path. The profile of the pillar had to go back just as the original.
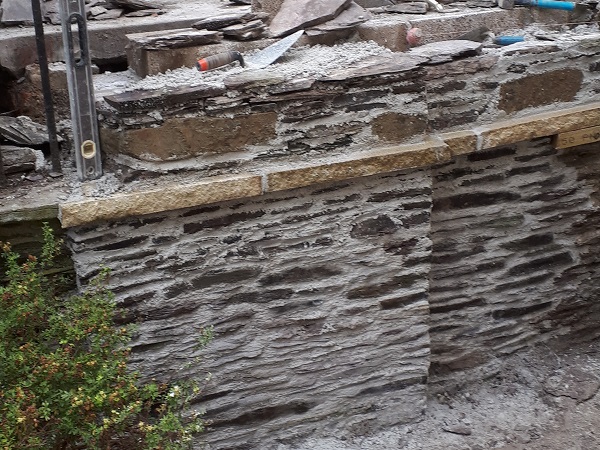
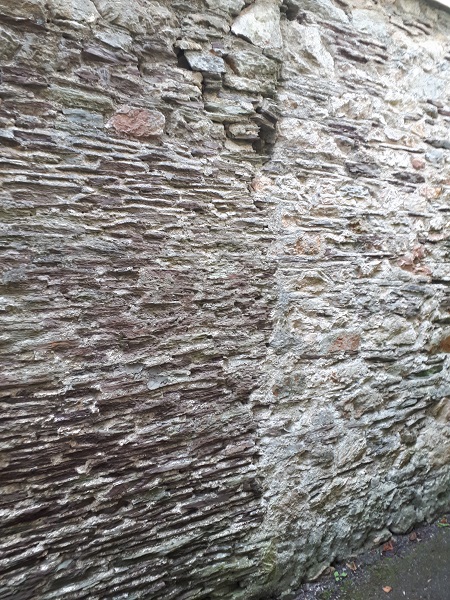
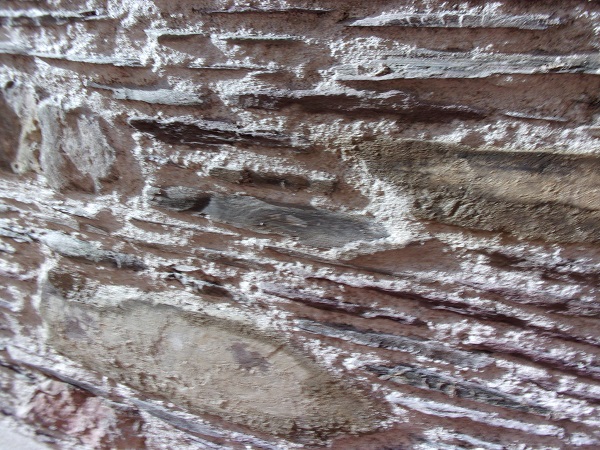
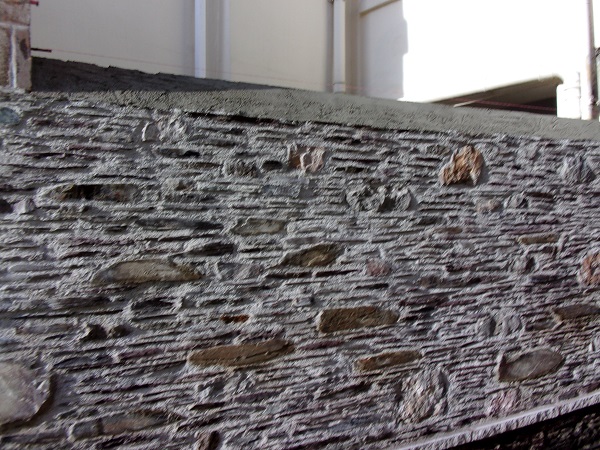
The original stone comprised of a ‘Mudstone’ shale. Purple/brown in colour, it’s soft and fragile in its nature with most of it being very small thin pieces. Mudstone is a fine grained sedimentary rock whose original constituents consisted of clay or mud particles. Overtime these tiny particles settled on the bottom of oceans, lakes or lagoons and even in quiet stretches of rivers. As the mud is buried and compacted by overlying sediment, the water is squeezed out and it turns into mudstone. The stone we were using would of originally been dug out of the ground somewhere nearby. Being a Grade II listed wall that we were repairing, we used a natural NHL 3.5 lime mortar in the new construction. The joints were slightly raked back and finished off with a stiff churn brush after the initial set. The name ‘Albemarle’ is derived from the Latinised form of the French county of ‘Aumale’ in Normandy (Latin: Alba Marla meaning ‘White Marl’, marl being a type of fertile soil). Marl or marlstone is a calcium carbonate or lime-rich mud or mudstone which contains variable amounts of clays and silt. The villas here though are so named after the Earl of Albermarle.
There was an existing wall adjoining the house that had to be tied into the new section we were building up and for now it was safely propped up in place until our new stonework could be tied into it. It consisted of a random rubble stone wall that had a skin of brick built up on one side and both the front and the back of this wall had been rendered over in sand and cement with a stucco finish and then painted. Although this wall was firmly tied into the house, the brick facing that had been built up sometime in the past showed signs of de-laminating away from the stonewall. It had never been tied back into the stonewall.
The structural engineer wanted this stabilized so holes were drilled at various locations and ‘Heli-Ties’ were resin fixed into place. The holes were drilled through the brick skin to a depth of just over twelve inches (300mm) to accommodate a 300mm x 6mm stainless steel Heli-bar. This ensured that the ties being used went through the full thickness of the brick and a good depth into the stone wall behind.
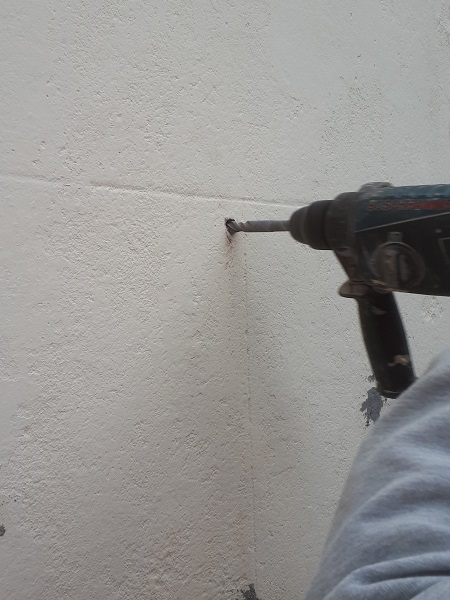
Wire brushes and a blow gun were used to flush out all the dust in the drilled holes.
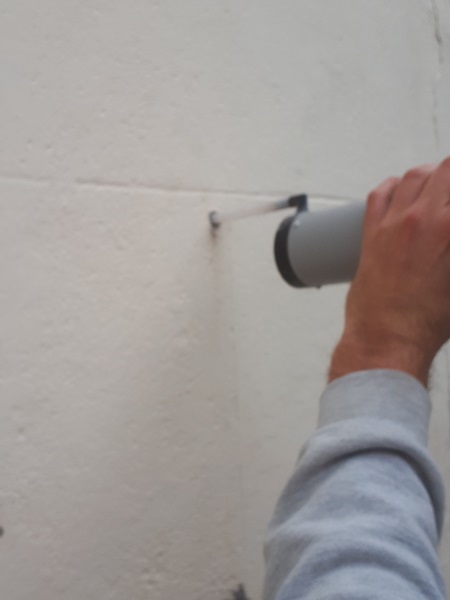
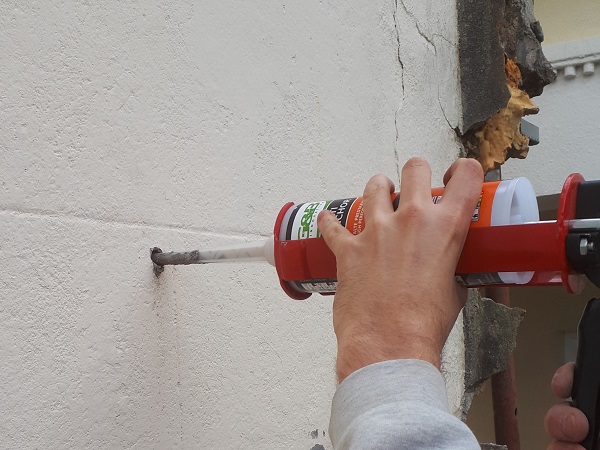
The ties were then fixed in situ with epoxy resin and the holes smoothed over ready to paint.
Originally there was an entrance here leading down the side of the house, the cobbles underneath at the bottom of the flight of steps proved that, and this rendered section of wall was built to close it off. It was probably built during the same time as the extension in the mid 1800’s forming a small enclosed courtyard area. It was also built against the already leaning garden wall section that we had taken down, which didn’t help matters. Once the brick skin was firmly tied back to the stone wall, we cut out horizontal chases to both sides of the rendered wall.
Stainless steel Heli-bar straps were fixed in with epoxy resin. The straps were inserted into a drilled hole which went right through the wall and wrapped around both sides following the chases along the front and back in one continuous length. The ends of these straps would be built into the new stonework we were building up. This would utilise the weight of the rendered wall to give added stability to the new section of wall we were tying into. Three ties in total were used over the height of the wall.
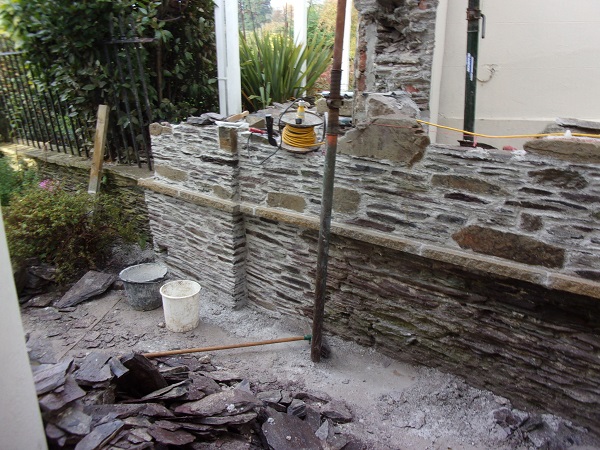
Now that the ties were in place we could concentrate on getting the wall up to coping level.
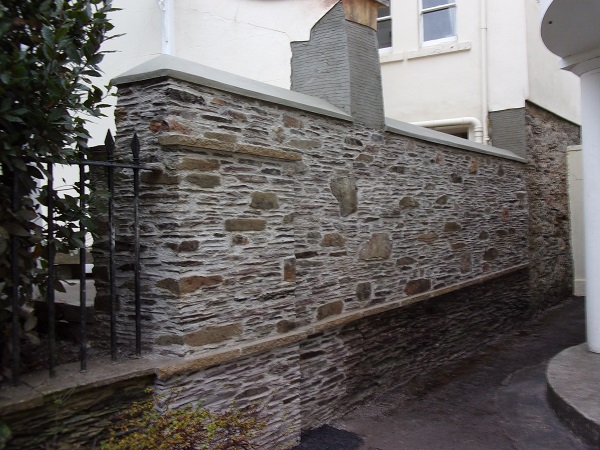
We knew that the wall we had taken down had, at some point in time, been raised up by a couple of feet (600mm) so we decided to place the coping at a lower level, the original height that it was when first built 200 years ago.
When the wall was up to height our next task was to build up the end of the rendered wall to tie in over our new stonework, which also meant we could remove the prop that was keeping it up. This was built up using concrete blocks in preparation for rendering.
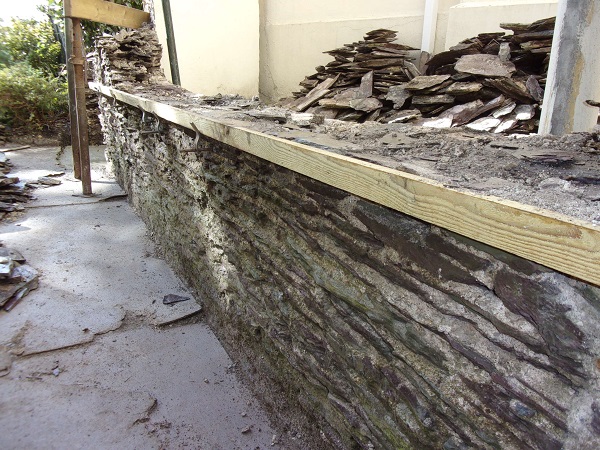
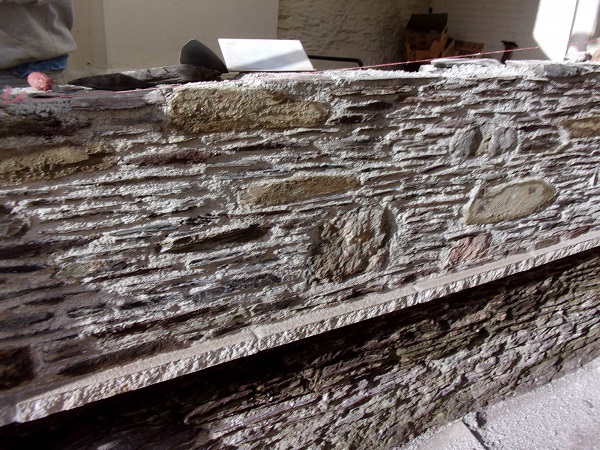
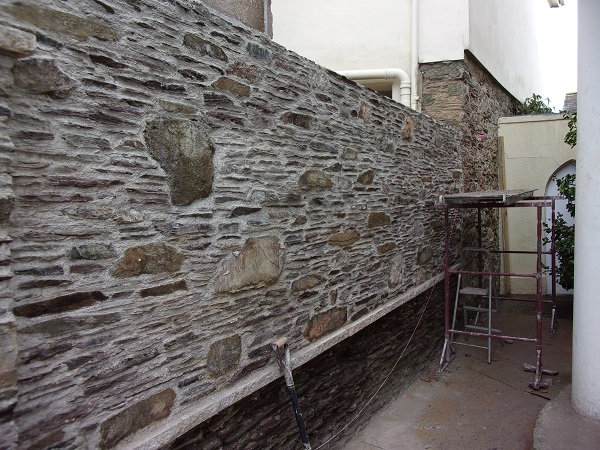
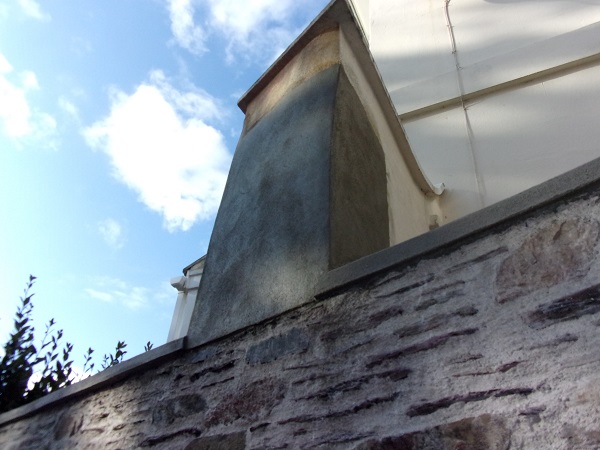
We were now ready to form the coping. The coping on the wall we had taken down had been a mixture of all different styles, repairs and materials. It was agreed that the new coping would be formed in sand and cement as this would be more durable. It would have a simple apex style profile as this would be weatherproof and in keeping with the surrounding Georgian architecture.
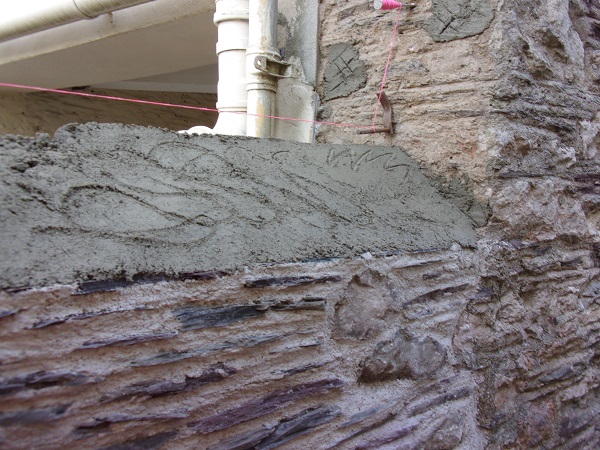
The first stage of the new coping was shaped using a semi-dry mix of sand and cement which we kept a couple of inches below a string line we had set up which would eventually be the finished point of the apex profile.
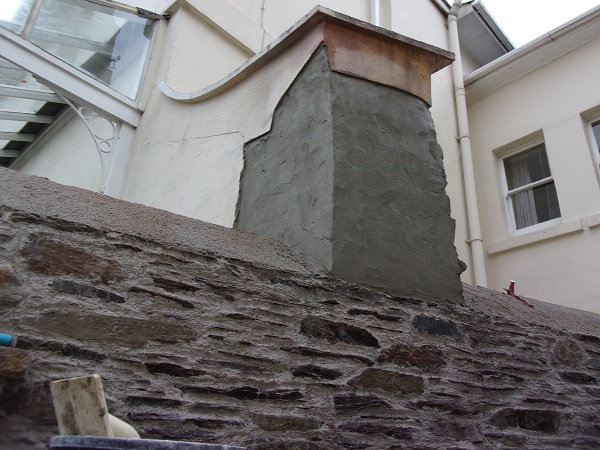
A quick scratch coat was also applied to the bare blockwork on the rendered wall.
When the first initial shaping of the coping had set, we fixed in a temporary batten which would form the bottom edge of the coping and this would also create an overhang when the batten was removed after the coping was finished. The final coat of sand and cement was applied to finish off the coping with a small upstand along the edge of the batten.
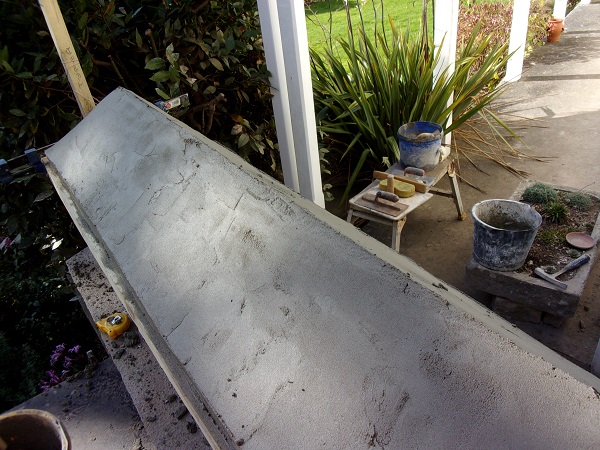
After shaping up with a float, it was finished off with a sponge to give a stucco finish and left to set before the battens were taken down.
Finally, now that the coping was complete, the lasts sections of rendering were finished off to tidy up the rendered walls.

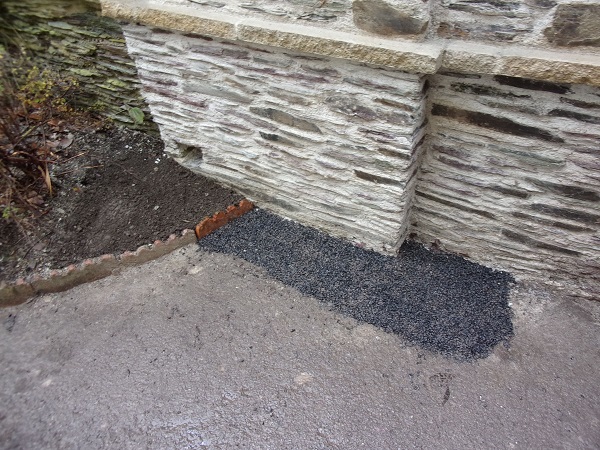
The site was given a good clean up and the tarmac path was made good around the end pillar section where we had to dig out for the foundation.
And that was us more or less done.
Many prominent people have made Albermarle Villas their home over the years, but its most famous resident was probably Guy Burgess. Burgess was born on the 16th of April, 1911 at No 2 Albemarle Villas, a few doors up from where we were working. He came from a Naval background being the elder son of Commander Malcolm Kingsford de Moncy Burgess R.N. and his wife, Evelyn Mary. Signing up to Cambridge in 1930, he joined the Communist Party and whilst there he quickly developed a reputation as a bombastic character, openly gay and a heavy drinker. In 1934, Burgess was introduced to Arnold Deutsch, a Soviet spy. He travelled to Moscow and that same year began suggesting other men from Cambridge who could also be recruited. Together with Kim Philby, Anthony Blunt, Donald Maclean, and John Cairncross they would go down in history as the infamous spy ring known as the Cambridge Five. Incredibly, Burgess was able to find work in MI6, the BBC, the Foreign Office, and the Washington Embassy without arousing any suspicion.