
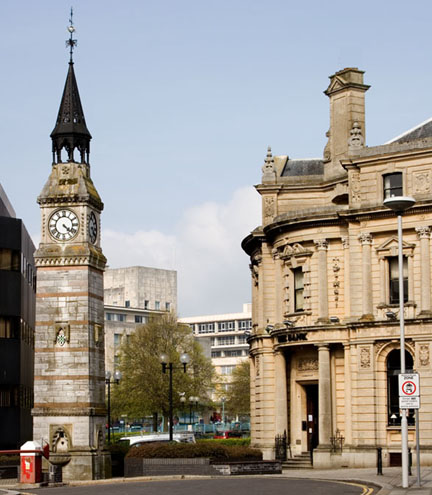
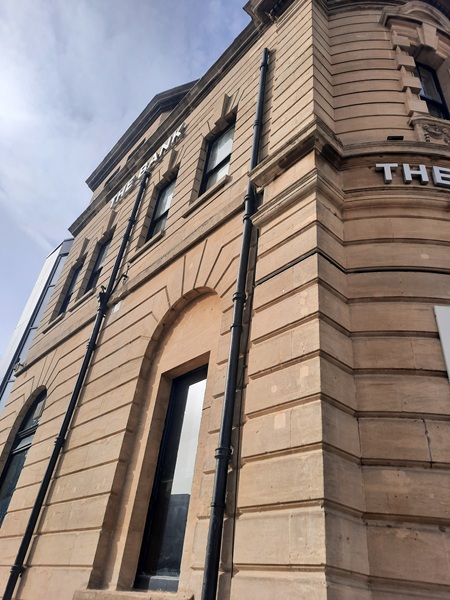
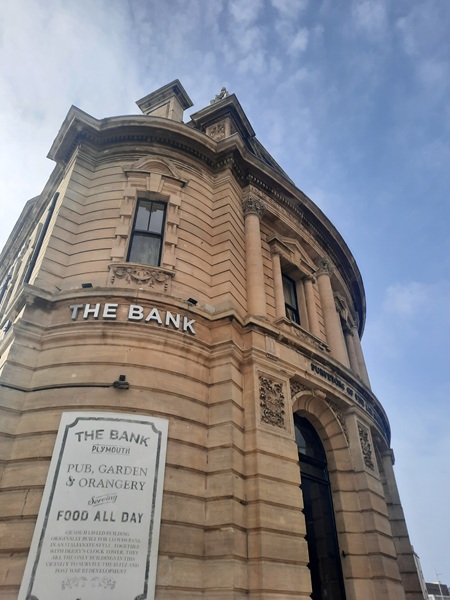
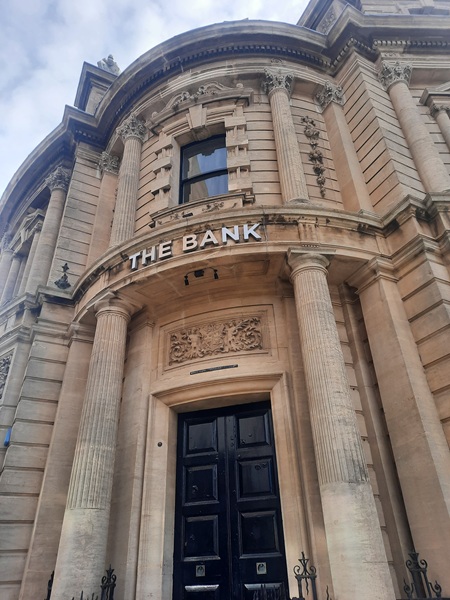
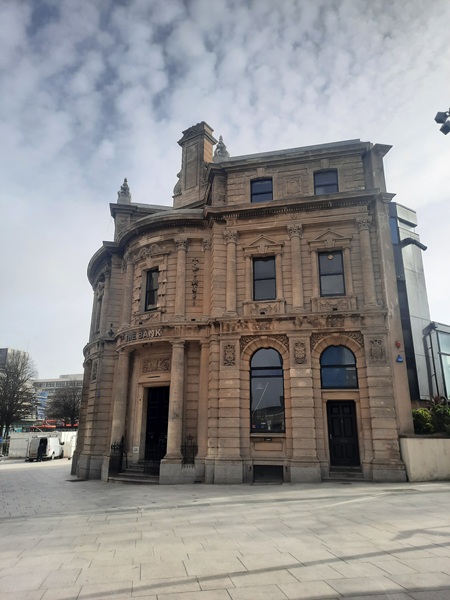
The Bank ~ Plymouth, Devon.
Client : Miller & Carter.

The Wilts & Dorset Banking Company Ltd was founded in 1835 and did not open a branch in Plymouth until 1885. In 1888 they bought Harvey’s Hotel and the site was developed into new bank chambers. The Wilts & Dorset Bank was acquired by Lloyds Bank in 1914 and served as a bank for them up until the 1950’s.
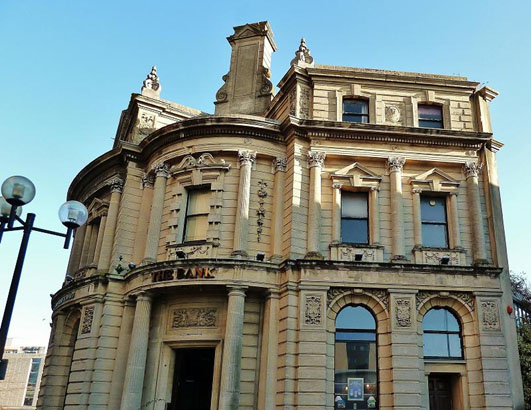
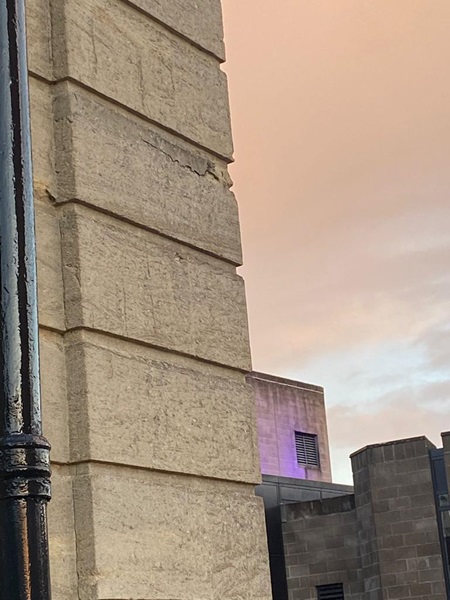
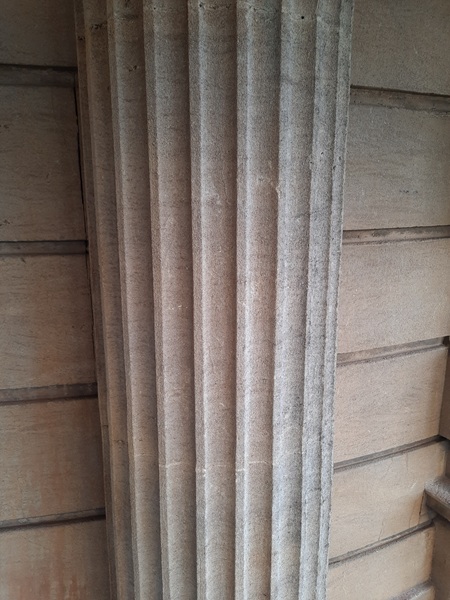
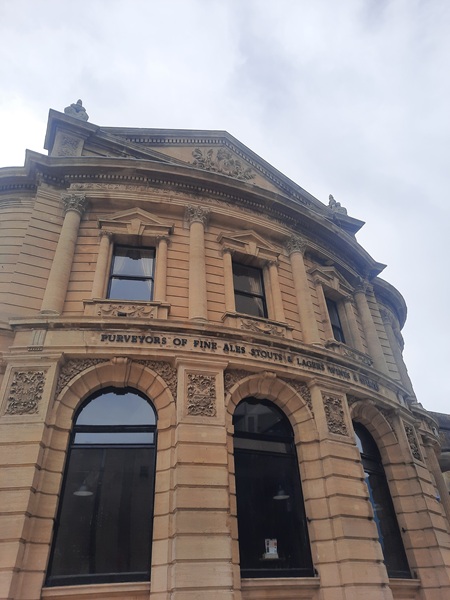
In 1888 the architect who had the task of designing the new chambers for the Wilts & Dorset bank was George Michael Silley of The Strand in London and on completion received many compliments. As principal architect, Silley had built or altered numerous buildings for the Wilts & Dorset bank. The Italianate style building was constructed on a base of granite with the frontage in richly ornamented Bath stone with Portland stone capitals to the fluted columns around the building. The contractor was George Shellabear of Plymouth.
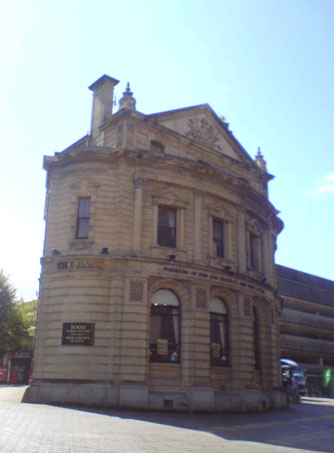
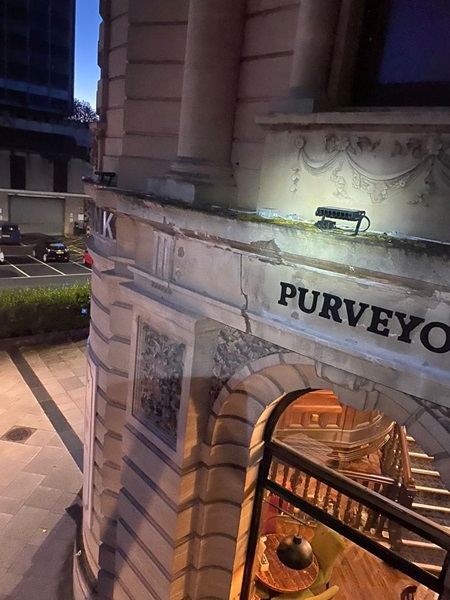
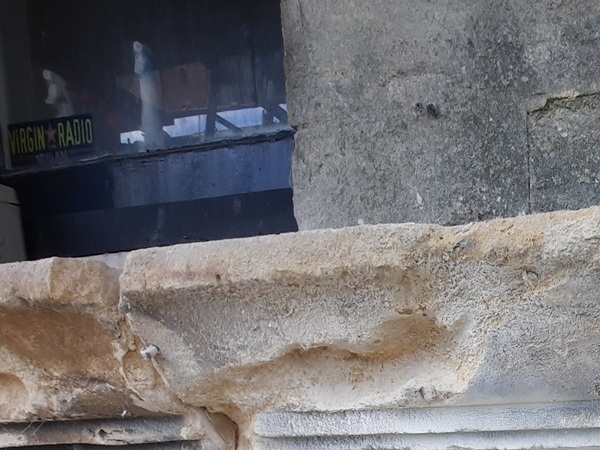
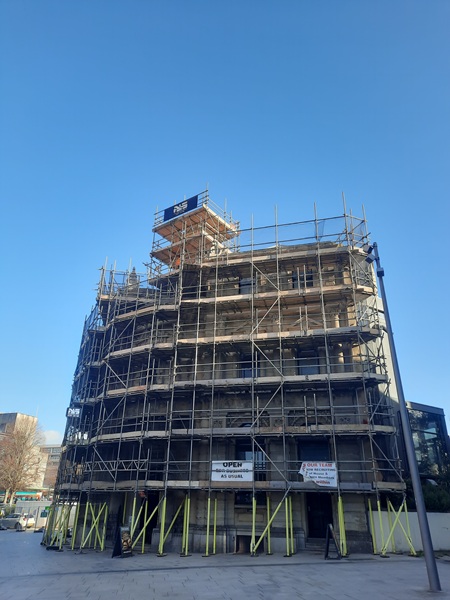
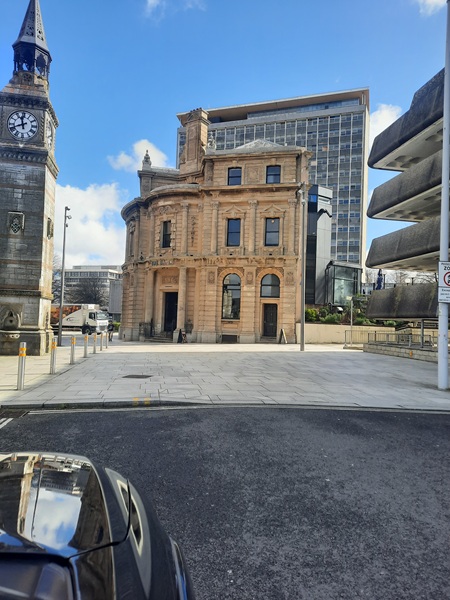
In 1982 the Halls, Oxford & West Brewery acquired this Grade II listed building situated at the bottom of Royal Parade opposite Derry’s clock, and converted into the pub that we see today.
And it was during this refurbishment that we were contracted to carry out all the stone cleaning to the external elevations.
But that was then.
Jump forward to the winter of 2022, the pub was now owned by Miller & Carter, one of the UK’s biggest pub chains. They were concerned about the structural integrity of the stonework on the elevations and had a structural survey carried out to assess the situation. That initial survey had been carried out by aerial drone.
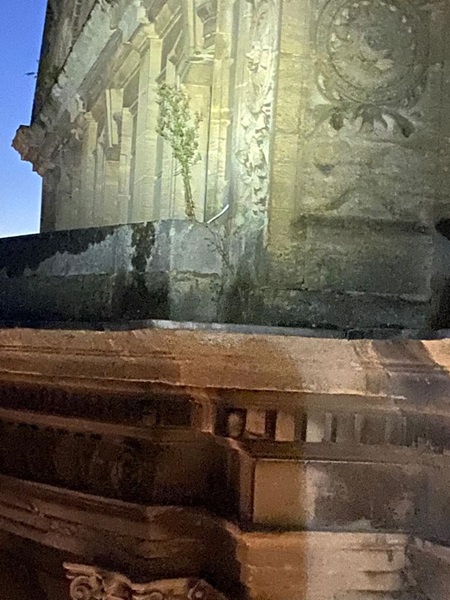
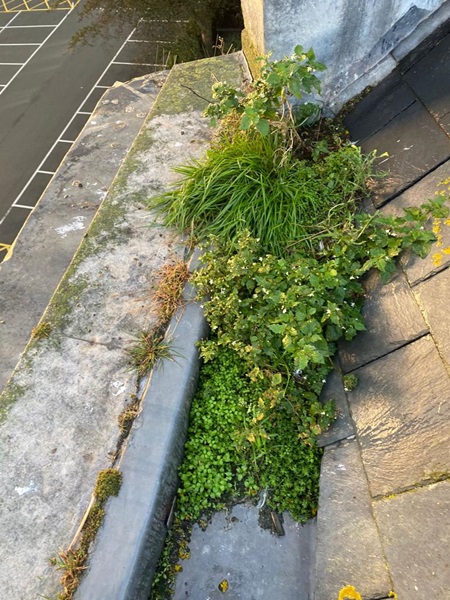
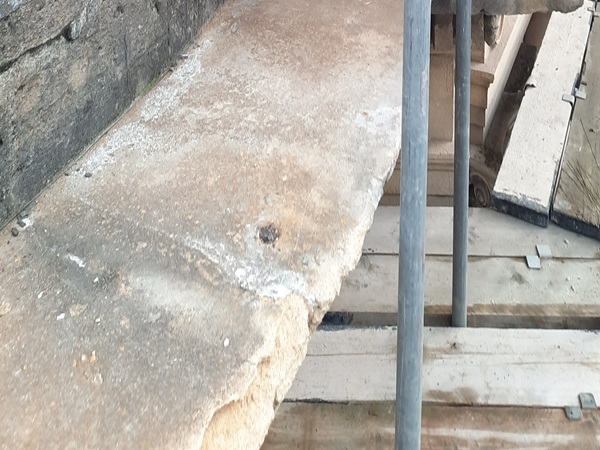
The drone survey highlighted several issues and these were issues you would normally expect to see on a building of this age that hadn’t had any maintenance carried out over many decades. These consisted of vegetation growth, spalled stonework, hairline cracks within the masonry, displaced stonework and loose or missing jointing. Once the initial survey report was written up, a scaffold was erected to further investigate those issues.

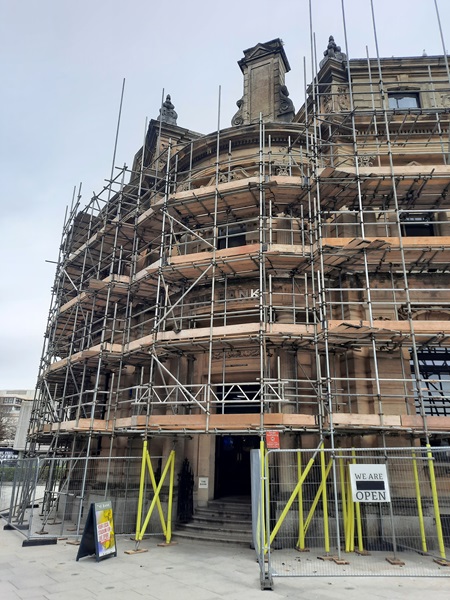
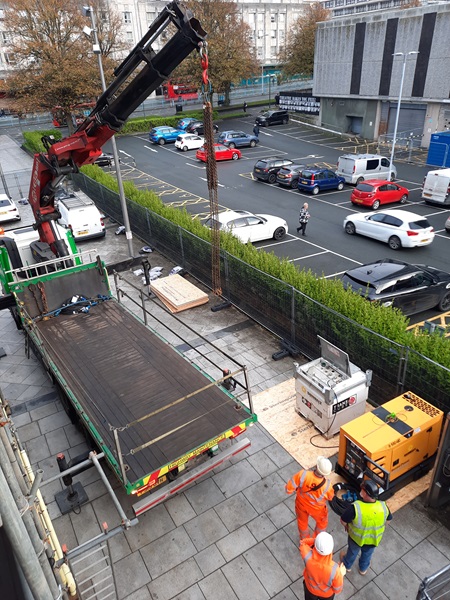
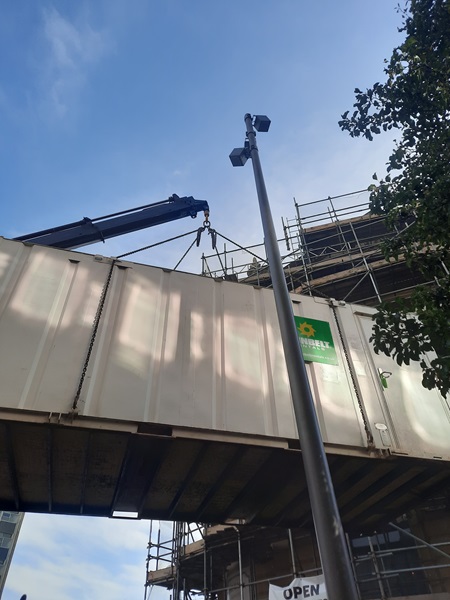
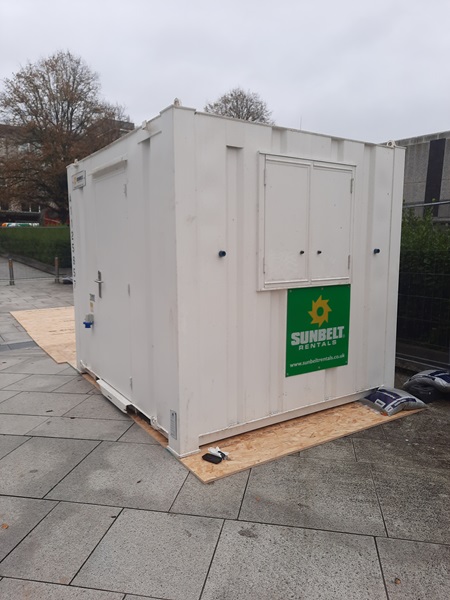
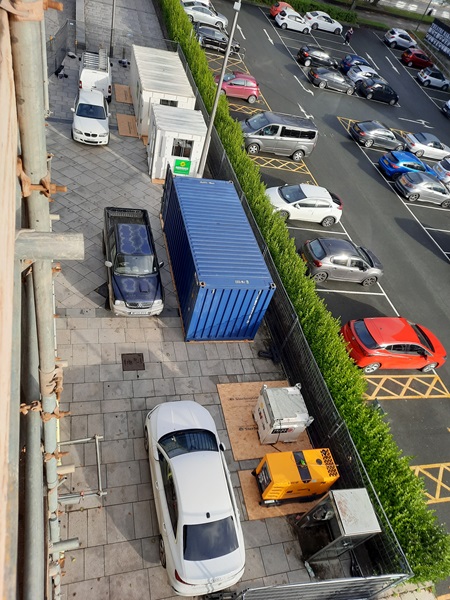
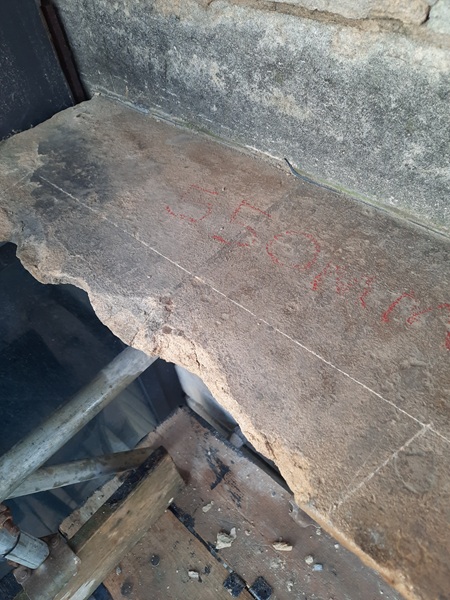
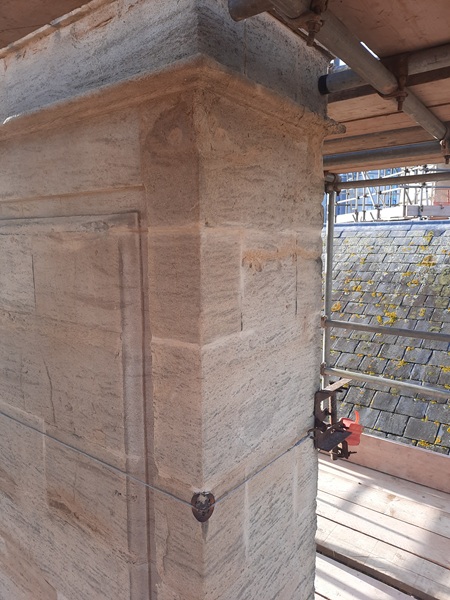
And it was at this point that we were contacted to carry out further inspections to determine the extent of any repairs required to those elevations. It turned out that we were going to be very busy as there were hundreds of items within those investigations that had to be addressed. Once those items had been determined, a listed planning application had to be applied for, outlining specifications and materials used and any repairs had to be approved by the local council as this building is Grade II listed. Once the approval was granted, we were then given the go ahead to rectify them. Our first day on site involved giving the main contractor, County Contractors based in Weston-super Mare, a hand with setting up the site. These requirements involved setting up site security fencing, positioning the site office, welfare facilities, storage containers and generators to supply power and everything else needed to create a safe working environment.
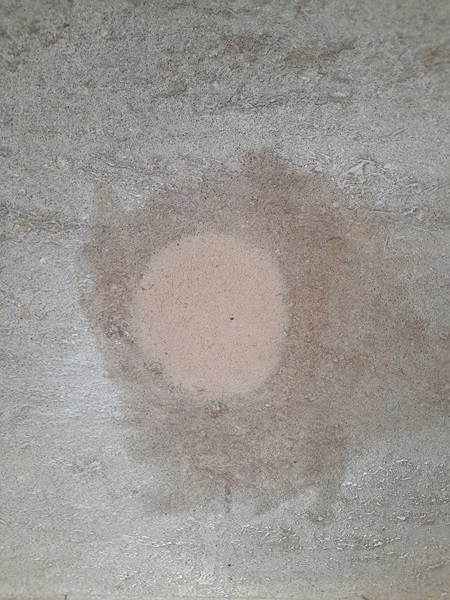
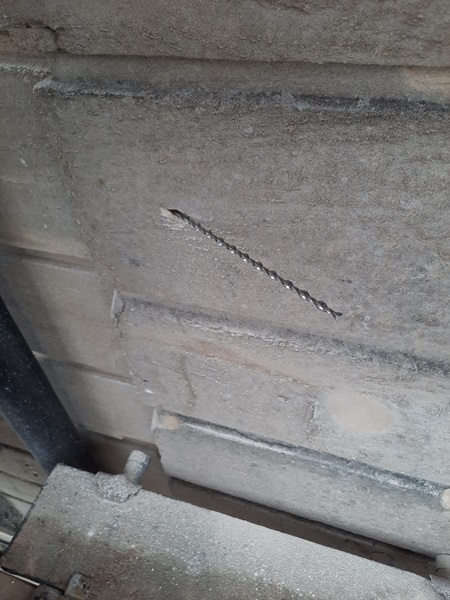
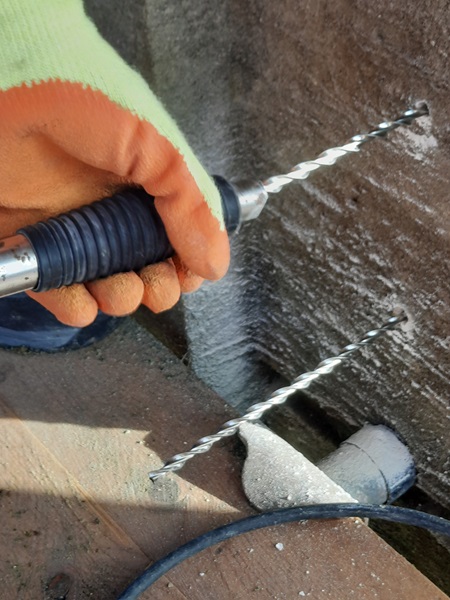
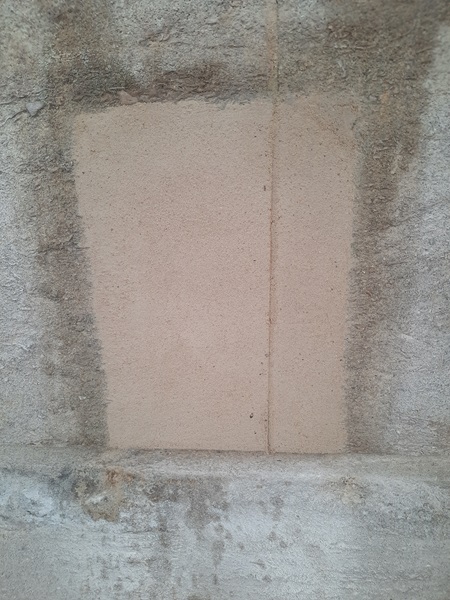
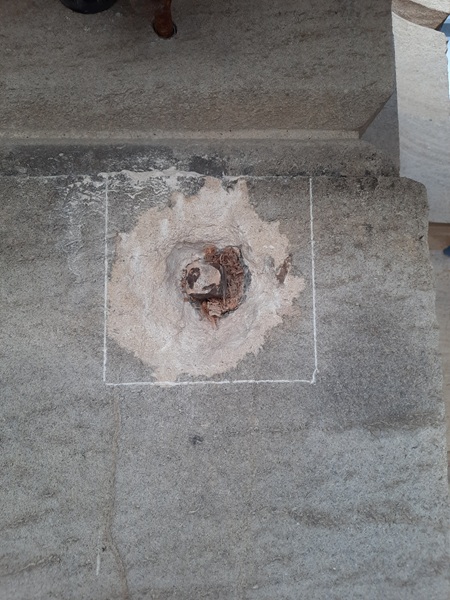
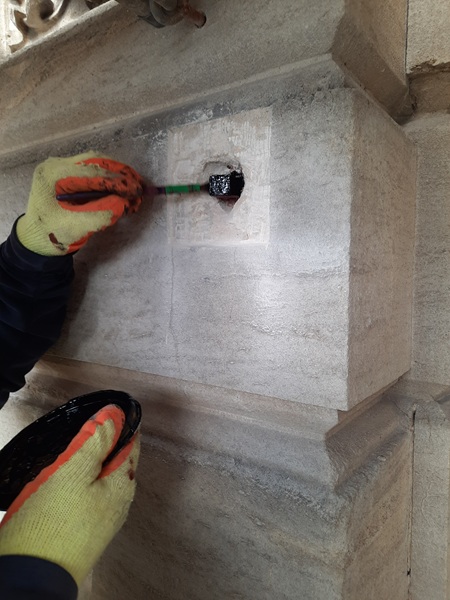
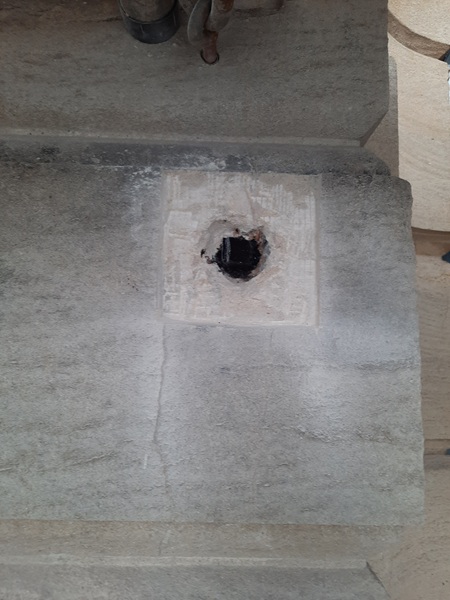
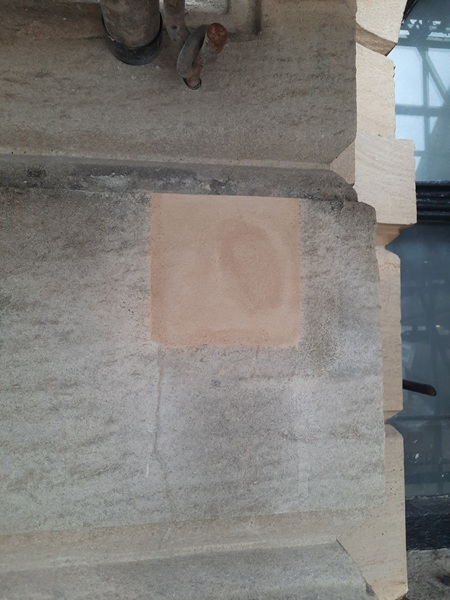
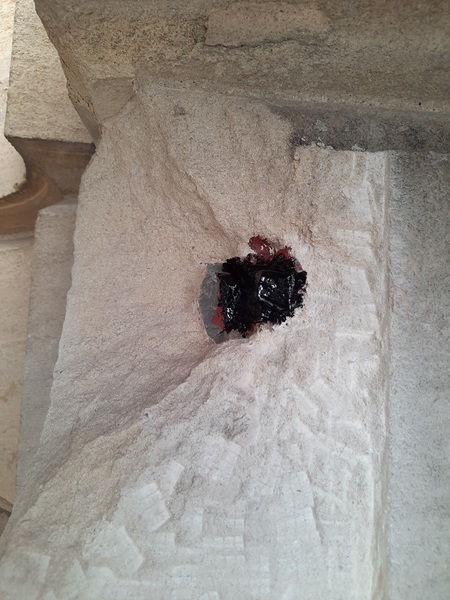
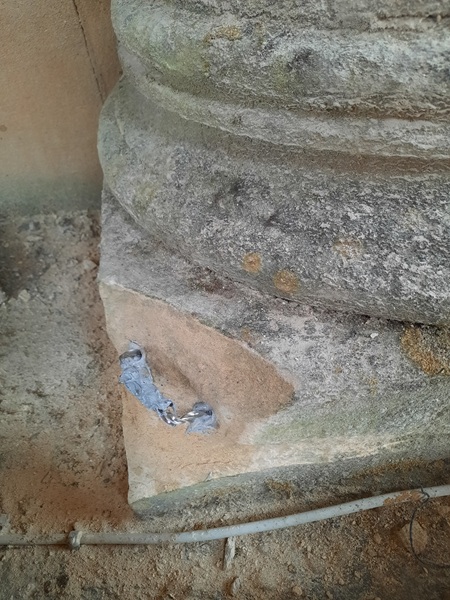
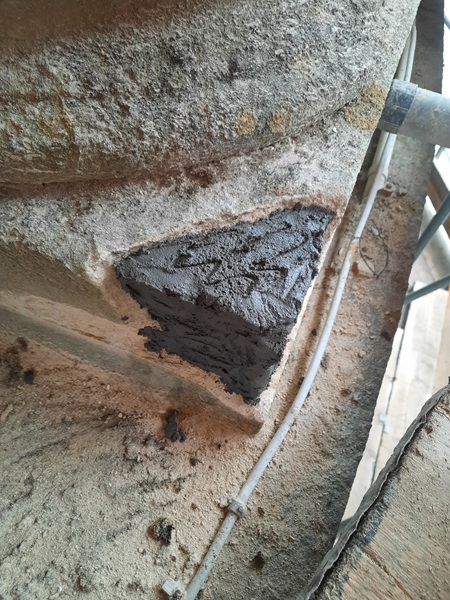
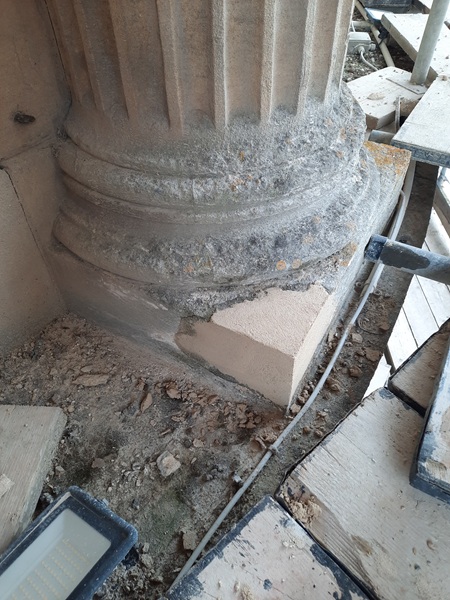
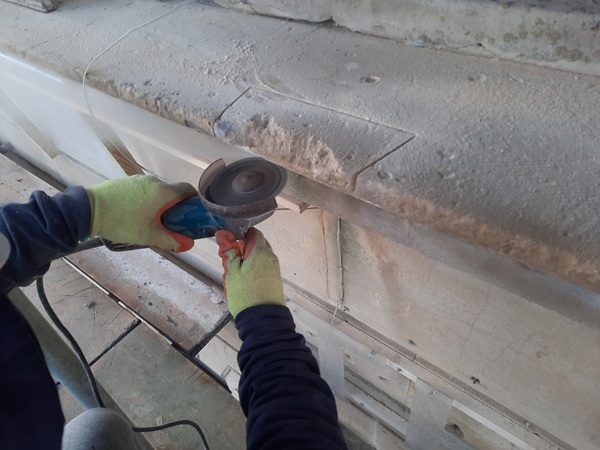
There were several different types of repairs required and each one was designated a specific repair specification. One of the repairs needed was to make good the areas where stress testing had been carried out to the stonework on the façades. Stress testing involves drilling a 12mm hole into the stonework to a depth of about 100mm and fixing a 10mm diameter stainless steel dowel with epoxy resin anchor which protrudes out from the surface by about 50mm. Once the epoxy resin has set, a rig is attached to the dowel to test its breaking load. This testing had been carried out all over the building to test the structural properties of the Bath stone. First we had to core drill around each protruding dowel and the stonework within the core drilling cut back about 25mm.
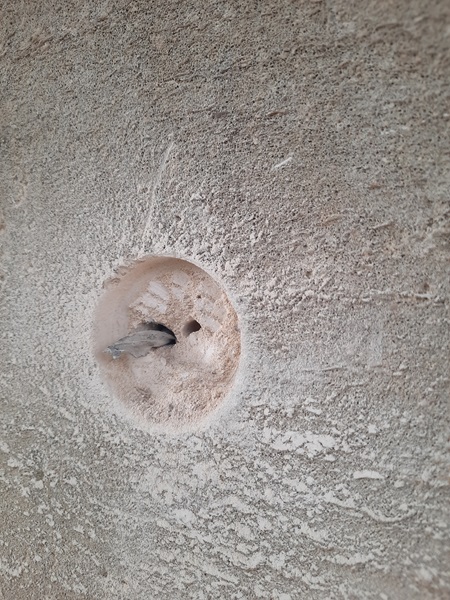
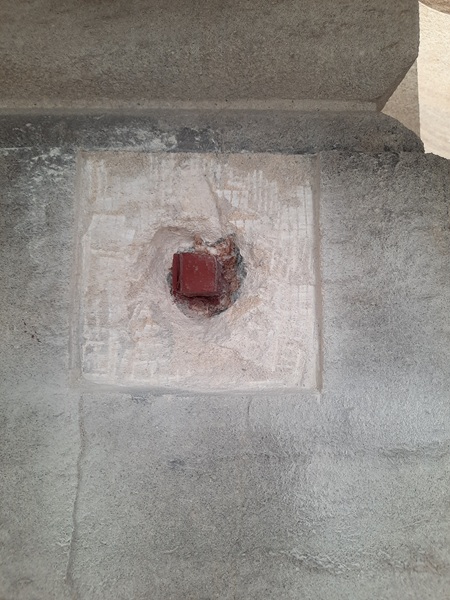
Once that was prepared we were able to cut the dowel flush to the back of the repair hole without damaging the face of the stonework.
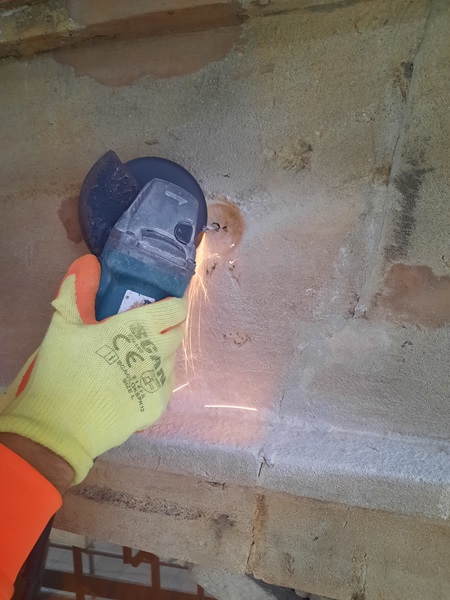
And when the dowel was cut back flush, the hole was repaired using a lime based Bath stone repair mortar. We had about sixty or more of this type of repair to carry out.
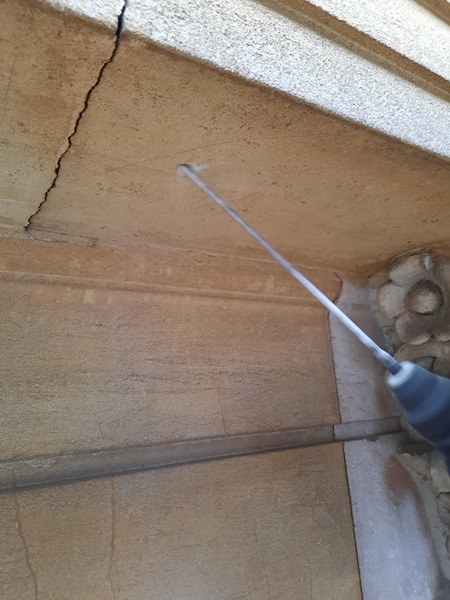
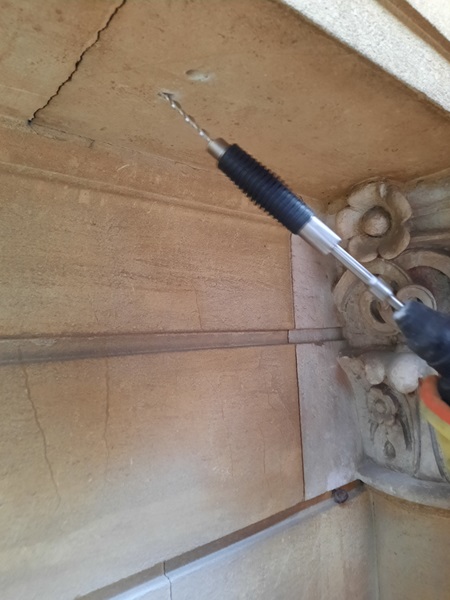
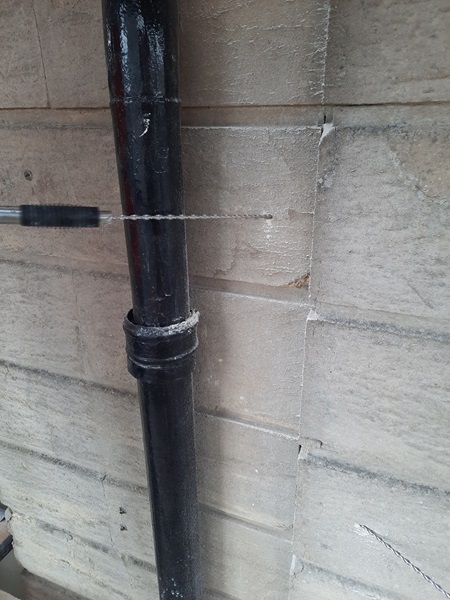
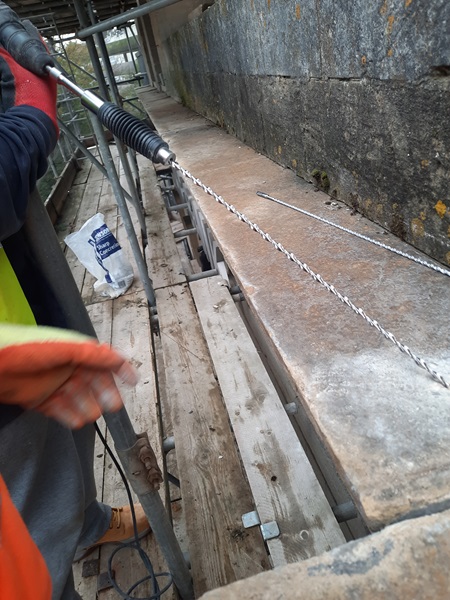
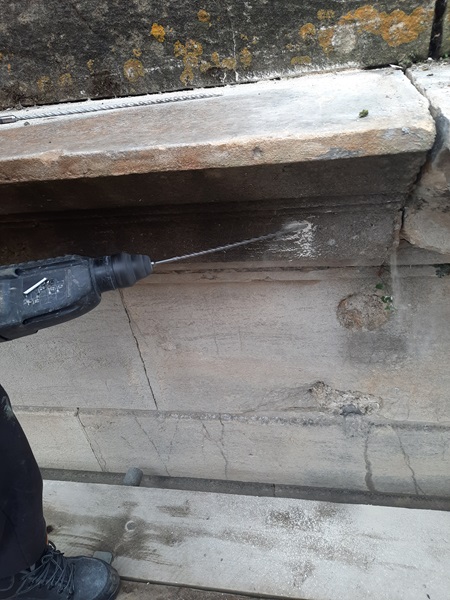
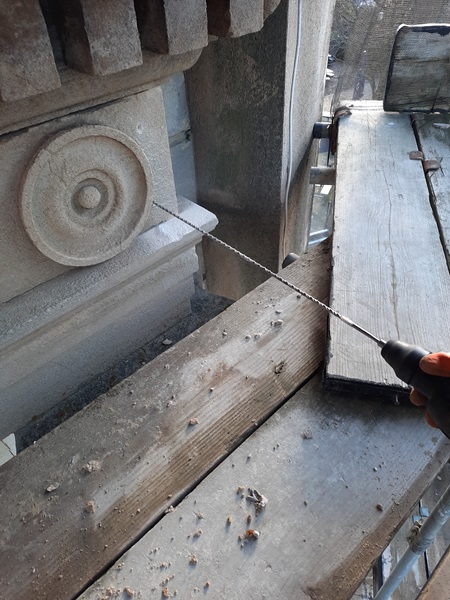
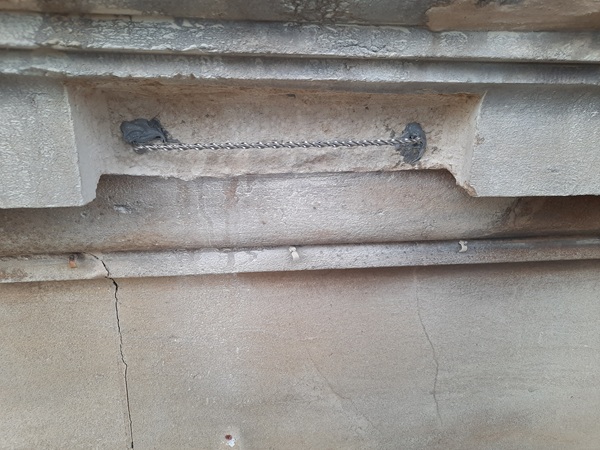
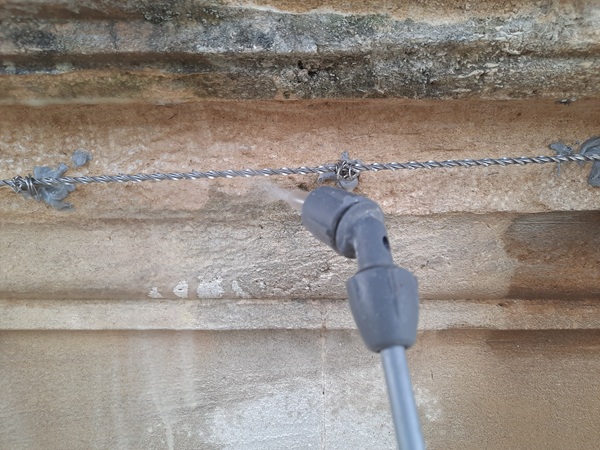
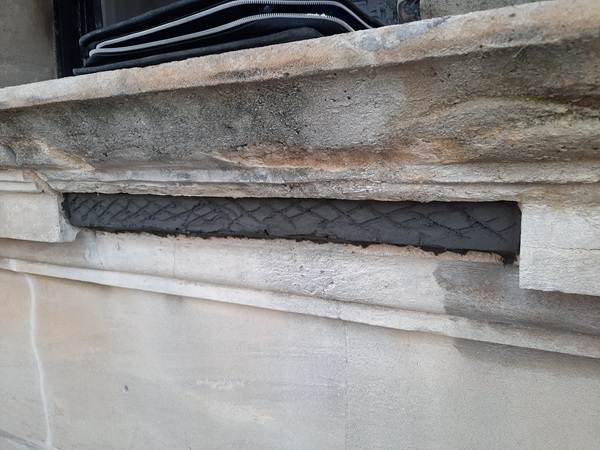
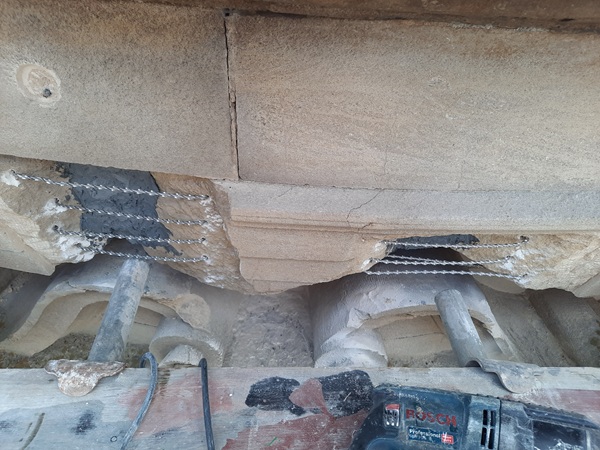
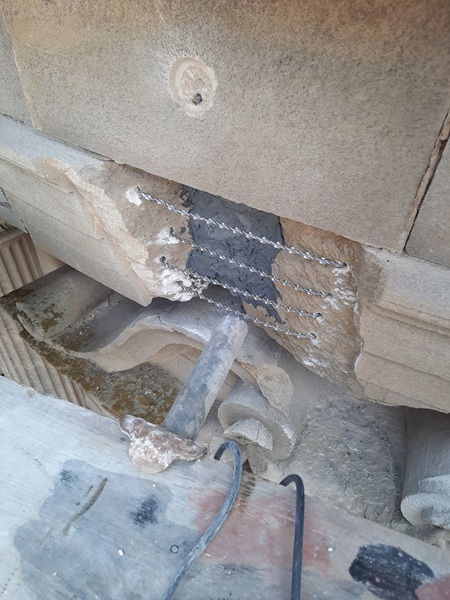
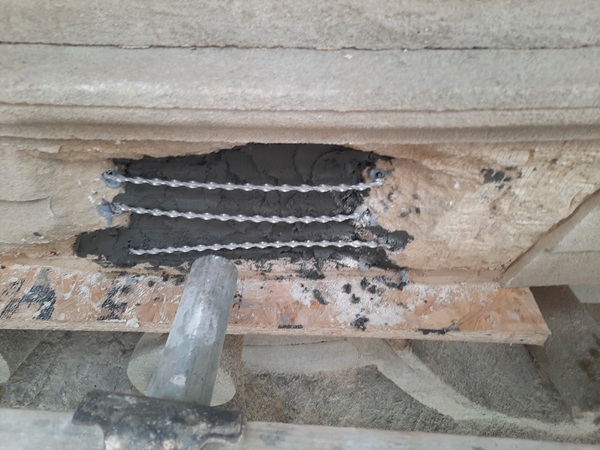
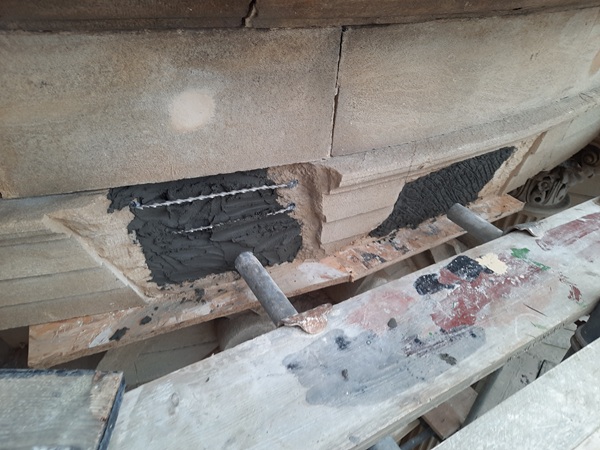
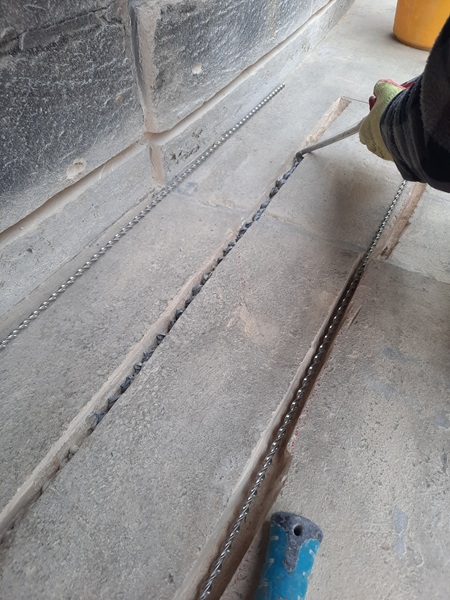
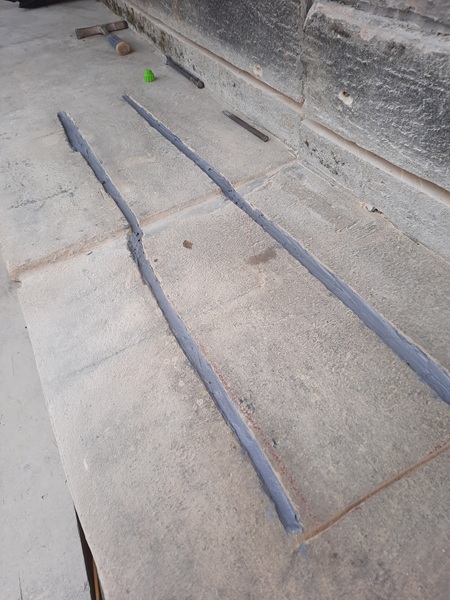
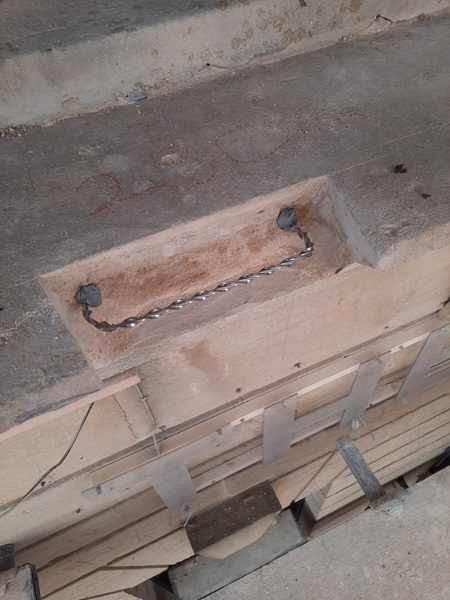
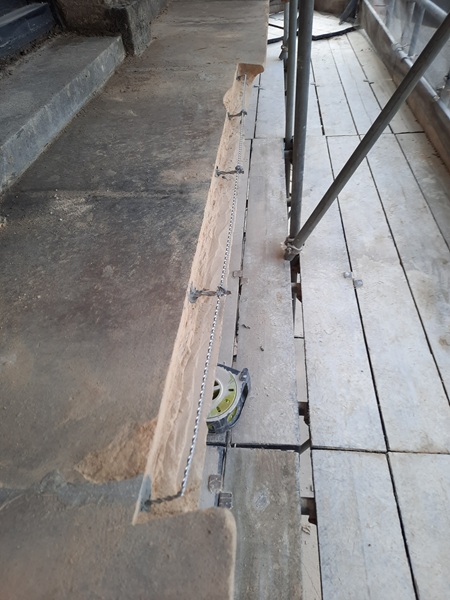
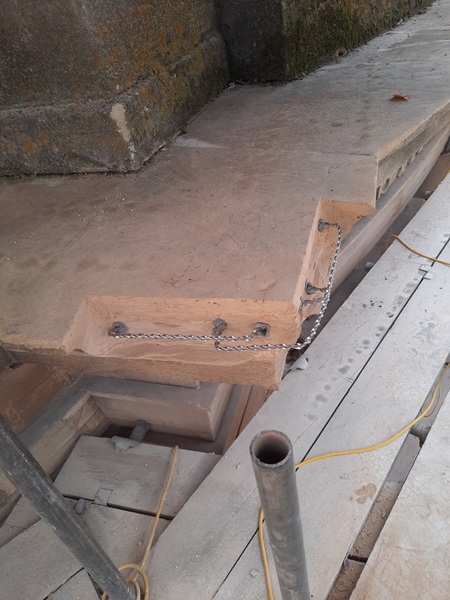
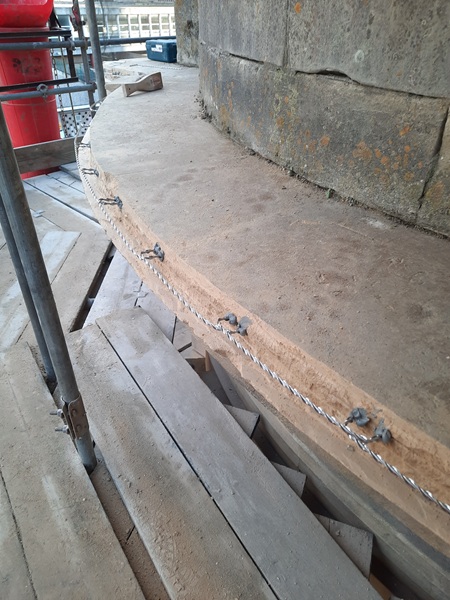
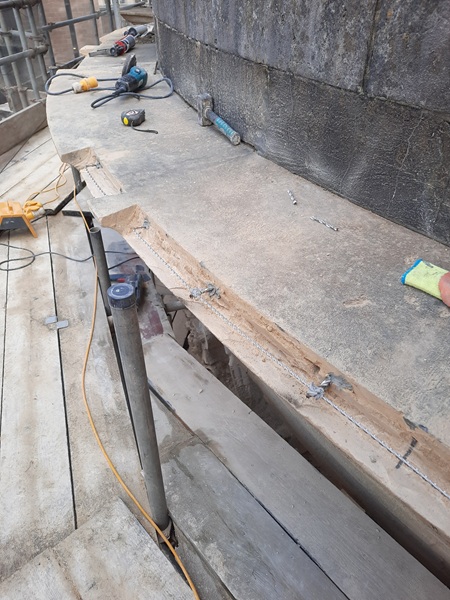
Another type of repair was specified for areas where stonework had cracked or where deep open joints had appeared. Here we drilled across the open cracks / joints at about forty-five degrees from one stone into the stone next to it. This is known as ‘Cross stitching’. These holes were 7mm diameter and drilled to a depth of 600mm. Once drilled a 500mm length of 9mm diameter stainless steel helical dowel was placed into the hole. With a special adapter attached to the drill these dowels were then hammered into place the full length of the dowel. The attachment also pushes the dowel 10mm into the hole from the face of the stonework. Because the dowels are of a bigger diameter than the hole drilled for it, as they are hammered in they bite into the sides of the stone creating contact between stone and the full length of the dowel. No resin anchor mortar is required as each dowel screws itself in like giant screws. This is a really good method for stabilizing stonework as it can sometimes be very problematic trying to fill these deep drilled holes with an epoxy resin mortar to grout the dowels in situ. These are simple to install and cost effective and once installed, because of the helical design of the dowel, they are never coming back out. They are also less intrusive because there is no need to take out and re-set the masonry so the only visible evidence is the small drill hole which is filled in with lime based Bath stone repair mortar. Every crack / open joint had a minimum of four dowels inserted two inserted each side of the crack. Some, depending on its severity had as many as eight.
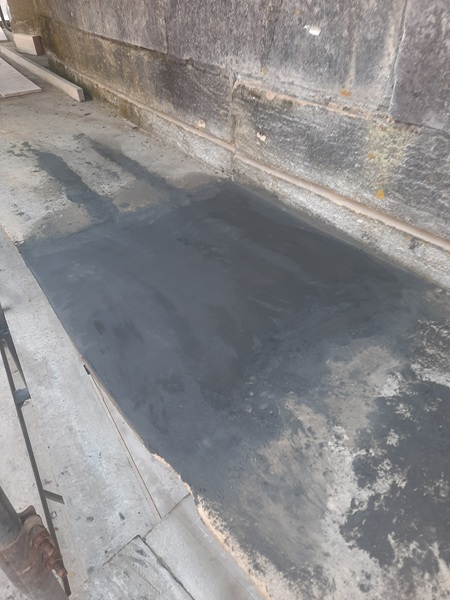
These repairs fell into two categories depending on the width of the open joint or crack. Joints or cracks that were 3mm or less were filled with a two part thixotropic resin adhesive and due to its fluid properties will seal cracks as small as small as 0.2mm wide. For the cracks and joints wider than 3mm we used a standard polyester styrene free epoxy. This is more thicker in nature allowing the vertical voids to be filled without it pouring back out. All epoxy fillers were left back 25mm from the surface of the stone and then filled over with a lime based Bath stone repair mortar.

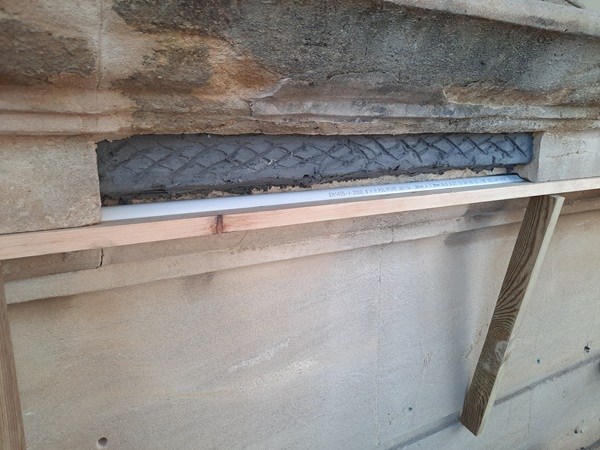
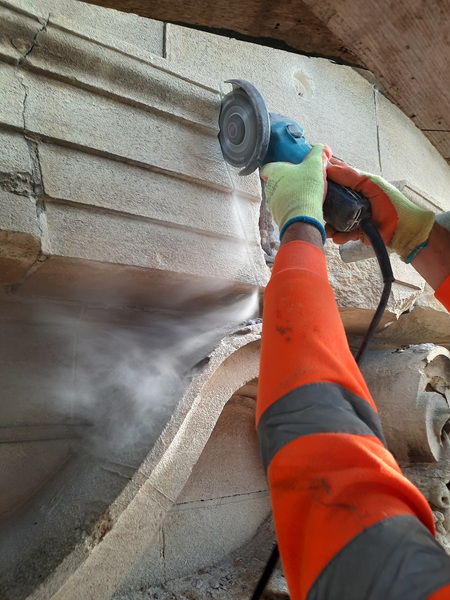
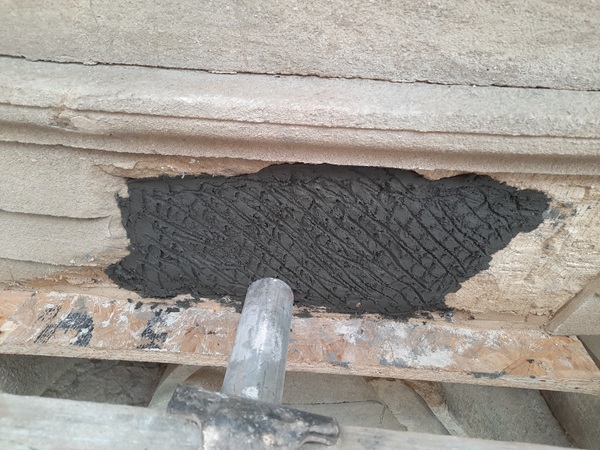
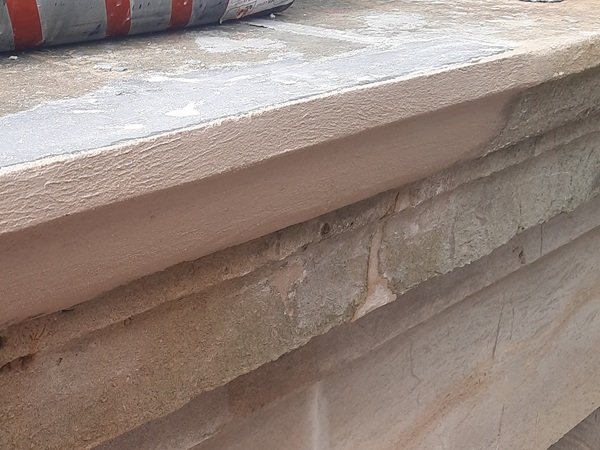
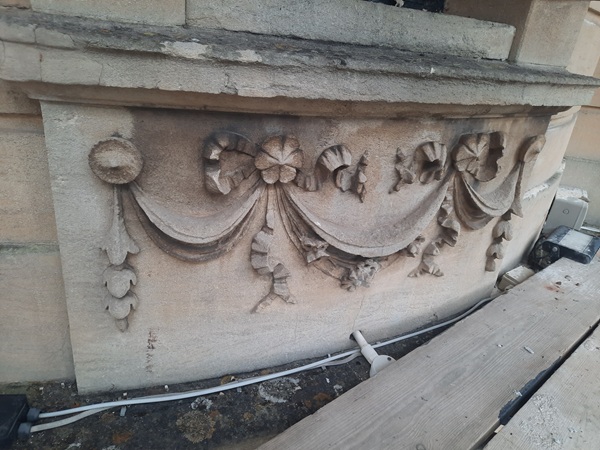
This particular repair was carried out on the frieze midway around the building and was one of many that we had to address in this area alone.
We installed roughly five hundred of these fixings around the building.
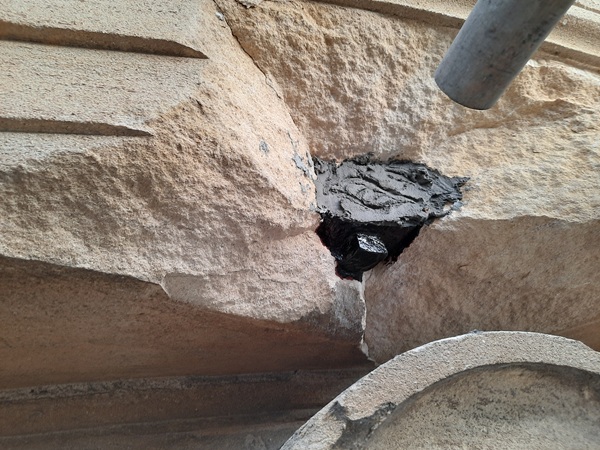
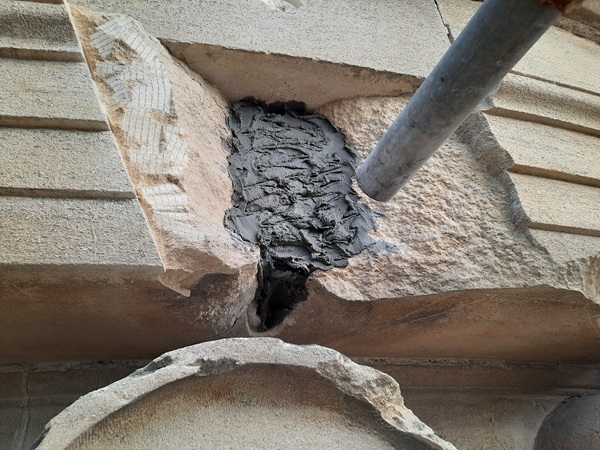
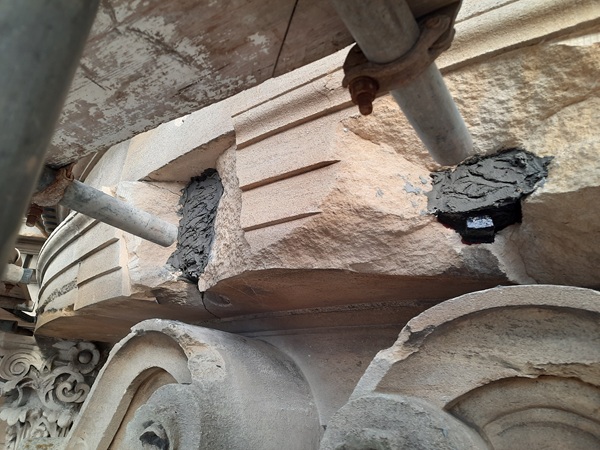
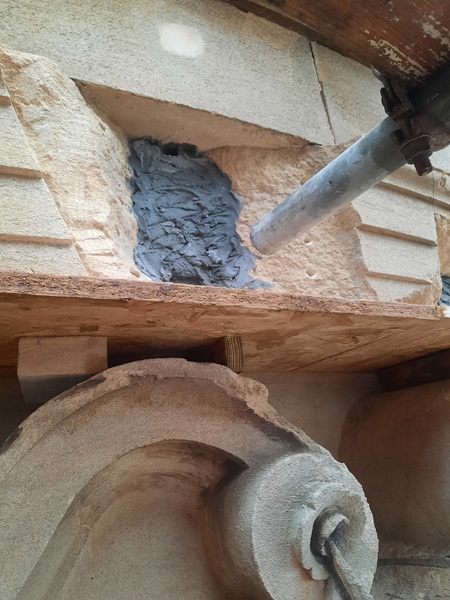
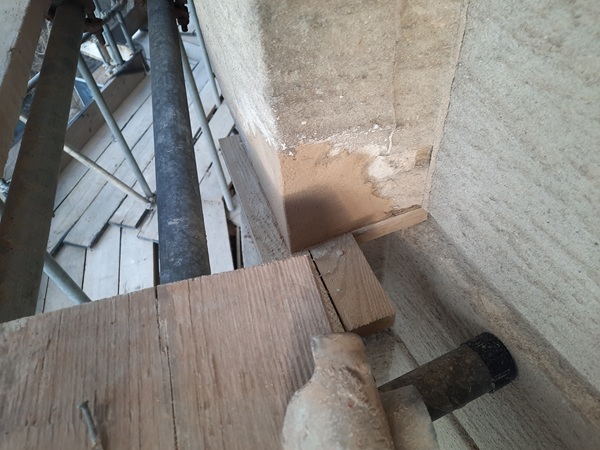
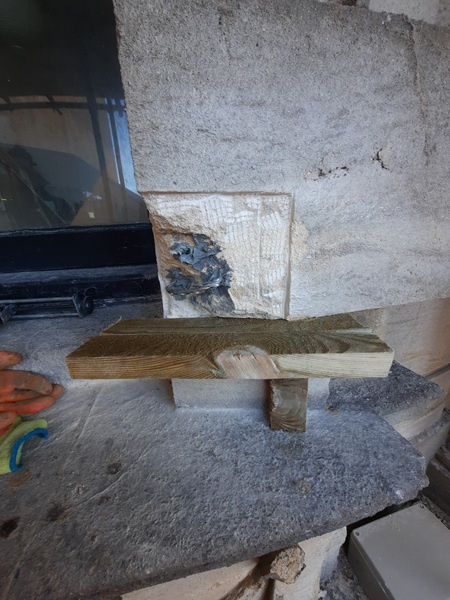
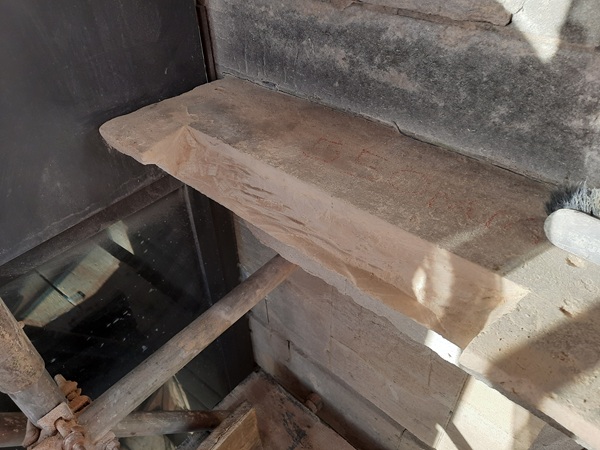
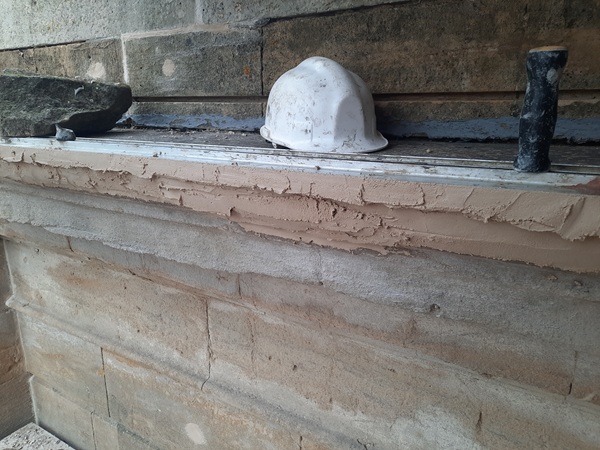
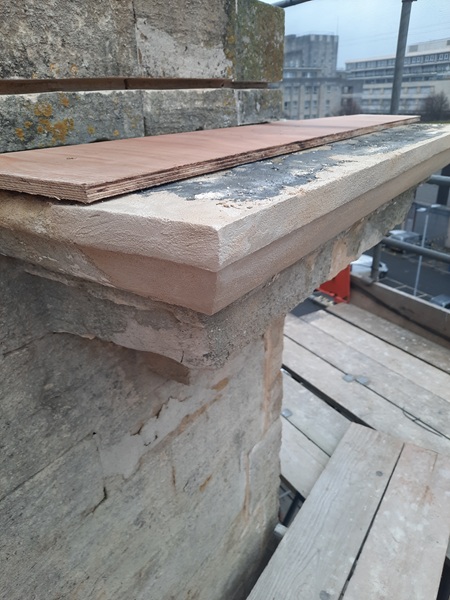
Other repairs involved cutting back redundant lead pipework that was no longer required. These areas were marked out, cut back to a depth of 25mm and then repaired with a lime based Bath stone repair mortar.
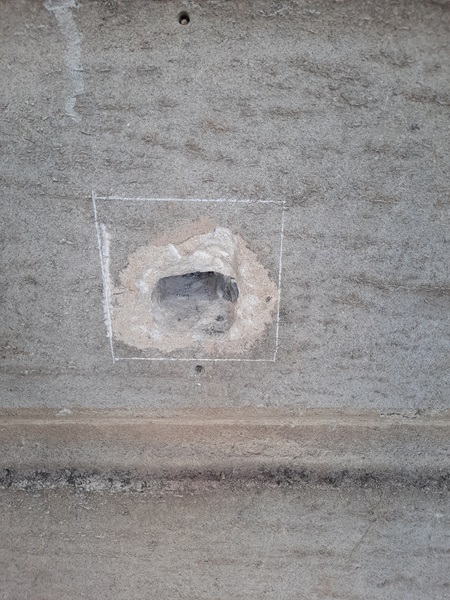
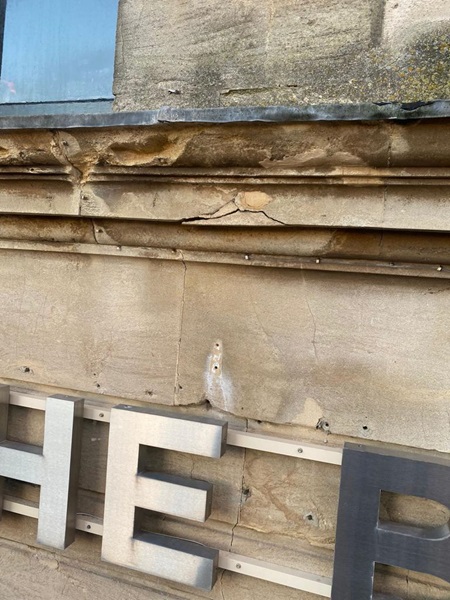
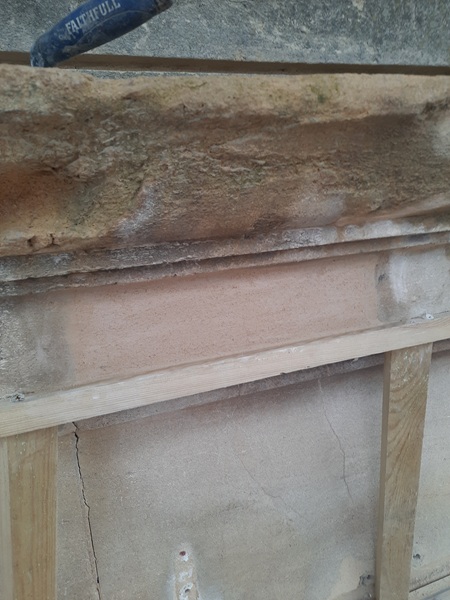
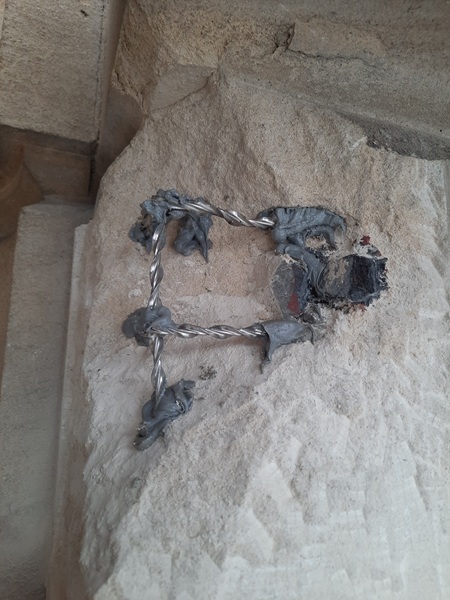
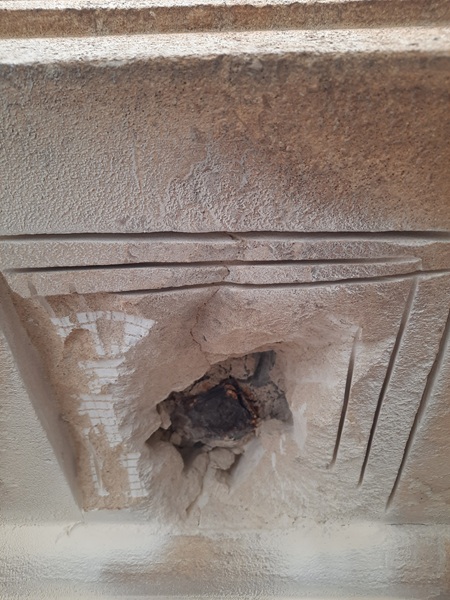
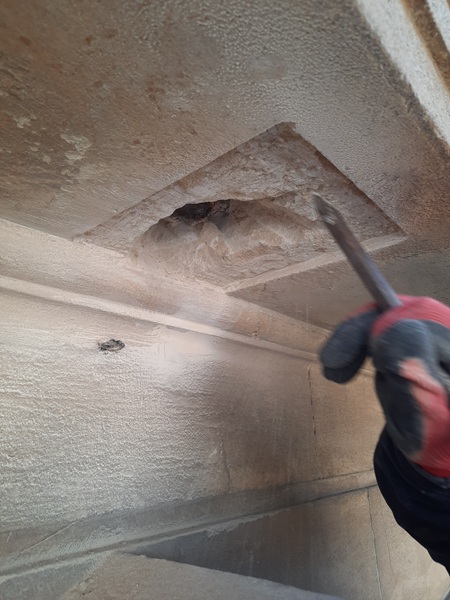
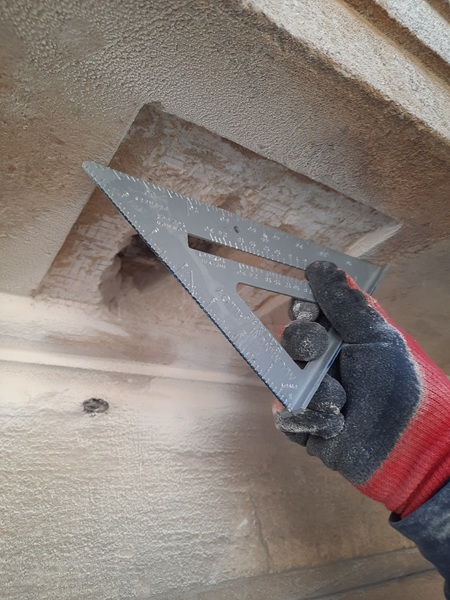
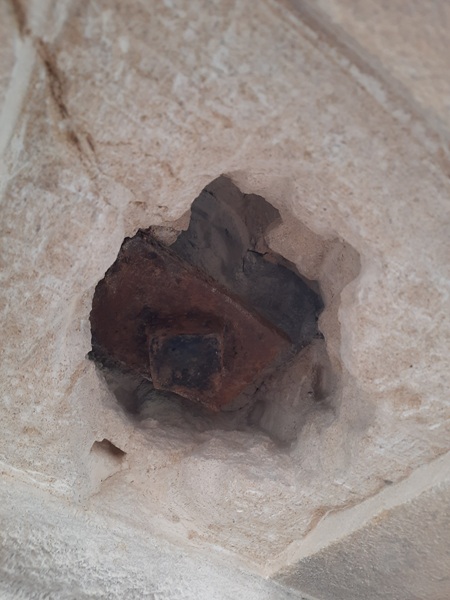
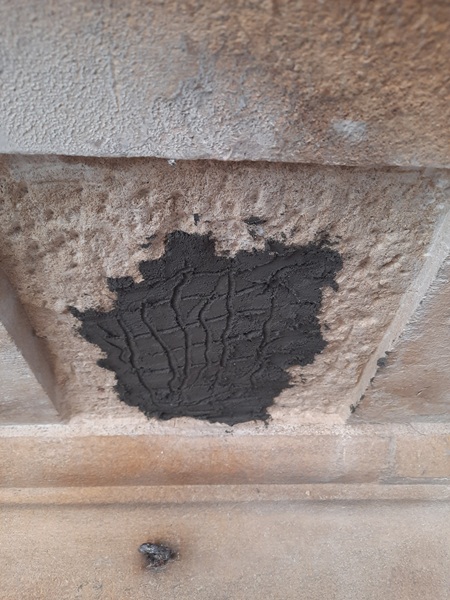
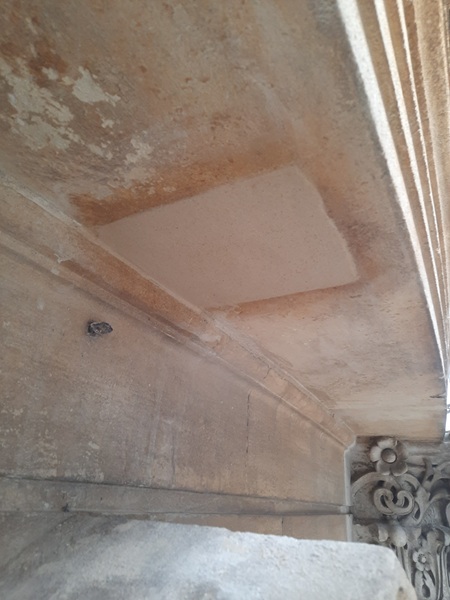
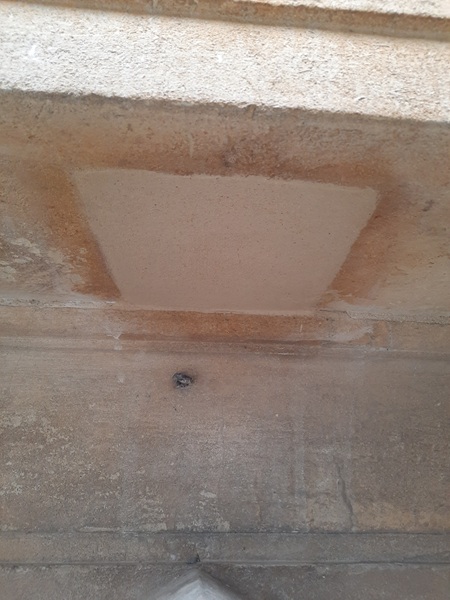
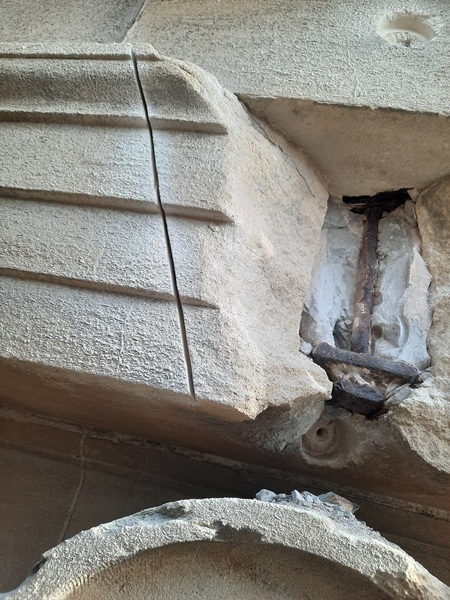
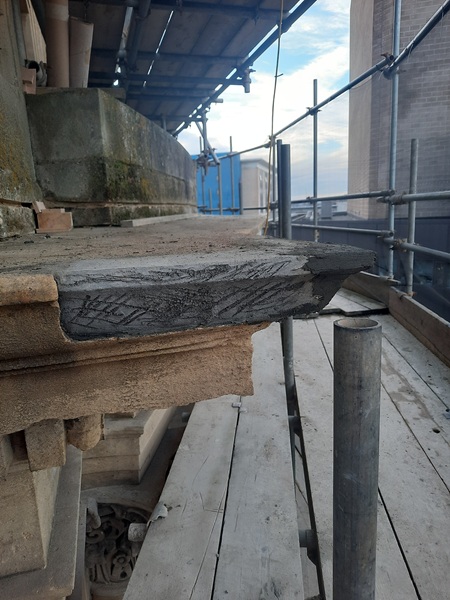
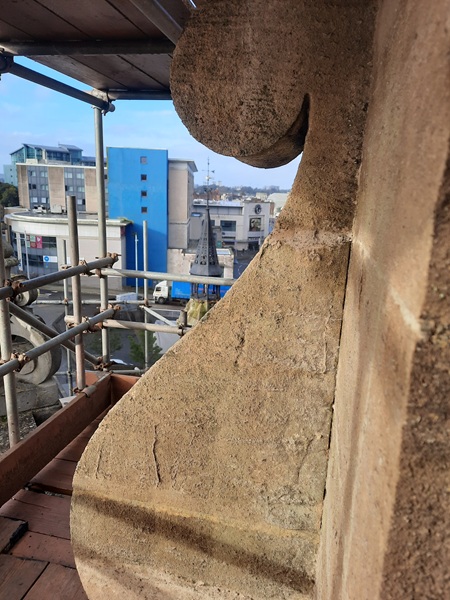
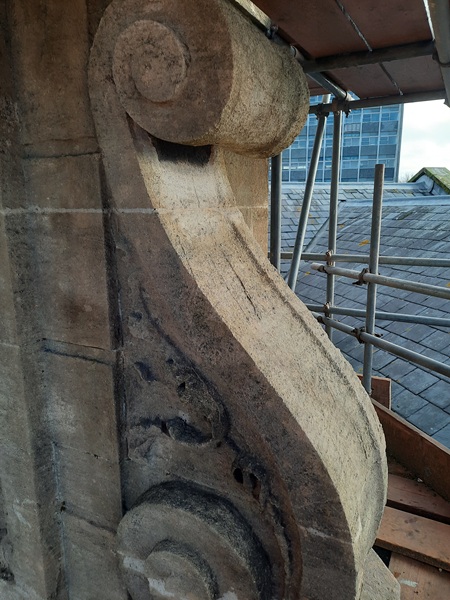
Many sections to the details of the Bath stone around the whole building was showing considerable signs of deterioration. These had been caused either by frost damage or as in most cases the cause was due to the original iron fixings or dowels used in its construction. Iron or steel clamps used for these fixings have been for centuries. When they rust, they become iron oxide and when this expands it very often forces the face of the stone to spall away or even split a stone in two. This is known as ‘Oxide Jacking’ or ‘Rust Burst’, a phenomenon that has caused much damage to our historic buildings. This shows a classic example where the stone has fallen away due to frost damage on a cornice detail.

This occurs when rain or moisture seeps into cracks or the fabric of porous stone and when it freezes, this expands and forces the face of the stone away. But for now we were were going to leave the cornice sections and concentrate on other frost damaged sections around the building. These sections were cut out, prepared and Helifix armatures were then resin fixed into place.
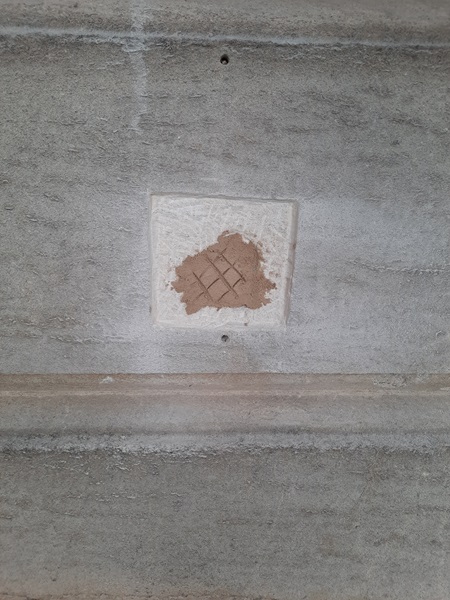
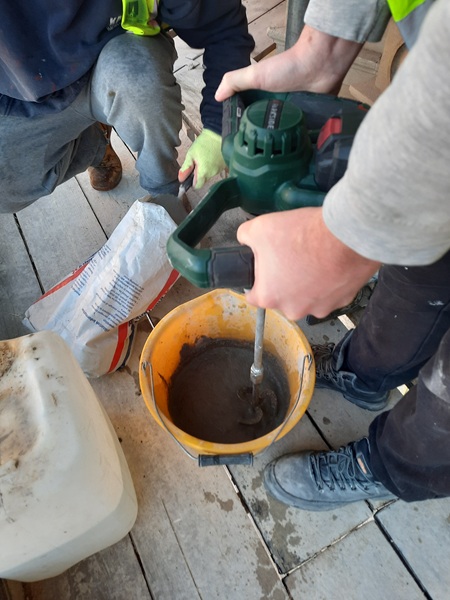
The armatures form a reinforced mechanical fixing to enable the new repair to be built up around it, ensuring that the repair can never fall out. The initial repair is built up using a product called ‘Monomix HD’. Primarily it’s used for the repair of concrete, but can also be used in these situations. It is waterproof and frost resistant. It has excellent bonding properties and it is lightweight, an added bonus for these high level repairs. It needs to be mixed up with a drill and paddle attachment to ensure thorough mixing, and all you need to do is add clean water until you have the right consistency.
Once mixed up the substrates are dampened down.
Then the Monomix HD is placed in and built up around the armatures in layers of up to two 50mm thick leaving the repair back 25mm from the finished stonework surface to receive a final finishing coat of the Bath stone repair mortar.
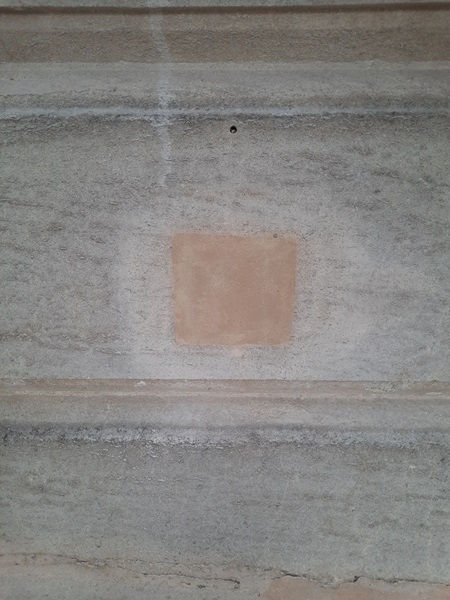
After a few days, once that had set, a coat of Bath stone repair mortar was used as a final finish.

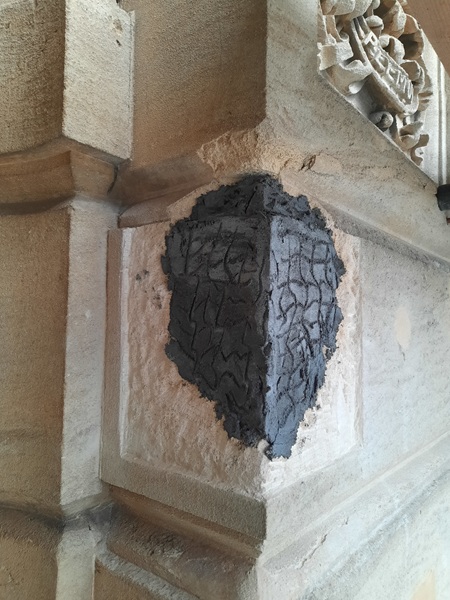
There were quite a few of these types of repairs we carried out around the building, all of which were repaired to the same specification. However, there were even more repairs that had to be addressed where Oxide Jacking had occurred. These areas were marked out for cutting back.
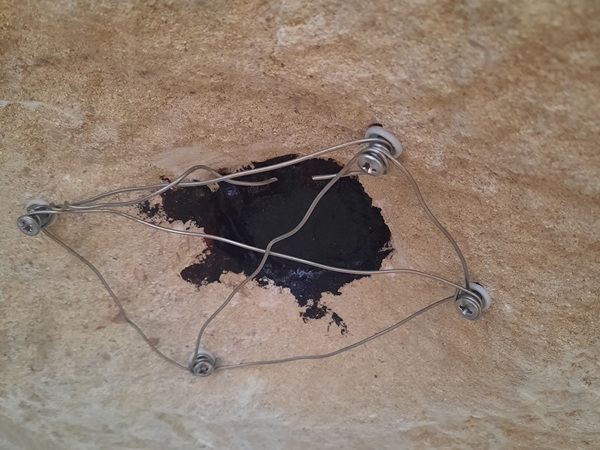
When cut back, the iron was de-scaled and treated with a red oxide primer.
This was then over coated with Hammerite.
And when that had dried, it was repaired using the Bath stone repair mortar.
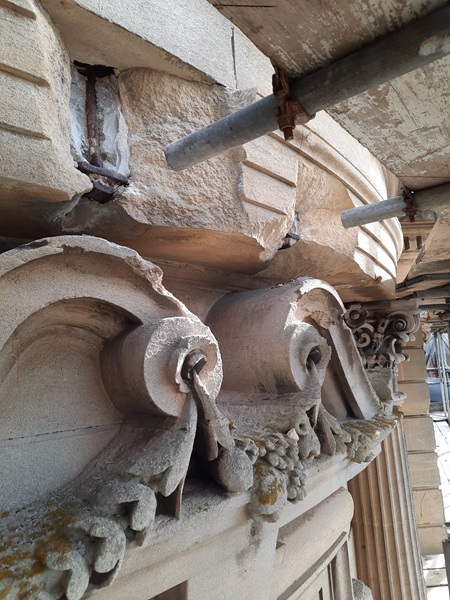
Some of the old iron fixings had caused considerable damage to the extent it becomes a health and safety issue. Bits of masonry falling down at this height will certainly be a cause for concern.
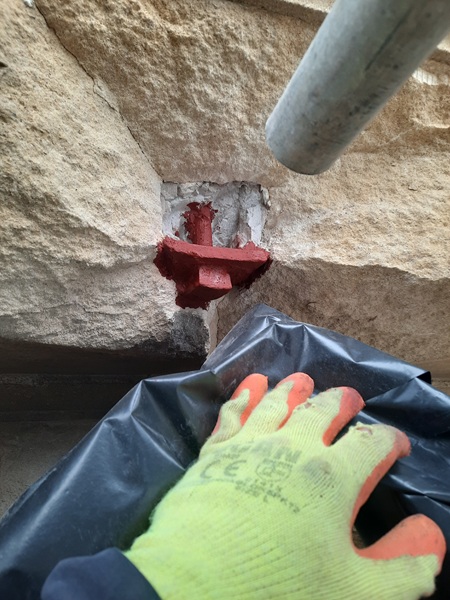
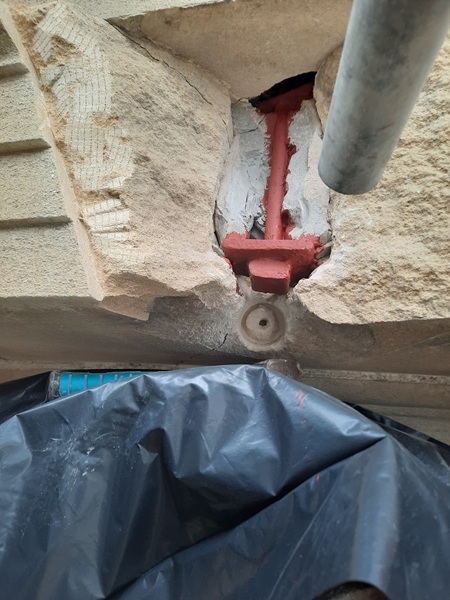
Armatures were also incorporated into the deep pockets repairs for reinforcement.
Several other areas affected by rusted iron were on the undersides of soffits. These marked out and cut back.
And checked for correct depths to allow for repairs.
After the steel had been treated, a reinforced wire mesh was fixed over the prepared steel.
Then the repairs were then carried out using the Monomix HD to bring them out to within 25mm of the finished surface.
And then finished off with the Bath stone repair mortar.
One particular area that was causing a great deal of concern was directly over the main entrance. The two sections you see here didn’t even require breaking out, they literally fell out when tapped gently with a hammer. It was only a matter of time before this could of resulted in serious consequences.

First of all the sections were marked out and cut back for repairs.
Again the steelwork was descaled and treated.
Then a first coat of Monomix HD was put into place to cover the steelwork.
We made up some Helifix clamps to suit the repairs.

These were then resin fixed into place to bridge the new repairs.
Further layers of Monomix HD were added until it was built out to within 25mm of the finished surface.

After a few days to let it set a final coat of bath stone repair mortar was used to finish of the repair.
On completion of these repairs several 500mm long Helifix ties were hammered into position around each repair to stabilize all the surrounding stone. In the meantime there were lots of other small repairs that required attention. All very much similar to these.

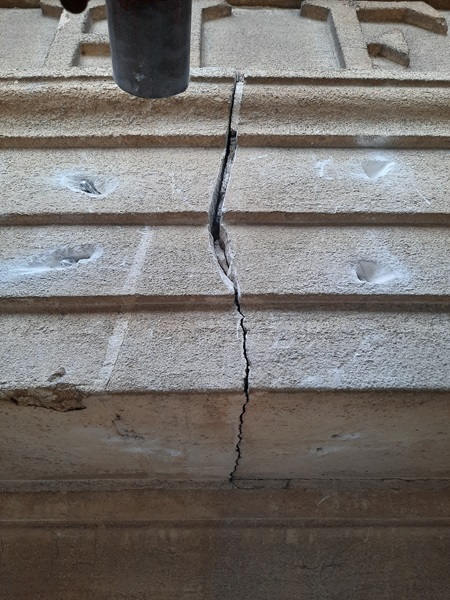
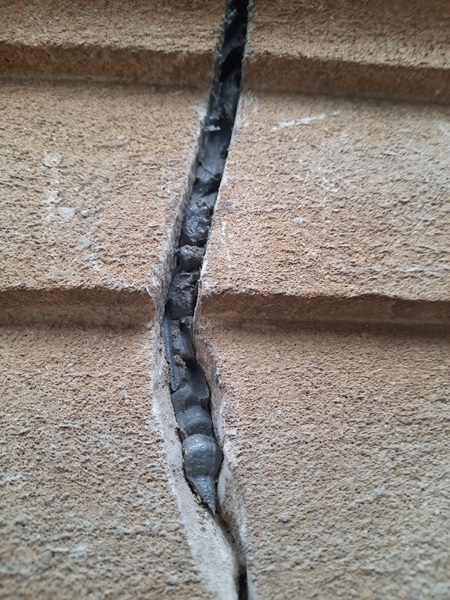
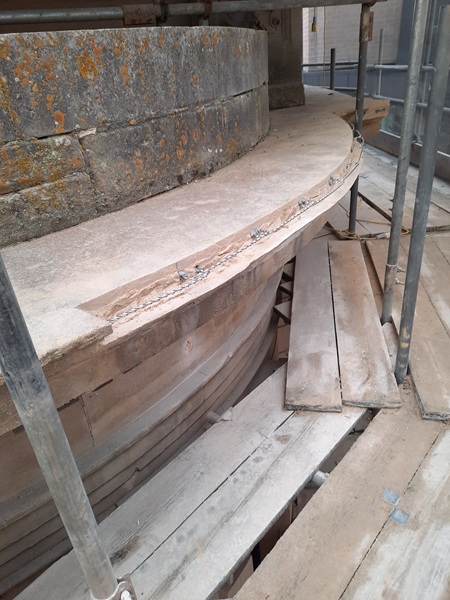
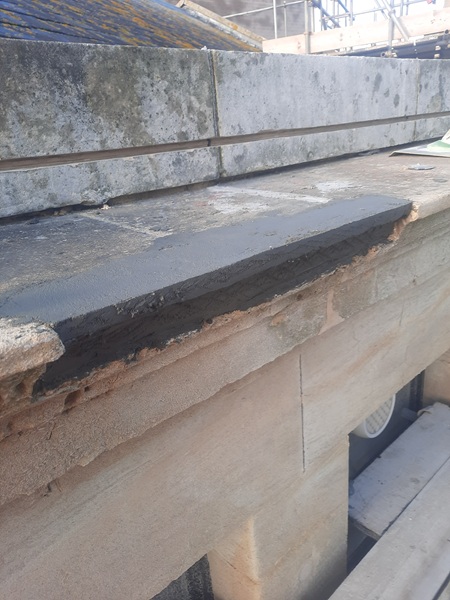
There was still a lot more to do, and we weren’t even half way through yet at this stage. One area showed signs of movement along one of the cornices. This was more than just hairline cracks. The stonework in this area had moved out of alignment by about 25mm. It was deemed that it was going to be a huge undertaking to take it all out and rebuid it back to its original alignment, so it was agreed that this would be stabilized in situ. Two chases were cut out to a depth of 25mm on top of the cornice which spanned the displaced joint by about 500mm on either side. Helifix tie clamps were then set into the chases and filled with epoxy resin.
A feathered screed was laid on the lower displaced section to marry it all in. This was done using Monomix HD.
The Portland stone parapet that sat on this cornice was also displaced, so Helifix dowels were hammered in to cross stitch the joint. the joint was clean out, filled with resin and finished off with a Portland stone pointing mix.
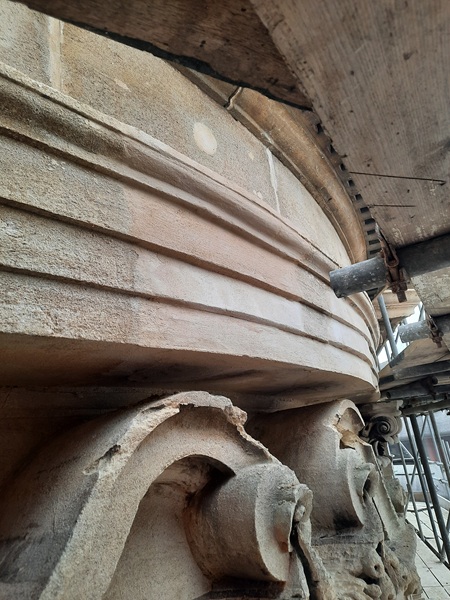
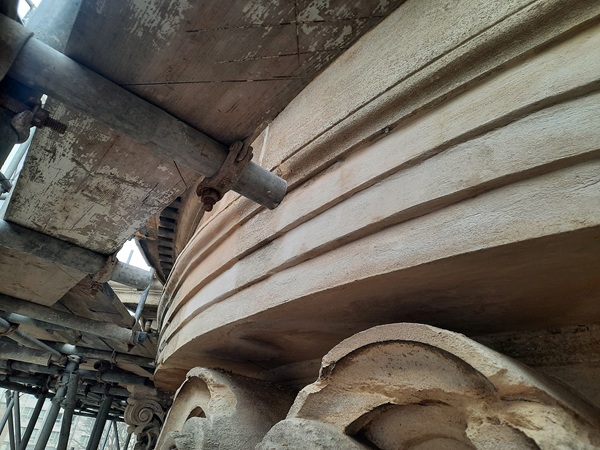
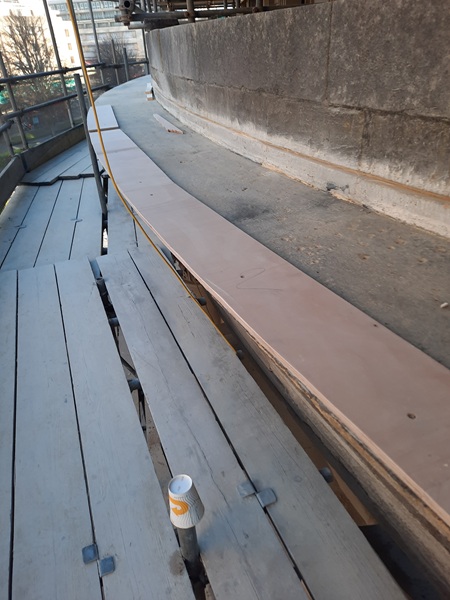
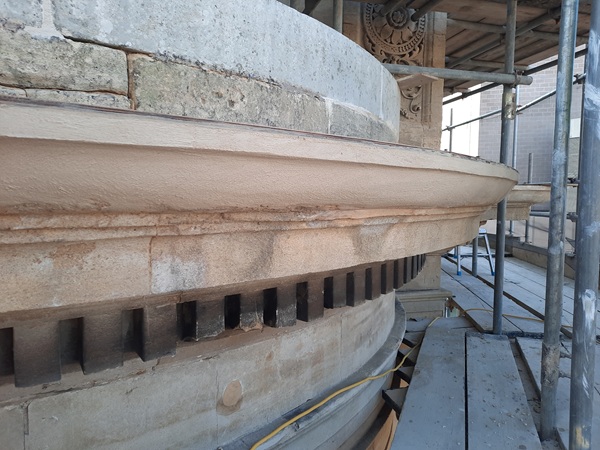
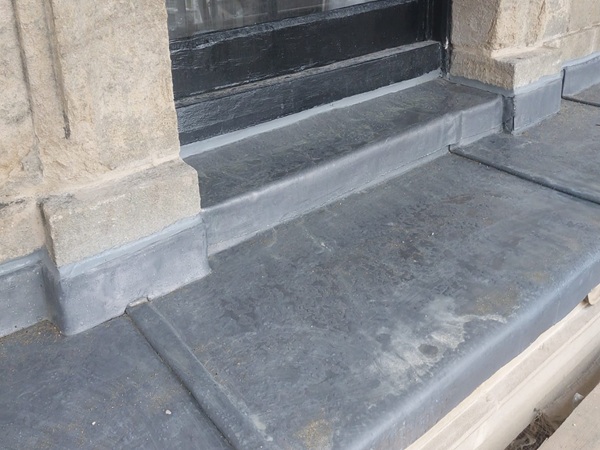
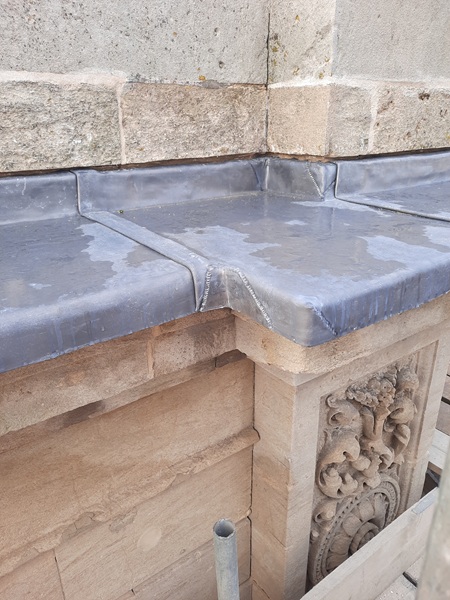
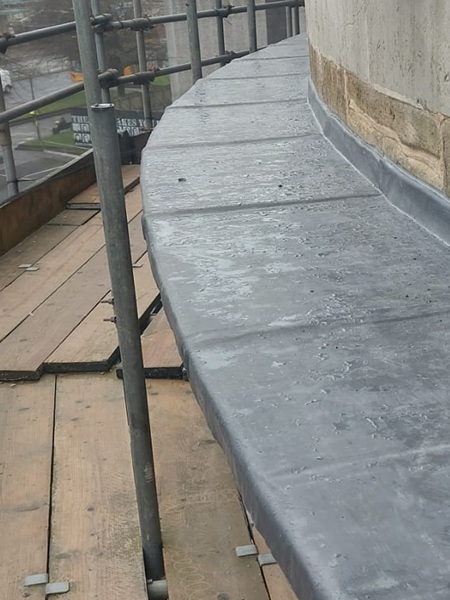
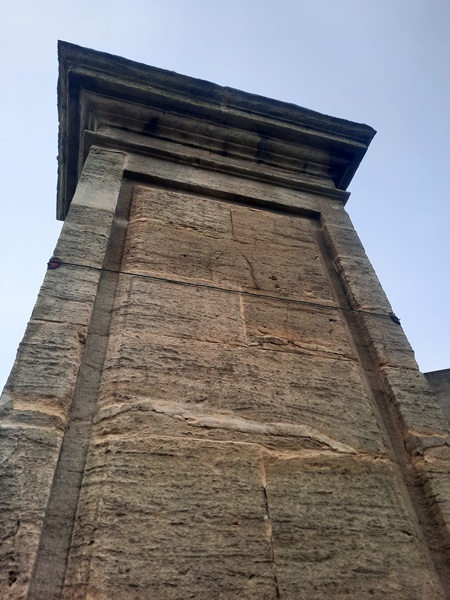
There are two main cornices that run around this building, one at the very top and the other runs around the next storey below. Both cornices were to be dressed over on top with new code six lead. In order to accommodate this, we had to form a chase 25mm wide and 25mm deep into the Portland stone parapets so that the 75mm upstands on the new leadwork could be fixed into. This was achieved by running a chase cutter along the whole length of the parapets.
With all the chasing out the way we then had to turn our attention to the cornices themselves. Sections of the top edges to the cornices had either worn away, fallen out or were about to fall out. Over the years this damage had been caused by frost.

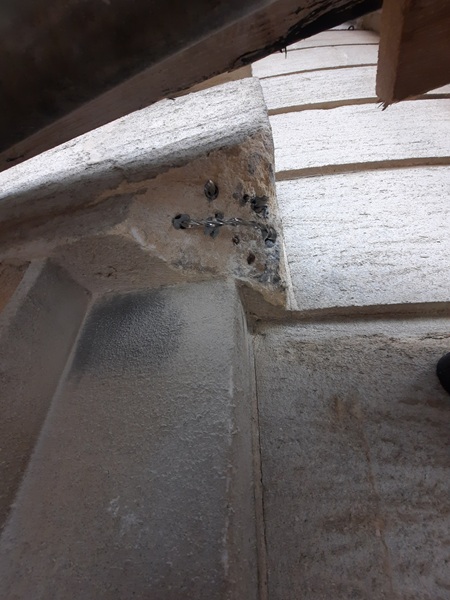
Before any leadwork could be put into place the cornices had to be sorted out first. The areas to be addressed were marked out and cut back to a depth of 100mm.
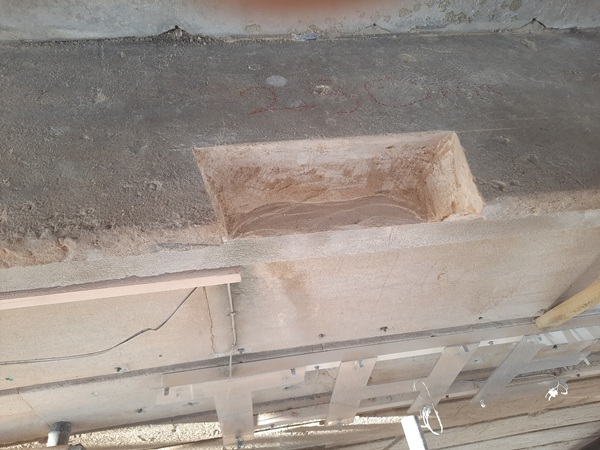
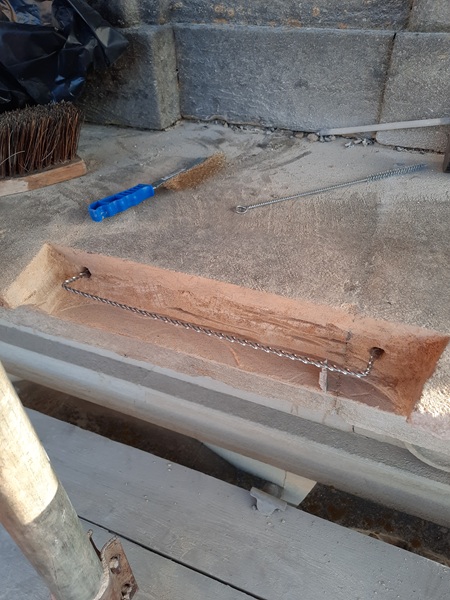
The cut out was slightly wider at the back edge than the front edge. This ensures that the new repair is ‘wedged’ in situ, similar to a mortice and tenon joint in carpentry. Also Helifix armatures were made to suit and fixed into place with epoxy resin to add reinforcement and build up the new repair around.
Several corner sections had to be prepared.
And most of the length along the radial sections had to be done too.
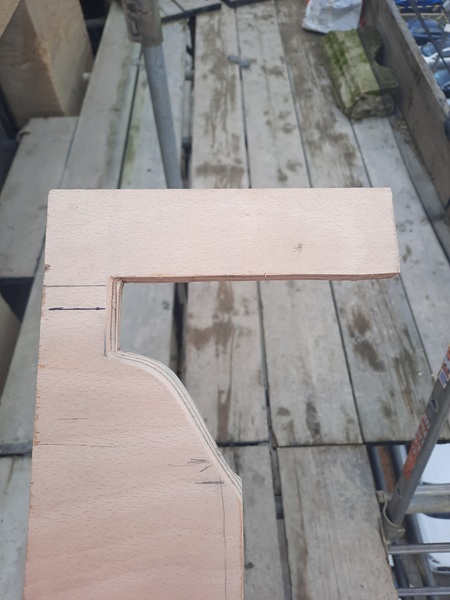
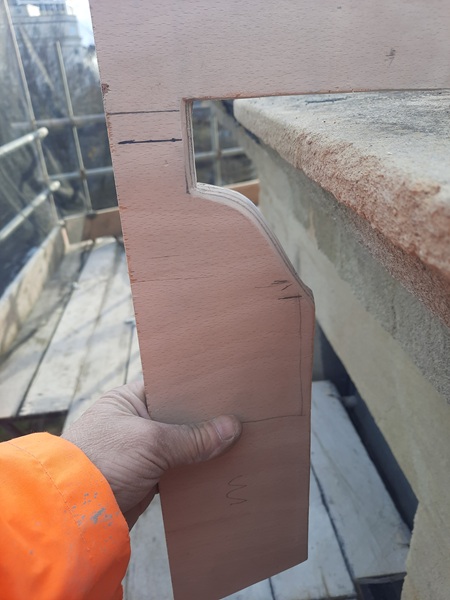
Along the edge of all the prepared radial sections, we had to temporary fix timber plywood to give us a top edge to work the repair into. This edge would follow the original line of the cornice before it was cut back.
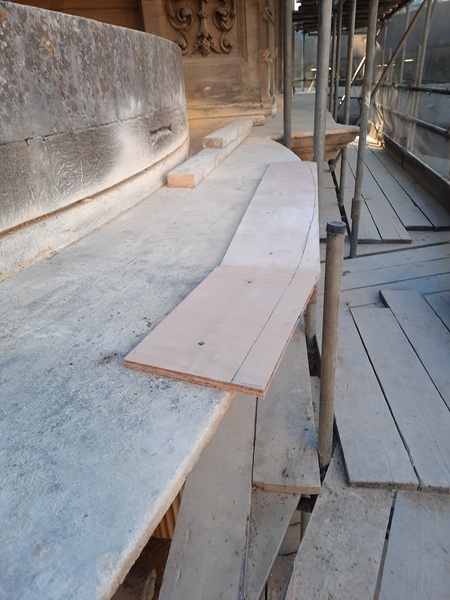
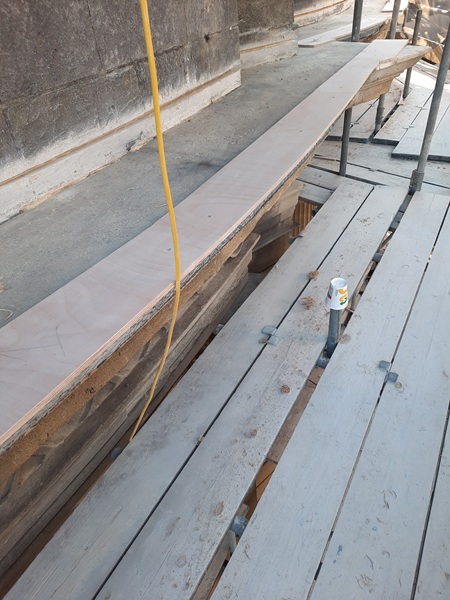
We also made up a template to match the existing profile of the cornice. This would be used to run in the new repair and especially useful on the radial sections.
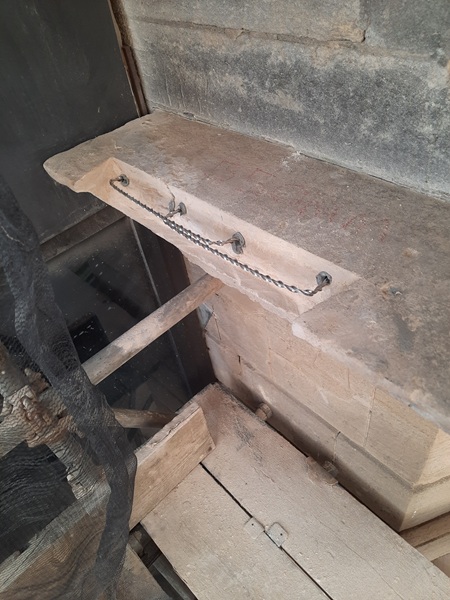
Now that all the preparation work was complete we gradually built up the repairs using the Monomix HD and left this back from the finished surface to allow for a final finishing coat of Bath stone repair mortar.

A few days were left to let the Monomix HD to set and then we finished off the repairs with the Bath stone repair mortar. These cornice repairs were essential to prevent loose masonry falling at height. It also gave a good edge for the new leadwork to be dressed against.
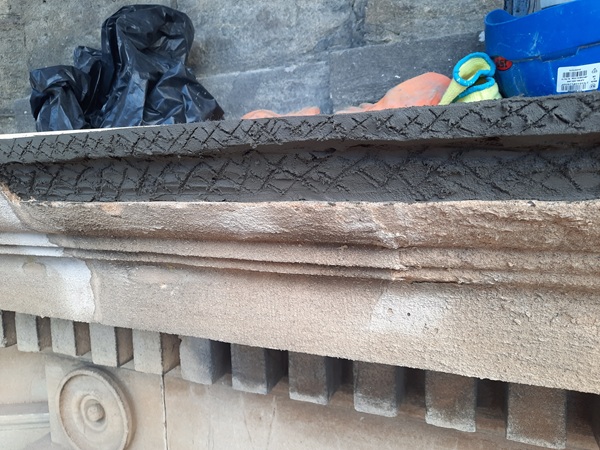
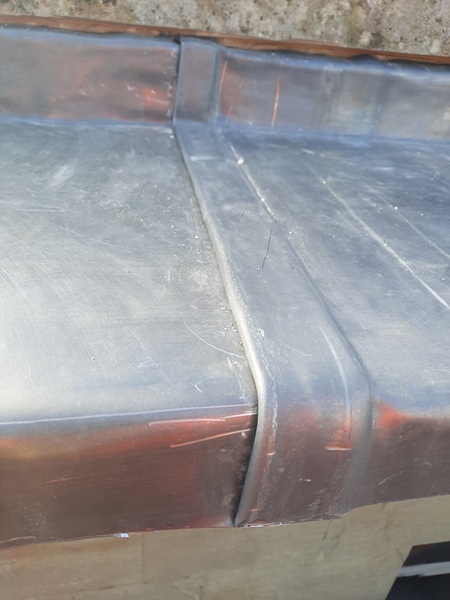
Once the cornices had been repaired it was time for the lead guys to come in and do their part.
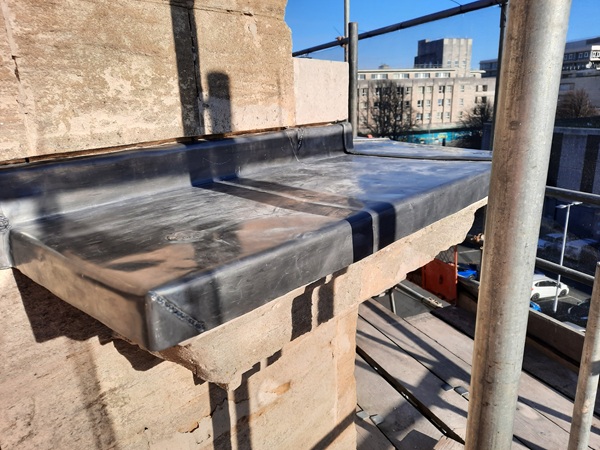
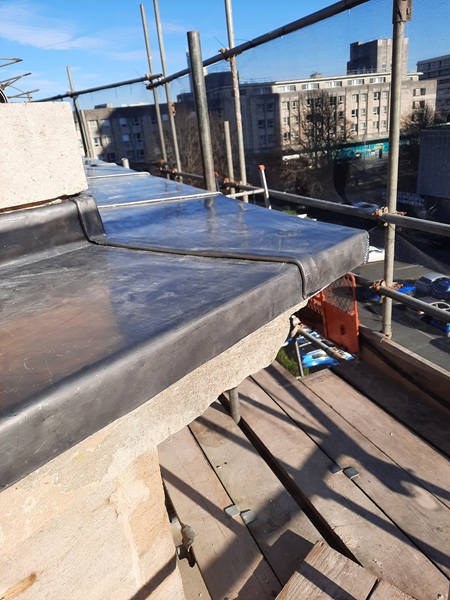
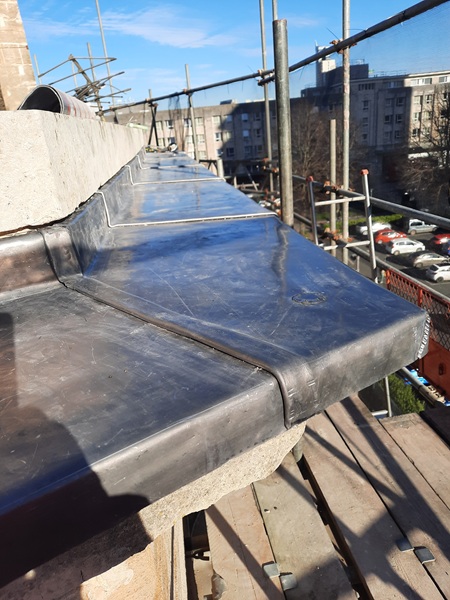
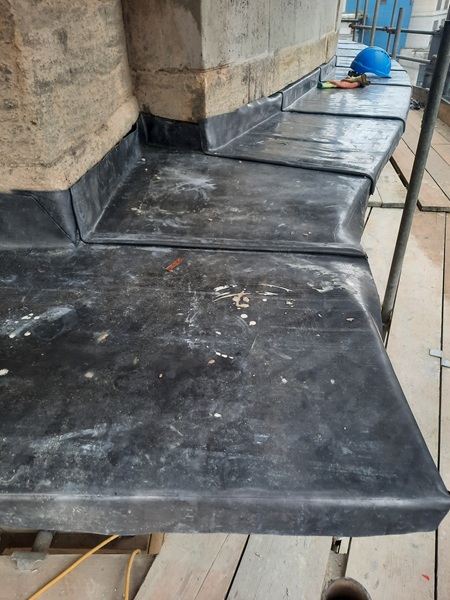
The sections of lead had folded joints. This allows for expansion which prevents the lead from splitting.
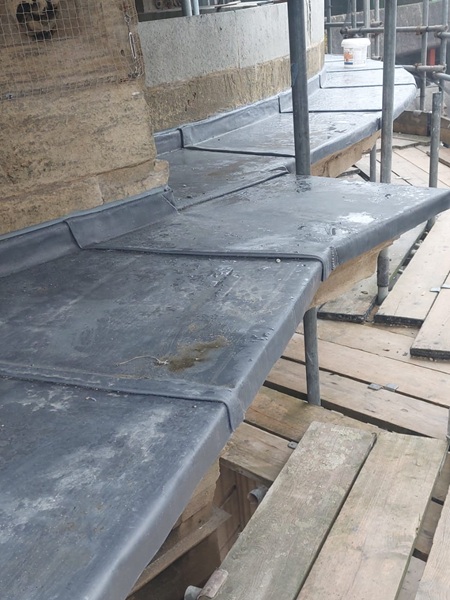
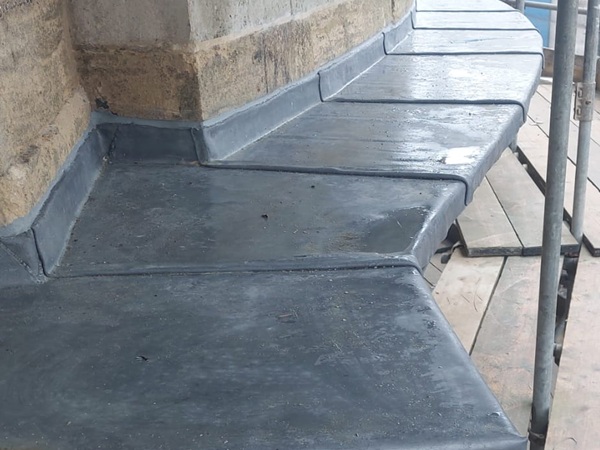
The leadwork was dressed up over window sills and all the lead was pointed in to the new chases we cut out with lead pointing mastic to form a watertight seal.
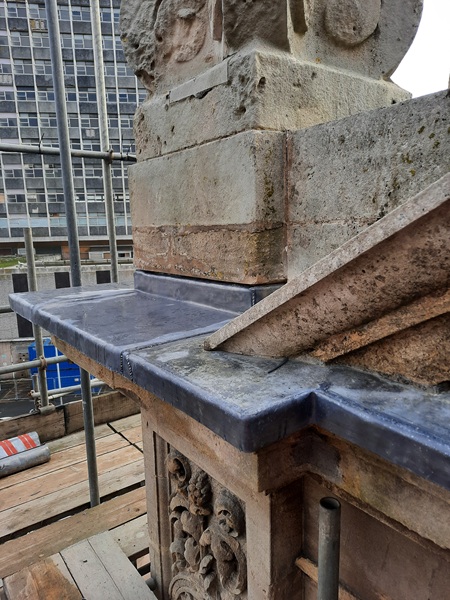
Collars were made and dressed around stack pipes.
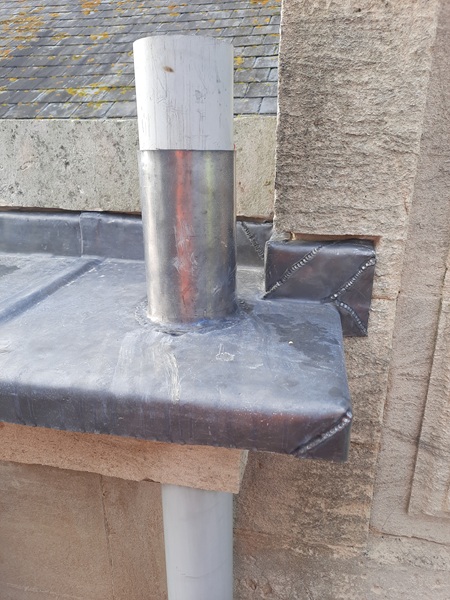
Mitre joints were welded together.
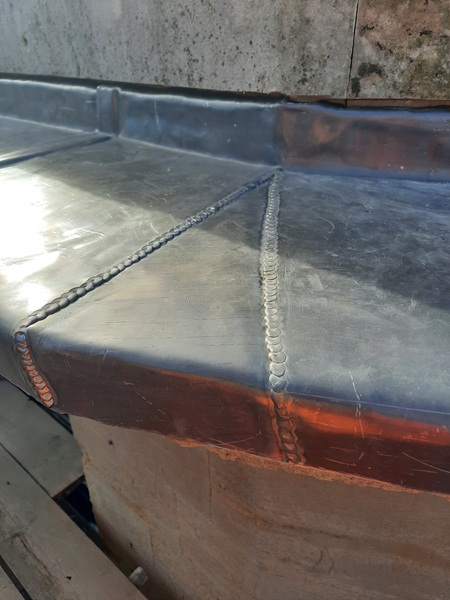
More than one ton of lead used used.
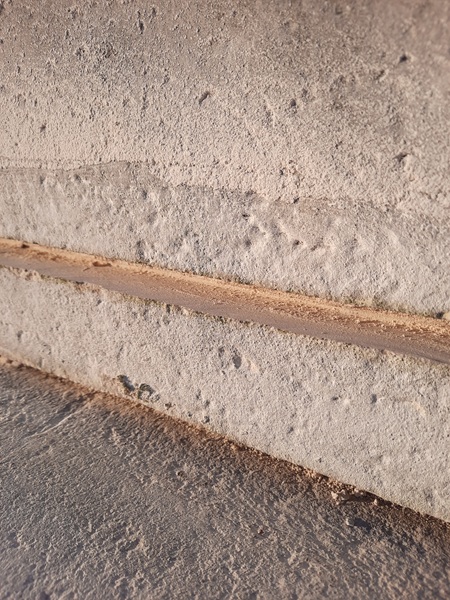
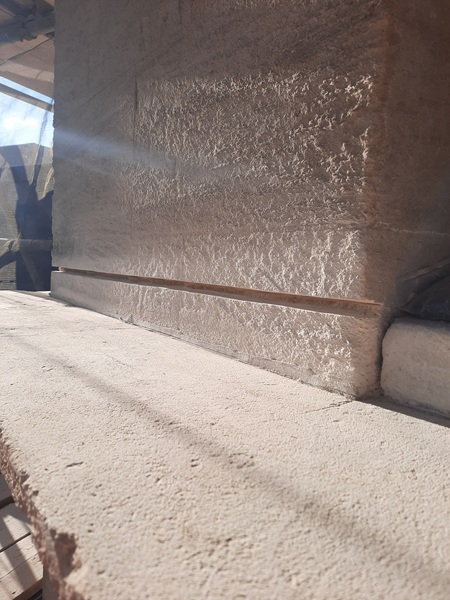
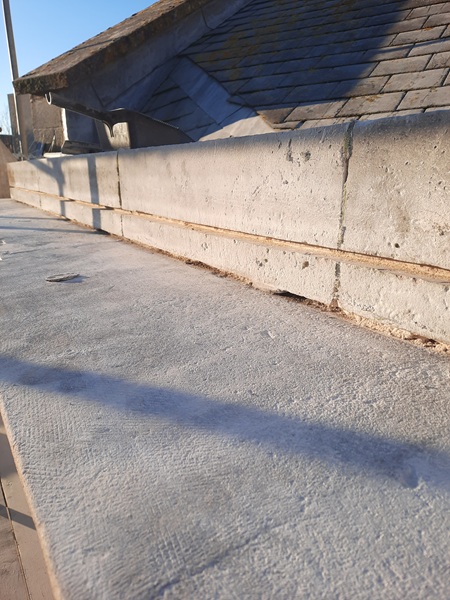
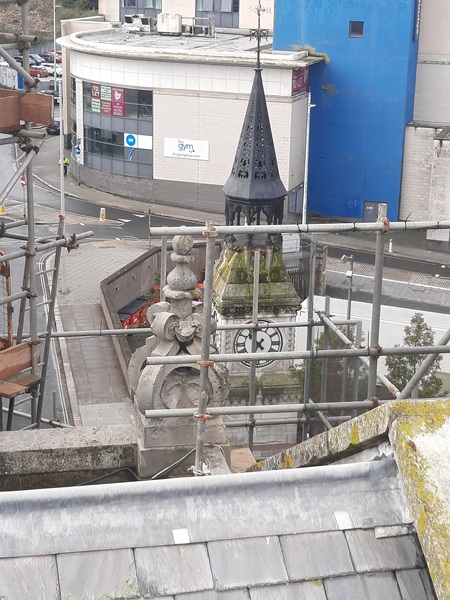
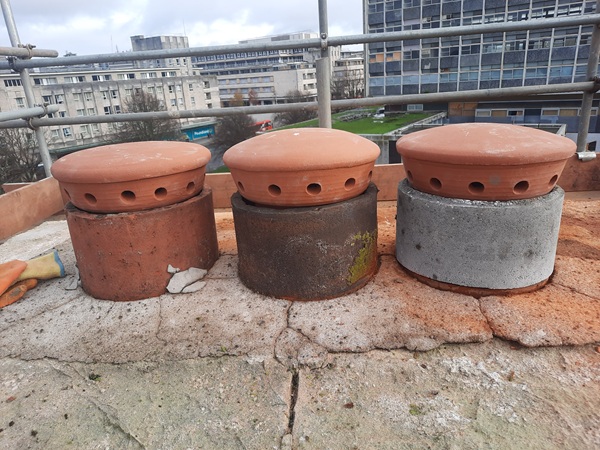
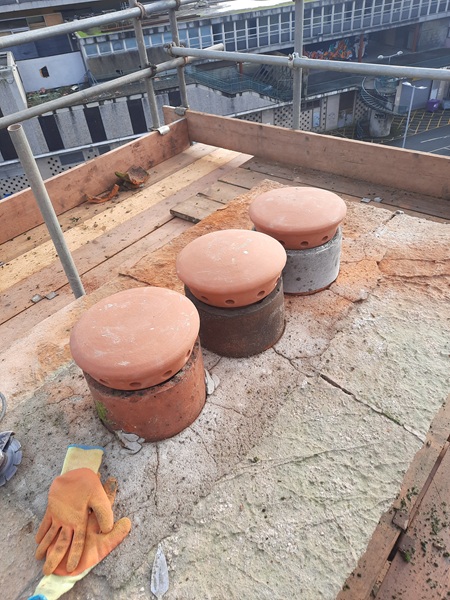
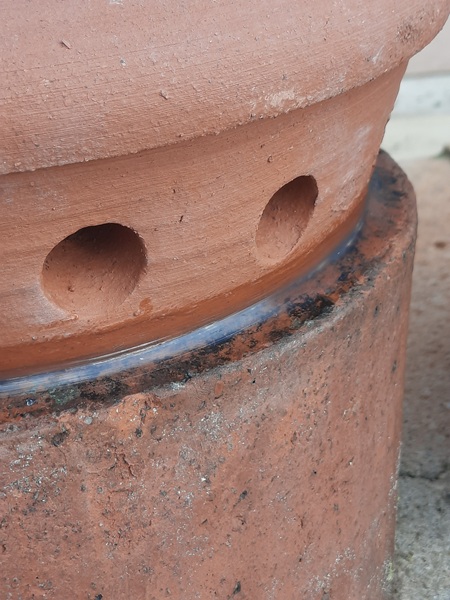
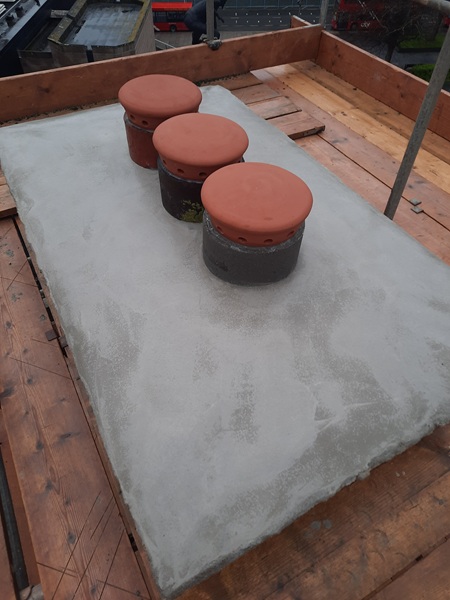
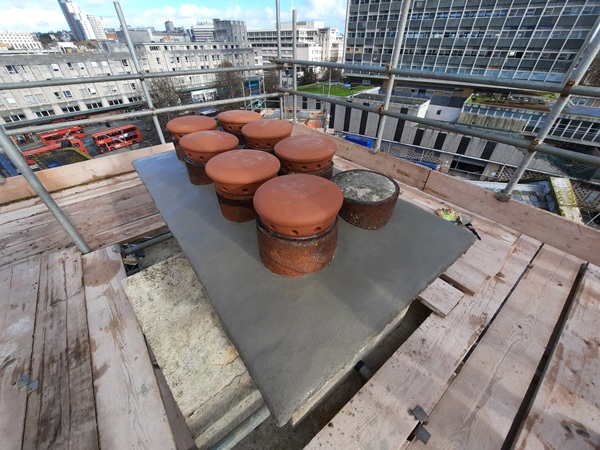
We also carried out general repointing to the joints to the stonework over the whole building, pointing them in with lime based Bath stone mortar, but we weren’t quite finish yet. We were heading higher up as two chimneys needed our attention. The general specification for these chimney stacks required us to carry out any repointing needed. There were also signs of movement so we had to drill and hammer in Helifix ties to cross stitch any open joints to stabilize the stacks. And finally we had to re-cap the very tops of each stack to make sure the chimney pots were not going to move and also fix terracotta venting cowls to each pot in order to keep the rain and birds out. It was nine lifts up from ground level to get to the tops of the stacks.
That put us higher than Derry’s clock tower opposite us.
We first concentrated on the rear chimney stack. This consisted of three flues running up it and one of the pots was broken.
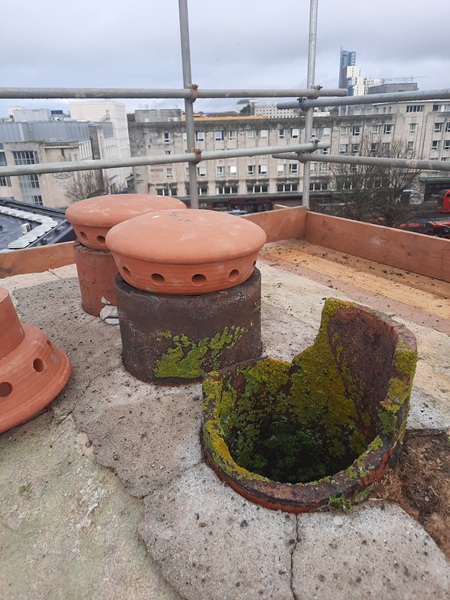
We cut this down to its base.
Then cut a new section of flue to replace it.
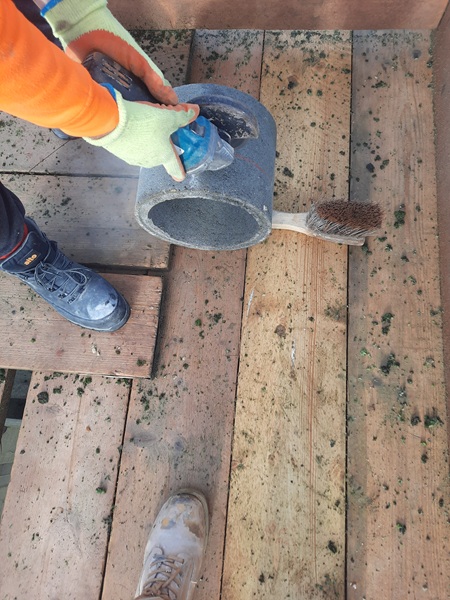
The ventilation caps were sealed with a mastic joint.
All loose masonry on top of the stack was removed and given a good clean to remove moss and vegetation in preparation for the new capping.
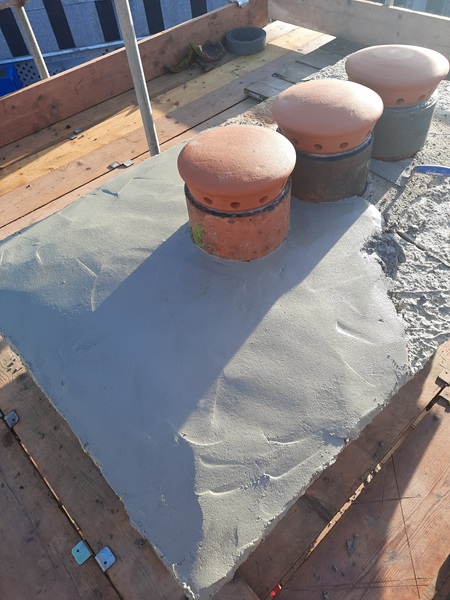
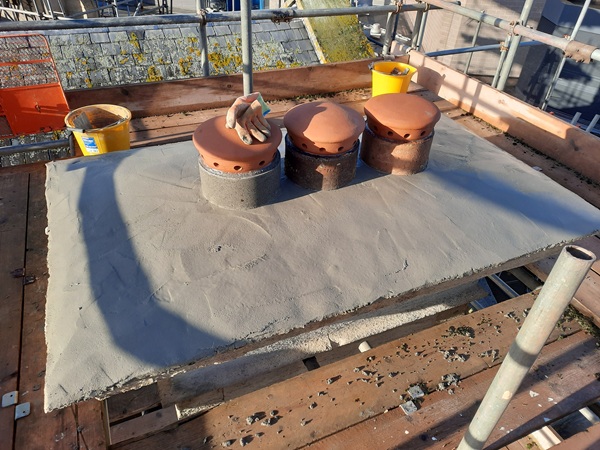
It was agreed that the capping would be sand and cement with a waterproof additive as this would be more durable for the top of the stack and the new screed for the capping was trowelled to smooth finish.
Some general repointing was carried to the stack itself and a few Helifix ties were drilled and hammered in here and there, but this stack was now more or less completed.
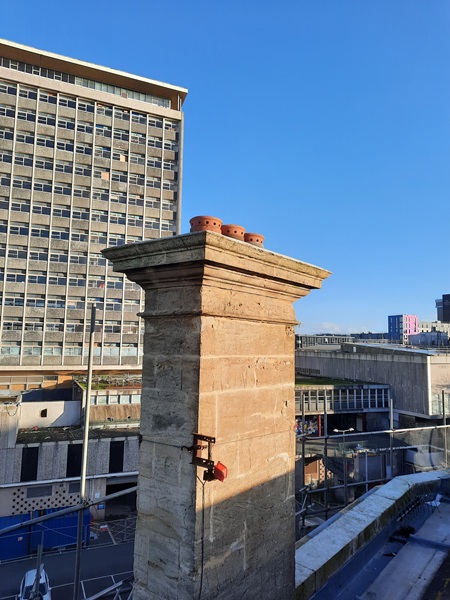
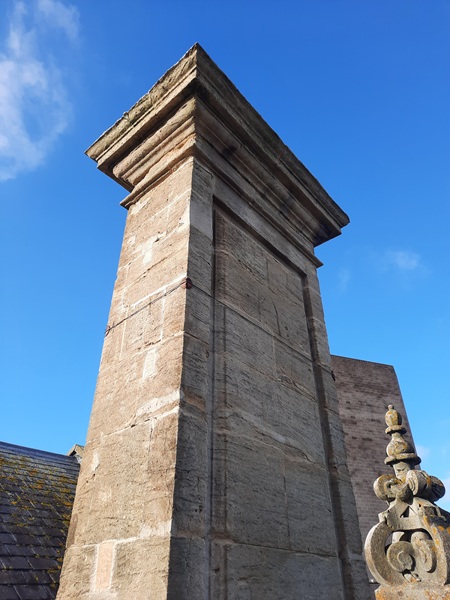
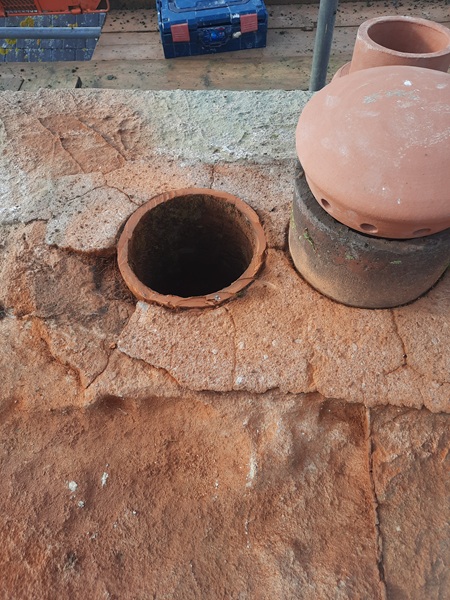
It was now time to jump over to the main stack on the front of the building. This stack was bigger, more ornate and had eight flues running up through it. Again we fixed new ventilation caps, prepared the top and re-screeded the top just the same as the other one.
More general repointing was carried out the the joints, but this stack seemed to suffer from more movement, so we drilled and hammered in more Helifix ties to stabilize everything together.

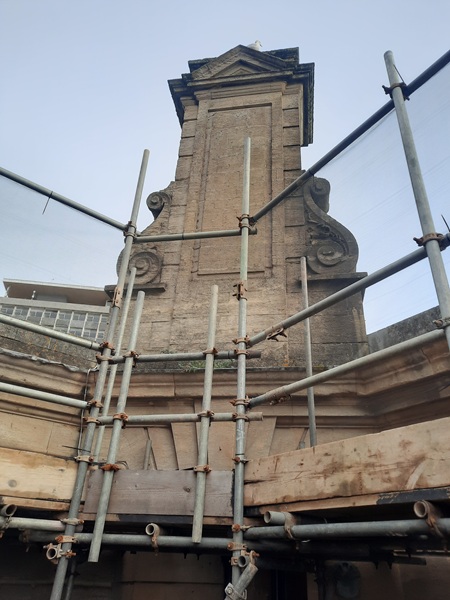
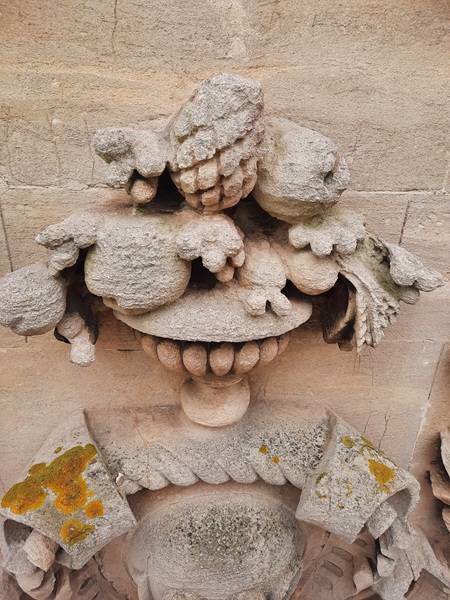
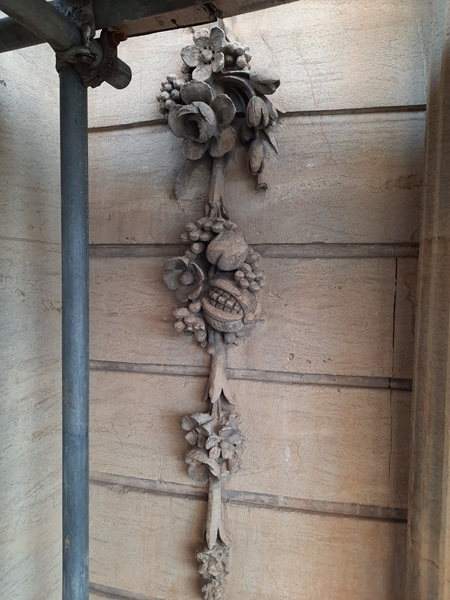
And that was us done. It was interesting working on this building especially seeing the standard of stonework and attention to detail. The whole building just screams detail. Those Victorians knew how to build stuff. Here are just some of the detailing found around the building.
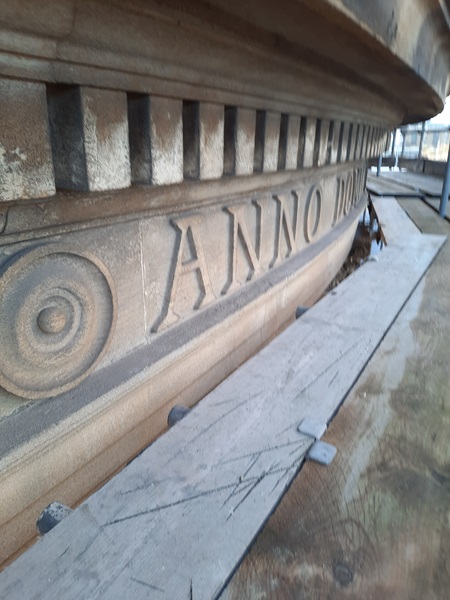
1889, the date the new bank chambers were finished. This can be found way up on one the top pediments.
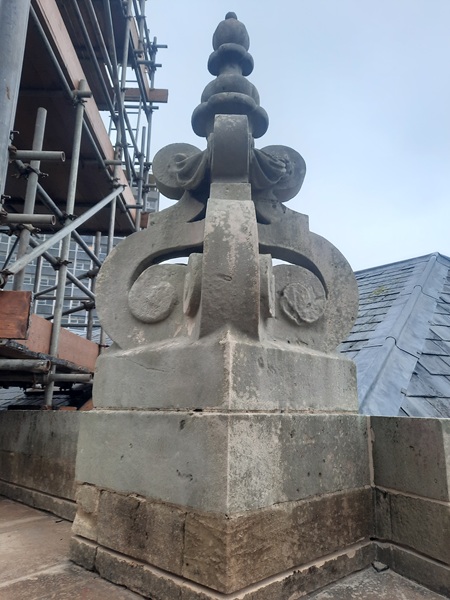
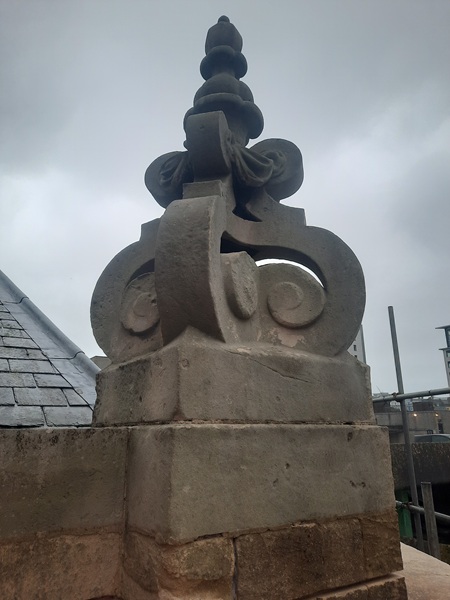
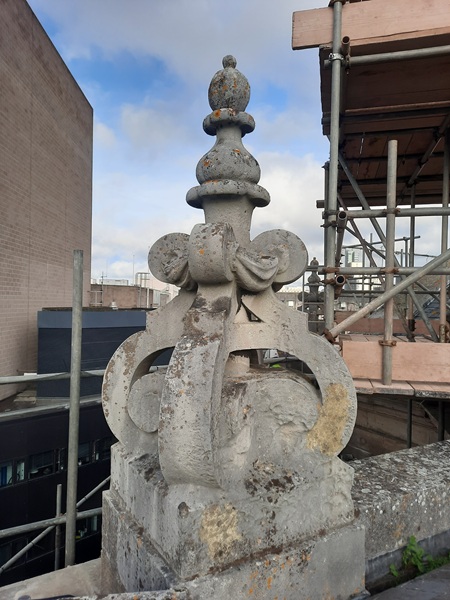
Portland stone finials, you can find four of these dotted around the top parapet.
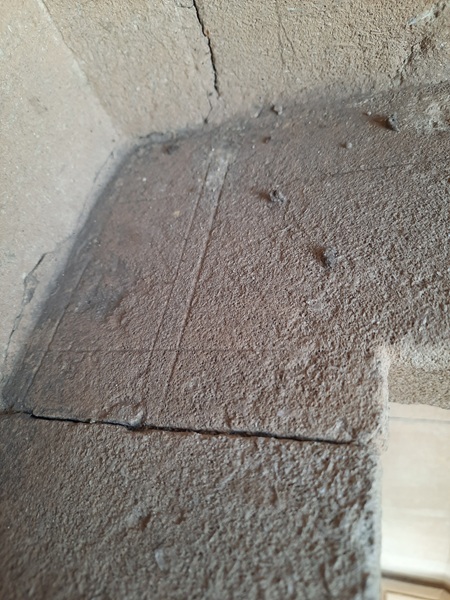
This was an interesting find. It can be found scribed into the top of one of the smaller cornices. The banker mason who originally made this corner section of cornice would of cut these markings into the stone whilst setting out the dimensions for him to work to. Still there after more than 135 years!
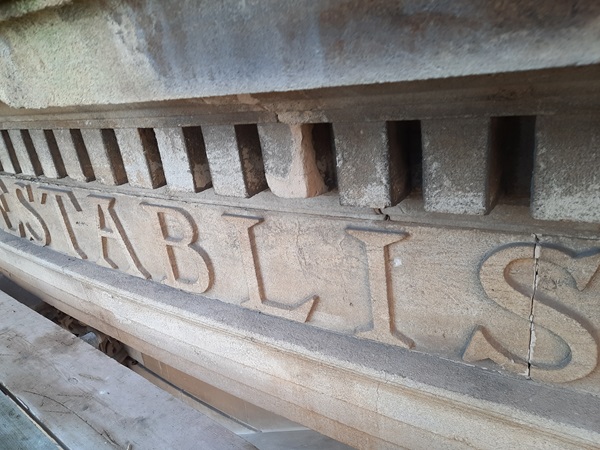
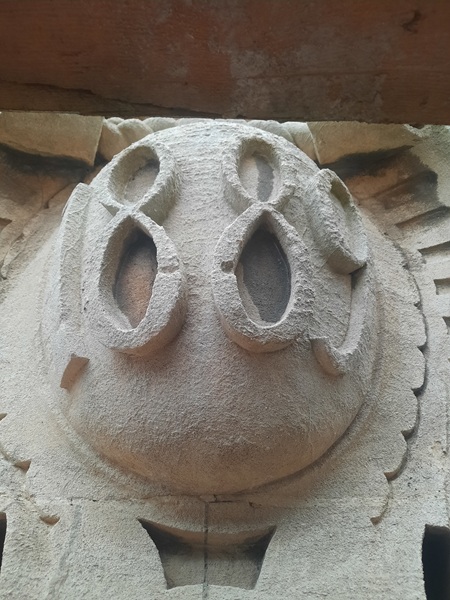
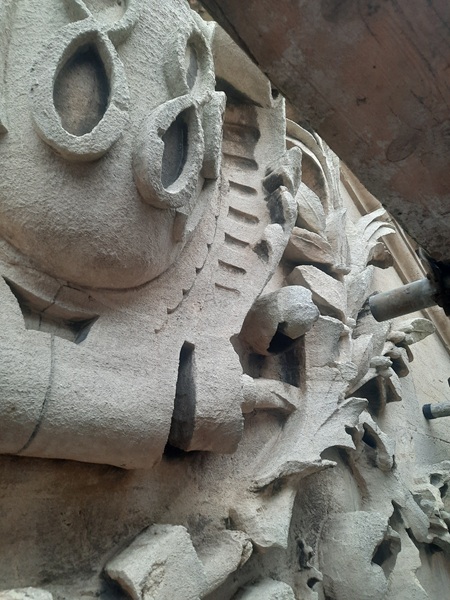
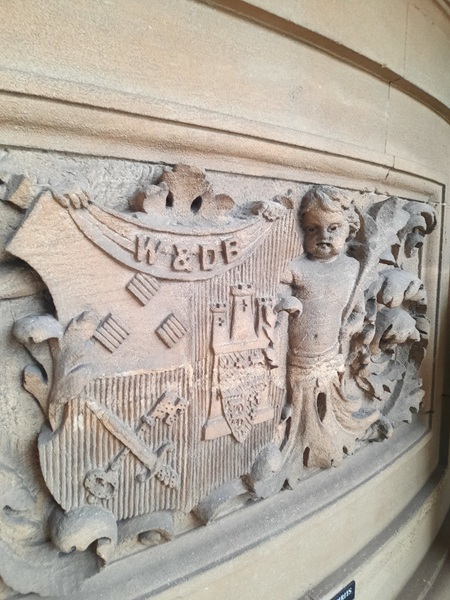
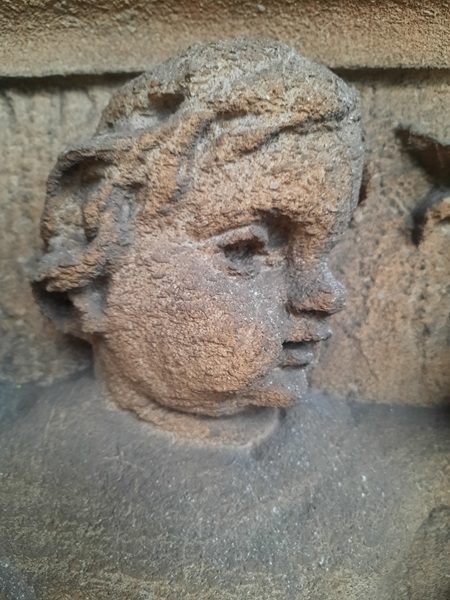
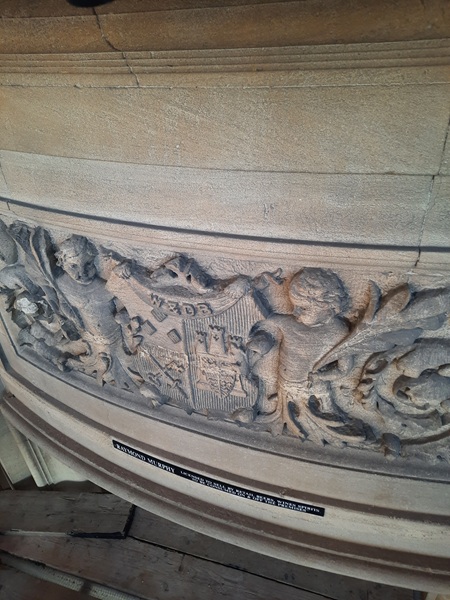
W & DB…..otherwise known as The Wilts & Dorset Bank.
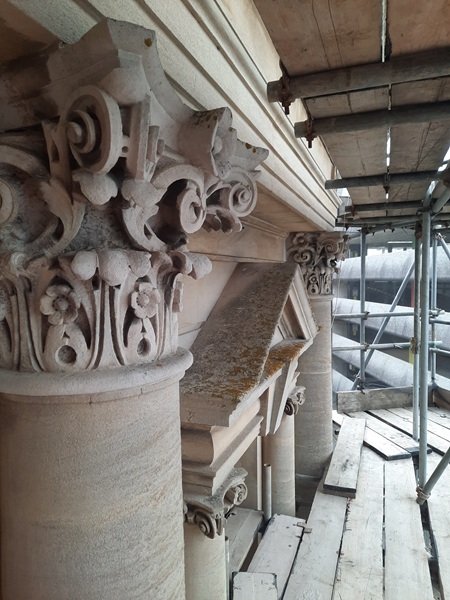
Fluted Bath stone columns.
Complete with Portland stone Corinthian style capitals sat on top. The Corinthian order is the last developed and most ornate of the three principal classical orders of Ancient Greek architecture and Roman architecture. a design of scrolls and unfurled acanthus leaves.
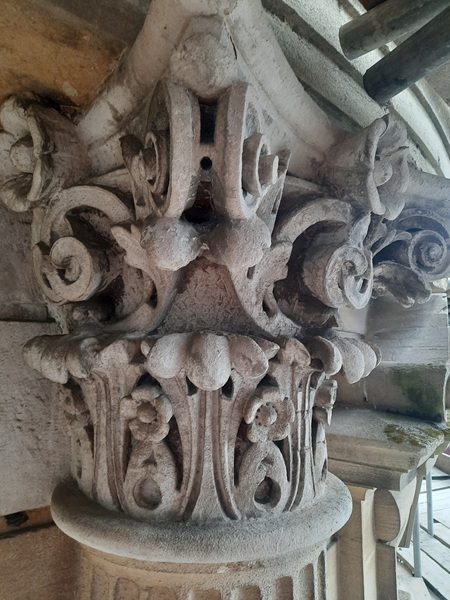
Some Corinthian capitals sat on square columns.
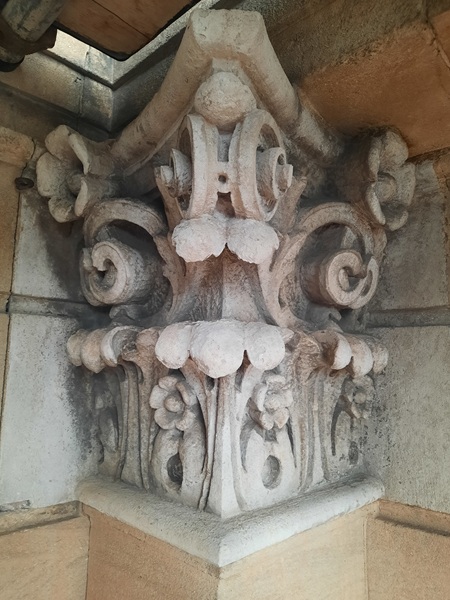
Whilst others sat on plain rounded columns.
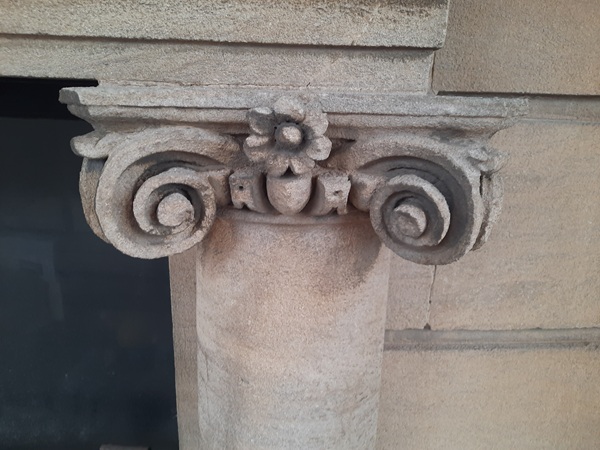
More capitals. These are known as ‘Ionic’ and one of the three principals of the classical orders. The Ionic capital is a distinctive architectural element characterized by its paired, scrolling volutes (scroll-like ornaments) and this is a key feature of the Ionic order, renowned for its elegance and femininity in architecture.
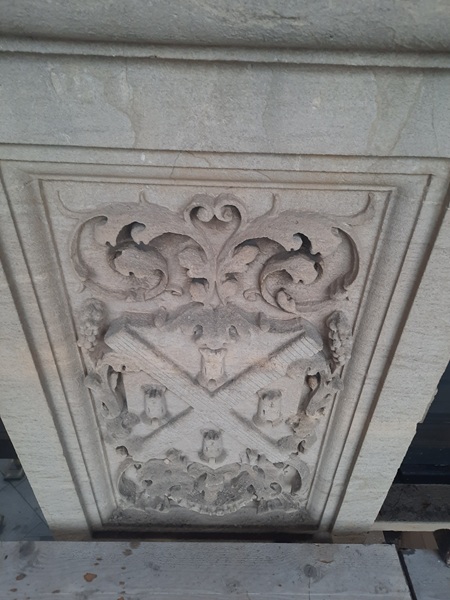
And of course, the Plymouth coat of arms.
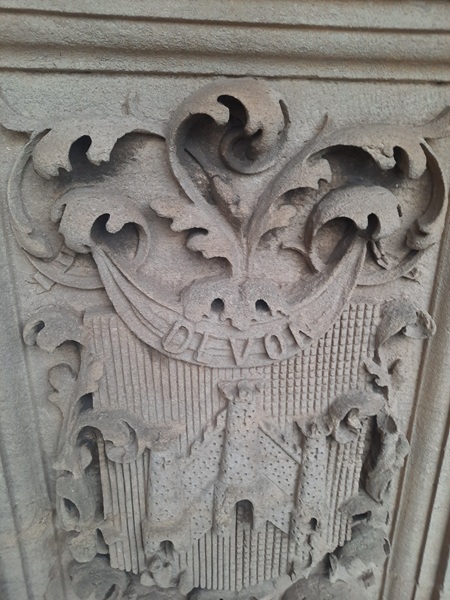
The crest for Devon.
A rather imposing keystone.
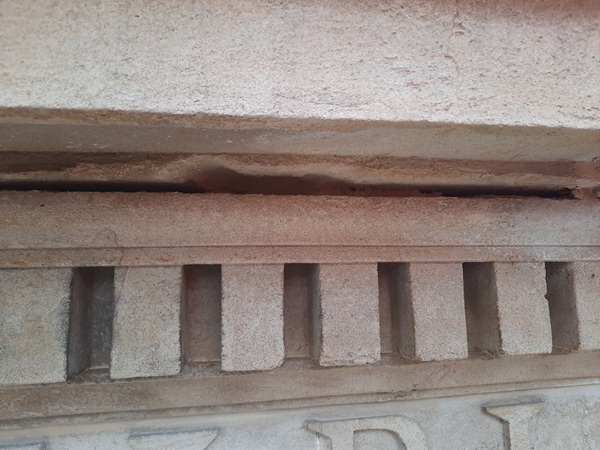
A dentil frieze, typical of Greek and Roman architecture.
A blind balcony.
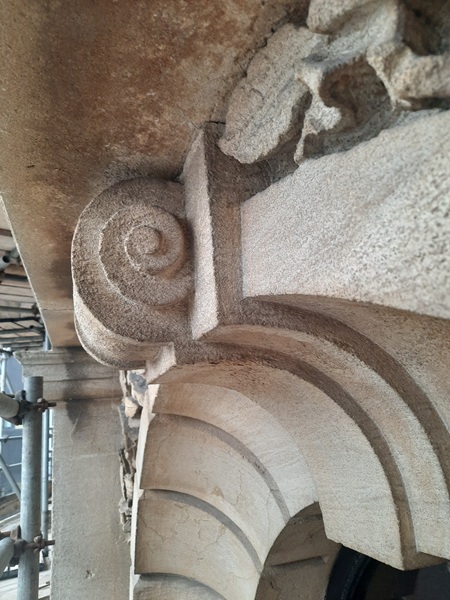
A fancy scroll.
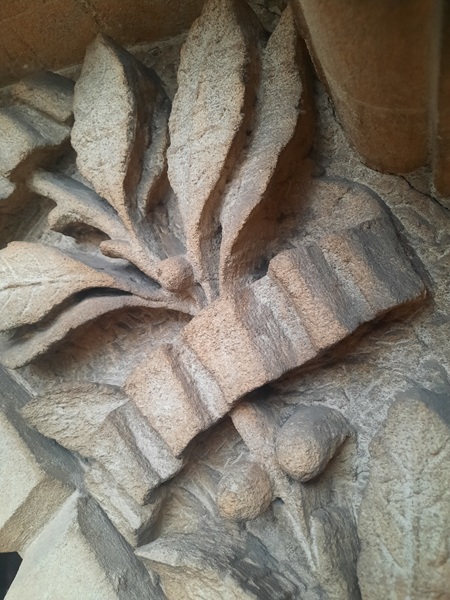
Leaf carving.
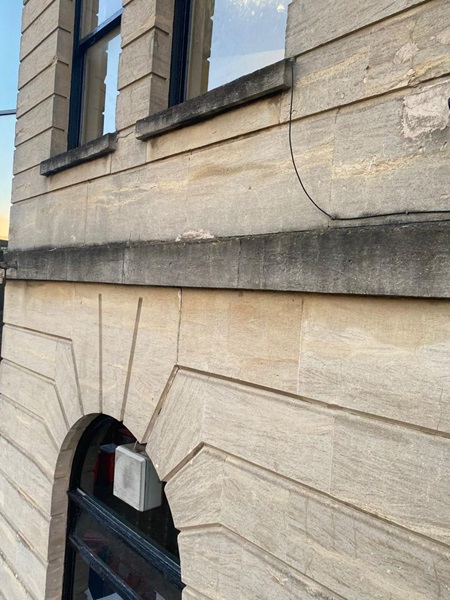
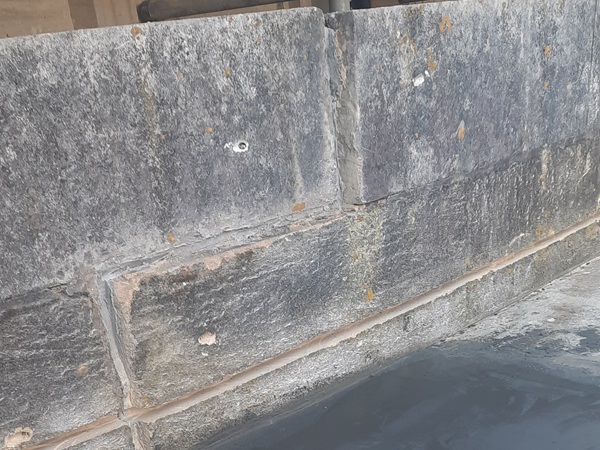
This is known as a ‘Rusticated’ façade. Rusticated masonry was first used in the classical world. It is characterized by stones cut with a smooth or rough surface, and deliberately wide sunken joints between blocks to emphasize each stone. The Ancient Romans typically employed coursed rusticated stone in public structures such as city walls and aqueducts.

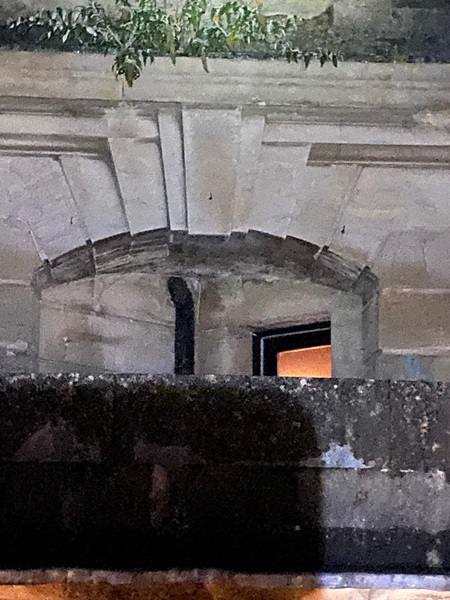
A very fancy splayed arch with keystone.
The bank truly is a lovey building, a jewel in Plymouth’s architecture for sure.
Hopefully the repairs we carried out here will help prevent further deterioration in the future.
But for now we were heading off to our next job.