Redwoods ~ Stowford Mill, Ivybridge, Devon.
Client : Private.

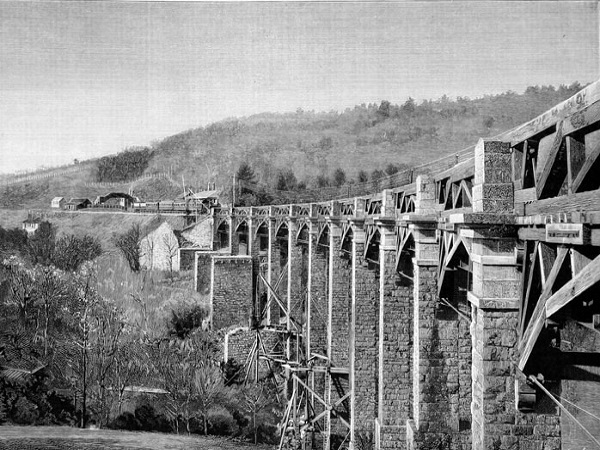
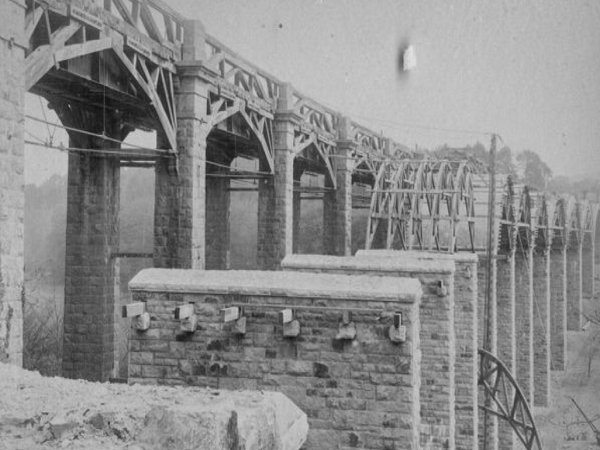
The first Ivybridge Viaduct was originally designed by Isambard Kingdom Brunel for the South Devon Railway. It was opened in 1848 as part of the Totnes to Laira (Plymouth) line. This line consisted of the last extension of the Great Western Railway from Bristol to Plymouth. Originally built as a broad gauge railway, the line was converted for standard use in 1892 following a merger between South Devon Railway and Great Western Railway in 1876. The Ivybridge Viaduct was the highest of the five viaducts constructed between Plymouth and Totnes. Built over a stretch of the Erme Valley, at a height of just over 110 feet it consisted of eleven bays covering a distance of 252 yards. The design, using double piers, were built from locally dressed granite with a timber superstructure which was strengthened with wrought iron girders twenty years after its construction.
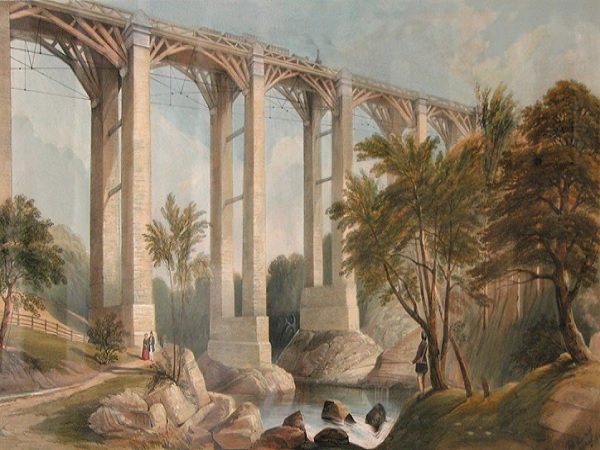
Due to the conversion of the line from broad to standard gauge, the original viaduct that Brunel had built became redundant and was replaced in 1893 with a newer viaduct designed by Sir James Inglis, the General Manager and Consulting Engineer of the Great Western Railway and built by S. Pearson & Son Ltd of London.
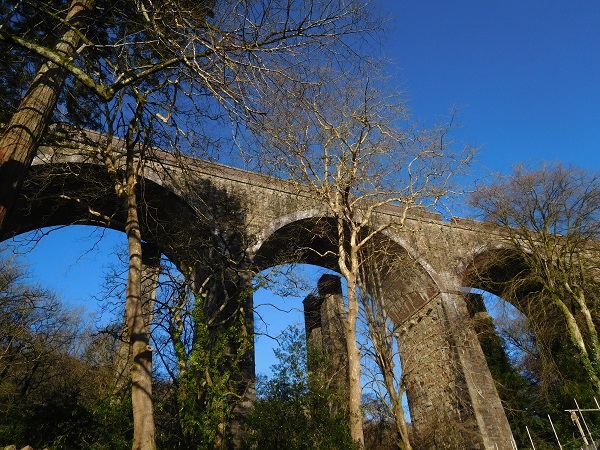
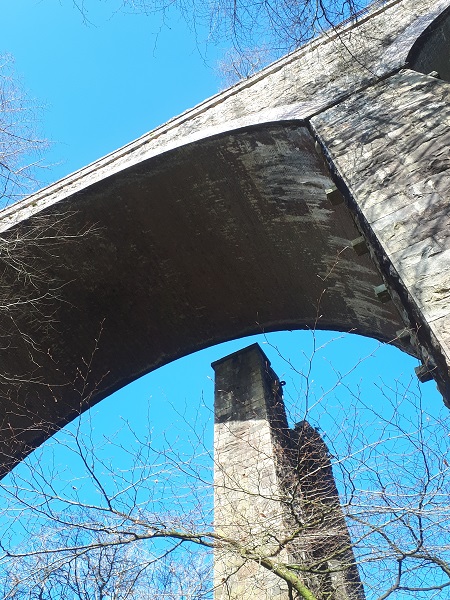
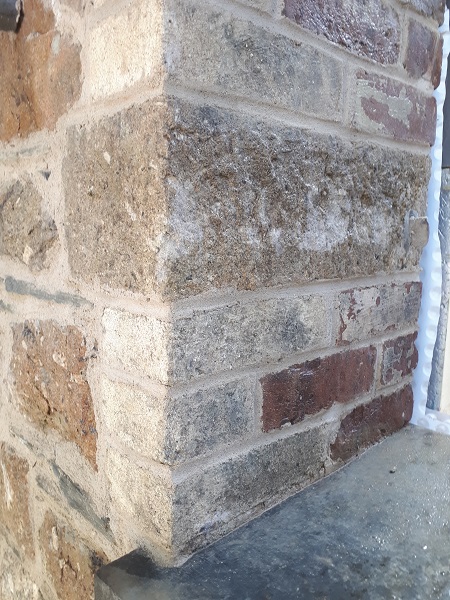
The viaduct built by Inglis consists of eight arches constructed of Staffordshire blue engineering bricks that span across solid piers of local ‘rock’ or ‘pitched’ faced granite. This style of dressing stone is where the mason will square off the edges to the granite shaping it into square or rectangular blocks with a pitching chisel leaving a natural looking face to the stone. It’s one of the cheapest methods of dressing stone as no further tool work is required to finish off the face. The spandrels between the arches are also built from granite with a brick parapet on top of that again which is finished off with granite coping stones.
Six of Brunel’s piers from his original viaduct still stand to this day alongside the newer viaduct although its timber superstructure has long since disappeared and both structures are Grade II listed by English Heritage as these types of construction demonstrate the significant technological and engineering advancements in the railways throughout that period.

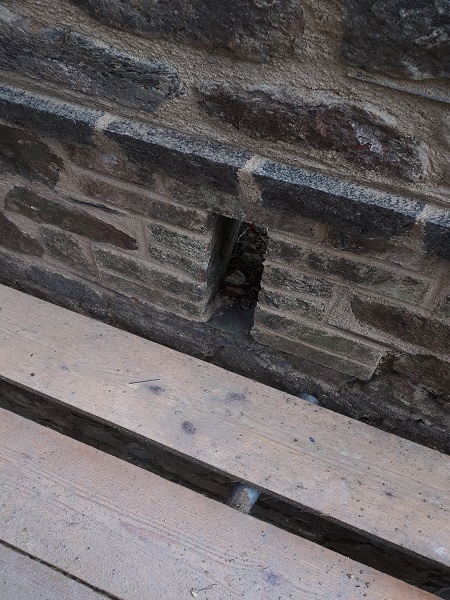
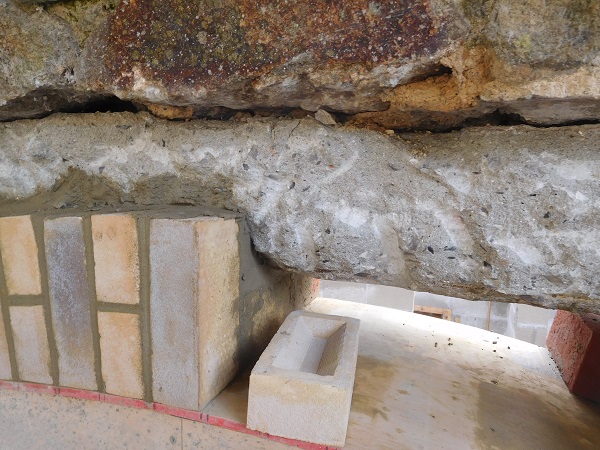
The piers for the viaduct have large through-stones set in which are corbelled out on each side at the top. These corbelled projections are not architectural features, they served a purpose. On these corbels sat the huge timber centrings which were wedged in position whilst the bricks for the arches were put into place. Once the arches had set, the wedges and centrings would be removed. Originally the design for the viaduct specified for the arches to be built in granite, however by the time the piers were up to height, all the local stonemasons went on strike over pay disputes. Not to be held to ransom, Sir James Inglis decided to get an army of Irish bricklayers in and build the arches out of brick instead, which was quite a feat in itself really, considering it took more than 4,000,000 bricks to complete all the arches along this stretch of railway line.
The term ‘viaduct’ is derived from the Latin ‘via’ (road) and ‘ducere’ (to lead). It is a nineteenth century derivation from an analogy with ancient Roman aqueducts, and just like the Roman aqueducts, many early Victorian viaducts consisted of a series of arches which were, more or less, equal in length.

Paper making in Ivybridge began towards the end of the eighteenth century. William Dunsterville, a Plymouth businessman had purchased the lease for the Barton of Stowford from the Lukesland Estate in 1787. His prime interest was to establish a paper mill next to an existing corn mill and leat. The location beside the River Erme proved to be ideal as water wheels provided all the necessary power for the production of paper. In 1849 the paper mill was bought by John Allen who set about completely rebuilding and expanding the mill. Apart from the paper mill, Allen also built himself a new residence naming it Stowford Lodge. This was a seven bedroomed Italianate style villa complete with servant quarters set in its own grounds overlooking his paper mill.
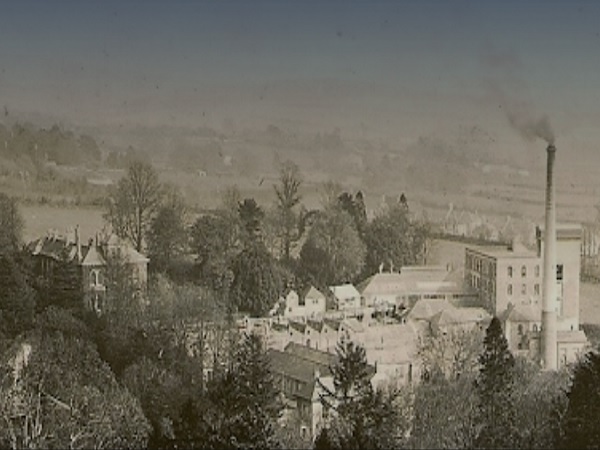
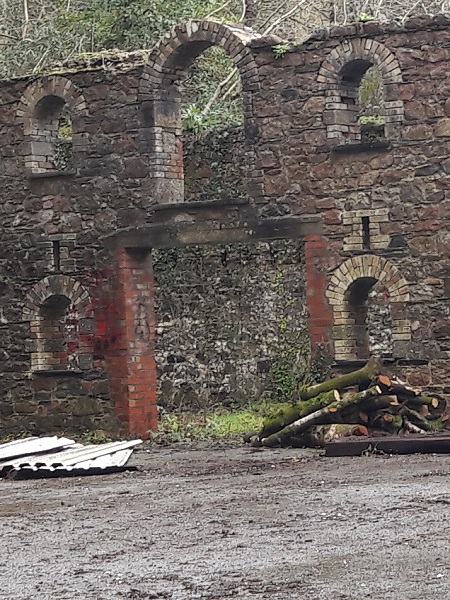
At one time the mill produced the paper for all postage stamps in Great Britain and by the 21st century the mill was owned by Arjowiggins who announced in 2014 that Stowford Mill would be closing down for good and so ending more than 200 years of paper making in Ivybridge. The site lay dormant for a few years until it was eventually sold for development. The new developers now set about transforming this important site creating a contrast of high quality mixed housing and business premises along with retaining, converting and restoring the historic Victorian mill buildings as they are listed by English Heritage due to their industrial significance. Hidden away at the top end of the site under the shadow of the viaduct stood a dilapidated ruin which was almost folly like in its appearance.

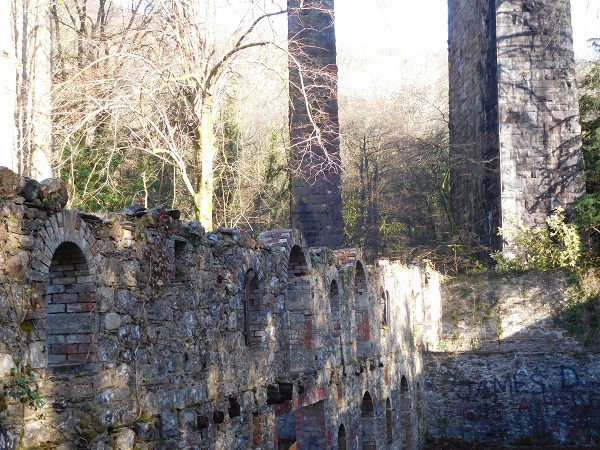
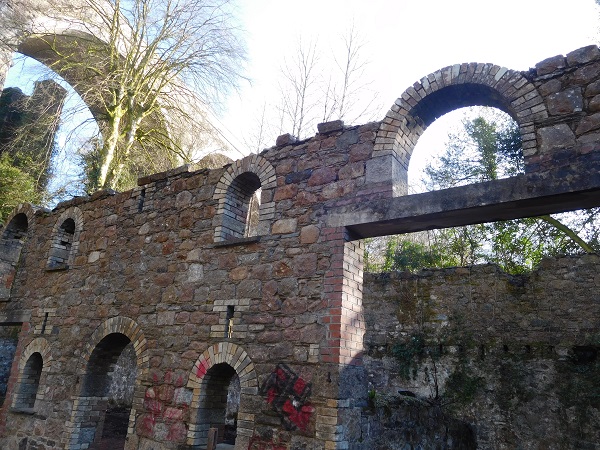
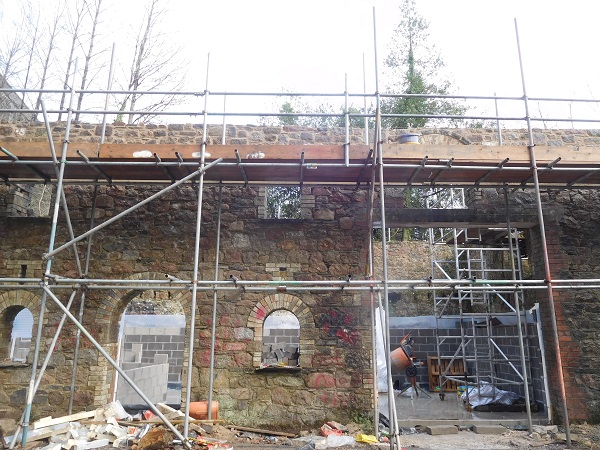
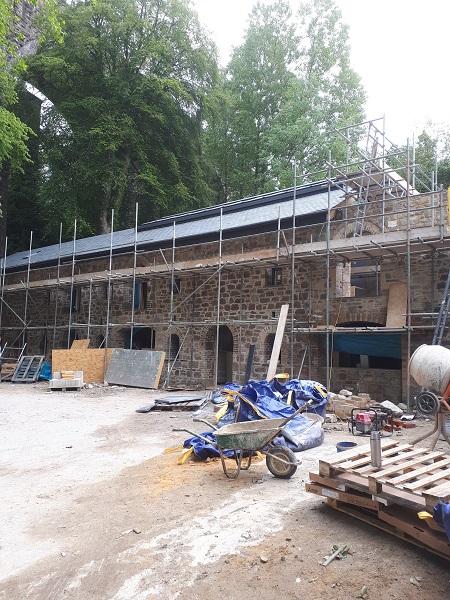
Overgrown with vegetation, no roof and in a very sad state of repair, this ruin looks like an old stable block probably built for John Allen in the 1850’s and would of been here before the present viaduct that was built by Inglis. Being part of Stowford Mill’s heritage, this building is Grade II listed and the plan here was to convert it into a bespoke single residential property. We were asked to carry out all the associated masonry work regarding structural repairs and re-pointing to bring this lovely old building back to its former glory, so a scaffold was erected prior to us turning up on site, and this was going to keep us busy for quite a while.
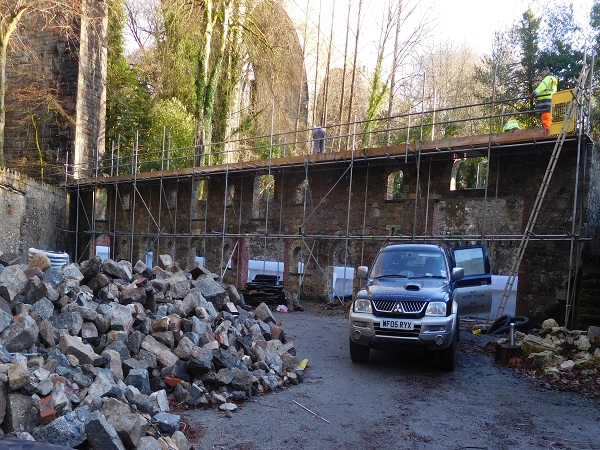
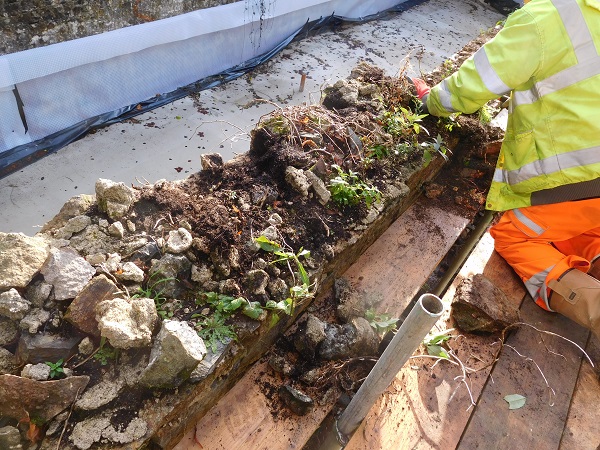
Our first job was to remove all the vegetation and loose masonry along the tops of the walls, as well as getting all the preparation work done and treating everything with a strong dose of weed killer.

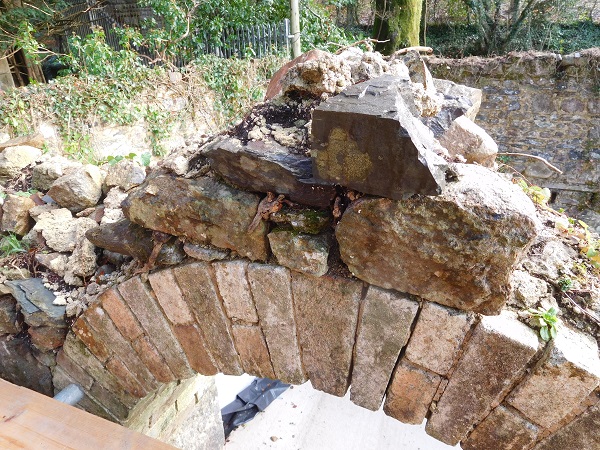
This was done so that we could raise the walls up by about three feet or so to take the new roof. It would also give more headroom internally to the upper floor area.
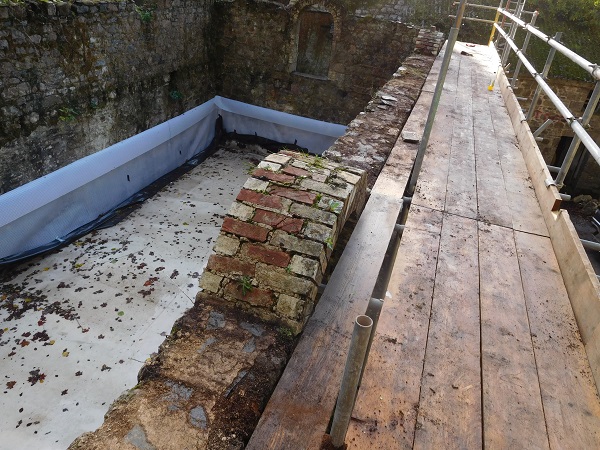
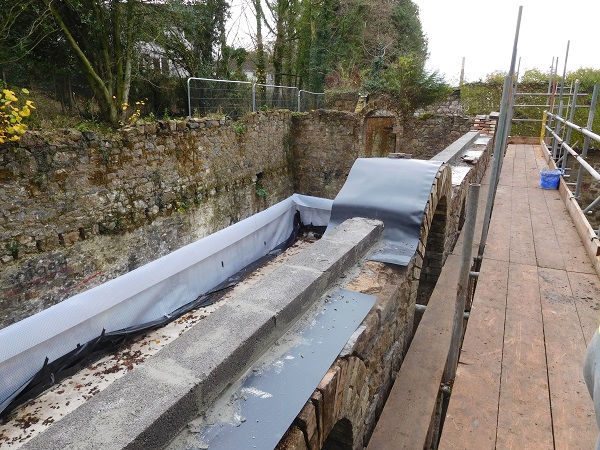
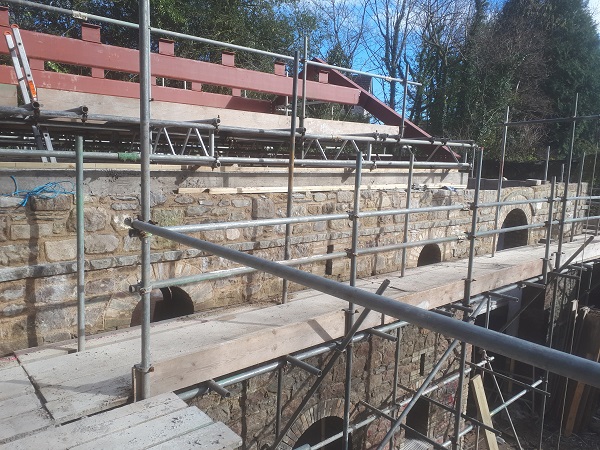
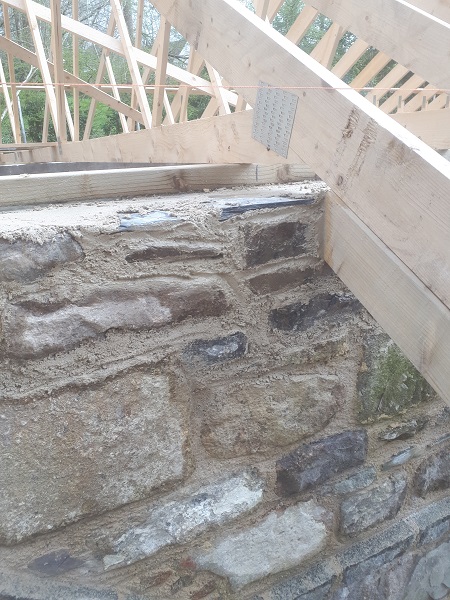
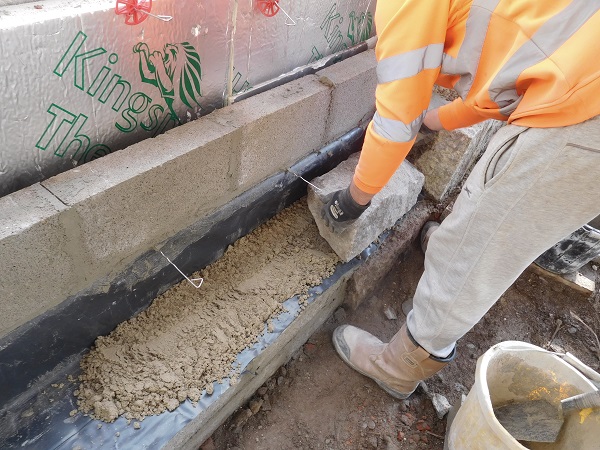
And once all the prep work had been completed, it was time to start building up the walls to height. First of all a damp proof course (D.P.C.) was laid over all the arched window openings as this would prevent future water and moisture ingress that could penetrate the wall and appear on the internal window heads at a later date. This is a quick, cheap and invaluable exercise to do because if omitted at this stage, it could prove to be a costly job to rectify once the roof is in place and all the internal plastering completed should any damp problems occur later on down the line.
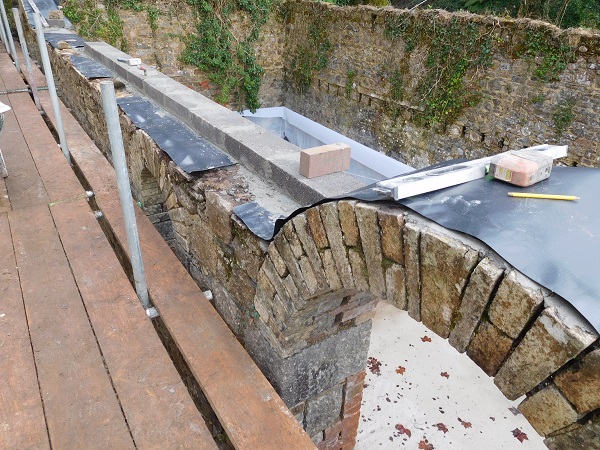
The D.P.C is held in place by bedding a concrete block on its flat along the back edge of the existing wall. The D.P.C. is kept back an inch (25mm) from the face of the stonework but four inches (100mm) are left sticking out on the back edge. This would be turned up in a cavity behind as a new internal insulated skin of blockwork was to be built on the inside, so any moisture over the arches will only come out through the external face of the wall.
With the D.P.C. now in place we proceeded to build up the back of the wall in concrete block with stainless steel ties. Face stonework would then be built against it.
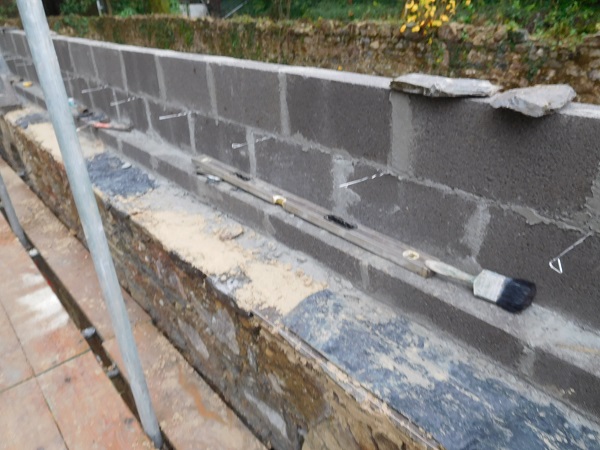
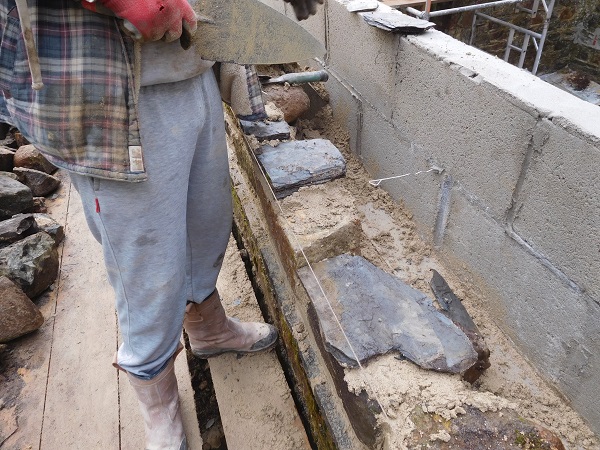
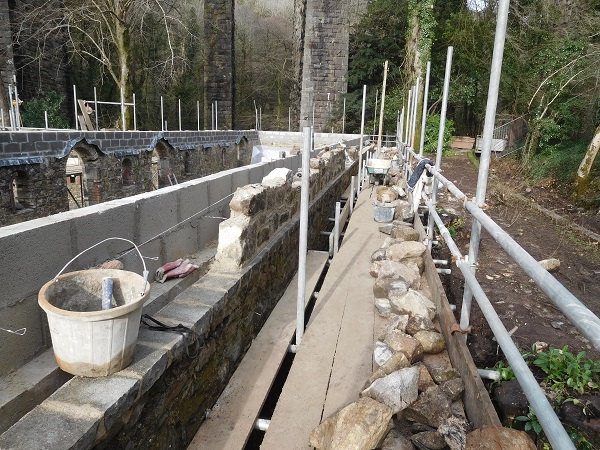
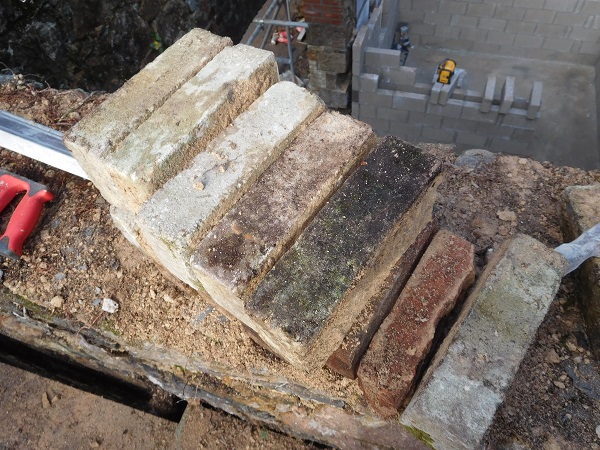
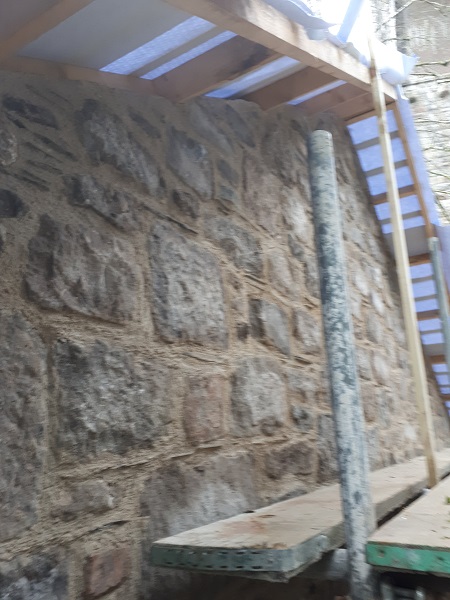
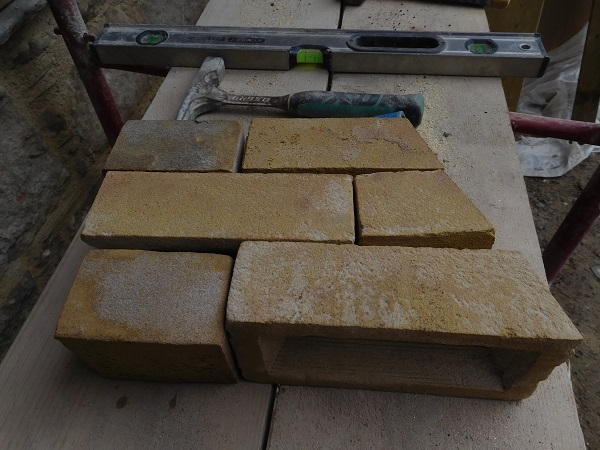
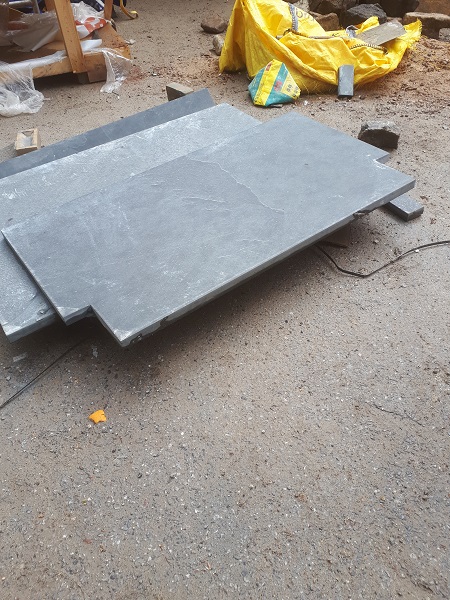
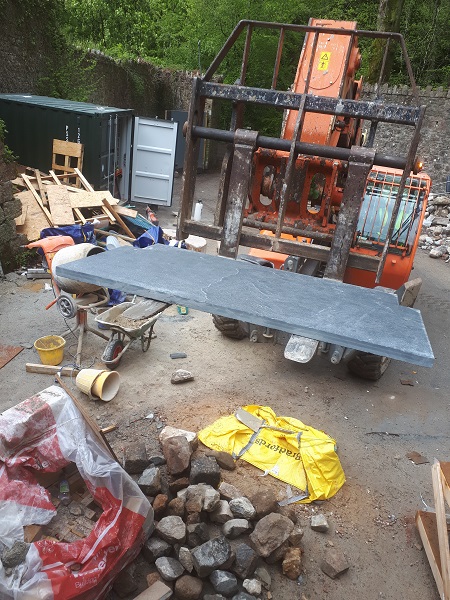
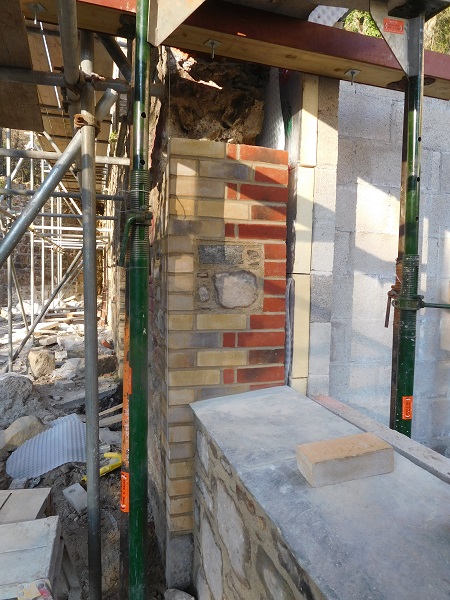
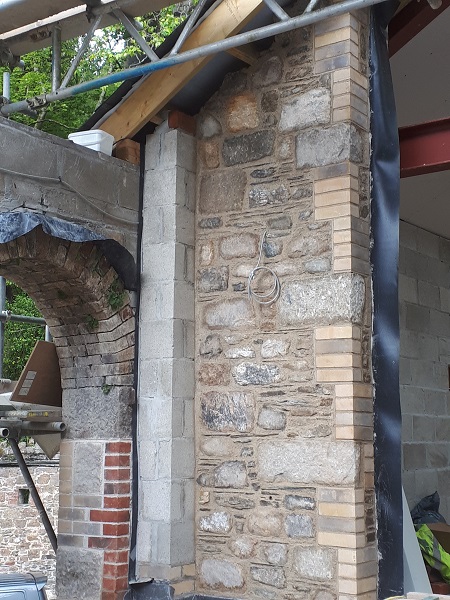
But before we could begin the stonework, we had to set in a levelled string course along the face of the wall out of granite. Luckily for us, on site was a huge stockpile of palleted granite that had been acquired from another job which was surplus to requirement. This granite consisted of all sorts of shapes, colours and sizes, so we went down and had a good look to see if anything there was suitable for what we needed.
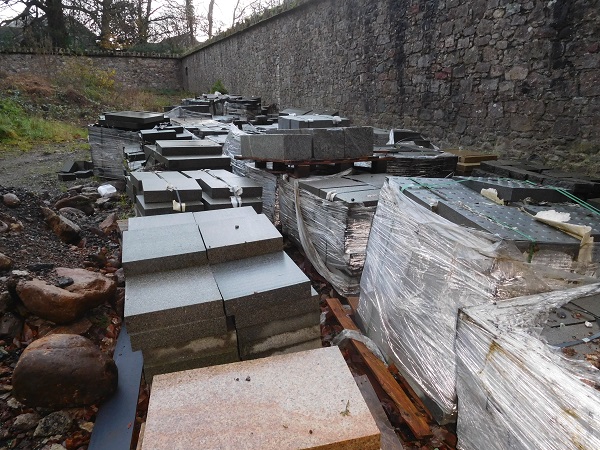
Amongst this pile were several pallets of a dark grey granite that had originally been intended for use as paving. These paving blocks were approximately eight inches square (200mm) and three inches (75mm) thick. More importantly all the edges had been split and not sawn, which gave a natural appearance. These blocks were perfect for what we wanted to achieve.
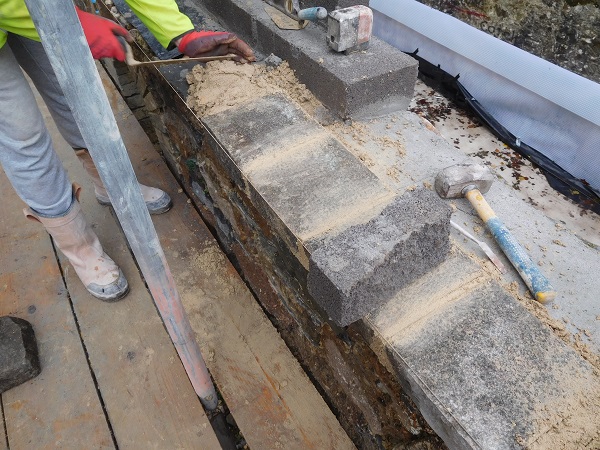
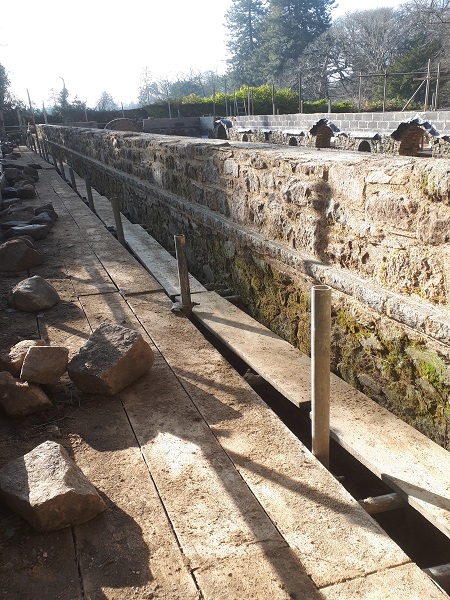
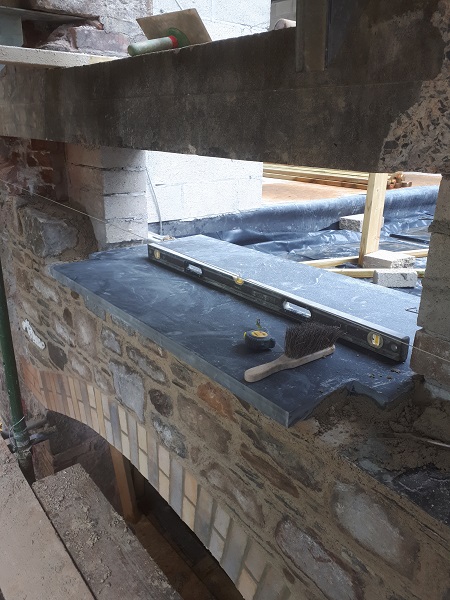
The string course was set in because whilst we were carrying out the preparation work it was evident that a string course was already there, albeit much of it had disappeared over time, and being a listed building it was only right that this feature went back again. They were bedded down using a traditional historic lime mortar overhanging the face of the wall by about two inches (50mm) with the natural face of the granite on show. This string course went from one end of the building to the other.

We also followed this course line over the arched openings that were higher than the new string course.
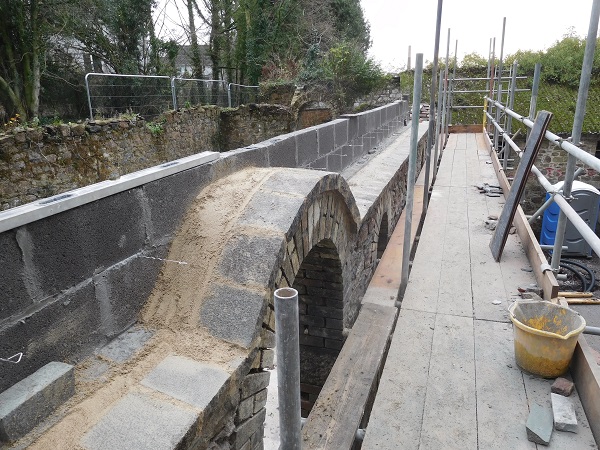
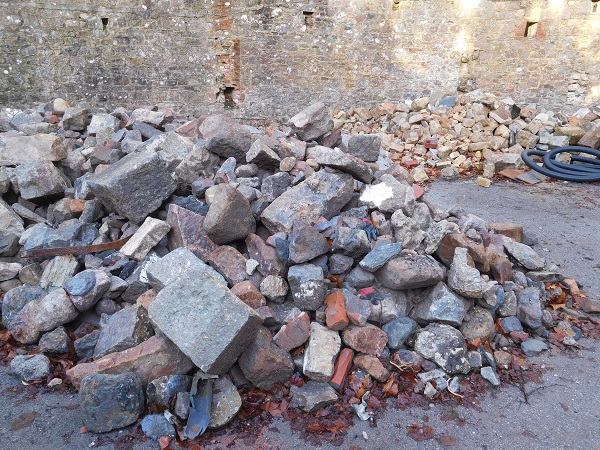
The string course was set in by laser level and would eventually continue around the building on all four of its elevations. The stone we were going to use to build above the string course came from demolished buildings and walls from the old paper mill, that were not listed, to make way for the new development further down the site. The stone was a perfect match to carry out the new stonework and would of originally been quarried from long abandoned granite quarries out on the nearby Moors. Old reclaimed stone is always the best to use, especially on old buildings because it not only matches into what you are building, it has also been originally selected to go into a wall by the masons in the past, and you’ll find nearly every stone will generally be of good quality. If it was good enough for the old masons, it was certainly going to be good enough for us. We needed a huge amount of stone so more was brought up to us and dumped against the boundary wall opposite to where we were working.
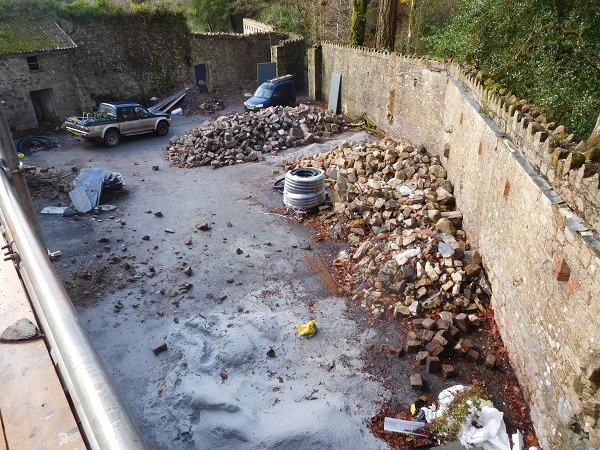
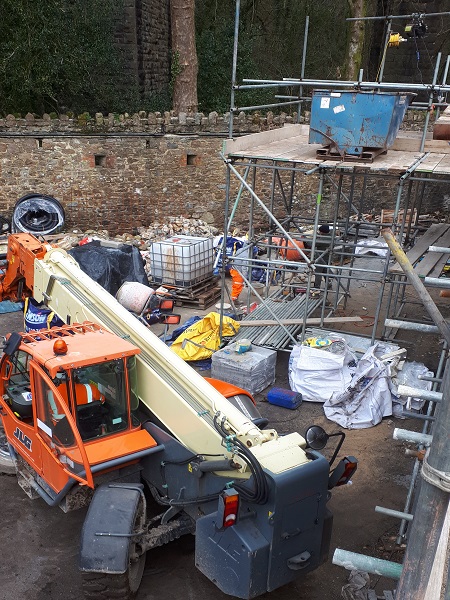
A scaffolded loading bay was set up for us complete with a winch, not only to haul mortar up to us, but mainly so a telehandler could lift up skips full of reclaimed stone to roof level where we needed it. We were going to use tons of mortar and tons of stone.
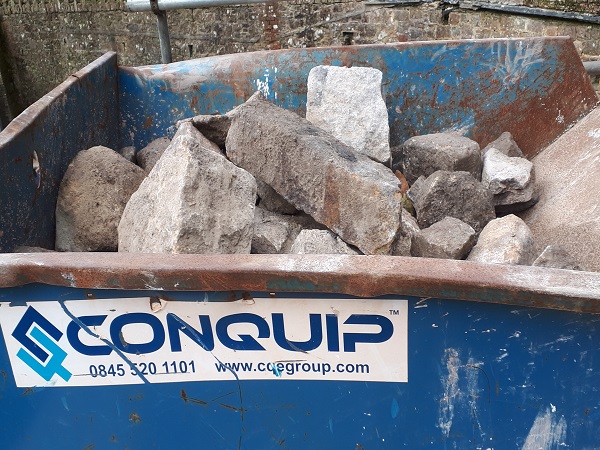
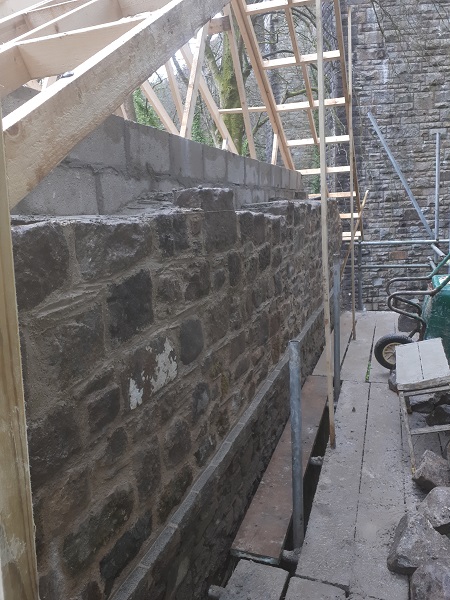
The reclaimed stone consisted of roughly shaped granite with a little bit of slate, some of the granite had been dressed having been originally used as quoin stones in a previous life, the colours varied in shades of brown, pink, red, yellow, grey and black, and now that the string course was set in on the front elevation, we were able to start the new stonework and again, historic lime mortar was going to be used for the stonework though out the construction.
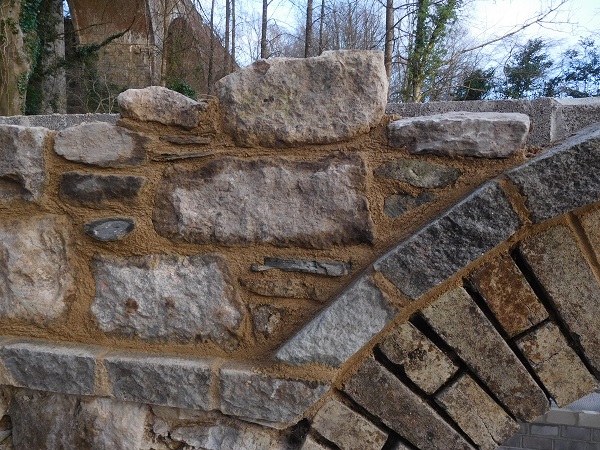
When first mixed up the lime mortar is golden yellow in colour, but once it dries out it turns to a pale cream.
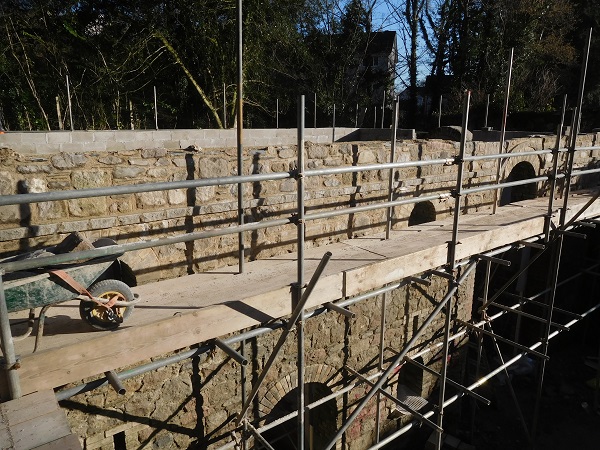
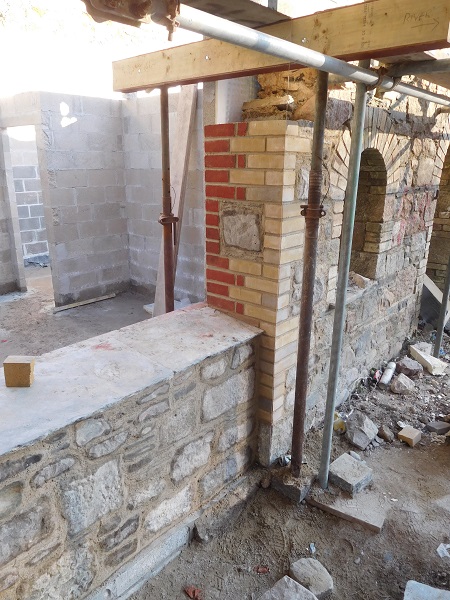
Having built the stonework up to the required height for the new roof, we also repointed the original stonework and brick arches on this level whilst we were still on this scaffolding lift.
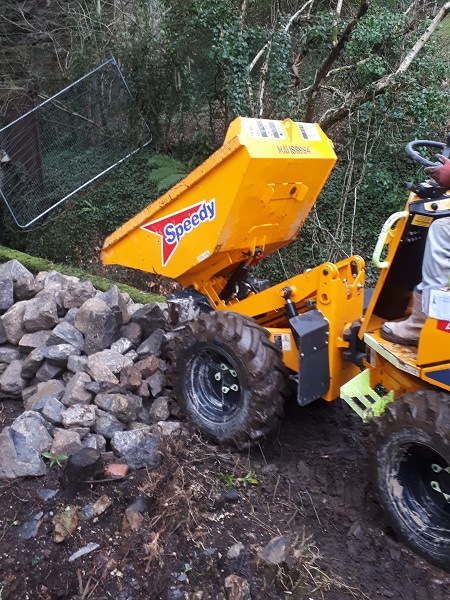
We continued with the new stonework and string course at this level all the way around the building, although there were no window openings on the the back elevation. Luckily for us we had better access along the back elevation which enabled us to place stone using a small dumper along the full length of the building which could then easily be placed on the scaffolding for use.

Despite their age, all of the arches that had been originally constructed for this building were found to be in a very good structural condition. However one of the brick arches on the side elevation had some serious root infestation in the form of a young tree sapling.
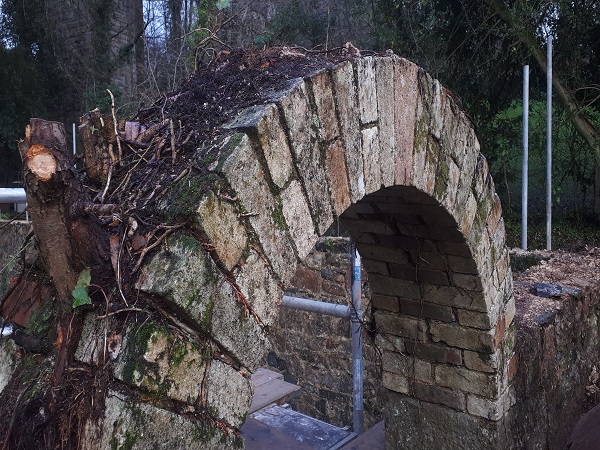
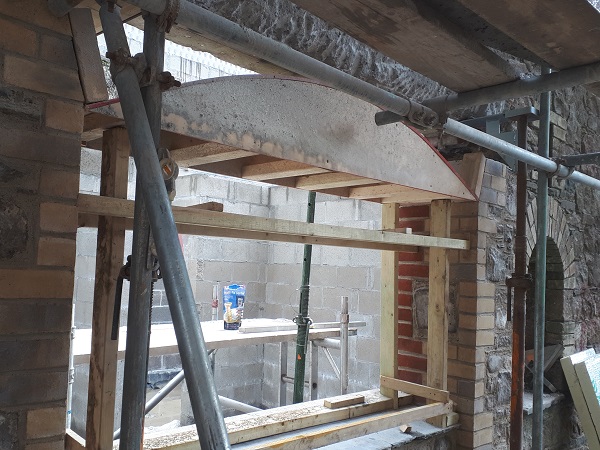
It soon became evident that it was going to be impossible to remove these roots without completely taking down the arch itself. Because the building was Grade II listed, we wanted to preserve as much of the original arch as we could, so a timber centring was made up to mirror the existing curve of the underside of the arch. The underside curve of an arch is called the ‘Intrados’.
This was then placed into position under the arch to support it. Once positioned it is crucial that the centring is propped securely from underneath and more importantly sitting on wooden folding wedges which enable the centring to fit nice and tight to the underside of the arch. The wedges make it so much easier to remove the centring once the repair has been completed. We used four sets of wedges to support each corner of the centring.
Now that everything was propped up securely, we took out the bricks that had been affected by the roots.

By carrying out the repair in this way we were able to save one half of the original arch and this is why it’s important to ensure the centring is securely in place with no movement as it is now completely supporting the weight of half the arch. The original bricks that we removed were cleaned up and set aside for reuse.
With all the preparation work now complete we were able to build the arch back together again using the original bricks. There are many types of arches and most of the arches used on this building are what is termed as an ‘Axed arch’. This type of arch is so called because the bricks used in its construction have been roughly cut into a wedge shape known as a ‘Voussoir’. These arches distribute weight efficiently by taking full advantage of using the compressive strength of each brick within the arch.
The centring is left in place for at least a week before it is removed to give the arch plenty of time to set, so in the meantime we continued with the string course on this elevation, which also followed up over the arch, and began building up the stonework to level.
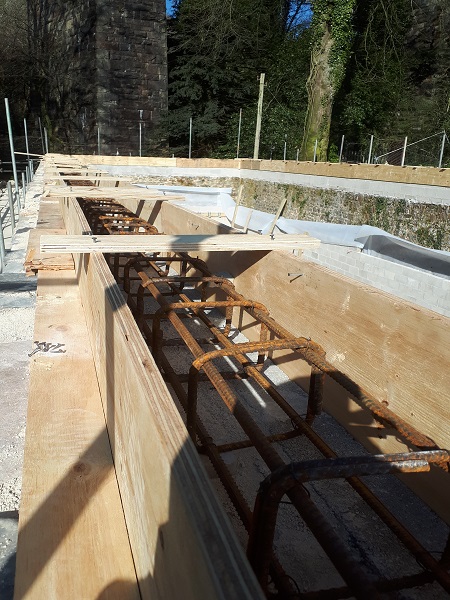
The walls were now more or less up to height and the new roof was to sit on a reinforced concrete ring beam and this was the next job that had to be done. So the carpenters turned up on site and set in place all the timber formwork complete with steel reinforcement for us to cast the ring beam.
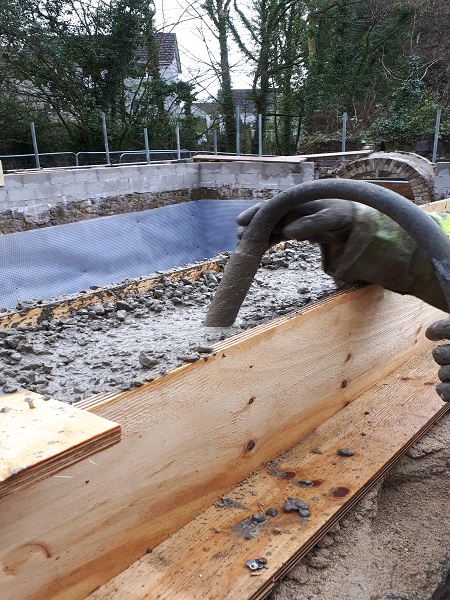
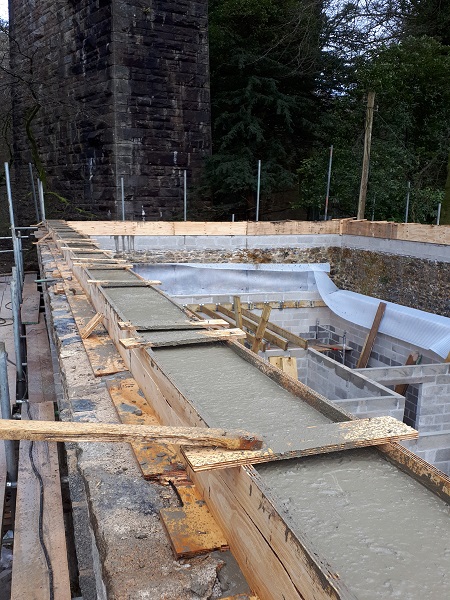
When the concrete is put in place a poker vibrator is used to ensure all the air pockets and voids are removed from within the concrete and this makes it as dense as possible. The concrete used here is a grade C35 which is specified when a high compressive strength is required once it has cured in order to take heavy loads, after all, the roof structure when completed with all the timber, steel and slates etc, would weigh several tons.
Once vibrated it’s then levelled off with a steel trowel.
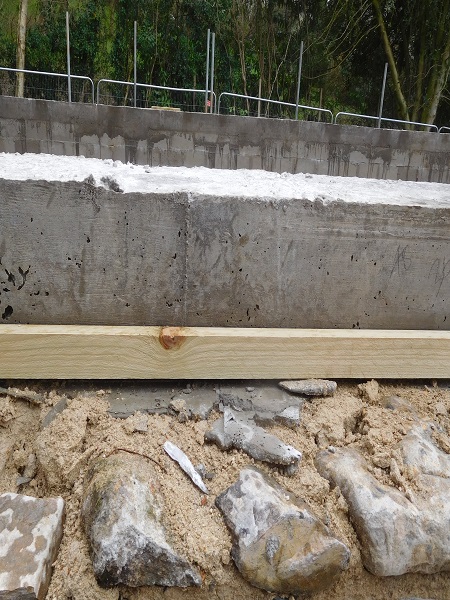
The concrete is left for a week or so to cure before the timber formwork is taken down.
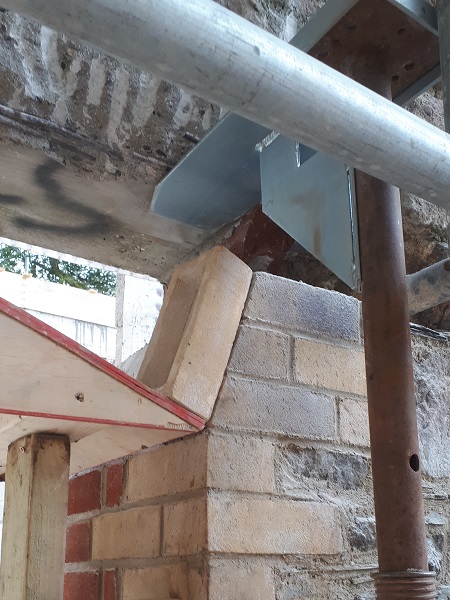
At this point the steel erectors arrived on site and positioned the structural steelwork in place for the roof.
The steelwork sat on the new concrete ring beam and fixed into place with anchor bolts.
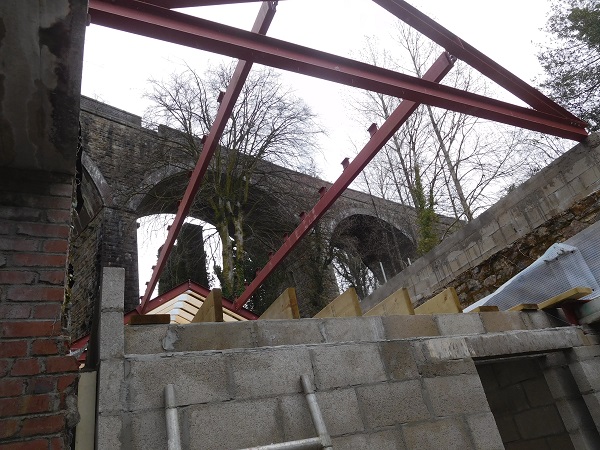

Only half of the roof consisted of steelwork and this would have glass sky lights situated high up along both sides of the ridge line with timber rafters from the sky lights down to a wall plate fixed to the concrete ring beam. The other half of the roof nearest to the old viaduct was to be constructed in the traditional way using timber trusses.
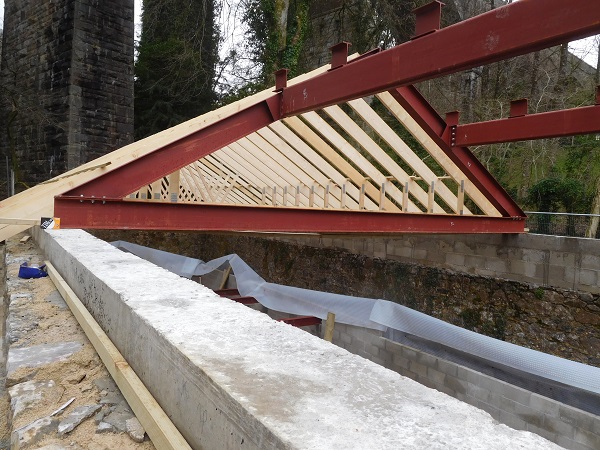
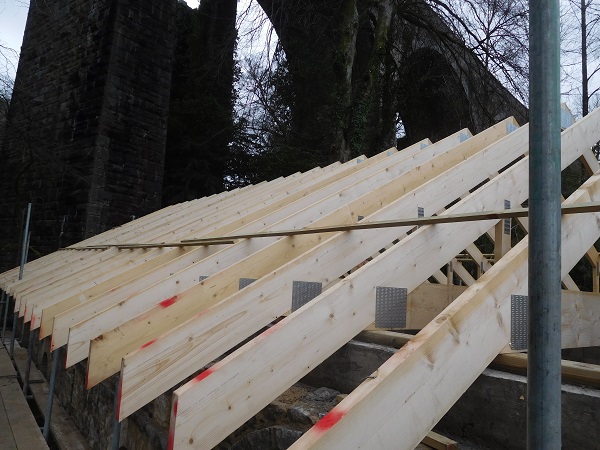
Now that the carpenters had the timber trusses in place we could concentrate on building in the ends of the overhanging rafters using stone. The roof overhang the stonework by about 12 inches (300mm) and this makes the walls more weather resistant.
On the gable end elevation we finished off the string course, built up some blockwork and cladded that with new stonework.
The end truss incorporated a ‘ladder’ and this detail enables the roof on this elevation to also overhang the gable end wall, again making it more weather resistant. The new stonework would be built up to encase the ‘ladder’ and also tie in the roof construction.
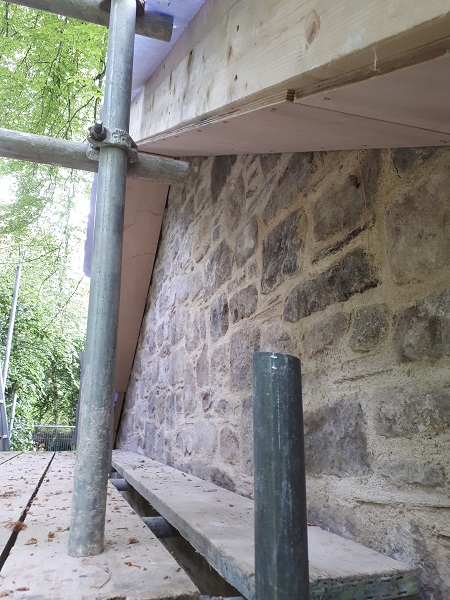
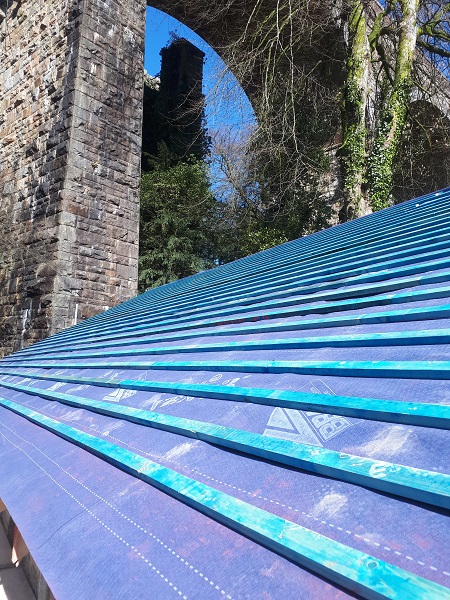
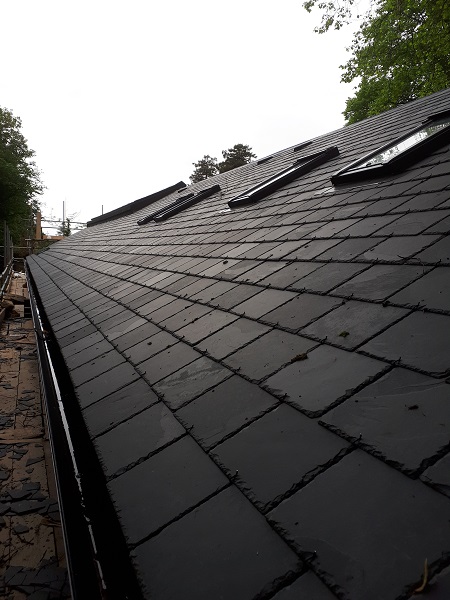
When the stonework to the gable end was complete and the rafters built in, the roofers were able to felt and batten the roof in preparation for the natural slates that would eventually be fixed there, but for now the building was mainly dry inside and that opened up a lot of work for other trades.
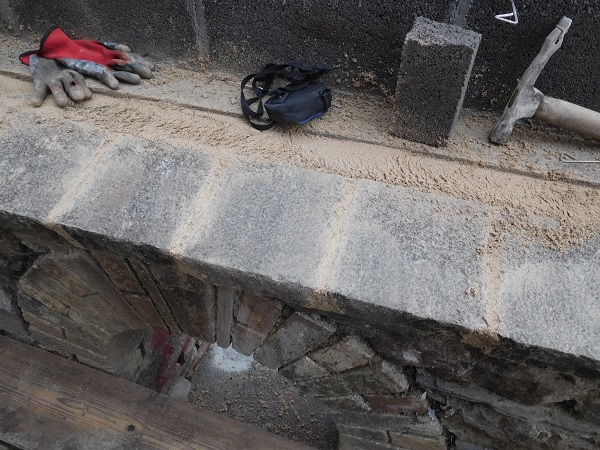
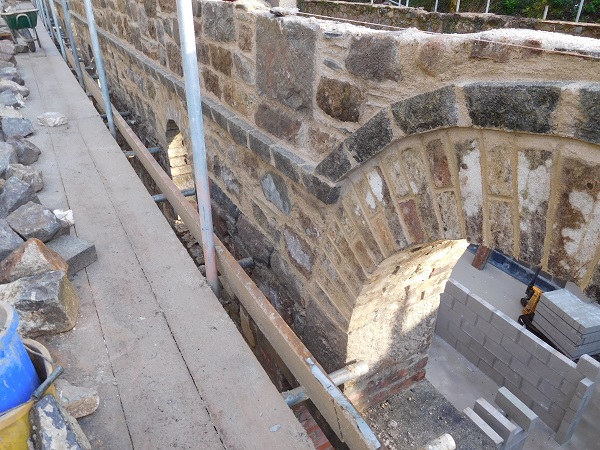
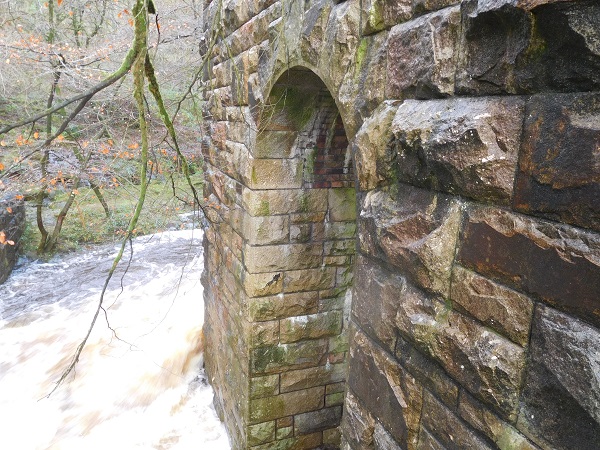
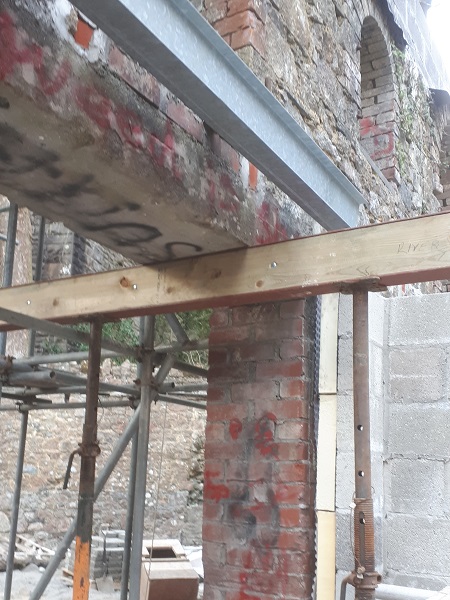
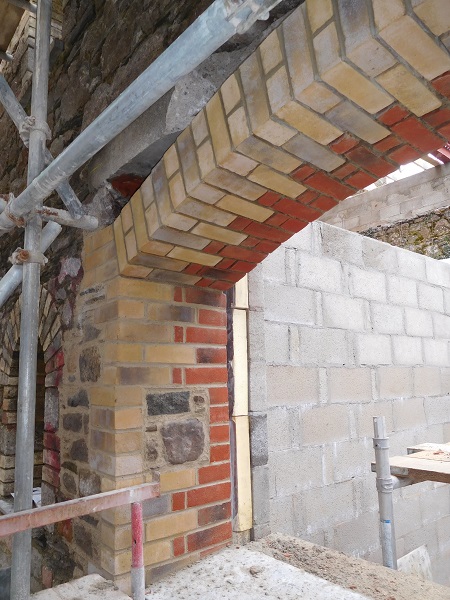
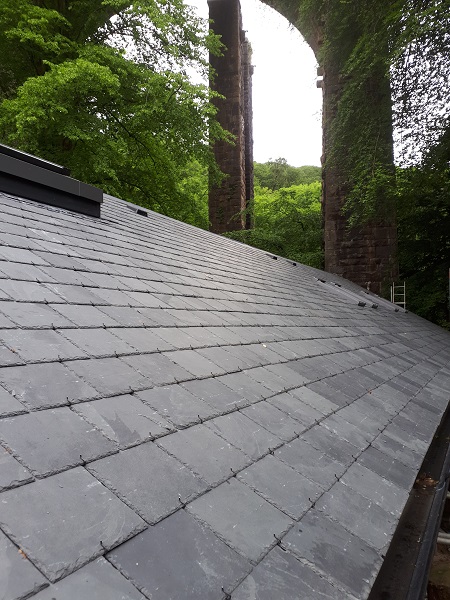
On the scaffold by the gable end we were within touching distance of the granite pillars that held up the old viaduct.
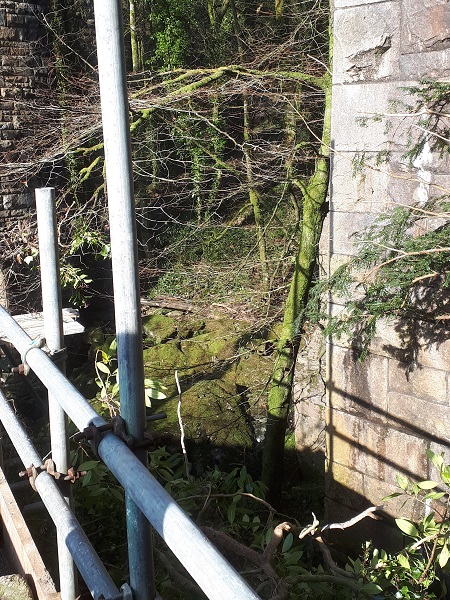
And below us flowed the river Erme which ran between its giant pillars.
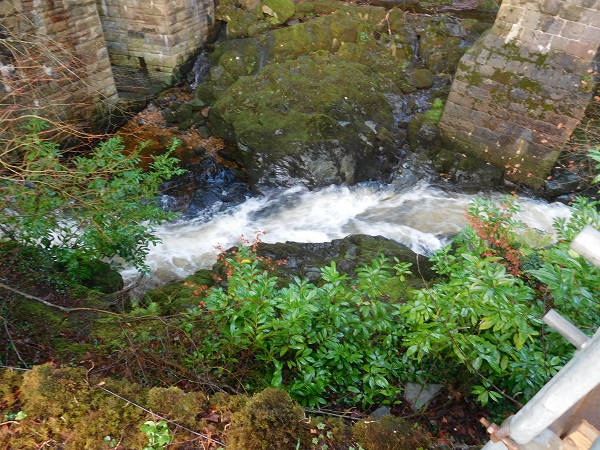
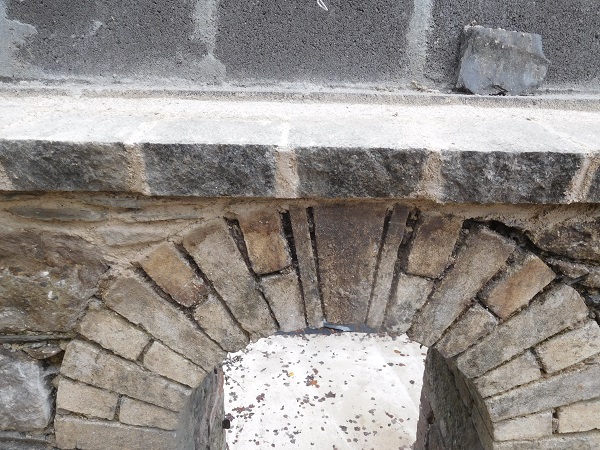
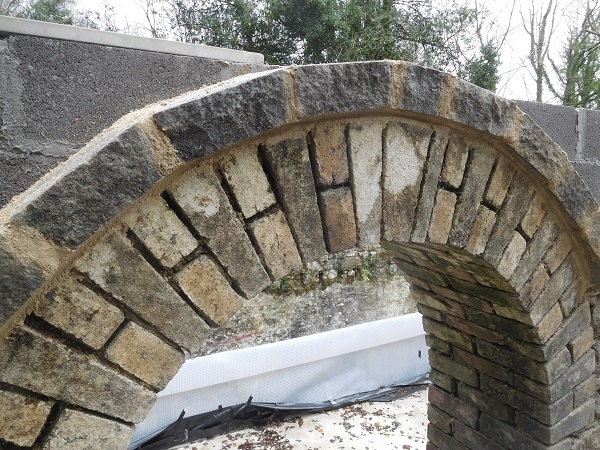
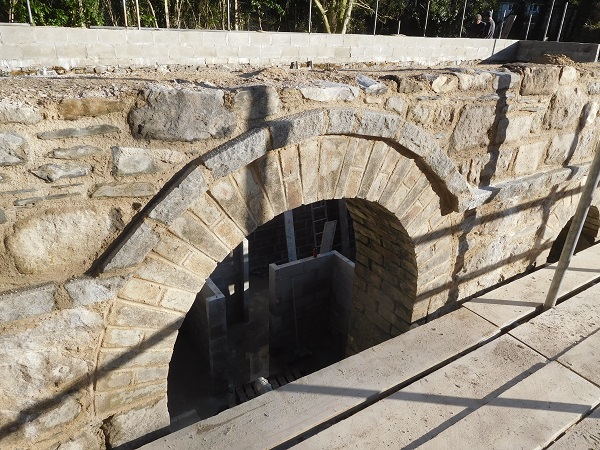
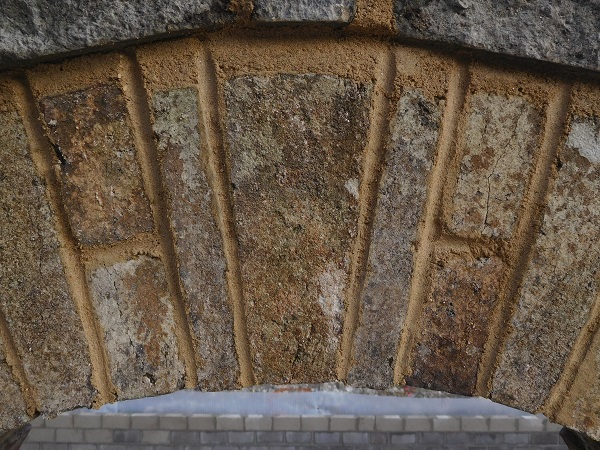
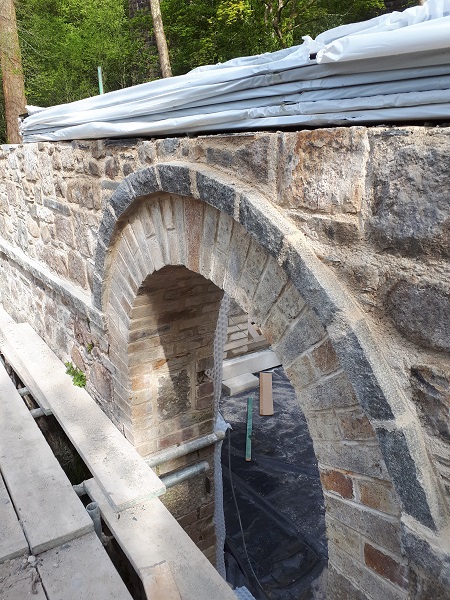
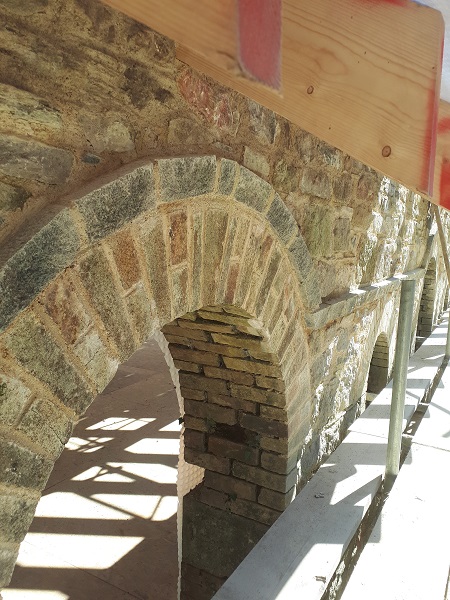
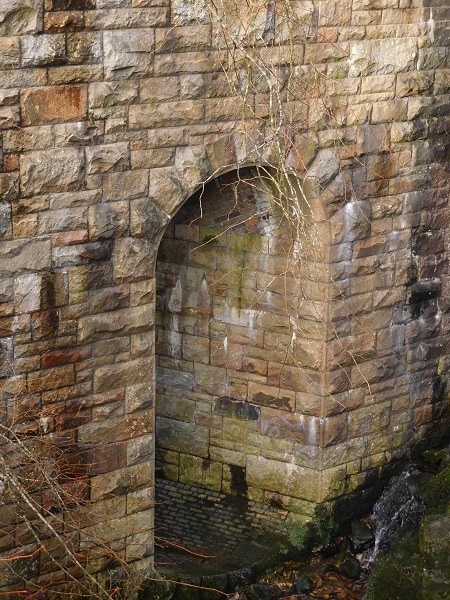
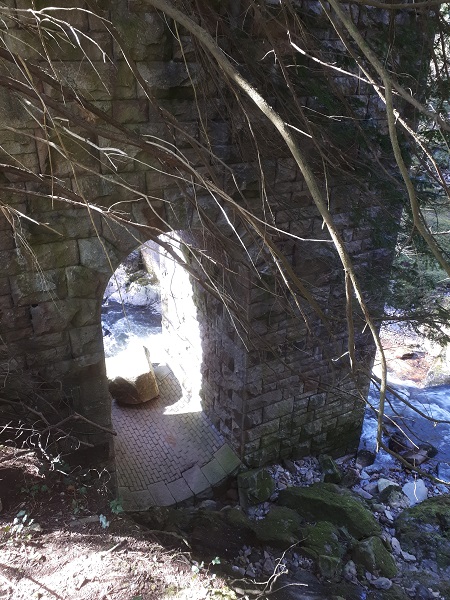
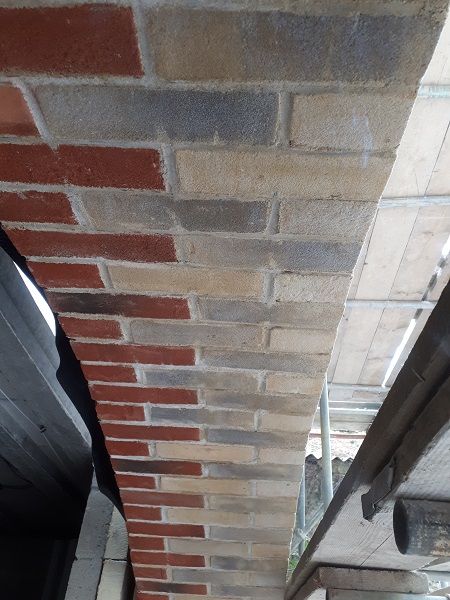
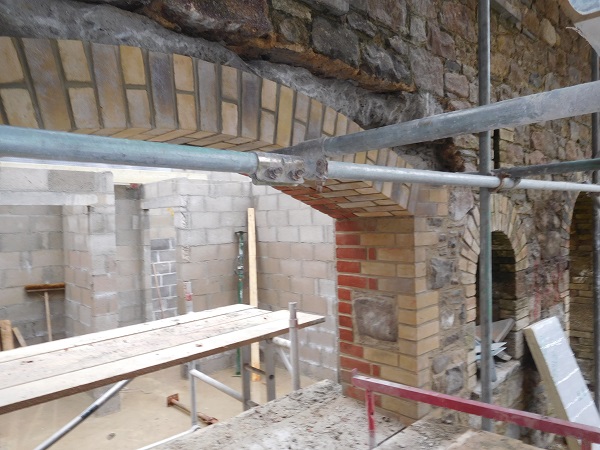
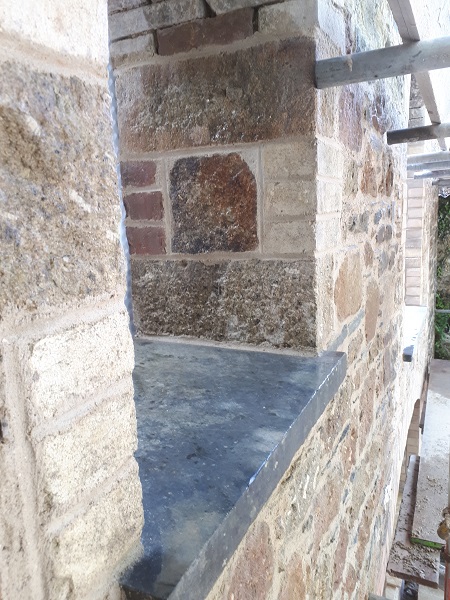
Some of the pillars that had been built close to the river’s edge had arched openings built through them at the base. The arches are semi-circular in their design and the ‘vousoirs’ which are the wedged shape stones to form the arches are all shaped at ninety degrees on the ‘extrados’, the top of the arch, so that the coursed ashlar stones built above them are able to bond and tie in horizontally over the arches to make a much stronger construction. The floor of these openings had been built in engineering brick to form a concaved gulley. The Victorian stonemasons certainly knew their stuff.
During times of heavy rain the river at this particular spot would flow at great speed and rise to quite a height above the base of the pillars. These arched openings allowed the river to flow through the pillars thus placing less stress on the viaduct.
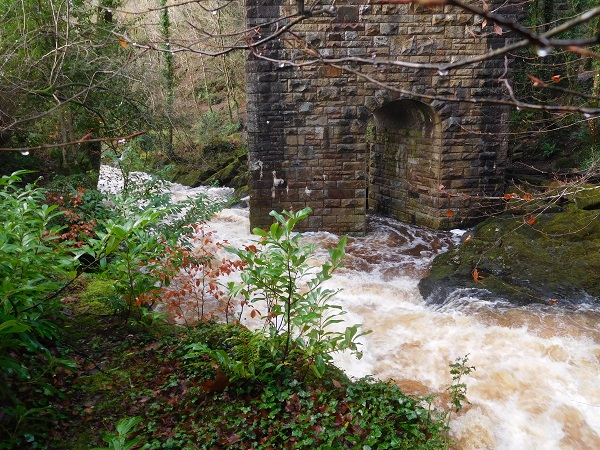

And just to prove the power of Mother Nature at times like this, when the river subsided, there sat in the gulley within the pillar was a huge lump of granite weighing several tons!
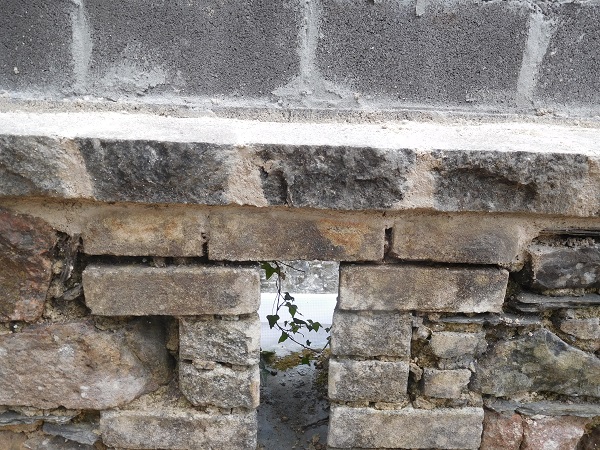
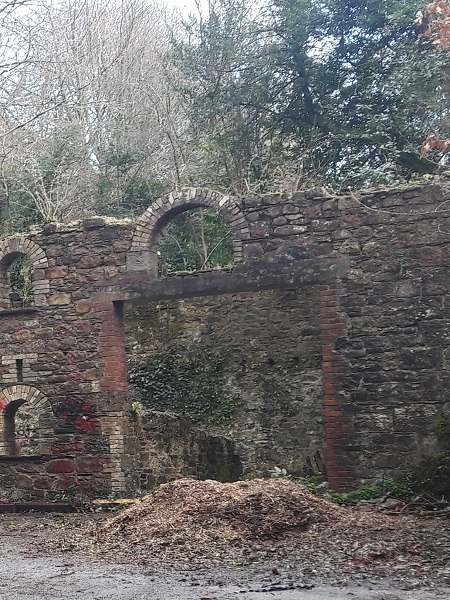
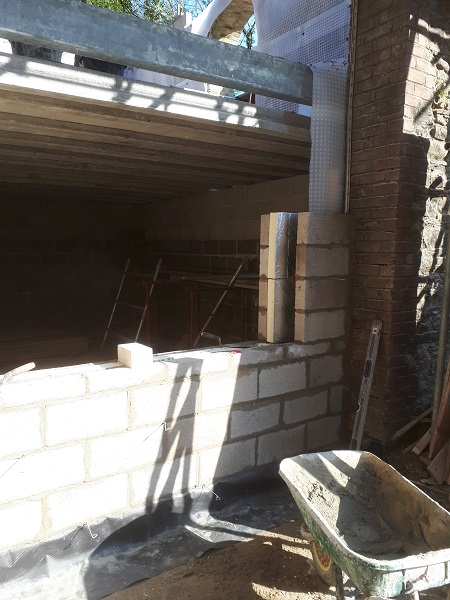
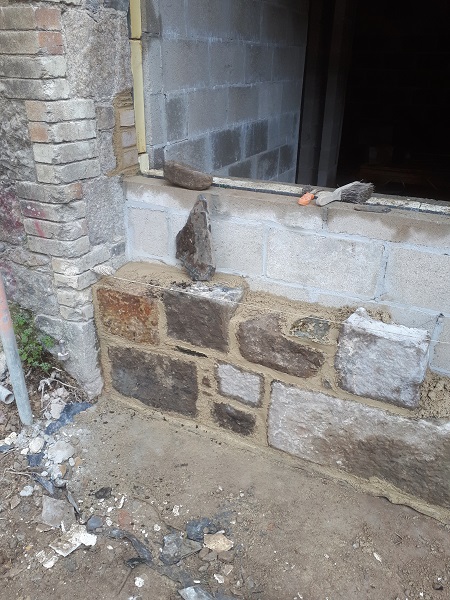
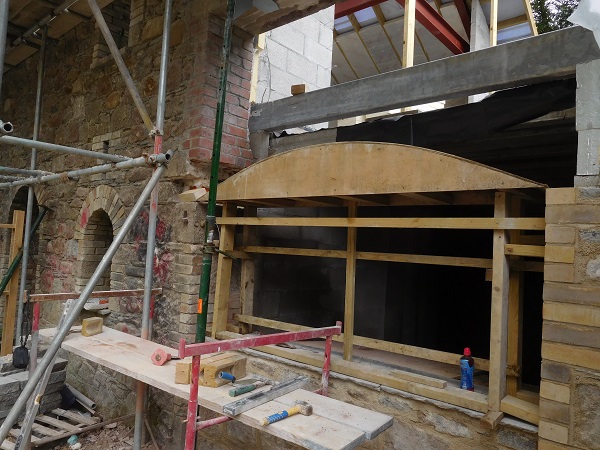
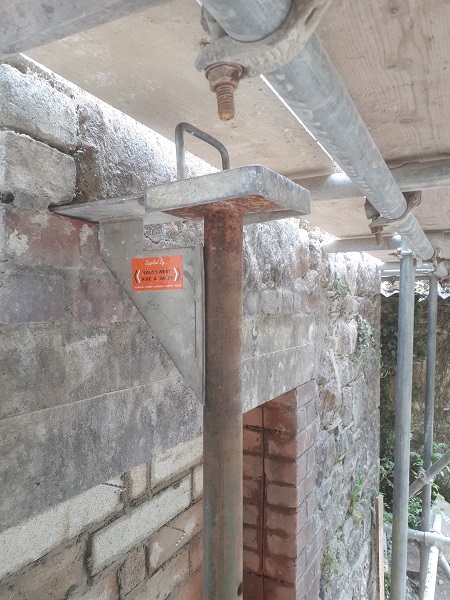
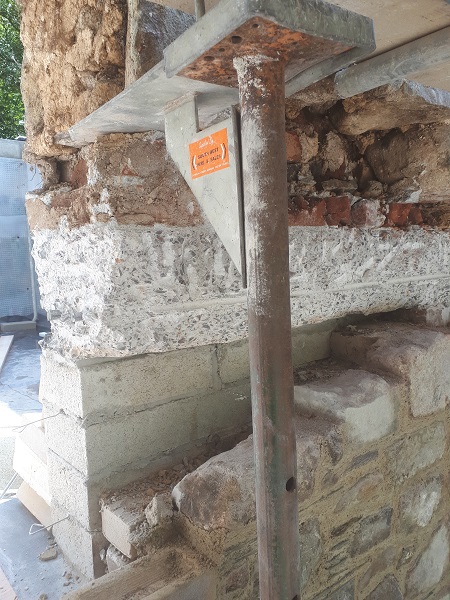
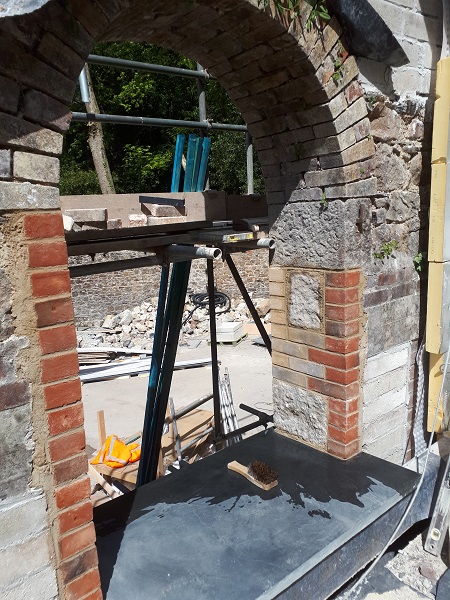
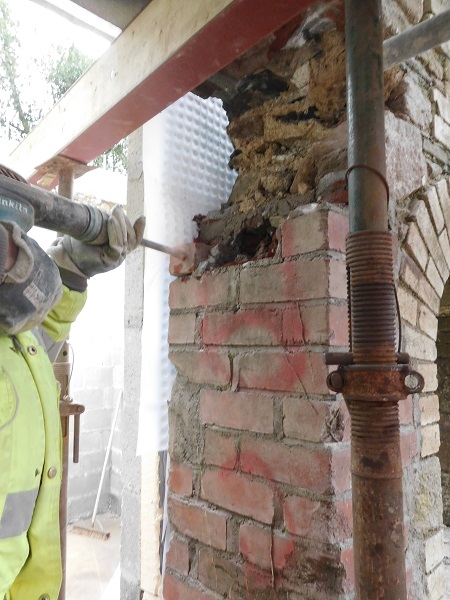
Our next task was to concentrate on an opening. Not so much as forming a new one, but to reinstate it back to its original configuration when the building was first built in the 1850’s. When the paper mill was still in operation during its later years, this building was used by them probably as some sort of storage area. At some point in time someone had punched a huge hole in the front elevation forming a large opening enabling forklifts or some other types of machinery to gain access into the building. By creating this new opening they had destroyed one of the original lower arched openings along with the lower half of a window opening above it. Who ever had done the work had built up the new reveals to this opening in red engineering brick and cast a steel reinforced concrete lintel above, leaving an ugly looking scar on the face of the building. To give you some idea what this looked like, here is a picture taken prior to the scaffolding going up before we started work on site.
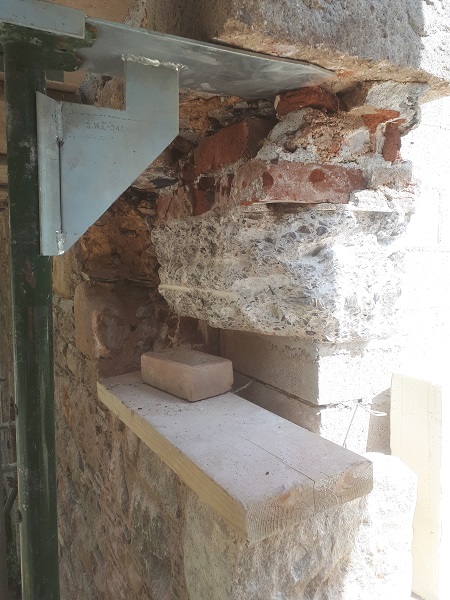
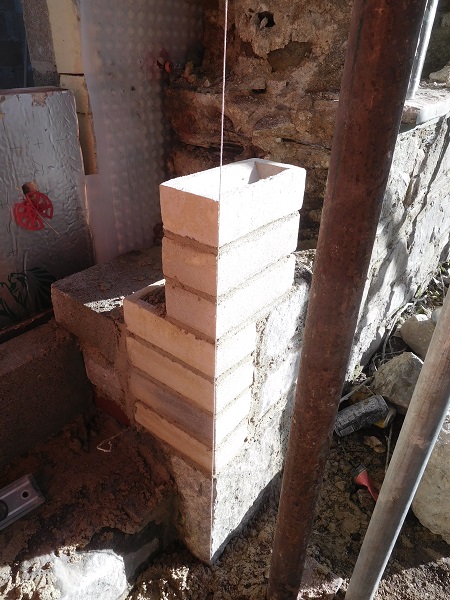
This opening was now going to be put back as it was originally, matching the existing openings on the building, and the work required us to carry it out in a set order of sequences. This opening, although originally it was a double door entrance, it was now going to become a window opening. The first order of events was to fix stainless steel starter ties into the brick reveal on the right hand side of the opening, the left hand side of the opening still had the original brick and stone quoin. Then an insulated blockwork cavity wall was built across the opening up to the new window sill height. Also blockwork was built up the right hand reveal as the opening had to be reduced. The blockwork would be faced off with stonework.
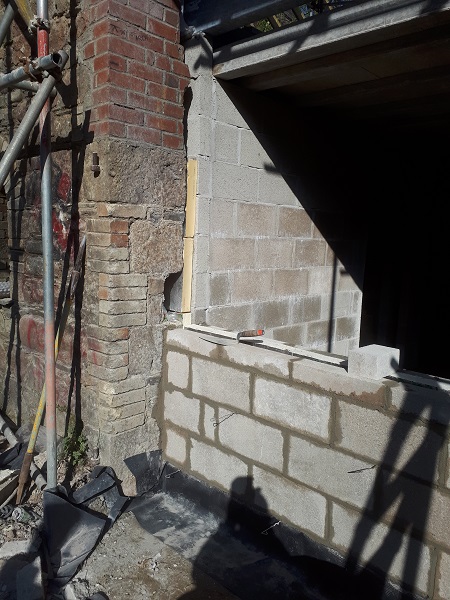
For now the blockwork was taken up to where the new arch was going to be sprung, thus forming the top of the window opening, and when the blockwork had hardened off it was time to break out the unsightly brick reveal. The front external face was cut back approximately six inches (150mm), just enough to tie and build in the stonework forming a new reveal. The internal edge of the brick reveal would stay in place, that would eventually be plastered over and not seen.

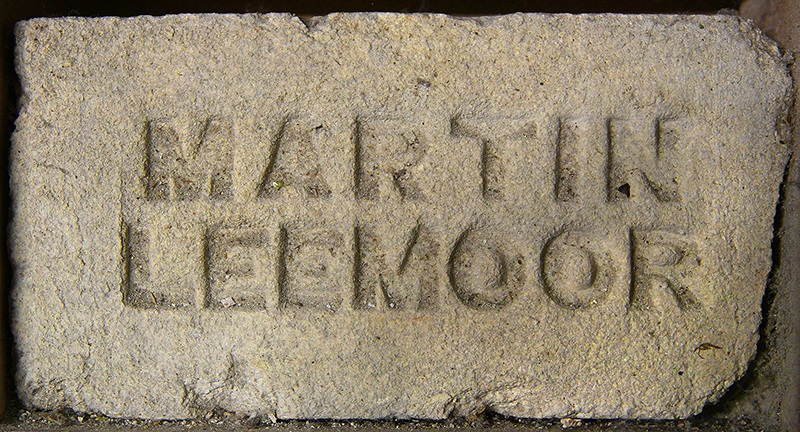
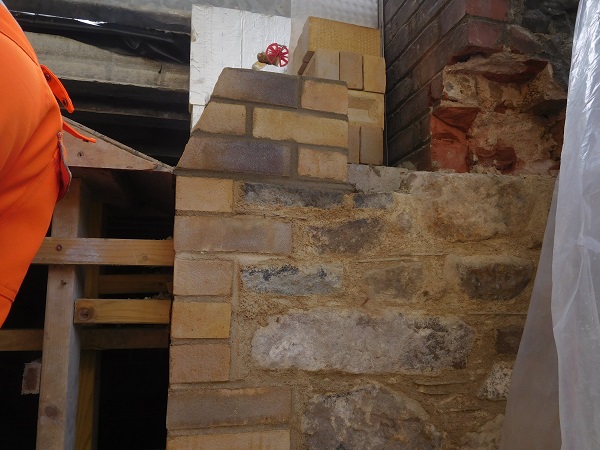
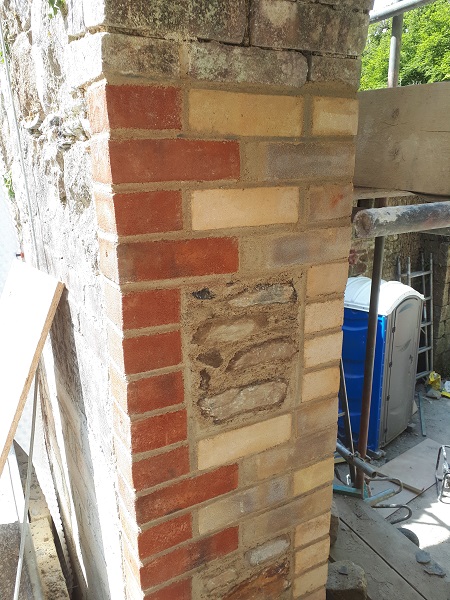
When the old brickwork had been cut out the new reveal could be built. This was built in stone using brick as quoins. We we unable to source any reclaimed brick to match the original bricks. The original brick manufacturer was a brickmaker called ‘Martin’ (Martin Bros) from Lee Mill on Western Dartmoor and they went out of business years ago. At Martin’s brick and tile works they produced a white frogless brick with a granular body. Production began in 1840 and continued up until the early 20th century. These bricks were known worldwide and used extensively in the construction of many brick kilns, due to their excellent fireproof qualities. They also produced bricks in all shapes and sizes.

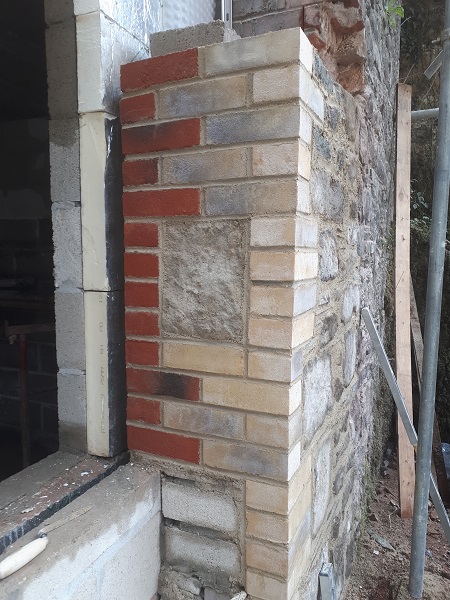
New handmade bricks were used and they consisted of a weathered pale yellow London stock brick made by ‘Wienerberger’ which proved to be a pretty good match.
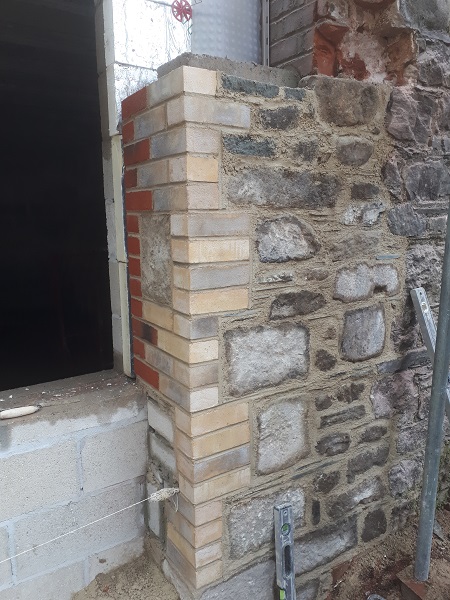
Handmade stock bricks were used for the internal quoins with a stone infill between the brick coursing, only these were red in colour and this was in keeping with the rest of the building. These too were manufactured by Wienerberger.
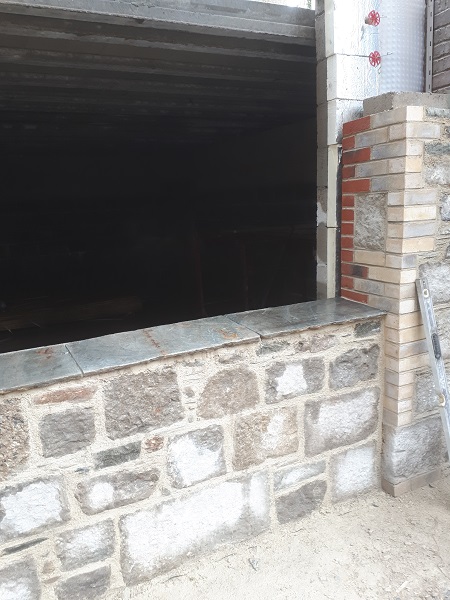
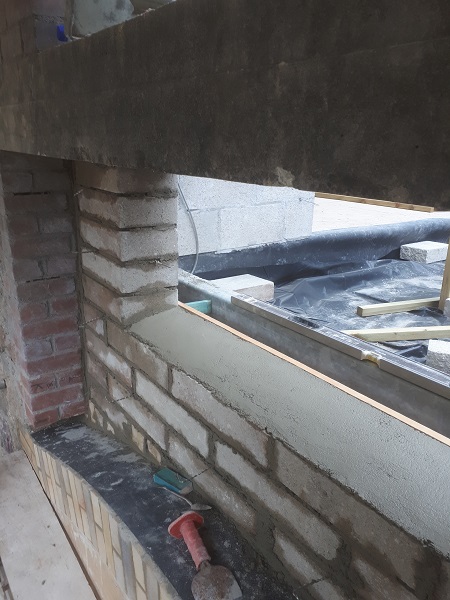
Stonework was built across the opening to face the blockwork and this was set back from the reveals by about four inches (100mm). This small detail looks far better than just building flush across the opening. It also keeps a historical record that shows the original size of the door opening.
The new stonework is then built up to height in preparation for a new sill made from reclaimed Delabole slate.
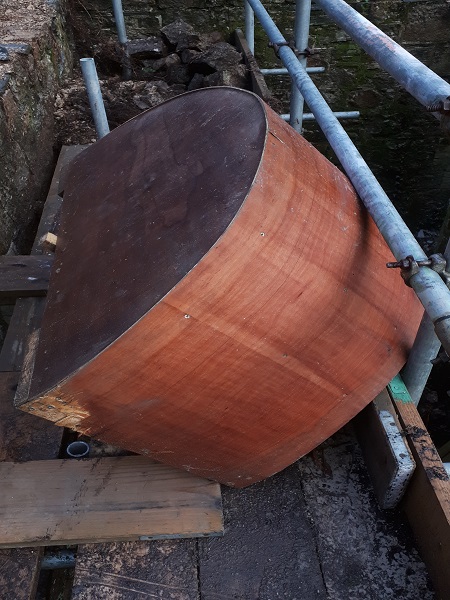
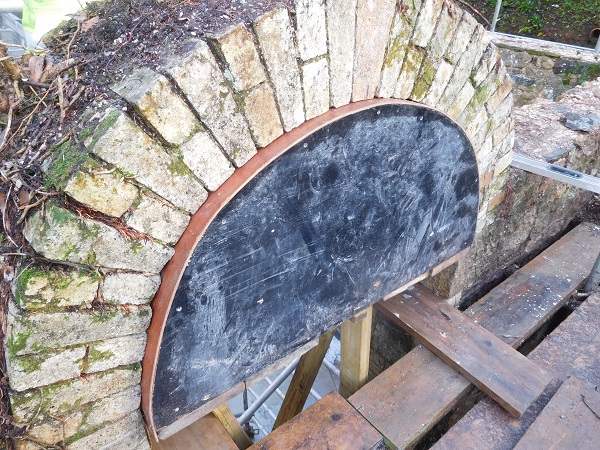
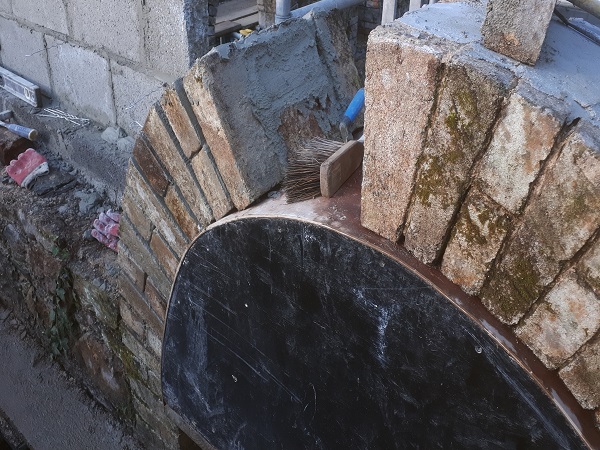
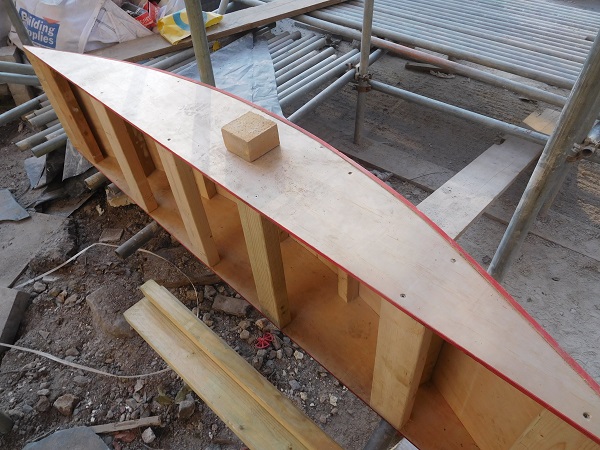
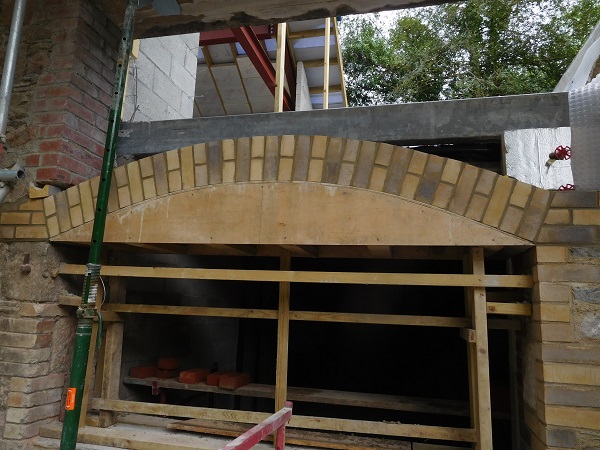
The next thing we had to do was to get the arch prepared but first we had to make a timber ‘centring’ which supports the arch during its construction.
And then we cut the ‘skewbacks’. These are cut bricks angled as such to take the arch. The angle is determined by placing a brick on the centring, and cutting the skewbacks at a 90 degree angle to the brick placed on the centring.
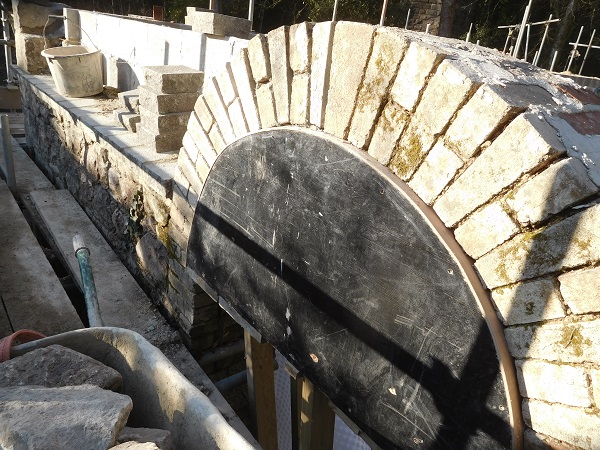
The timber centring is then supported in place.
The brick skewbacks are then built forming that 90 degree angle to both sides of centring.
When the skewbacks are completed, the bricks are first laid out dry over the centring and spaced evenly to get the joints equal and each brick for the arch is marked on the centring showing where the joints needs to be.
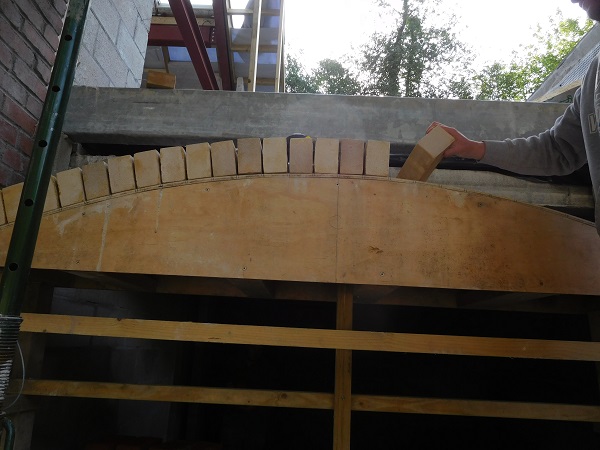
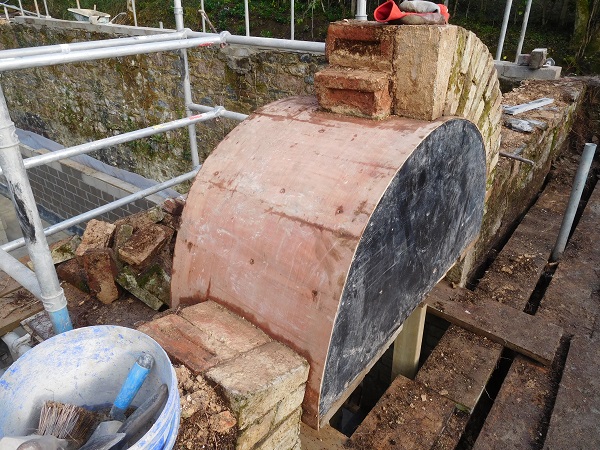
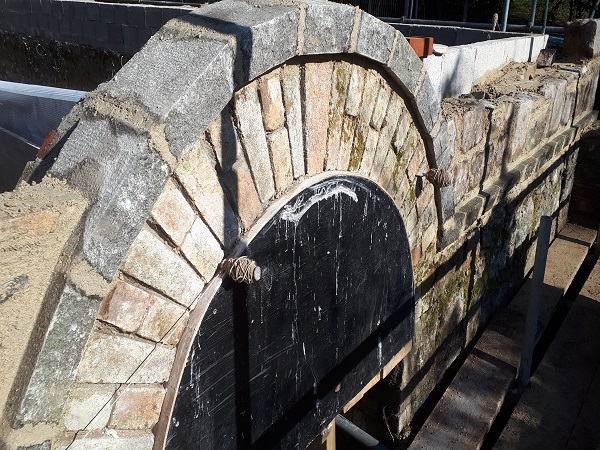
A bonded course of bricks nine inches (225mm) high are then built full width over the centring.
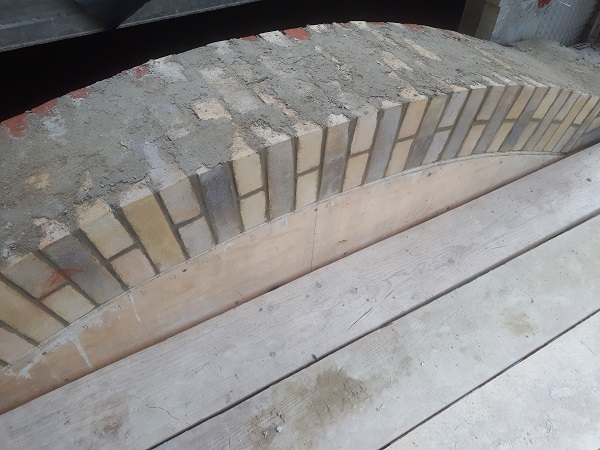
This now completed the window opening on the ground floor. A damp proof course was laid over the top of the new arch and a nine inch (225mm) thick blockwork wall was built up to pick up the concrete lintel above. This concrete lintel ran right through the original upper opening and would need to be cut out. We also had to form the bottom of the upper opening which was above the new arch but under the concrete lintel. When the blockwork set, it was then supporting the concrete lintel.
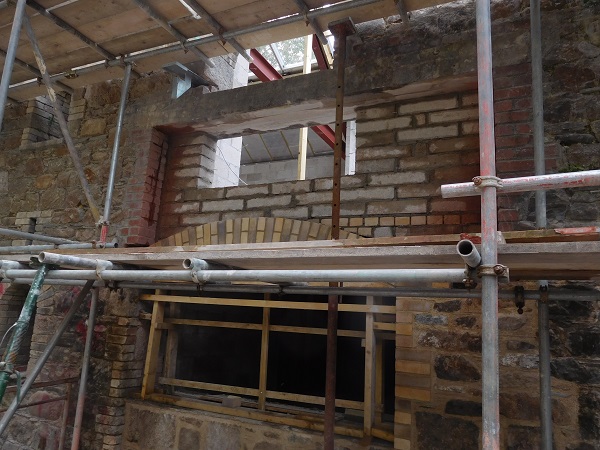
At this stage we cut out the old brick reveal which would enable us to tie in new stonework for the upper opening reveal as we built over the arch.
Whilst this was being done a new one and a half inch (40mm) thick slate sill was cut to shape.
And when the stonework was up to the correct sill height, with the help of the on site telehandler, it was set into place.
Acrow props with ‘strongboys’ were positioned above the lintel to support the reveals of the upper opening whilst we cut out the old concrete lintel.
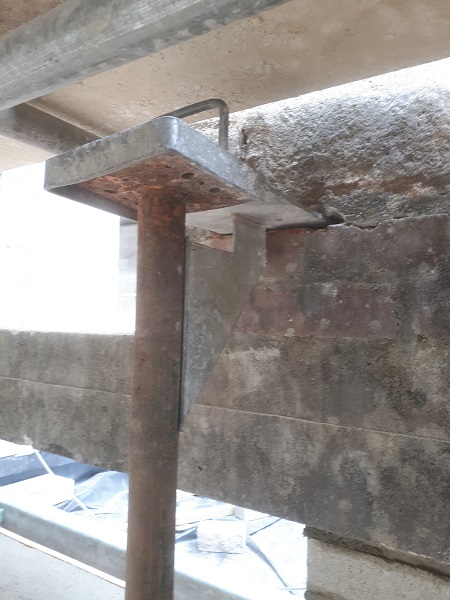
Now that these upper reveals were supported we could carry on with the next stage, so the breaker was set up again and the section of concrete lintel that ran through the window opening could be broken out.

The face of the concrete lintel either side of the reveals along with the reveal returns were cut so that new brick and stone could be built in its place.
After all the ugly concrete had been removed it was time to build up the reveals to pick up the arch above and in doing so completing the upper opening and reinstating the elevation back to its former glory.
The centring was removed from the lower window opening and the underside of the arch was pointed in to tidy it all up.
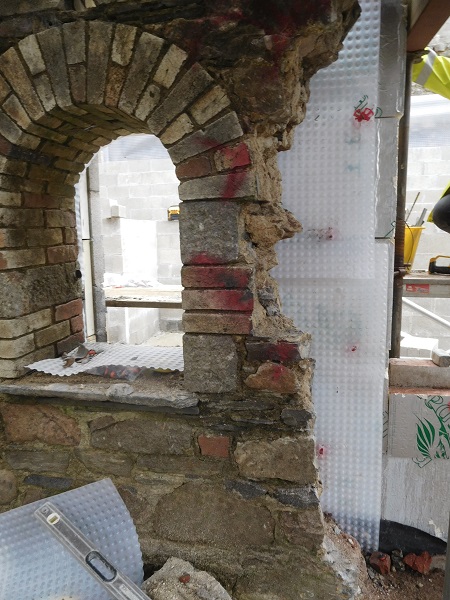
This was one opening reinstated back to its original but there was also another one to do in the middle of the same elevation in. This one however, wasn’t as complicated to sort out. Again someone in the past had raised an existing opening by taking out the arch and casting a concrete lintel a little higher up. There was no upper window affected by this, so in essence all we had to do was remove this concrete lintel and reinstate the arch along with the reveals and its adjacent stonework. Here’s a picture of that opening showing what it looked like prior to us starting any work on site.
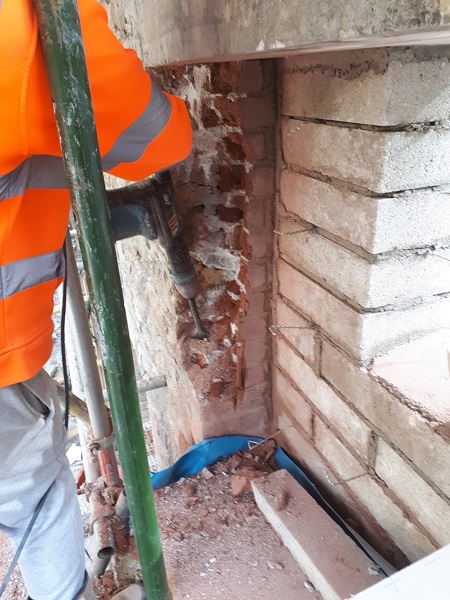
Luckily, not all of this concrete lintel needed to be removed, only part of it. We only had to cut out enough of the face of the concrete so we could build in new stonework, and we only needed to cut out a middle section on the underside of the lintel in order for us to turn the arch. First of all acrow props and needles were set in place under the concrete lintel whilst we broke out the brick reveals underneath. These props had to line up under the reveals of the window opening above, just to be on the safe side.
Once again it was time to bring out the breaker and get rid of those ugly brick reveals on both sides of the opening.
Just like the previous opening, although this originally was a double door entrance, it too was now going to be changed into a window opening. Once the old brick reveals were removed it was time to build across the opening and up to the new sill. Again we built up the new reveals in brick showing the original line of the door entrance, but set back the stonework under the sill that was built across the opening.
This was built up to the sill level and reclaimed slate was used to make the sill and the brick reveals were carried on up to take the new arch tying it all into the original stonework on either side.
This opening was exactly the same size as the other opening we had just completed, which meant we could use the same timber centring that had been previously used, and that was our next job…..to set in the centring for the new arch.
The ‘skewbacks’ were cut and built in to the correct angle for the new arch.
Then the arch was turned which picked up the underside of the old concrete lintel.
Once the arch was formed and the mortar set, the centring was removed and the old concrete lintel trimmed back a bit more for us to build in the stonework along the face over the arch to pick up the existing stonework above and that was this opening more or less completed.
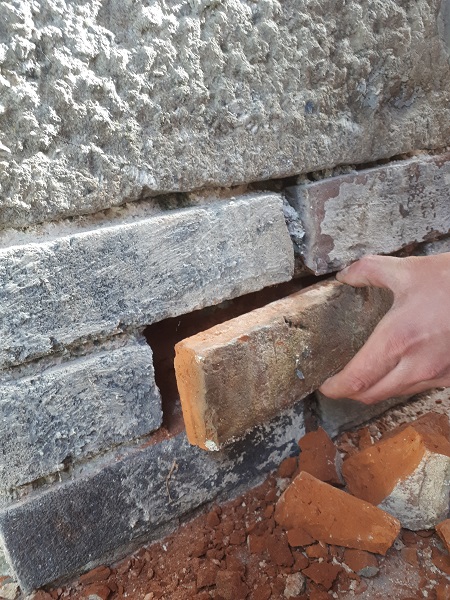
There were a few other jobs we had to do and one of them consisted of replacing bricks on various window openings on the building. These bricks were mainly on the returns of the reveals that were missing, damaged or had weathered badly over the years and these had to be replaced because most of them were sited where the new windows were going to be fixed. These were carefully cut out.
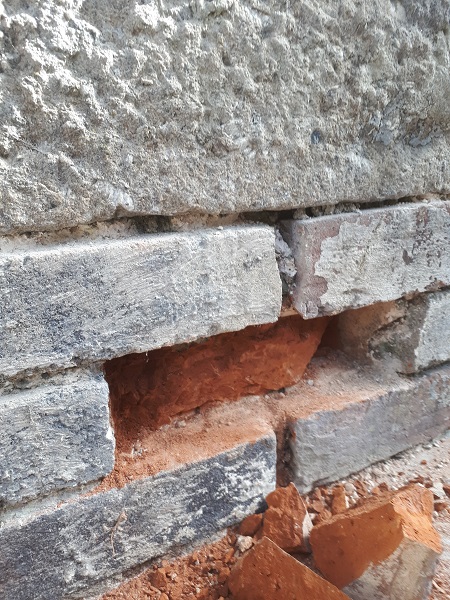
New brick slips were cut and fixed into position.
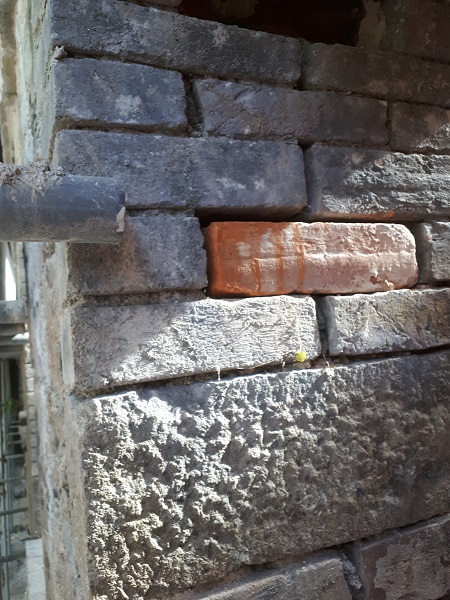
Afterwards the joints to the reveals were prepared and then pointed in using lime mortar.
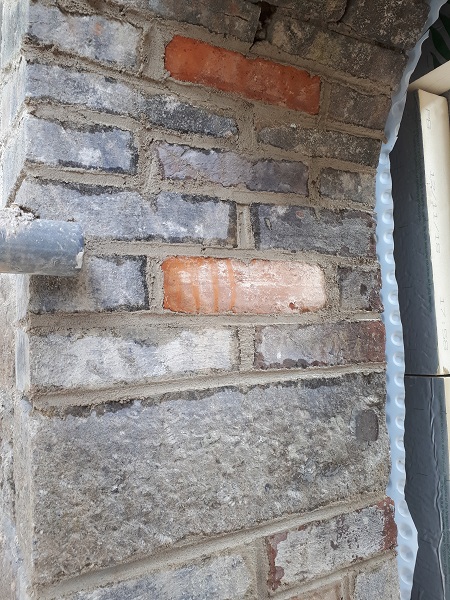
There are twenty-one openings on this building, all of them arched and most of them needed brick replacement somewhere or other on the reveals and when this work was complete the new windows could be fixed in place. Another job we were tasked to carry out involved building up two new returns both sides of a kitchen patio door which lead out from the kitchen area on the upper floor to a secluded enclosed courtyard. First of all we built up a single skin of four inch (100mm) blockwork either side of the new opening. A new lead tray was set in place on the outer leaf and insulation fixed to the new blockwork. The lead tray would stop any water ingress into the rooms below.
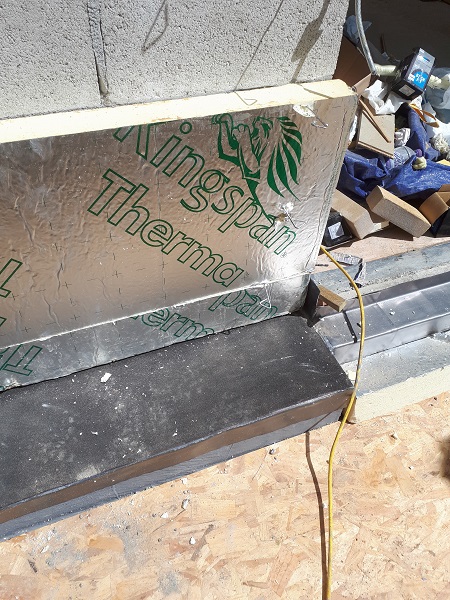
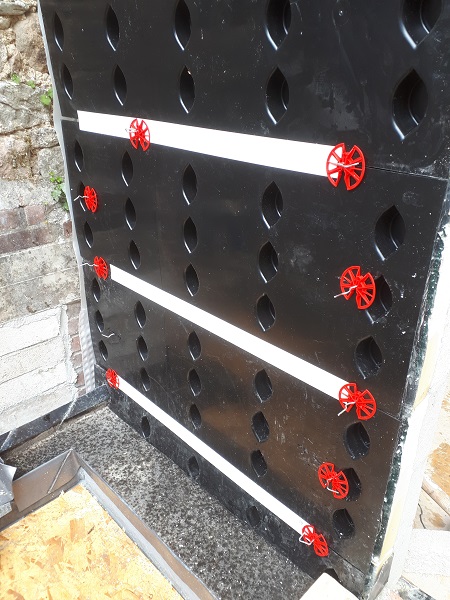
‘SureCav’ was then fixed in place against the insulation. Not only does this prevent damp penetration from getting to the internal walls, it keeps the insulation in place whilst maintaining a cavity. It also forms a key for the new stonework that was going to be built on the outer leaf.
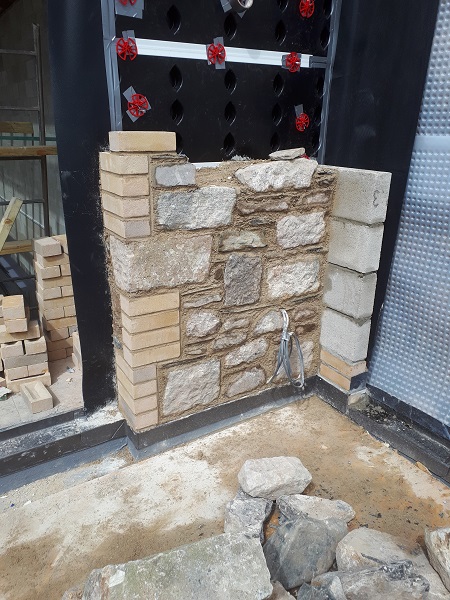
The new returns were then built with quoins consisting of a mixture of brick and stone.
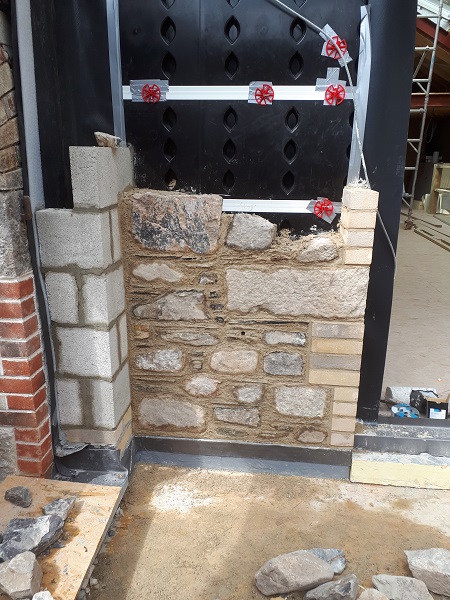
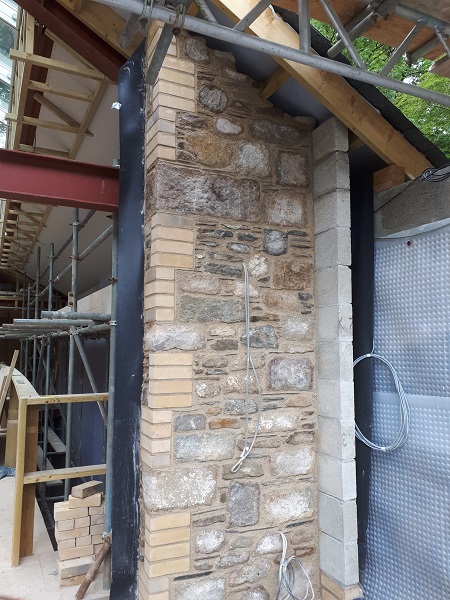
These returns were then built all the way up to pick up the underside of the roof.
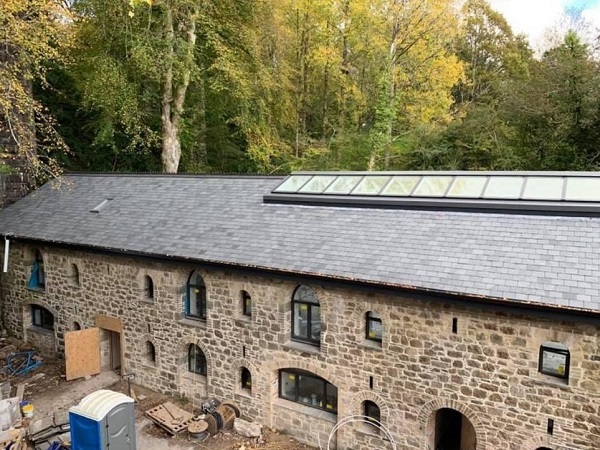
By now the roofers had, more or less, completed all the slating to the new roof.
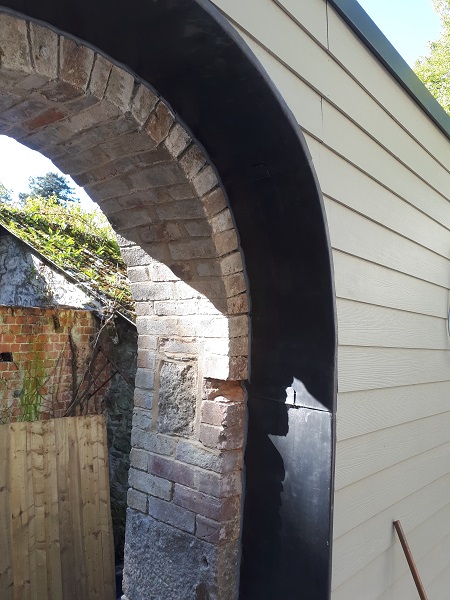
Now that the returns were finished for the kitchen patio doors the walls to the enclosed courtyard were faced with a composite cladding.
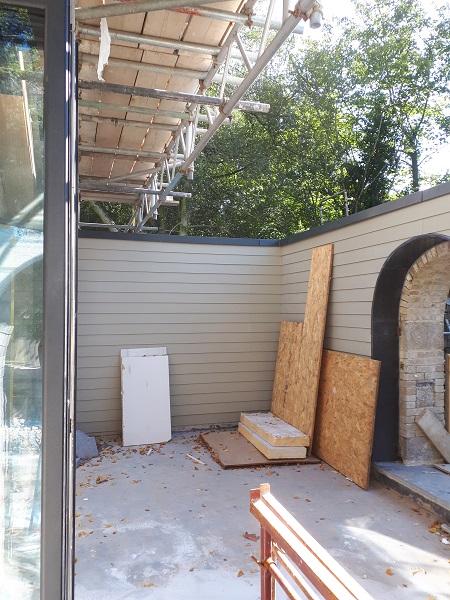
The reveals from the cladding back to the brickwork on the original arched openings were finished off with dressed lead.
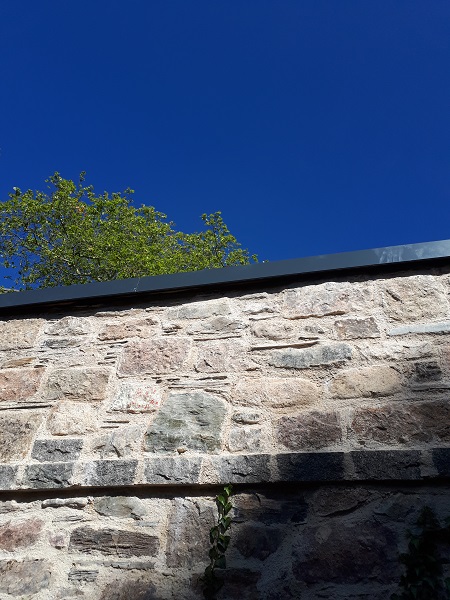
And the tops of the walls around the enclosed courtyard were clad with a powder coated capping to make everything water tight.

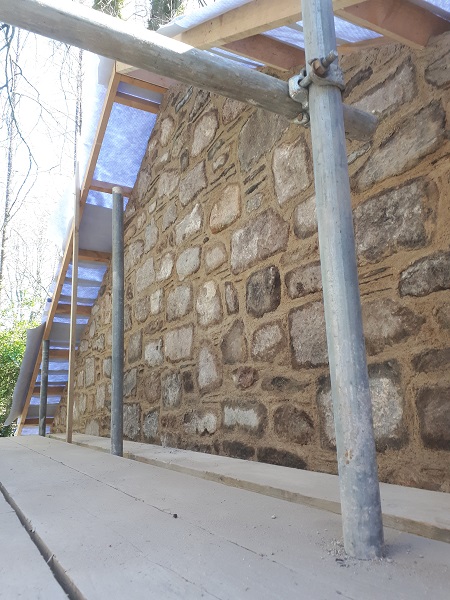
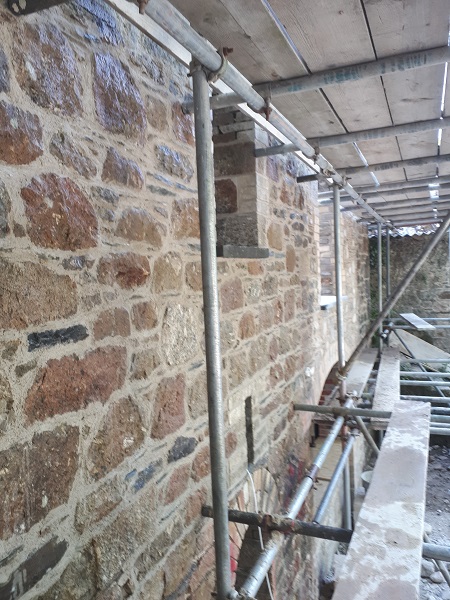
All the structural work by now had been basically completed which left just one more thing to finished off…..re-pointing. All the jointing to the stonework around the whole building which had not been re-built or renewed was cut out, prepared and re-pointed using lime mortar.
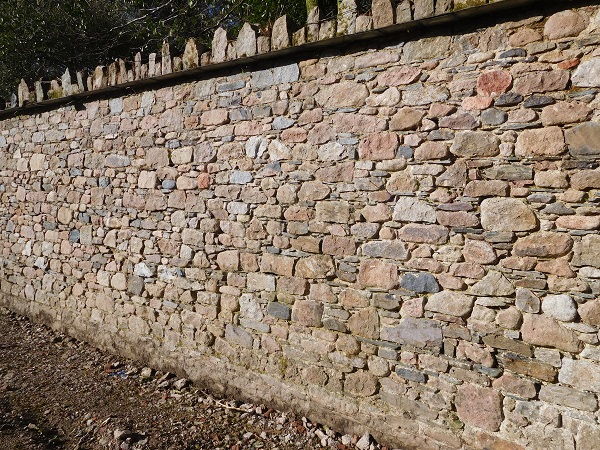
Interestingly situated next door to this building is a one acre walled garden. This walled garden was also built by John Allen in the 1860’s who as owner of Stowford mill supplied the estate with fresh produce. The walls around the garden are built in a mixture of granite and slate and despite their age are generally in a very good state of repair.
In 1911 Misses May Crooke and Mabel Carlyon took on the lease of Stowford Lodge and its five acres of gardens for a period of six years, at an annual rent of roughly £123. May Crooke then set up the Devonshire School of Gardening, which was the only such establishment in the South West at that time. May and Mabel had trained, and then became instructors, under the guidance of the Warwickshire Agricultural Scheme which was started by the Countess of Warwick in 1898. She was better known as one of the mistresses of Edward VII. The gardens were fully equipped containing ten greenhouses including vineries, peach and carnation houses, a conservatory, a mushroom house, heated pits and a good selection of fruit trees. The Devonshire School of Gardening closed in the February of 1917 but the gardens remained in full production until the early 1990’s after which they remained largely unattended. This area inside the walled garden has now been cleared in preparation for four new houses to be built within its walls. Today only one of the original Victorian greenhouses survive.
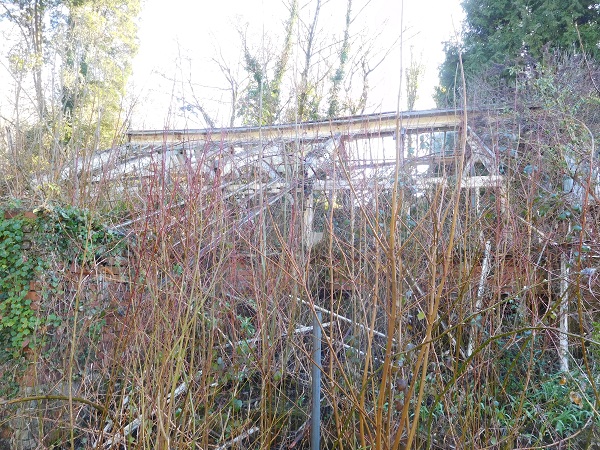
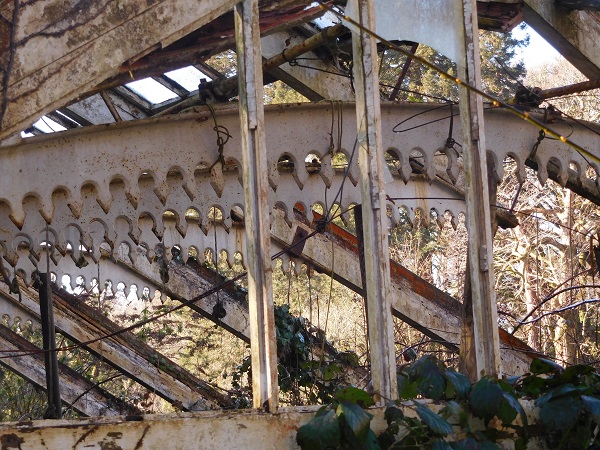
Overgrown with vegetation, this greenhouse is in much need of repair, but it is Grade II listed which means it’s protected and it has now been earmarked to be restored to its former glory.
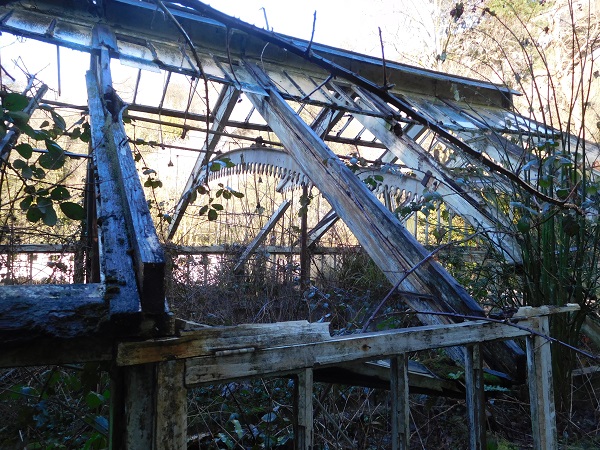
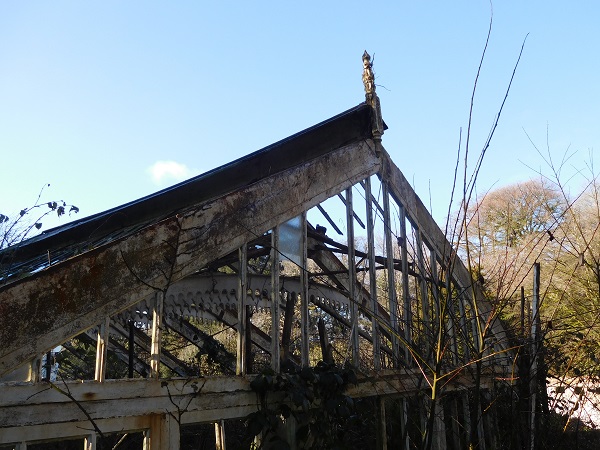
Inside the greenhouse you’ll find the original cast iron girders that hold up the roof and these girders are recognized as being nationally unique by gardening historians. It is thought that they were cast by a foundry in Exeter.
Our work was now complete so the scaffold was stripped down and the site in general was tidied up.
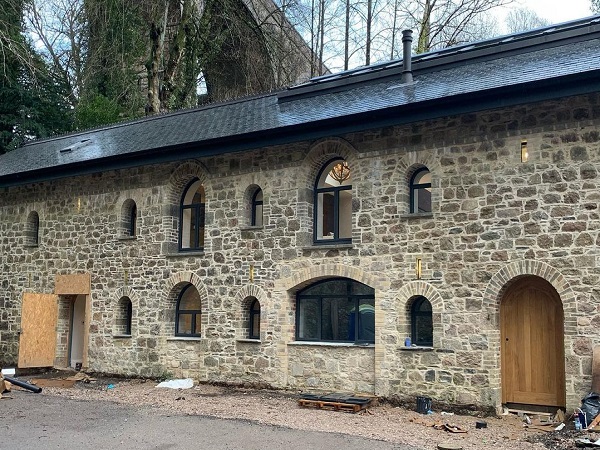
The groundworkers arrived and carried out all the finishing to the paths, paving and driveway.
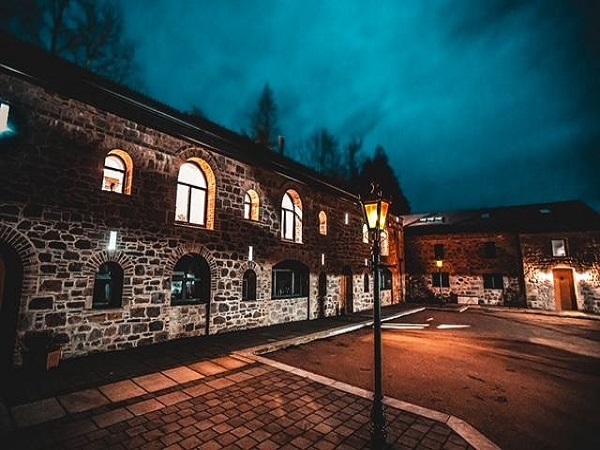
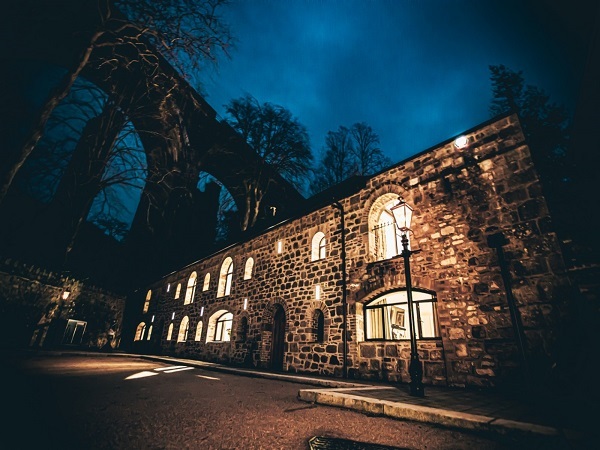
Quite a transformation!